How to use this often misunderstood woodworking chisel.
A room full of woodworkers will evoke spirited discussion about the right angles and methods of sharpening tools with no two finding much common ground. I think one of the least understood chisels is the mortise chisel. Catalogs offer two types, the first being a heavy square-edged chisel in 3/4″ and 1″ widths. Timber framers use these for cutting mortises in frames. First, a series of 3/4″ or 1″ holes are bored and the chisel of the appropriate width is used to clean out and square the mortise. The framer drives these chisels with a big mallet and a heavy hand. While most bench chisels are ground to 25°, an edge this thin would fail quickly in such severe service. Framing chisels are ground to a 30° or even a 35° edge.
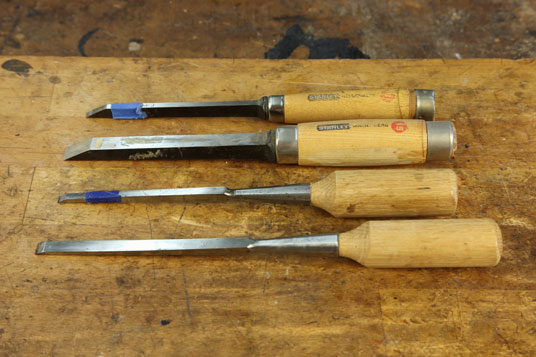
Cabinetmakers use a London Pattern Mortise Chisel. They are sold in widths exactly the width of the mortise to be chopped. Historically, they were sold in a wide range of sizes from about 3/16″ to 11/4″. Now, they are only offered in 1/4″, 3/8″ and 1/2″, with 6mm, 10mm and 13mm being the actual sizes, as all are made abroad.
Modern London Pattern Chisels have two flaws. The first is the handle (photo below). Traditionally, mortise chisels had an oval handle, which gives the user a very precise idea of the radial alignment of the tip, thereby placing it much more precisely at the extremes of the mortise. Today, this ergonomically friendly handle is replaced by an oversized round handle that is clunky and makes radial control more difficult. Some are so big as to be humorous. A British idea of Texas, I guess?
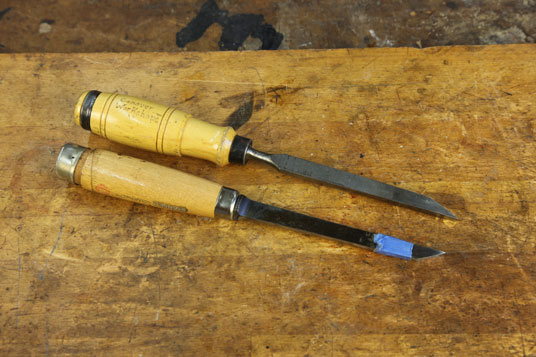
Traditionally, mortise chisel handles were oval, giving the user a good idea of the alignment of the edge with the mortise. Today, they are round and oversized, making them clunky. Many are even larger than this example.
The second problem is the hardness—they are too hard. While most chisels, including bench and framing, should be in the 58 to 62 hardness Rockwell C Scale (HRC), this is far too hard for our London Pattern Chisel. They are meant to be pounded straight down into plank grain to considerable depth, then pried sidewise to remove material. This combination of severe pounding and prying requires the edge to be ground to 30° to 35°, but even at this steeper angle modern chisels will generally chip at the edges. The hardness is too attenuated for the bit. The solution is to remove the handle and bake the chisel in a household oven at 550° F, which is about as hot as most ovens go. This will draw the temper back to about 58 HRC, giving the edge much more toughness.
Using a London Pattern Mortise Chisel
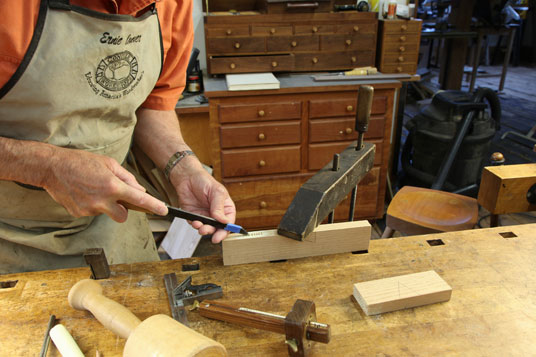
STEP 1: After laying out the mortise with a mortising gauge set to the size of the chisel, make a series of hand-pushed cuts between the gauge lines to create a clean entry. The chisel size should be about one-third the thickness of the material you are mortising together. For this 3/4″ face frame material, 1/4″ is perfect.
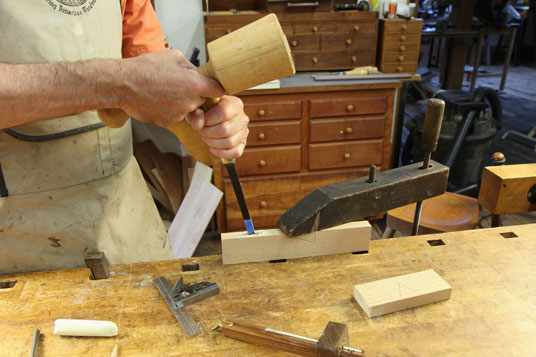
STEP 2: Starting in the middle of the mortise, make alternate cuts in an area just wider than the height of the chisel. Work to full depth, which is marked with blue masking tape.
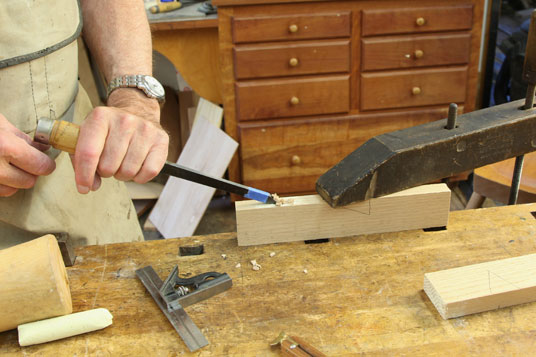
STEP 3: Now work to the ends of the mortise in 1/8″ increments. Pound to full depth and lever waste up and out of the mortise.
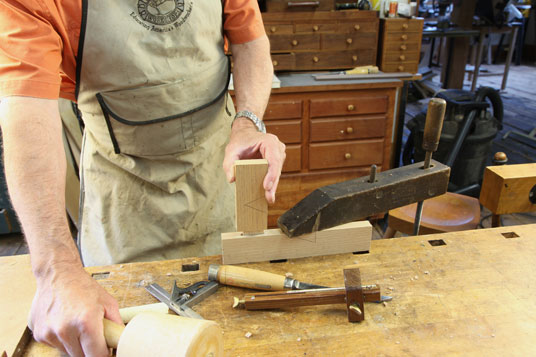
STEP 4: The result is a mortise that is exactly the width of the chisel. By laying out the tenon with the same mortising gauge, you can get a perfect fit right off the backsaw.


