This article, “Elegant and Useful Biscuit Cutter,” by Joe Larese, is from the pages of American Woodturner and is brought to you by the America Association of Woodturners (AAW) in partnership with Woodworker’s Journal.
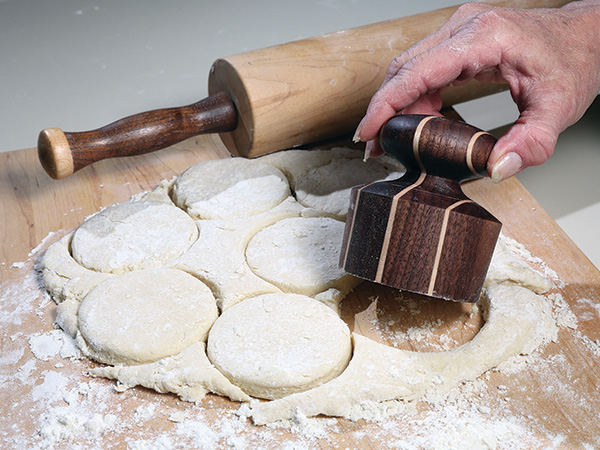
Growing up, we always had bread on the table, but homemade biscuits were usually reserved for Thanksgiving dinner. Mom would get out the flour and butter, and I would help her make and roll the dough, and then using a drinking glass held in both hands, I’d stamp out the dough into biscuit rounds. Using a glass had its drawbacks, notably the concern that it could fall and break. I decided to turn a wooden biscuit cutter and design it so it would be easier to grasp. Here’s how to make one.
Getting Started
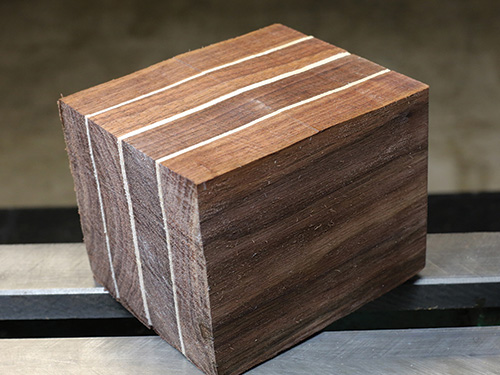
Doug Watters, a fellow instructor at the Brookfield Craft Center (Brookfield, Connecticut) had glued up a large black walnut and maple lamination. I cut a blank from it 3-1/2″ (9cm) square and 4-1/2″ (11cm) long. When turned, this size blank would allow for biscuit rounds about 2-3/4″ (7cm) in diameter. I carefully centered the blank on an interior maple lamination and oriented the grain for spindle turning — with the grain running parallel to the lathe bed. You could use a lamination like mine or a solid block of wood.
Turning
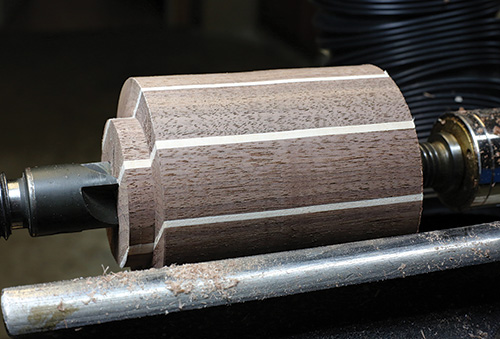
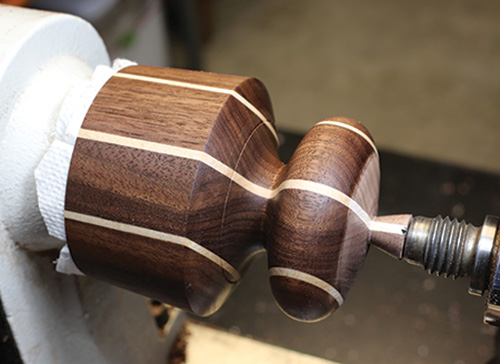
Turn the blank round and form a tenon to fit the jaws of your scroll chuck. Remount the workpiece in the chuck. Note that the end held in the chuck will eventually become the top/handle of the biscuit cutter. The centered indentation in the tenon created by the drive center will help center the work later when you reverse-mount it on a jam chuck.
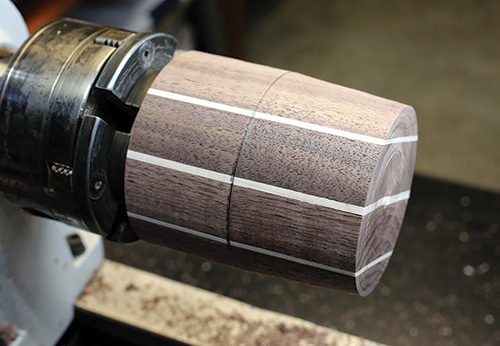
With the piece remounted in the chuck, true up the end of the blank, then measure and mark 2″ (5cm) from the tailstock end. Turn a gradual taper from that 2″ mark down to the end to a diameter of about 2-7/8″ (7cm).
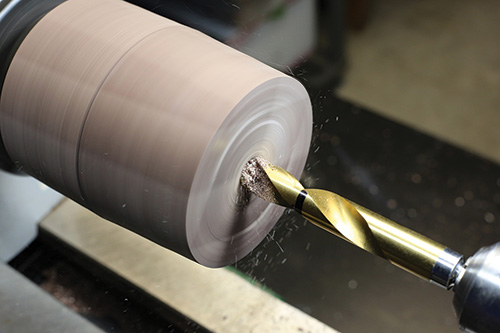
Next, drill a hole to ease the hollowing process, then hollow to 1-7/8″ (48mm) deep. When hollowing, ensure the sides are parallel with each other for the first 1-1/8″ (29mm). In use, straight walls will make it easier for the biscuit dough to be released after it is cut.
Pay attention to the shape of the interior from the thin straight sides to the top center. This portion can be straight or curved, but consider that you will need to match that shape when you make a jam chuck to reverse the cutter and finish the top of the knob.

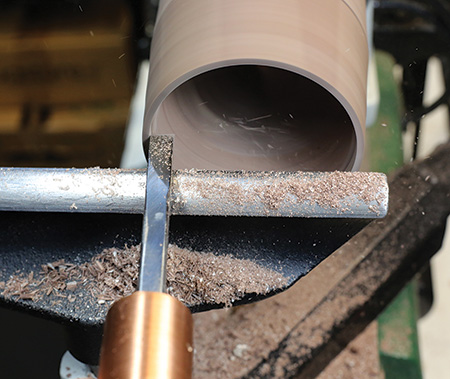
Note that a more conventional jam chuck holding just the rim won’t be possible because the rim is too thin. Carefully take very light cuts to reduce the rim to a thin 1/16″ (1.6mm).
I use a freshly sharpened scraper for this task. Sand the exterior tapered section and the hollowed interior, being careful not to cut yourself on the rim. Use a parting tool to make an angled shoulder, and start to form a cove and develop the knob portion above the tapered area.
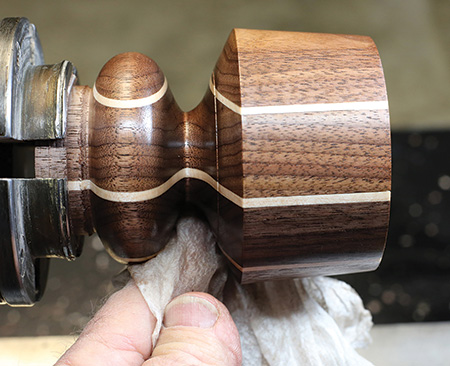
Continue to refine the knob, then sand and finish. I used a light coat of mineral oil.
Reverse-mount on Wasteblock
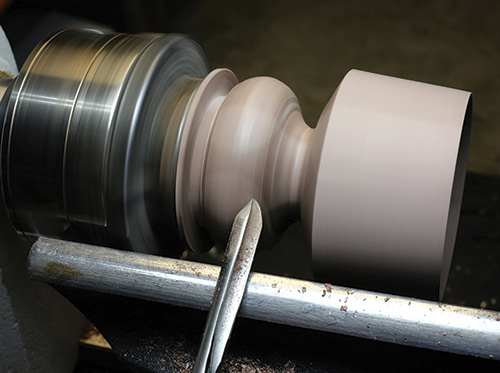
Mount a wasteblock in your chuck and turn a jam chuck to reverse-mount the workpiece. Shape the jam chuck so it matches the heavier upper area inside your biscuit cutter. The jam chuck should be long enough so you can place the biscuit cutter over it. As noted before, don’t try to mount and drive the turning by the rim, as it is too fragile. Use cushioning material and bring up the tailstock live center for support, aligning the point to help you re-center the piece. Apply just enough tailstock pressure to drive the nearly finished piece.
Take very light cuts to finish shaping the knob, leaving a small nubbin to cut off by hand with the lathe off. Sand and finish the unfinished area with a light coat of mineral oil. There are few things in life better than making and eating warm biscuits. By hand-turning a biscuit cutter and giving it to your favorite baker, you will contribute to memories that can last a lifetime.
Joe Larese is a member of the Kaatskill Woodturners and the Nutmeg Woodturners League and is a turning instructor at the Brookfield Craft Center. He is a photojournalist by profession.


