This article, “Skill Building Project: Elegant Letter Opener,” is from the pages of American Woodturner and is brought to you by the America Association of Woodturners (AAW) in partnership with Woodworker’s Journal.
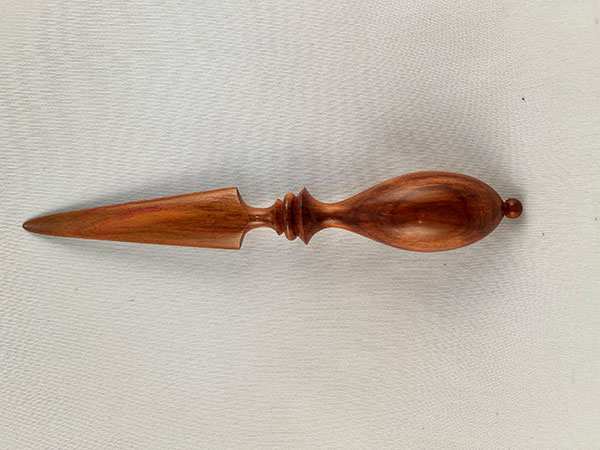
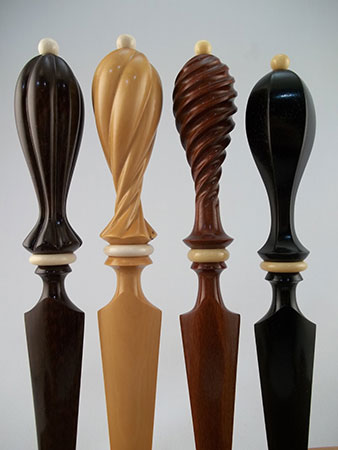
Here is a project that allows you to transform a small piece of hardwood into something elegant and functional—the classic letter opener. Over the years, I have made and sold more than 1,500 of them, as they are a good production item. An effective story stick makes the process go faster; in an eight-hour day, I could make ten letter openers. But it is also good as a learning project. There are three elements that make a quality letter opener: beautiful wood, an elegant design, and a well-filed blade. I hope my design and this article inspire you to make one—or twenty.
Material Prep
Consider that the harder the wood, the longer the letter opener edge will last. Dense, straight-grained woods with closed pores are the best choice for this project. Woods like oak and ash are poor choices because their open pores show up on the blade edge and weaken it. Here, I’ve chosen a piece of ornamental plum, harvested from a local tree.
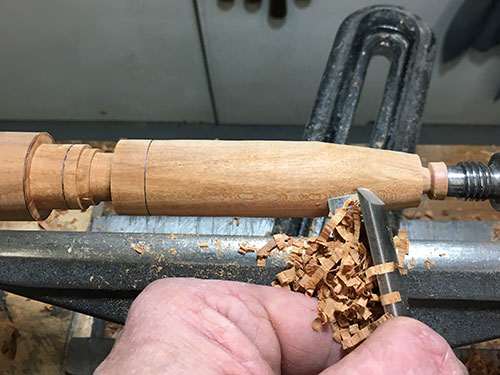
Start with a piece 1-1/4″ (32mm) square and 8-1/2″ (22cm) long. Mount the work securely between centers; I like to use a small spur drive and live center. With your lathe speed set around 1200 rpm, bring the wood to round with a roughing gouge. Make sure to stop cutting the moment the piece is round. The finished diameter of the handle will be 13/16″ (30mm), so there is not a lot of excess wood in the blank.
Story Stick
If you want to make multiples, it’s a good idea to make a story stick—a quick physical reference that eliminates the need for measuring key transitions repeatedly.
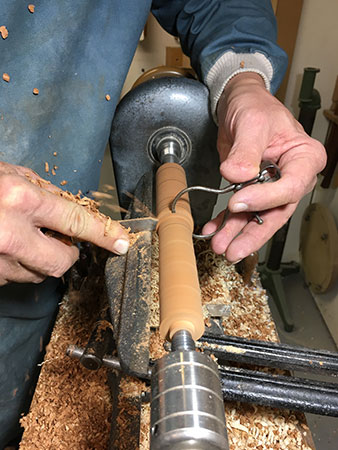
With the toolrest close to the wood and the lathe running, use a story stick to mark the transition points on your rounded blank.
Tips for a Good Story Stick
Here are a few tips for making a useful story stick:
• Use a thin strip of light-colored hardwood for your story stick, so numbers and lines stand out. I use 1/8″ (3mm) holly, but light maple would also do nicely.
• Make it easier for your pencil to find the transition lines by filing a V-shaped slot at the edge at all pencil marks.
• Write numbers between the lines to designate “ledge” diameters.
• Write numbers through lines to represent the depth of parting cuts.
• Circle lines that need to be redrawn after initial sizing.
• Always mark the back of the story stick with basic information about the project, so you’ll be able to identify it in the future.
• Sand the bottom of the front edge round; this makes it is less likely for the story stick to catch on the spinning wood as you are marking the workpiece.
Form “Ledges”
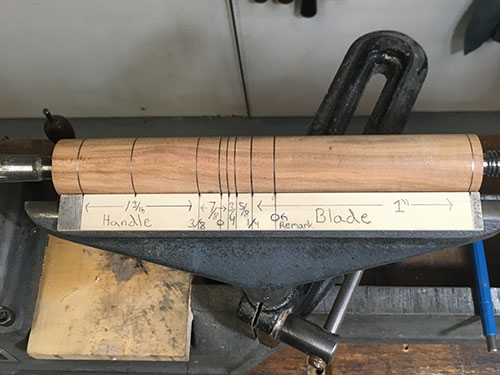
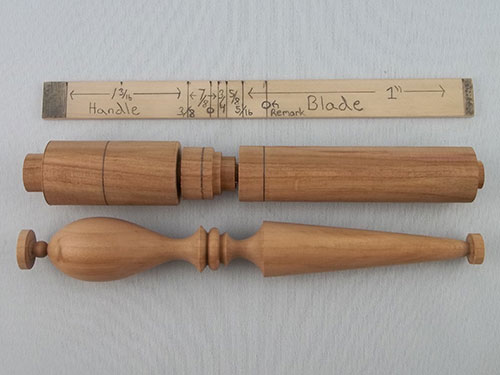
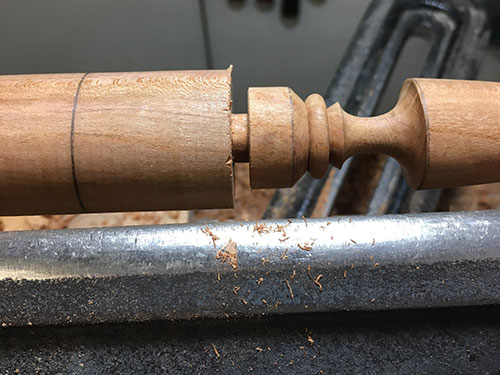
The way I copy a spindle is to first part in to make a series of “ledges” that represent each element’s transition lines and maximum diameter. The diameters of these ledges are recorded on the story stick and are the maximum diameter of any given element.
Start by paring down the scrap wood on both ends of your workpiece—the solid grey areas on the story stick. Stop this cut just as you get close to the spur drive and live center. This action will define the beginning and end of the letter opener’s elements and is always a good place to start on any spindle that has a scrap area.
Set your caliper to 1″ (25mm) and use a parting tool to make a series of cuts to that depth along the blade section. Remove the excess wood between the parting cuts to flatten this section to 1″ and then remark the blade line that has just been cut away.
Now for the 5/8″- (16mm-) diameter ledge behind the blade, set your caliper and make two parting cuts to this depth, one on either side of the 5/8″ section. Use your parting tool to remove any extra wood, and to level and clean the shelf you have just created.
Now set your caliper to 3/4″ (19mm) and part the next section to this diameter. The full width of a 1/8″ (3mm) parting tool should create the 1/8″-wide ledge. The last section that needs to be sized is 7/8″ (22mm) diameter. Once this section is sized and the scrap removed, you will need to remark the line on the handle that has been cut away. It should be equal in width to the 3/4″ section just to the right of it. Don’t worry if everything is not exact; small variations are part of what it means to make something by hand. The letter open is now ready to have the final shapes cut into it.
Shape the Elements
Before shaping any element, ask yourself, “Where does the majority of the wood need to be removed to make this shape?” Start cutting at that point. As you make several small cuts in the waste wood of any element, try to mimic what will become the final shape of that element.
When cutting shapes in a spindle, I prefer to start at the tailstock end and work toward the headstock, one element at a time. Start by defining the tip of the blade. I use a parting tool to make an angled cut to a diameter of about 3/8″ (10mm). After turning, the blade section should end up as a long “cone,” so use several sweeping, angled cuts with a roughing gouge to slowly define this shape. Use the remark line on the blade as the end point for the top of the cone. Stop the lathe and confirm that the blade’s taper is flat using a small ruler.
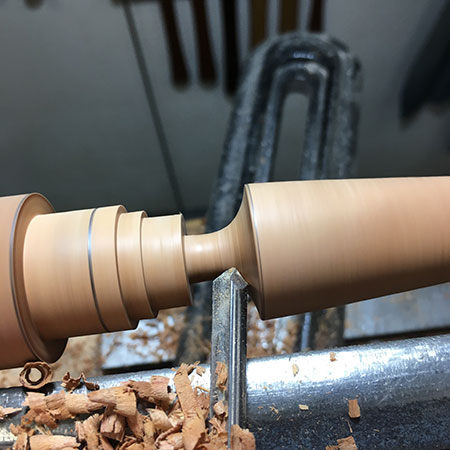
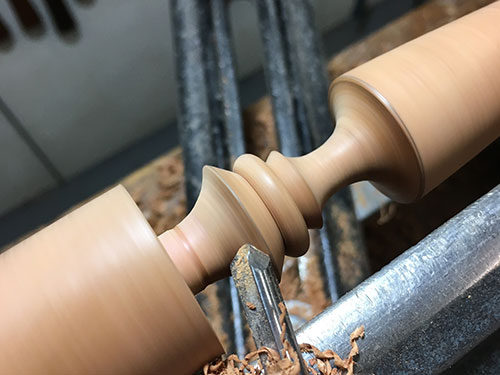
The next element is the cove directly behind the blade. Set your caliper to 5/16″ (8mm) and make a parting cut to this depth right at the transition line between the 1″ and 5/8″ ledges. The bottom of this part defines the bottom of the cove. I use a small gouge to create the cove. Start by making the half cove on the blade side, then halve what’s left of the 5/8″ ledge with a pencil line.
The right side of this line is for the other half of the cove; the left side is an angled cut down into the 3/4″ ledge. Cut the left side of the cove .
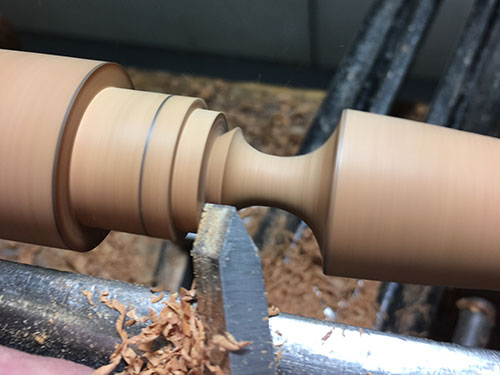
If you are using a gouge, don’t cut “up” the walls of the cove; cut “downhill” (from larger diameter to smaller), stopping at the center to join both sides. I use a skew to make the angled cut from the top of the cove down to the start of the 3/4″ ledge.
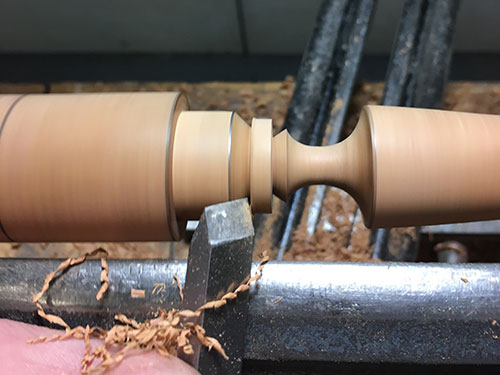
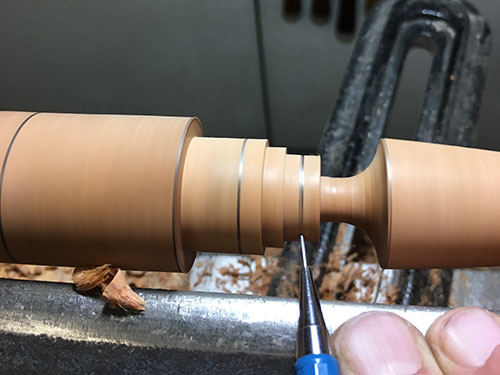
Before starting the 3/4″ ledge, which will become the small central bead, cut another angle into it from the handle side. Use the first line on the handle side as a reference for the top of the angled cut. These two angled cuts will make the bead stand out and clearly define its boundaries.
Mark the center of the 3/4″ ledge with a pencil; this reference mark will help keep the bead symmetrical during its shaping. I like to lay a small skew on its side and use it as a scraper to shape the bead.
Shape one half of the bead to the pencil mark, then flip the skew over and shape the other half.
Now it’s time to shape the handle. Set your caliper to 3/8″ and make a parting cut to this depth at the end of the handle section. The bottom of this cut is the bottom of the handle’s cove. First, cut the half cove at the top of the handle using a small gouge.
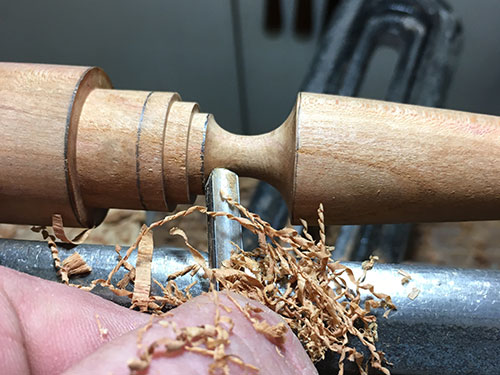
The other half of the handle cove needs to make a smooth transition into the elongated bead of the handle. To make this transition easier to visualize, I start to make the elongated bead on the back of the handle first.
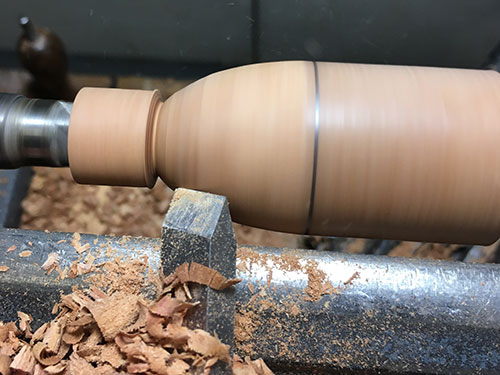
Start by shaping the left half of the elongated handle bead; I use a small skew for this. Carry this shape down into the scrap wood at the headstock.
Now begin cutting the other half of the handle bead until it is in balance with the first half. The scrap wood that remains in the middle of the handle can now be gradually cut away to create a smooth transition to the top of the handle.
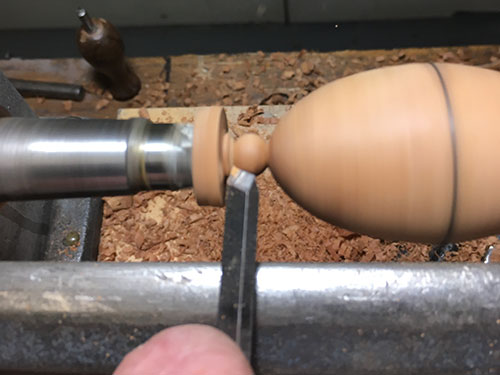
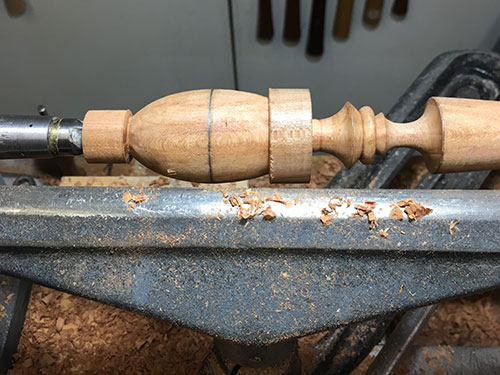
The last element I like to add is a small ball, or bead, at the end of the handle. Avoid rounding over the crisply turned details on your letter opener during sanding. I start with 120-grit abrasive and sand up to 400 or 600 grit.
Sanding Fine Details

I have always told my students that good sanding can make a poorly cut piece shine, while bad sanding can make a crisply cut piece look brutal. Here are some tips for sanding those well-turned details without rounding them over:
• Good lighting is synonymous with good sanding. A movable, crane-neck light that can light up every crack and crevice is imperative.
• The higher the sanding grit, the lighter your pressure on the wood needs to be, or you will load the fine grit and end up polishing the wood instead of sanding it.
• Just because we start sanding with 120-grit paper doesn’t mean every element gets sanded with 120. If any shape is cut so well you can’t see tool marks or torn grain on it, leave it until you reach 150 or 220 grit.
• Notice how the color and texture of the wood changes precisely where the sandpaper touches the spinning wood. Use this as a gauge to make sure each grit of paper touches the entire surface area of each shape.
• If you pause the motion of sandpaper on the wood, you will create a series of sanding lines that appear as white rings. These rings are not easy to remove so try to always keep your paper in motion.
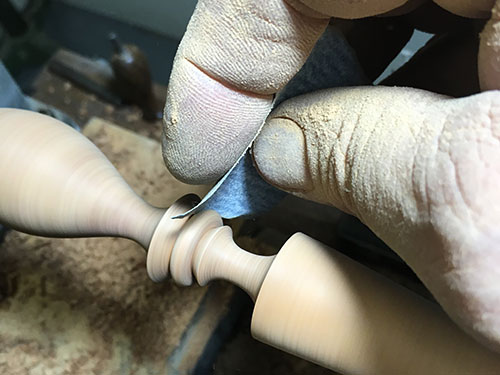
• To sand coves, roll the sandpaper onto a drill bit whose diameter conforms to the shape of the cove. Start sanding at the bottom of the cove and roll the drill bit between your fingers as you bring it up to the outside edges.
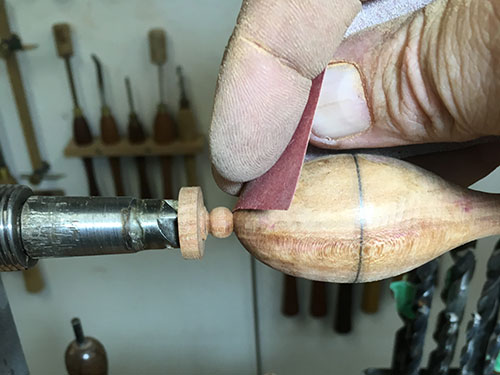
• To sand beads or short angled cuts, pinch the edge of the paper between your thumb and two fingers. This action makes the edge of the sandpaper rigid and is perfect for sanding right down to the bottom of curved or angled shapes. It is never a good idea to fold sandpaper if you want to maintain sharp lines between shapes. The folded paper will inadvertently sand the opposing shape and blur transition lines.
• When you reach 220 grit, stop and sand in the direction of the grain with the lathe off. Then continue sanding, using the same methods, until you reach 400 or 600 grit.
Shape the Blade
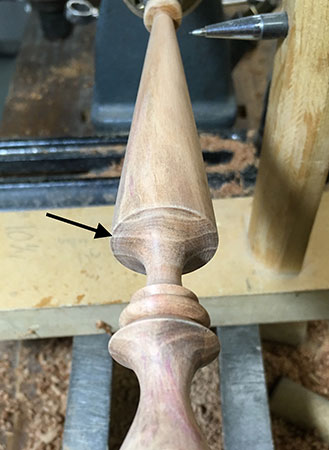
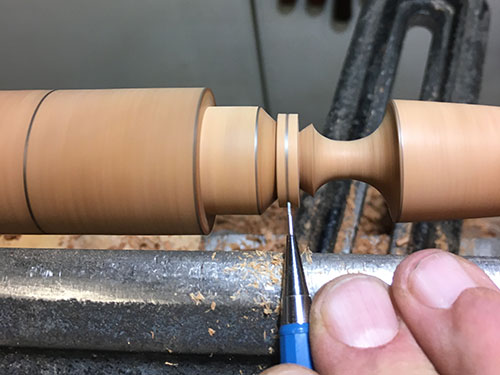
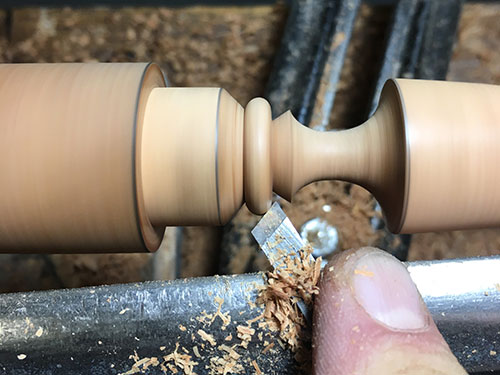
After you have sanded the letter opener, it is time to shape the blade. I begin by drawing lines to mark the two blade edges. The good news is that you don’t need an indexing head, just a jig that holds a pencil at center height and slides along the bed of your lathe. Start by standing at the headstock end of the lathe; now look into the cove behind the blade. Here you should clearly see the grain direction in the wood.

Turn the lathe by hand until the grain is horizontal. Using the pencil jig, make several gentle passes along the entire length of the cone, on both sides of blade, until the lines appear dark and defined.
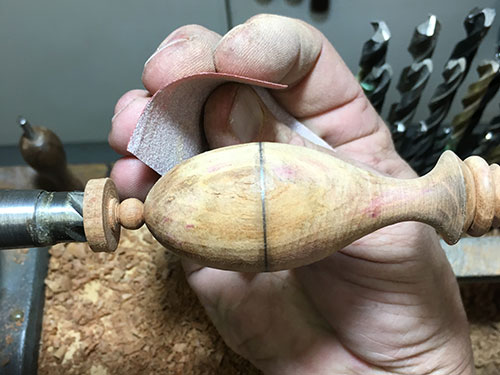
With the opener removed from the lathe, I use a fine-tooth Japanese saw to remove the scrap pieces from the ends, then a sharp utility knife to roughly shape the outside half of the end bead. To refine this bead, I first cut a strip of 320-grit sandpaper. With the letter opener handle in one hand and the strip of paper in the other, pull the strip of paper over the top of the bead. At the same time, use your thumb to apply gentle pressure to the top of the paper. This action produces an effective “belt sander” that quickly sands away any tool marks.

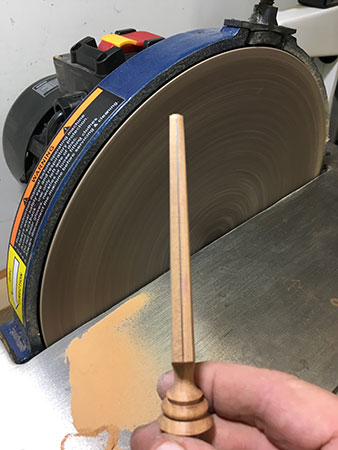
To start shaping the blade, I use a disk sander outfitted with a 60- or 80-grit disk. The object is to sand away most of the unneeded wood without impacting the blade edges. Hold the letter opener tightly with both hands and use gentle pressure against the sanding disk. Referencing the letter opener against the sander’s table adds an element of safety. Make sure the blade line is facing straight up. Pause frequently and check that you are sanding evenly on both sides of the blade. Keep sanding until there is 1/8″ to 3/16″ of wood left on both sides of the pencil lines.
There is no doubt that the blade can be completely formed with only a sanding disk or belt sander. This method is much quicker than handfiling, but I find hand-filing is a joy and not a chore. With the right files and a bit of practice, wonderfully crisp shapes can be made quickly and easily in wood.
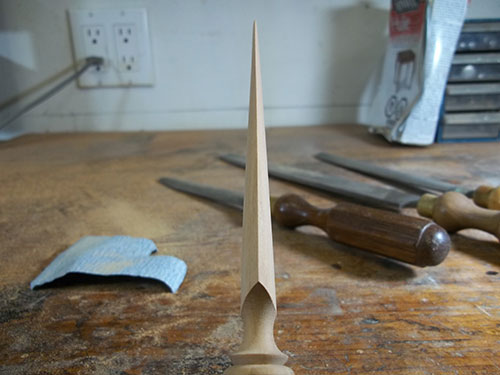
Filing starts with a fine-toothed wood rasp; a piece of felt glued to the edge of my workbench protects the workpiece. I always hold the letter opener directly behind the blade, so my fingers prevent the file from accidentally impacting any of the other elements. Use your index finger on top of the file to produce a light downward pressure as you push it forward to cut. Take that pressure off when you pull the file back over the wood. If your file chatters over the wood, you are pressing too hard or moving too quickly.
Start filing the blade edges first and continue until the rasp is just starting to touch the pencil line on both sides. Then pick one side of the blade and file the middle of that side until it joins the edges you just made. Remove all the marks of the sanding disk and then file some extra wood away from the middle and tip to thin the blade. As you file the second side, stop frequently and compare it to the side you just completed. When the two sides are reasonably close to matching each other, you are ready to move on to a finer file.
I use a coarse file made for metal to begin thinning the blade line even more, passing it over the wood with long, even strokes. Work both blade edges on both sides until just a wisp of pencil line is left. Now move to the middle of the blade and file away all the marks left by the rasp.
Finally, I use a fine mill file with long, even strokes on both sides of the blade to make the pencil line disappear and set the edges straight. No need to file the center of the blade, as a little 150-grit paper over the entire blade, followed by 220, will remove any remaining marks. Always sand in the direction of the grain on the blade.
Apply any finish you like. My preference is three or four coats of a hand-rubbed hardening oil, such as Minwax Antique Oil, as I like its appearance and durability.
Scott Belway is a woodturner based in British Columbia, Canada.


