This article, “Make an Elliptical Vessel” is from the pages of American Woodturner and is brought to you by the America Association of Woodturners (AAW) in partnership with Woodworker’s Journal.
When I was new to woodturning, I never tossed bowls away simply because I had turned through the bottom. They went into my “parts” bin, and when I had time, I would mess around with them, trying to figure out what they could be. Striving for perfection is great, but each item you make becomes precious, and you are less likely to explore alternative possibilities. Creativity comes from alternative possibilities.
In the early 1980s, my woodworking mentor taught me about pattern fences and how they are used in cabinetmaking. Later in my career, I used a pattern fence to make staves for coopered columns. And about six years ago, I adapted the concept to make elliptical vessels from turned bowls.
I take classes in as many nonturning- related subjects as possible. When I took metal-smithing classes, I was not thinking about metal smithing, I was thinking, How can I bring these techniques to my woodturning practice? When taking archeology classes, I was thinking, How do these objects from antiquity relate to my woodturning practice? As an architectural woodturner, I have spent lots of time standing at a lathe, a bandsaw, and a table saw, thinking about the objects I am making. That is how the adaption of the pattern fence for making the elliptical vessels came about. I was messing with my box of “holey” bowls, and that week’s job was coopering columns. I was using the pattern fence to make staves but thinking about the bowls in my parts bin. The two came together in my head, and I started adapting and experimenting that night.
What is a pattern fence? It is a simple jig that allows you to cut a straight edge on a workpiece that does not have a reliable working edge. Typically in woodworking, a straight edge is cut by referencing an existing edge against a fence, resulting in a straight, parallel cut. To make elliptical vessels, the idea is to cut the center out of a bowl and fit the two outer pieces together. But a bowl does not have a straight, or working, edge to run against the bandsaw fence, so you must create one. A pattern fence facilitates this process.
A Temporary Straightedge
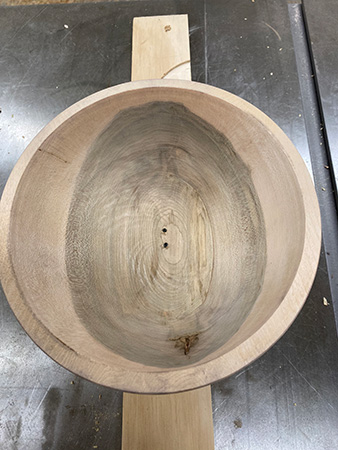
Begin with the bowl you want to. work with. If you rough-turn a lot of wet bowls, I am sure you have a few lying around that have cracked on the rim, or possibly you went through the bottom.
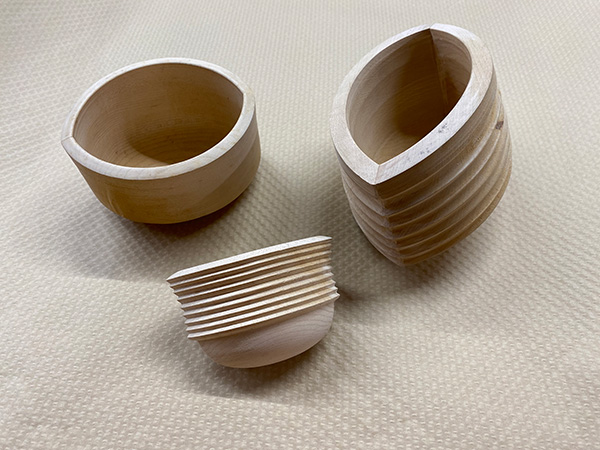
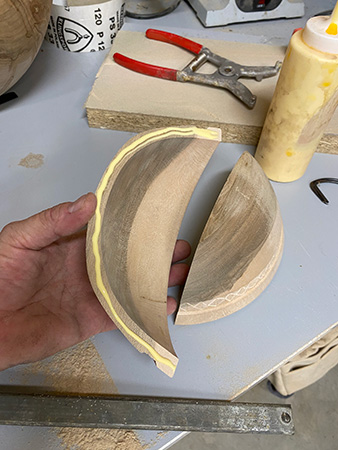
Once you have identified a bowl to use, think about the final shape you want. You will be cutting a parallel strip from the middle of the bowl. The wider the strip, the narrower the final two side pieces will be, with sharper, steeper angles. The thinner the strip, the rounder the glued form will be.
In the example shown here, I started with a bowl that was turned wet and had dried to an oval. I wanted to remove the crack at one edge, but I also needed to take out a strip from the middle in such a way that the two remaining pieces would be as close in shape to one another as possible. To split this oval bowl symmetrically and remove the crack, I needed to remove a strip at least 1-3/4″ (4cm) wide. I like my elliptical vessels narrower and sharper looking, so in this case, I decided to remove 2-1/2″ (6cm). From a scrap piece, I ripped a temporary straightedge 2-1/2″ wide. Make sure to leave your straightedge long; mine was about 24″ (61cm).
The rough-turned bowl I used had a foot, so I could use the flat surface on the bottom of the foot as a reference to measure each side and ensure the two would be equal. If you are using a round bowl, you can use any remaining tool marks as a guide. Spend the time needed to get both sides as close to equal as possible, as there will be less sanding required after you cut them. I darkened the bowl foot edges with a pencil so it would be easier for me to compare visually.
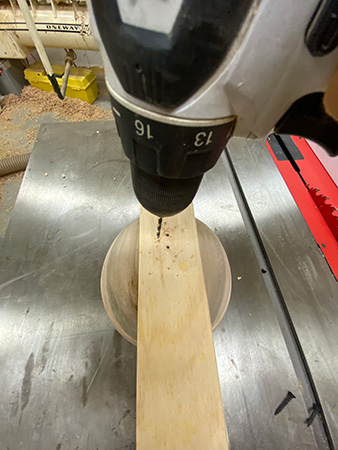
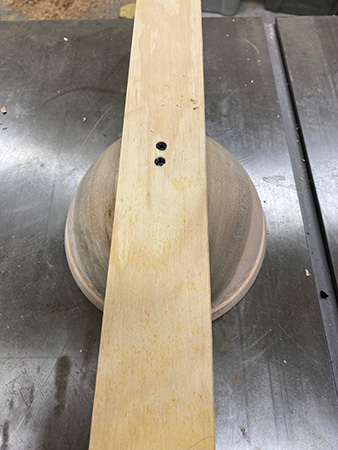
Predrill and screw the straightedge onto the bowl. Predrilling makes it easier to maintain the careful alignment you have achieved. Don’t worry about screws going through and out the other side, as they will not come near the bandsaw blade. I use short sheetrock screws. If the center is missing from your bowl, place the holes out on the edges, where you know you will catch some wood. Now you basically have a bowl on a stick. Make sure the bowl is firmly attached.
Make a Pattern Fence
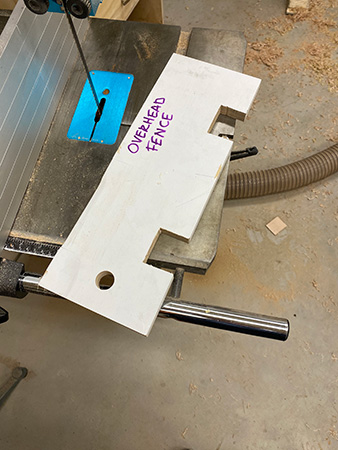
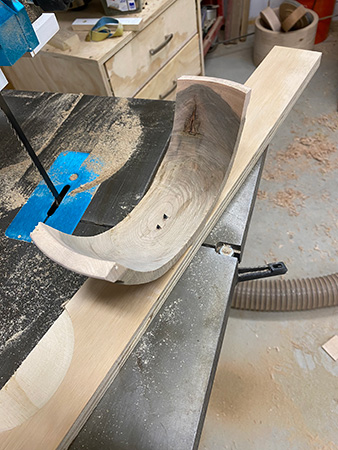
Now you will need a fence to run the straightedge against, and this is where the pattern fence comes in. The pattern fence — I call this variation an “overhead fence” — is just a straight piece of wood that is wider than the sides you are cutting off, say half the width of your bowl. I cut two notches in the pattern fence, so I could clamp it to my existing bandsaw fence without the clamps sticking out farther than the edge.
As an alternative, you could also drill a couple of large holes in the pattern fence. If your bowls are big and wide, it is best to position the clamping pressure closer to the bandsaw fence; drilled holes could be of benefit in that scenario, as you wouldn’t have to cut deep grooves into the edge of the fence.
The idea is to run one edge of your “stick on a bowl” against the edge of the overhead fence. The opposite edge must be exactly aligned with bandsaw blade, so it represents where the blade will cut. Adjust the position of the bandsaw fence accordingly and lock it in place.
Flattening Board
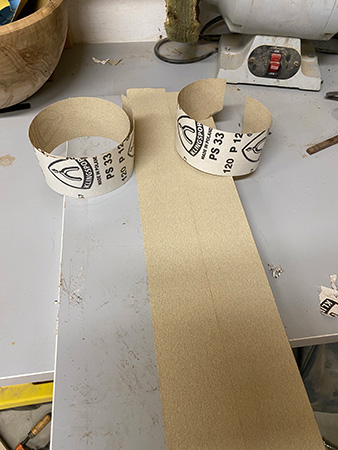
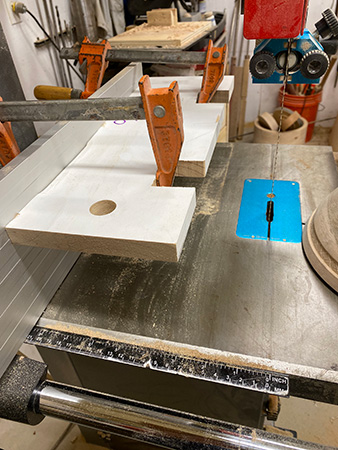
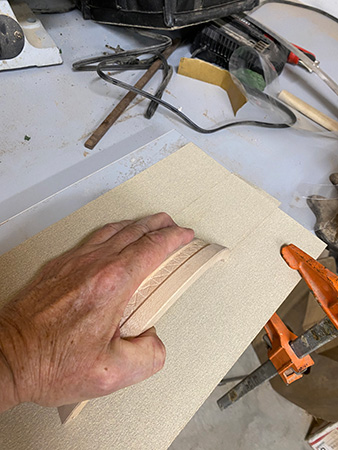
I made a dedicated flattening board from a sink cutout from a countertop, but you could use any board that is flat. Attach strips of self-adhesive sandpaper (80 or 120 grit) to the flat surface (I use Klingspor sandpaper). Clamp the sanding board down securely. This setup is great for flattening many things in the shop, from tools to guitar parts. When you need to change the sandpaper, use a heat gun or hair dryer to loosen the grip and peel off the worn abrasive. Then replace it with new strips of sandpaper.
Cut Away Bowl Sides
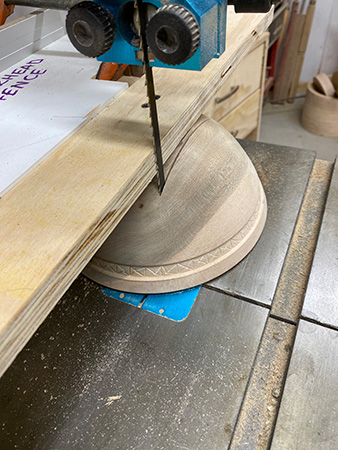
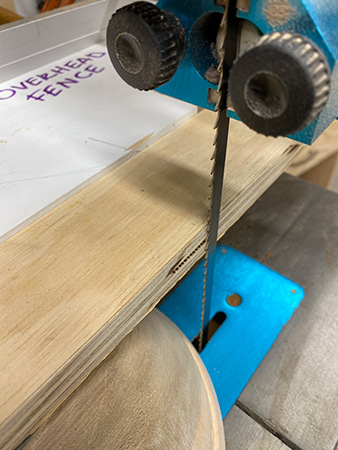
With the overhead pattern fence mounted and the bandsaw fence positioned, it is just a matter of keeping the straightedge against the pattern fence as you slide the bowl into and past the blade.
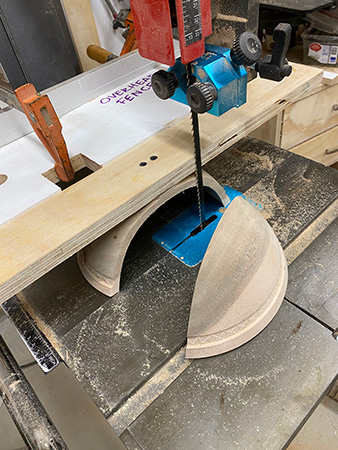
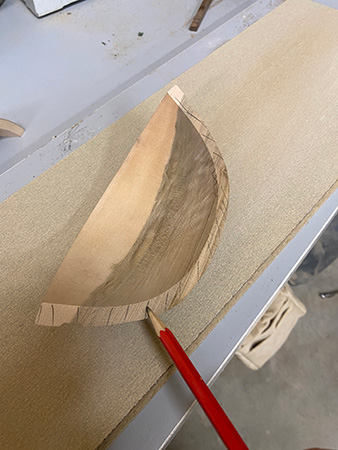
After cutting one side of the bowl away, flip the whole piece around and cut the other side. This will leave you with the middle section (waste material) still attached to the straightedge. Of course, this curved element can go into your “parts” bin for future creative possibilities.
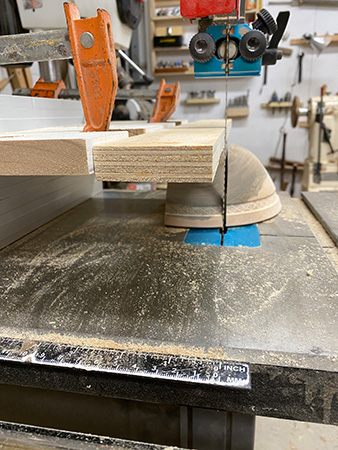
Note that for both cuts, the bowl rim is securely registered against the bandsaw table. Never cut unsupported round or “rocking” pieces on the bandsaw, as this would pose a safety hazard.
Since I made the straightedge long, I could grab it on either side, without my hands coming close to the blade. For this kind of cutting, use a stiff blade that will not flex. I typically use a 1/4″, 3/8″, or 1/2″ (6mm, 10mm, or 13mm) blade with 4 tpi (teeth per inch), but any stiff bandsaw blade will work.
Prepare Gluing Surfaces
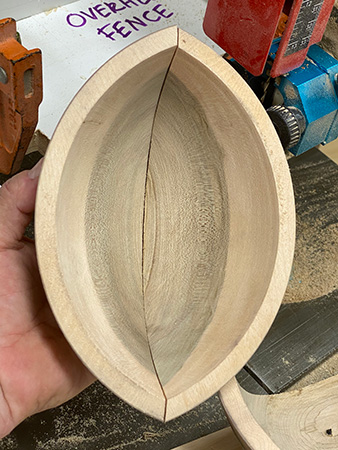
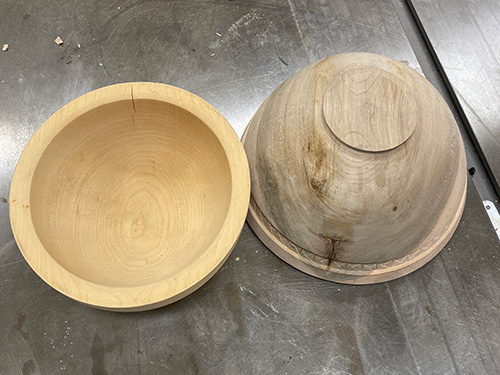
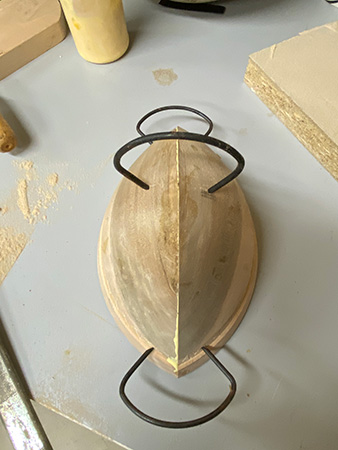
Now you have the two halves of an elliptical form that should be close to a perfect fit. But no matter how hard you try, there is always a little adjusting to do. Hold the two pieces together and evaluate the seam. You will probably have a wider gap at the bottom of the form. Now notice the top edges. If one side hangs over a little, you will need to sand it a little more than the other side.
To prepare the newly cut bowl edges for gluing, sand them on a flat surface. When you look at the soon-to-beglued edges, you will see blade marks from the bandsaw. You will need to sand these marks off to get a clean glue joint. Draw several pencil marks on both glue surfaces and sand on the flat surface, keeping the pressure as even as possible. When all the pencil marks are gone, you know you have a flat surface. Now check the fit for size. If one side is bigger, keep sanding that side until the two parts fit together perfectly.
Glue sides together Now comes the gluing. I like to use spring clamps for odd-shaped pieces such as these elliptical forms. I use Ulmia or Collins brand spring clamps. They are expensive but really come in handy during glue-up. I have purchased cheaper brands and ended up throwing them away.
Spring clamps come with a tool that opens them so you can put them in place. When you let go of the tool, the clamp squeezes securely. I take mine to the grinder and sharpen the tips.
They do leave a little mark, so if that is not acceptable on your finished piece, duct tape works well as a clamp, provided the fit of your glue joint is good. I use Titebond II for almost all of my regular glue-ups. Wipe off the glue squeezeout inside and out with a damp cloth.
Elliptical Form as Sculpture
I often use these elliptical forms in sculptural work, adding parts together and embellishing them. Sometimes, I do not glue but sew the pieces together instead. See where your creativity leads you—these forms are ripe for imaginative play.
The real trick is to find something to do with the leftover center section. I have lots of them in my “parts” box, just waiting for inspiration to strike.
Beth Ireland, a professional architectural woodturner and sculptor with more than thirty years of experience, lives and works in St. Petersburg, Florida. She teaches the two-month Turning Intensive at The Center for Furniture Craftsmanship in Maine, as well as workshop classes at major craft centers around the country. For more, visit bethireland.net.


