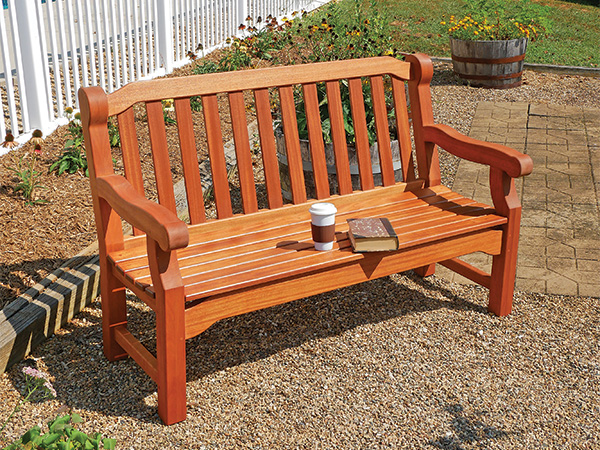
Nearly 30 years ago, Rockler published this elegant bench in its predecessor magazine, Today’s Woodworker. We’ve brought it forward again now because while its design and proportions haven’t changed one iota from the original article, neither has its timeless appeal: this is a classic that deserves a second printing.
Forming Back Legs
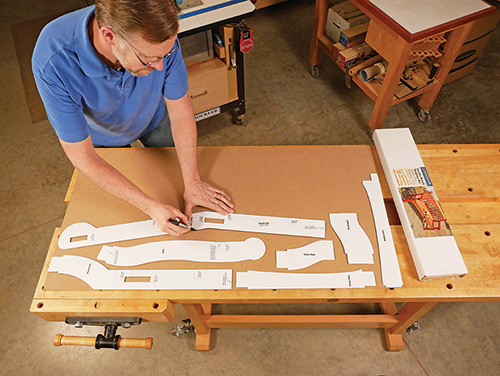
To get this project underway, start by tracing Rockler’s seven patterns (or plotting points from the gridded drawings) onto 1/4″ MDF or plywood and carefully cutting them out to create full-size, durable templates. Sand their edges smooth.
Next, glue up seven double-thick blanks for the front and back legs, arms and a spare “test” arm from 1-1/2″-thick stock. Blanks measuring 6″ x 39-1/2″ work well for the back legs; start with 4-1/4″-wide x 24″-long blanks for the arms. When the glue dries, plane the seven blanks down to 2-3/4″ thick.
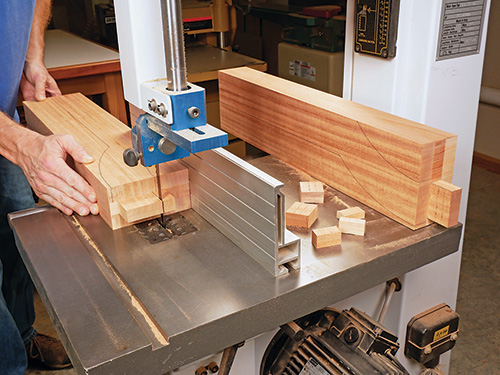
Use your rigid templates to trace the leg and arm shapes onto their blanks. When laying out the arms, make sure the angled back end forms a 16° angle with the bottom flat edge of the blanks and the “flat” behind the front ball end of the arm is parallel to the blank’s bottom edge. For now, cut out just the back legs at the band saw, sawing about 1/16″ outside the layout lines.

The next step will involve template routing, but these leg and arm workpieces are thicker than standard flush trim or pattern bits can reach in a single pass. To solve the problem, I used Rockler’s 1-1/2″ Double Bearing Shear Flush Trim Bit (item 27867) for this operation in two configurations — with the end bearing removed as a “pattern” bit, then with the end bearing installed as a flush-trim bit. But you could use long, single bearing flush trim and pattern bits instead, if you own those bits already.
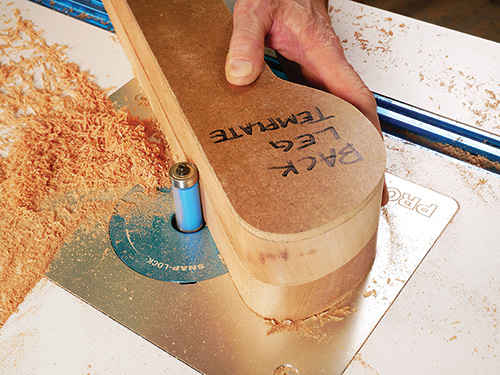
Either way, mount your back leg template to one of the back leg blanks with double-sided tape. Install a long piloted pattern bit in your router table and, with the workpiece oriented so the template is facing down, trim around the leg to match the template using the bit’s full cutting length. Feed the leg workpieces slowly along the bit to prevent chipping and tearout, especially when the bit must cut against the grain.
Now switch to a long piloted flush trim bit and raise it until the bit’s bearing will ride along the routed portion of the leg from the first routing pass. Flip the leg blank over (template-side up) and remove the rest of the waste to complete this template-routing step. (Editor’s Note: Bits with a shear cutting angle, such as the double bearing flush-trim bit shown here, are preferable to bits with cutters that are in line with the bit’s axis, because the shear angle cuts more cleanly against the grain.)
Template-rout the other back leg.
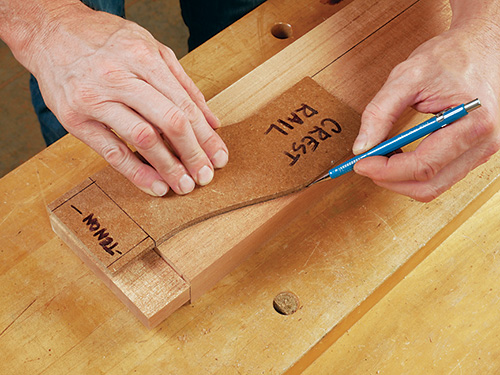
Lay out the arm, side rail and stretcher mortises on the front edges of each back leg, using Rockler’s leg pattern or the gridded drawing as a guide. All three mortises are 3/4″ wide, but the arm mortise is 2-1/4″ long, the side rail mortise is 2″ long and the stretcher mortise is 1-1/2″ long. Center these mortises on the leg thicknesses. Locate the stretcher mortise 3-3/4″ up from the bottom end and the side rail mortise 13-3/4″ up from the bottom. Position the arm mortise 6-3/4″ up from the inside corner where the leg transitions to a backrest.
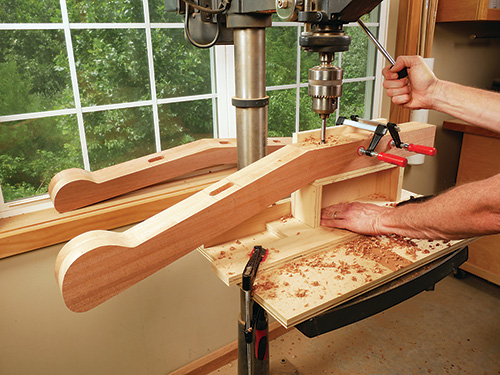
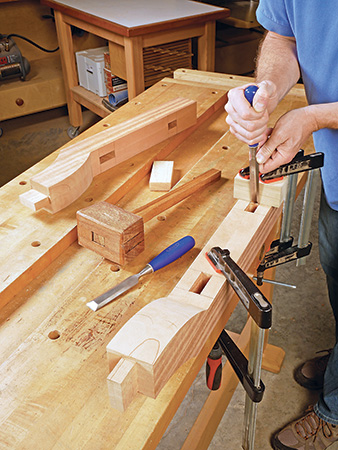
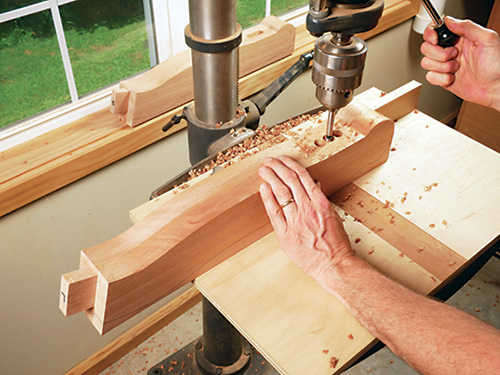
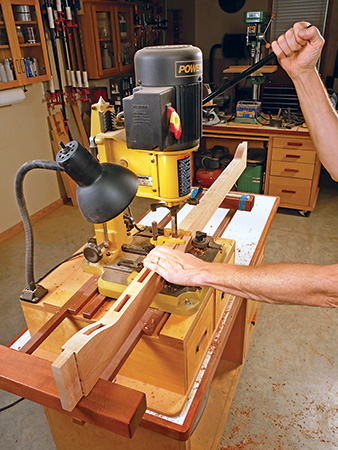
Use a 3/4″-dia. Forstner bit to drill out the bulk of the waste from the mortises. All three are 1-1/2″ deep. Due to the angled shape of these parts, you’ll probably need to use a tall spacer block or fabricate a raised platform on the drill press table to lift the leg high enough to clear the table. That way you can reposition the leg to suit its bent shape as well as drill these mortises squarely into the leg faces. Back up the spacer block and leg blank with a fence clamped to the drill press table to ensure that the drilled holes remain aligned and centered on the workpiece thicknesses. Then clean up and square each mortise with a sharp chisel.
Cutting Leg, Arm Tenons

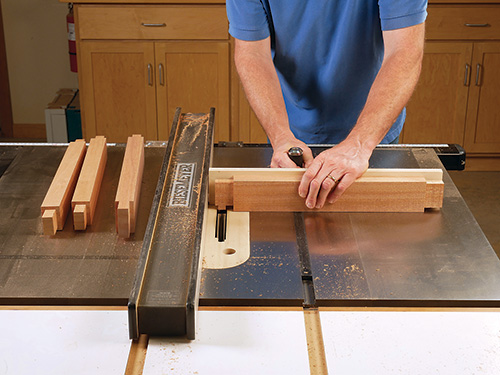
Set the back legs aside for now so you can miter-cut the back ends of the arm blanks and the “test” arm to 16°, which forms the ends of the arms’ angled tenons. Then gather up the arm and front leg blanks and head to the table saw to mill their 3/4″-thick, 1-1/2″-long tenons. Install a wide dado blade and raise it to just shy of 1″. Set the rip fence 1-1/2″ from the far side of the dado blade, and cut the long cheeks and shoulders of the front leg tenons. Back up these cuts with a miter gauge equipped with a long scrap fence.
Repeat the process for cutting the long cheeks and shoulders for the back angled tenons of the arms, but this time, swivel the miter gauge to 74° to support the arm blanks from behind; the angled ends of the arm blanks should be positioned flush against the rip fence, which will establish each shoulder cut. Once that cut is made, remove the rest of the waste in several side-by-side passes, sliding the arm blanks farther away from the rip fence for each pass. You’ll need to flip the arm blank over and swivel the miter gauge to 74° in the other direction to make these shoulder cuts on the opposite faces of the arm blanks. Be sure to practice this setup on the “test” arm blank before milling the actual arms.
Now complete the front leg and arm tenons by laying out and sawing their short shoulders and cheeks, bringing the tenons to an overall width of 2-1/4″.
Go ahead and rough-cut the front legs to shape at the band saw. Cut the bottom (mortised) edge of the arms to rough shape, too, but leave the top edges of the arm blanks flat for now.
Template-rout the front legs to final shape, using the same two router bit method as you did for the back legs. When those are done, template-rout the bottom “cut” edges of the arms as well.
Mark the back edges of the front legs for the side rail and stretcher mortises. Bore these mortises 1-1/2″ deep at the drill press, and chisel them flat and square. Don’t drill the front leg mortises in the arms just yet, however — those will get marked and machined later, when the bench’s side assemblies are ready to be fitted together.
We also need to mark the inside faces of the front and back legs for the front rail, crest rail and back rail mortises. Here is when the front and back legs become left and right specific, so choose which will be which. All three mortises are 3/4″ wide. The back rail mortises are 2-7/8″ long; locate them 1-1/8″ in from the front lower edge of each back leg and 14-5/8″ up from its bottom end. The mortises for the crest rail are 2-1/2″ long; they begin 17-1/2″ up from the point at which the back edge of the back leg transitions from a leg to a backrest. Position them 1″ in from the back edge of the leg. The front rail mortises are 3-1/2″ long; locate them 11″ up from the bottom of the front legs and centered on their width. Bore these mortises 1-1/2″ deep, and chisel them flat and square.
Building Side Assemblies
Prepare enough 1-3/8″-thick stock to make blanks for the side and middle rails, stretchers, crest rail, back rail and front rail. Gather the side rails and stretchers, and set the other blanks aside for the time being.
Back at the table saw, mill 3/4″-thick, 1-1/2″-long tenons on the ends of the side rails and stretchers. Then reset the blade to 1/4″ high to cut the short end shoulders and cheeks on the stretchers; the final width of these tenons is 1-1/2″. Keep this blade height setting for cutting the short shoulders on the front tenons of the side rails and the bottom shoulder of their back tenons. But you’ll need to raise the blade to 3/8″ for cutting the top shoulder of these back tenons because they’re offset on the rails. The final width of the back tenons on the side rails is 2″, whereas their front tenons are 2-1/8″ wide.
Next, form two bench side assemblies by dry fitting a side rail and stretcher between a back and front leg. Set the arms atop the front legs and against the back legs, and carefully mark where the front leg tenon intersects the bottom, flat edge of the arm. Remove the arms, and lay out these 3/4″-thick, 2-1/4″-wide mortises. Drill them 1-1/2″ deep, and chisel them smooth and square. Reinstall the arms on their side assemblies to be sure the arms and front legs fit together correctly. Once you disassemble these parts, cut the top profiles of the arms to rough shape and template-rout them to completion.
Use your side rail template to trace its top profiled edge onto the side rail blanks. Band-saw these edges to rough shape and template-rout them to match. Then ease the four long edges of the stretchers and the bottom two flat edges of the side rails with a 1/4″-radius roundover bit to prevent future splinters.
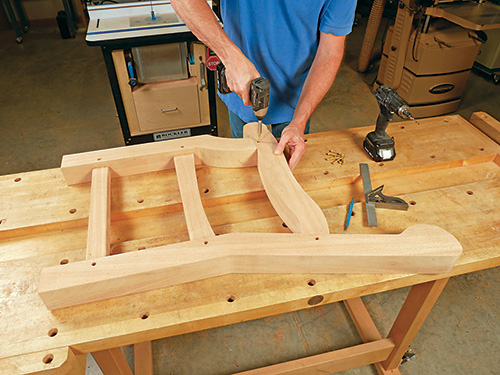
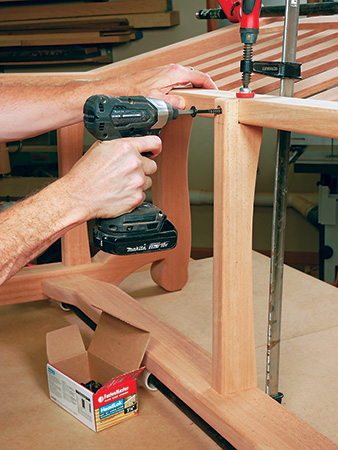
At this point, you’re ready to sand the legs, arms, stretchers and side rails smooth then glue and clamp the side assemblies together using Titebond III or other waterproof wood glue. When the bench side assemblies come out of the clamps, plane, scrape or sand any mismatched joints flush. Mark the outside faces of the mortise-and-tenon joints for a single counterbored #8 x 2″ screw that will pin them together permanently. Position these screws so they’re centered on the width of the tenons and 5/8″ back from intersection of the parts. Drill counterbored pilot holes and drive the screws into them. Fill these counterbores with tapered wood plugs made from scraps of the project wood.
In order to prevent the bottom ends of the legs from chipping or splintering when the bench is dragged around on hard surfaces, it’s a good idea to chamfer their bottom ends. Do this with a trim router and chamfering bit, set to 1/4″ deep. Or form these chamfers with a sanding block, plane or file. Then use a 1/4″ roundover bit to ease the remaining sharp edges of the side assemblies. Sand the profiles into smooth transitions where they intersect at inside corners.
Making Backrest Pieces
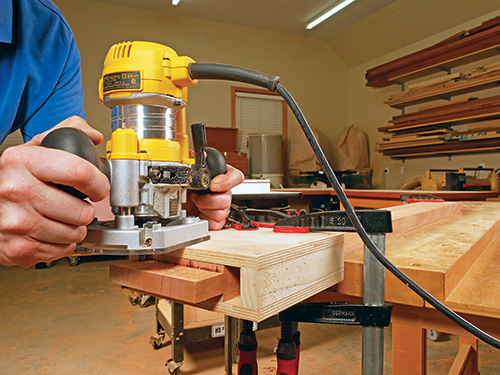
With the side assemblies now complete, rip and crosscut a blank for the crest rail from 1-3/8″ stock. Since the length and weight of this long rail would make it difficult to maneuver over a table saw for cutting tenons on its ends, use an edge guide or a jig and your router to mill the tenons this way instead.
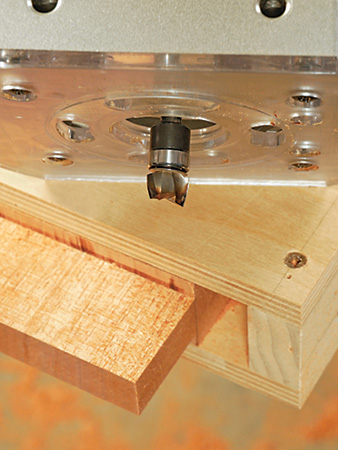
The scrap-made jig I used simply wraps around the workpiece like a collar to align the shoulders of the tenon all the way around. A short piloted mortising bit, run against the edges of the jig, completes the cuts. Rout 3/4″-thick, 1-1/2″-long tenons across both ends of the crest rail blank, removing the material in a series of deepening passes.
Next, trace your curved crest rail template onto the ends of the blank, and carefully bandsaw the bottom (slatted) edge of the rail to shape. Use your rigid crest rail template, if needed, to perfect these curves by template routing. Once that’s done, lay out the 1/2″-wide x 2-3/8″-long back slat mortises along the shaped edge of the crest rail. Mark the middle 2″ slat space first, then lay out the other 12 mortises 2″ apart. Center the mortises on the crest rail’s thickness.
Chuck a 1/2″ Forstner bit in your drill press or a 1/2″ hollow chisel in your mortiser to cut these back slat mortises 9/16″ deep (the outermost two mortises will be deeper to accommodate the crest rail curves; make their depth match the other ten shallower mortises). Square their ends and clean up their walls, if needed, so the slats will fit easily inside.
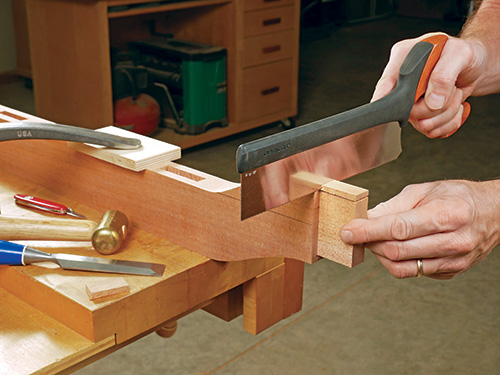
Complete the crest rail’s shape by rough-cutting and template-routing its top, curved edge. Mark the short end cheeks and shoulders on the tenons, then cut them with a hand saw to bring the tenons to their final 2-1/2″ width.
Make up a blank for the lower back rail next, and raise 3/4″-thick x 2-7/8″- wide x 1-1/2″-long tenons on its ends. The bottom ends of the back rail tenons will also need to be notched to fit around the top ends of the side rail tenons. Mark and cut these 1/2″-wide, 1″-long notched areas with a hand saw.
Refine the fit of the crest and back rail tenons as needed by hand planing until they fit snugly into their mortises in the back legs.
Set the crest and back rails together with their ends aligned so you can transfer the crest rail mortise locations onto what will be the top edge of the back rail. This ensures that the slat mortises will line up well when the backrest is assembled.
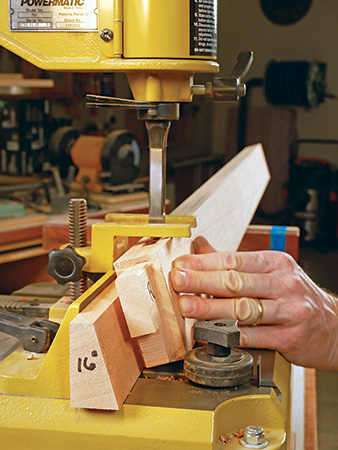
Notice in the Drawings that the back slats follow the angle of the bench’s backrest (16°), but the back rail doesn’t — it’s parallel with the lower portion of the legs. In order to mill the angled slat mortises that the back rail requires, first make an angled block for your drill press or mortising machine to hold the stock at a 16° angle to the bit. Affix the block to the fence of your drill press or mortiser with its angled face tilting backward. Adjust the fence to center the rail under the bit, and orient the rail with its front face against the angled block. Set the bit or chisel’s cutting depth to 9/16″, then mill the 12 slat mortises, making sure the rail remains flush against the angled block.
Now cut the back slats to size from 1/2″-thick stock, and test their fit in the crest and back rails by dry assembling the backrest. Check to see if the backrest tenons fit into the four mortises of the back legs. You may need to slightly shorten the slat length to accomplish this. I chamfered the ends of my slats to prepare them for easier insertion during final backrest assembly.
While the backrest is still apart, ease the long edges of its rails with 1/4″-radius roundovers, then sand the rails and slats up to 180 grit. Break the long sharp edges of the slats too.
Assembling the Framework
Create the front rail using the same tenoning and template-routing methods you used to form the crest rail. Make sure that its overall length matches the back and crest rail lengths. Then raise 3/4″-thick x 1-1/2″-long x 3-1/2″-wide tenons on its ends. The tops of these tenons will need to be notched to fit around the bottom ends of the side rail tenons, so mark and saw these notches now. Test the fit of the front rail tenons in their mortises in the front legs; plane them if needed to achieve a good slip fit.
Now mill a 3/4″-wide, 2-1/8″-long mortise into the back face of the front rail, centered on its length and located 1/4″ down from the top edge. Make this mortise just 1/4″ deep. Square up its ends.
Raise a tenon on the front end of the middle rail to fit the mortise you just made in the front rail. However, the back end of the middle rail has no tenon; instead, it will be notched to fit around the bottom edge of the back rail. Use your template to mark, cut and shape the middle rail’s top, curved edge to match the top edges of the side rails.
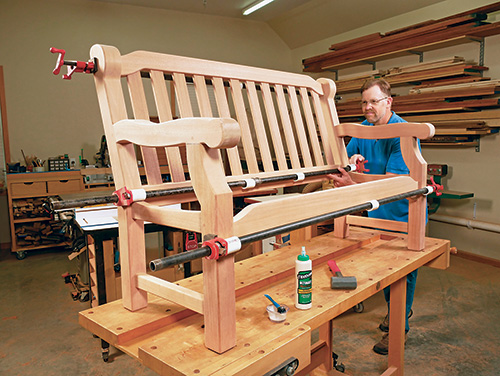
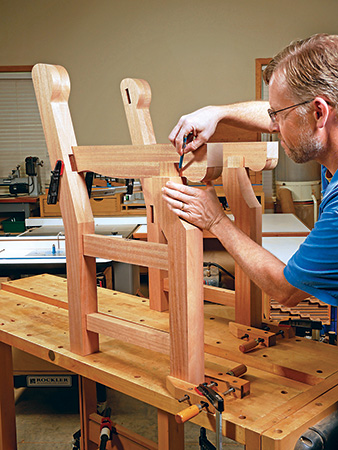
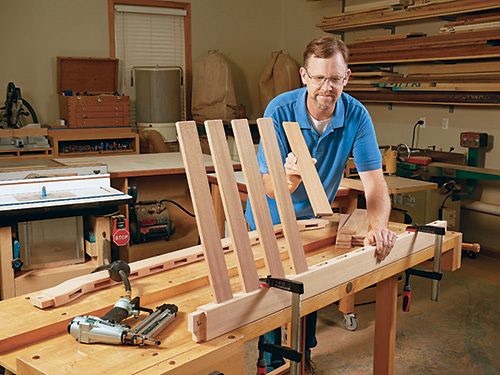
With that done, it’s time to complete the full bench framework. Reassemble the crest and back rails with the slats in between, and clamp this assembly together. Dry fit the bench sides onto the backrest and front rail, and install some long clamps to hold the bench together. Tack the crest and back rails to the slats with 1″-long, 18-gauge brads driven in from behind. Then pull the big components apart one last time, spread glue into the leg mortises and onto the rail tenons and clamp up the bench frame.
While these joints dry, fit the middle rail onto the front rail so you can mark the notch at its back end where it needs to wrap around the back rail. Cut the notch 1-1/2″ deep to form a tongue on its bottom back end, and test the middle rail’s fit on the bench. Now drill a centered hole through the tongue for a 1/4″ x 2-1/2″ lag or washerhead screw, extending this pilot hole up into the back rail as well. Install the middle rail with glue in the mortise-and-tenon joint, and drive the screw to secure the tongue to the back rail. Drive a counterbored 3″ deck screw through the front rail and into the front end of the middle rail to reinforce this joint further.
Grab a handful of 2″ exterior screws so you can cross-pin all the remaining mortise-and-tenon joints, just as you did for the side assemblies.
Finishing Up
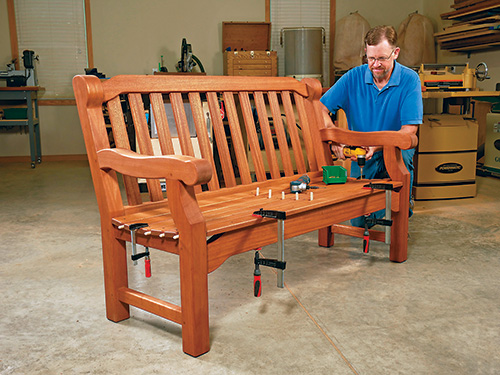
With the bench’s framework completed, fill all the remaining screw counterbores with tapered wood plugs, saw them flush and sand the plug areas smooth. Now you’re ready to add the final components — seat slats! Rip and crosscut the six slats to size. Test their fit on the bench seat with 7/16″- dia. dowels used as spacers in between (the shorter slat goes in front). If the slats fit well, remove them so you can mark and drill a single counterbored pilot hole near the ends of each of the five long slats, centering these screw holes over the side rails. Mark and drill screw holes for the middle rail as well. Bore four counterbored pilot holes for screws along the length of the front slat, positioning them to avoid the middle rail’s front screw. File or sand the sharp corners of the slats round, then ease their top edges and ends with a 1/4″ roundover bit. Sand the slats smooth.
Now is a good time to apply finish to the bench and slats before installing them, while their surfaces are still easy to reach. I kept things simple by applying two coats of oil-based deck stain.
When the finish dries, set the slats in place, adjusting for an even overhang on the side rails. Extend their screw pilot holes down into the side, middle and front rails, and attach the slats with #8 x 2″ exterior screws. Fill their counterbores with plugs, and trim them flush.
Touch up the finish on the slats to complete your bench. If possible, set it beneath a shade tree or in another spot out of direct sunlight, to help preserve the stain’s color as long as possible. Now have a seat and enjoy the view!
Click Here to Download the Drawings and Materials List.
Hard-to-Find Hardware:
English Garden Bench Template with Plan (1) #61885
Rockler 1-1/2″ Double Bearing Shear Flush Trim Bit (1) #27867


