This article, “Firewood Table Lamp,” is from the pages of American Woodturner and is brought to you by the American Association of Woodturners (AAW) in partnership with Woodworker’s Journal.
Over the years, I have read numerous articles on making a table lamp. While the idea appealed to me, I was always a bit apprehensive about drilling the long hole through the tailstock for wiring, and, not being an electrician, actually wiring a lamp. I purchased a few lamp kits, but balked at ordering a costly lamp auger set. I already have enough rarely used tools! I finally resolved to overcome the obstacles I had placed in my own path and figure out how to make a lamp with a few on-hand tools, and with minimal expense.
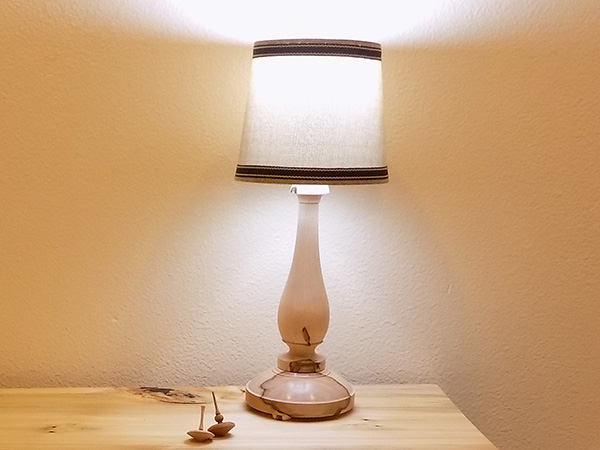
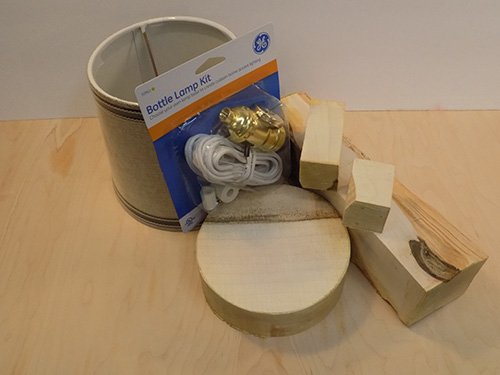
This useful table lamp project has several appealing aspects. It can be completed, start to finish, on a small lathe. Lamp kits are inexpensive and widely available at most hardware stores. I scaled the project so that it does not require an auger. And, finally, the wood needed for the project is modest. In my case, a visit to my firewood pile provided all I needed. Visit a lighting store or walk through the average house and you will note that lamp designs are almost infinite. This project readily lends itself to customization, but I like a classic vase design that keeps the lamp weight visually lower and, in practical terms, improves the stability of the lamp. My design has evolved slightly, as I recently added a small shelf detail near the top of the cove, a subtle touch that adds to the overall look.
Prepare the Stock
Checking out a few lamps in my house as examples, I decided the column blank for this project should be 3″ to 4″ (8cm to 10cm) square. Having no suitable stock in my shop sent me off to look through my firewood stack. Among the mix of hard and softwoods in the shed, I soon located a few split maple pieces large enough for the column and the base, which I bandsawed to rough dimensions.
I cut the base into a round 6-1/2″ (17cm) in diameter and 2″ (5cm) thick. I cut the piece for the column into a blank 3″ (8cm) square and 11″ (28cm) long. The length of my drill bit allows for a 12″ (30cm) column, but eliminating endgrain checking in the blank dictated the shorter length. I also cut a blank 1-1/2″ (38mm) square and 3-1/2″ (9cm) long for the feet under the base, and a 1-1/2″-square × 2″-long blank to be used as a shop-made drive chuck. After bandsawing, I sealed the endgrain and let the wood acclimate to the shop for a few weeks. I have neglected this step a few times with blanks cut from firewood and nearly always regretted it, as the wood checked and cracked soon after.
Turn the Lamp Bottom
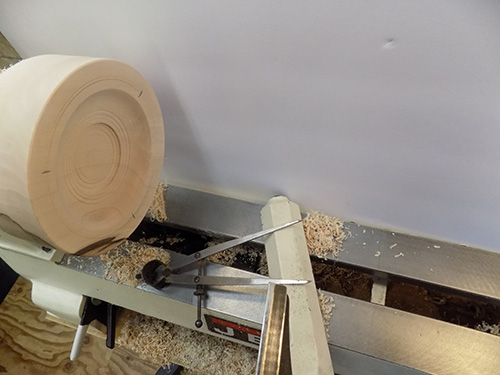
My tools for this project include a 3/4″ (19mm) spindle-rouging gouge, a 1/2″ (13mm) skew, 3/8″ (10mm) spindle and bowl gouges, and a parting tool. I also used drive and revolving centers, a chuck with standard 2″ jaws, and a drill chuck with a 1″ (25mm) Forstner bit.
blank and turn a flat
rim.
I start with the base because it will have a 1″ hole through its center to accept a tenon turned on the base of the spindle, or lamp column. Turning the base and drilling the mortise hole first allows me to finesse the fit of the spindle tenon in the pre-drilled hole.
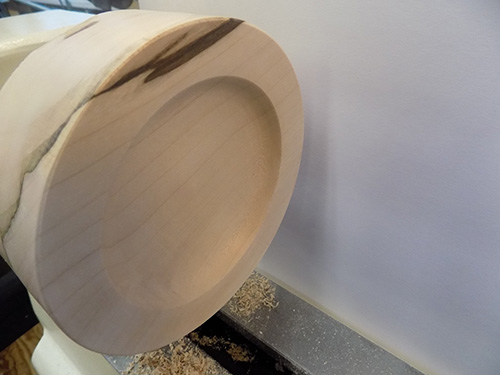
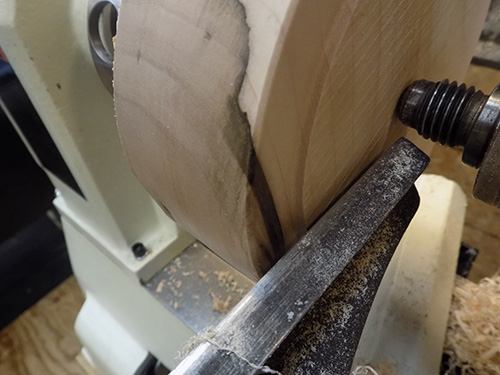
With a 5/16″ (8mm) hole drilled for the woodworm screw, I attach the base blank to the chuck. I true the sides and bottom with a 3/8″ bowl gouge, and then turn a 3/4″-wide flat base around the outside perimeter of the bottom. The interior of the bottom is hollowed about 1/2″ deep, like a shallow platter. This will help provide clearance for the wiring, as the feet will add only about 1/4″ (6mm) to the height.

To allow for reverse-chucking of the form with expanding jaws, I turn a recess in the bottom and add a few decorative grooves to camouflage the utilitarian nature of the recess. The bottom is sanded and finished at this point because I will not return the base to this orientation again. My finishing regimen is simple. I apply spray shellac from a can, followed by a coat of Johnson’s paste wax to achieve a semi-gloss finish.
Drill Holes for the Feet
Before removing the base from the lathe, I draw a circle 1/2″ in from the outside edge on the flat portion of the bottom. This is the reference line for the holes I will drill for the foot tenons. I set calipers equal to the distance from the middle of the base to the drawn line (i.e., the radius of the foot reference circle) and step out six equal points around the circle perimeter. I then mark every other point to establish three equidistant points. At these points, I drill 5/16″ holes, 1/2″ deep. Drilling these holes perpendicular to the base assures that the feet will sit flat.

With a drill chuck in the tailstock holding the 1″ Forstner bit, I drill a 1/4″-deep hole in the center. The hole will be through-drilled from the top later, but this step prevents tearout and also provides clearance for drilling the through-hole.
Turn the Top of the Base
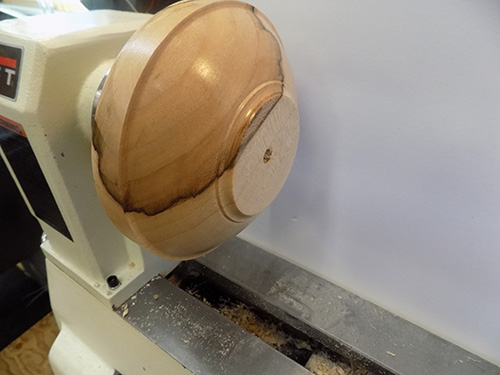
I reverse-chuck the blank by expanding the chuck jaws into the recess in the bottom of the base. Using a 3/8″ bowl gouge, I true the top, mark the spindle base diameter on the top, and slightly dish the platform for the spindle. I shape the sides into a pleasing form. After final sanding and finishing, I drill the 1″ hole through the base for the spindle tenon.
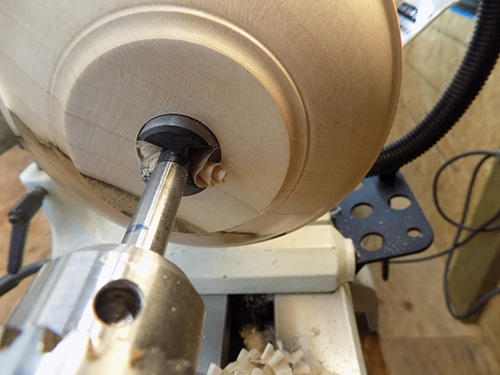
By advancing the Forstner bit slowly while drilling at a slow speed (about 840 rpm on my step drive lathe), I can listen for the sound of the bit breaking through the other side. Drilling too deep risks running the Forstner bit into the metal chuck. This is one of the reasons for partially pre-drilling the hole from the base side in the earlier step, and reason for caution at this stage.
Turn the Feet
I mount the blank for the feet in the contracting jaws of the scroll chuck. I true and face-off the endgrain before turning about a 2-1/2″ (6cm) length of the blank to 1″ diameter. I mark off 1/4″ of the blank (this is the thickness of a foot), then reduce the spindle above the foot to a 1/2″-long tenon, 5/16″ in diameter. The 5/16″ drill bit makes a handy gauge for setting the calipers to size the tenon. I part off the first foot, then repeat the process twice more until all three feet are completed.
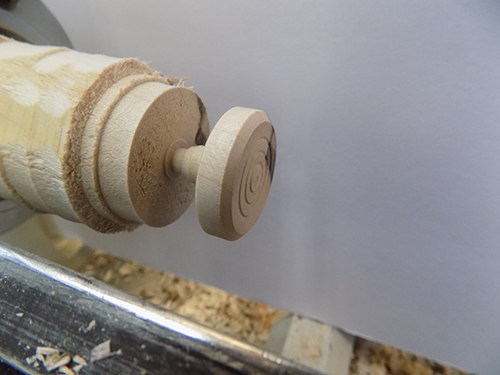
Turn the Drive Chuck
The homemade drive chuck is simple and eliminates the need for a specialized drive center. I mount the small blank (2″ long and 1-1/2″ square) into the contracting chuck jaws. Then I turn a 5/16″-diameter tenon, 3/4″ long to fit snugly in the hole that will be drilled through the lamp spindle. This shop-made drive is essentially a friction drive, so if heavy cuts are attempted or a catch occurs, the blank will slip. If the blank slips too much, it will smoke and char, so lots of moderate cuts are better than a spindle stalling heavy cut. If the drive tenon is too loose, slipping a small piece of paper towel over it can provide some grip.
Prepare the Spindle Blank
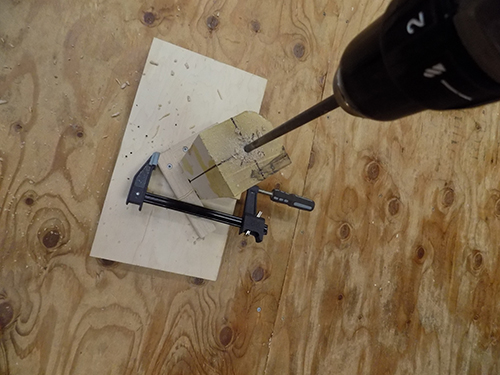
I decided to drill the spindle blank off the lathe prior to turning, which is a departure from the usual lamp-making methods I read about. After experimenting on some practice blanks, I found that sight lines drawn down the middle of the sides of the blank provide all the guidance I needed to drill a sufficiently straight hole. The test holes I drilled exited the bottom of the blank within a quarter-inch of the center— plenty of accuracy for a lamp spindle. I used a 5/16″ bit for the through-hole, which provides adequate clearance for the lamp wire. But before drilling, it is important to verify that the bit is smaller in diameter than the threaded rod provided with the lamp kit. I also built a simple jig to steady the spindle blank. The jig base is sacrificial so the drill bit can pass all the way through the blank.
While my approach limits the height of the lamp, it also eliminates a lot of steps on the lathe—mount the blank, turn a tenon, remount the blank in a chuck, drill the hole, remount the blank between centers. Eliminating the need for a lamp auger ultimately meant both cost and time savings.
Turn the Spindle
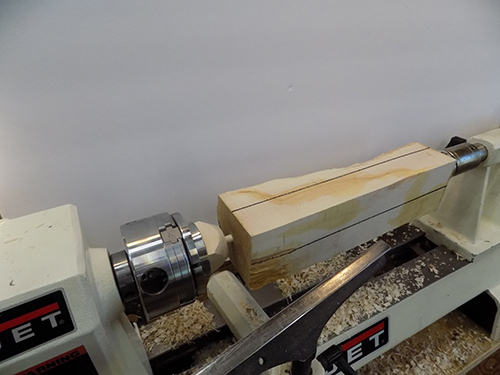
I orient the top of the lamp at the headstock end. The bottom is secured with a revolving cone center. With safety in mind, I use the 3/4″ spindle-roughing gouge to true the blank at a moderate speed before increasing the lathe speed.
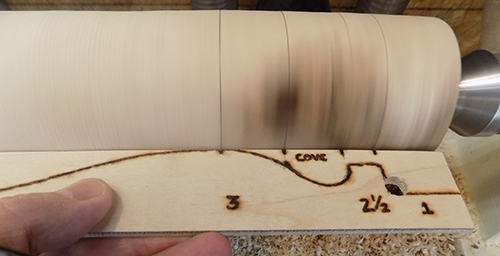
When the blank is round, I use a story stick to mark the spindle diameters, bottom tenon, and detail locations. The 1″ Forstner bit I used to drill the base makes a perfect gauge for setting calipers and turning the tenon on the base of the spindle.
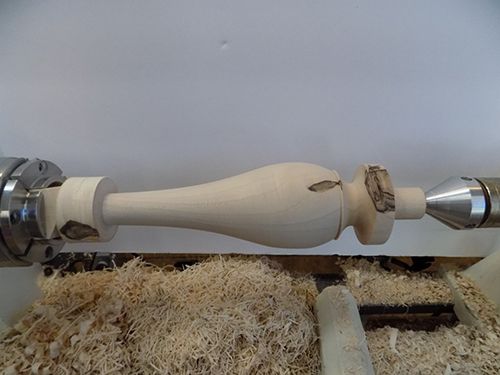
I sneak up on the fit, checking it frequently with the base. When the tenon fits perfectly, I turn the rest of the spindle.
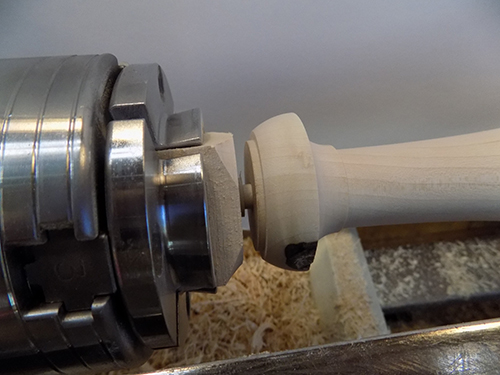
The benefit of the shop-made wood drive is that it permits working on the top of the spindle without fear of contacting the metal chuck jaws. Using a parting tool, I true the top of the spindle and add a shoulder to fit the small metal cap that comes with the lamp kit. I sand and finish the spindle while it is mounted on the lathe.
Assemble the Lamp
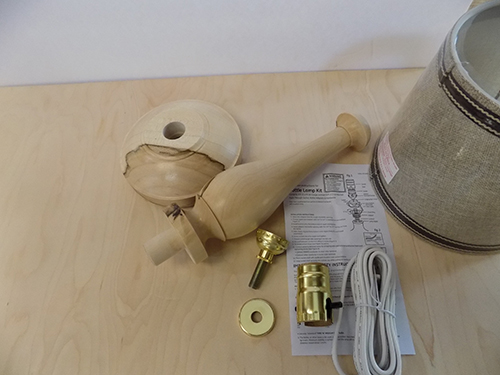
The instructions provided with the lamp kit are easy to follow. Assemble the wood components of the lamp using any suitable adhesive with enough open time to get the components aligned. I have lots of white glue on hand, so that is what I use, beginning by connecting first the feet, then the spindle to the base.
Having made a few lamps, I have noticed that the threaded tube that connects the lamp spindle to the socket is supplied in various sizes. The diameter of the threaded rod for the kit I purchased is 3/8″, so I use a 25/64″ (10mm) drill bit to drill down a few inches into the top of the spindle. A little gel type cyanoacrylate (CA) glue on the threaded tube locks it in place in the spindle.
Feeding the wire through the lamp can be challenging. My solution is to tape the lamp wire to a straightened section of clothes hanger wire and push the lamp wire through the central hole. Low tech, but it works amazingly well.
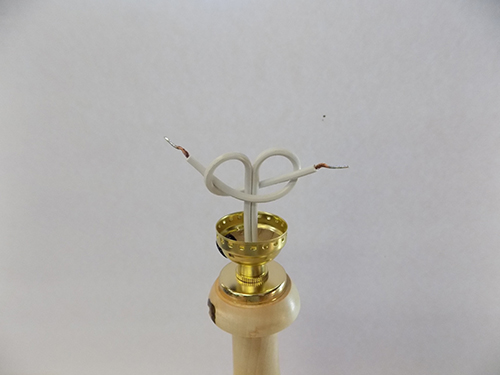
Tying an underwriter’s knot in the wire above the point where the wire enters the socket base is a critical safety procedure. This knot takes the strain when the lamp cord is pulled and prevents the wiring connections from failing. If you make a lamp, follow the kit instructions, including the guidance on tying the underwriter’s knot.
Lampshades come in lots of different shapes, sizes, and prices. For this project, I used a shade style called a slip UNO fitter, which sits on the lamp socket and is held in place by the bulb.
The final test is plugging the lamp in and turning it on!
Rick Rich is a part-time woodturner from Washington State. He is a member of the AAW, the Cascade Woodturners in Portland, Oregon, and a founding member of the Southwest Washington Woodturners in Vancouver, Washington.


