This article, “Nested Sibling Bowls,” is from the pages of American Woodturner and is brought to you by the America Association of Woodturners (AAW) in partnership with Woodworker’s Journal.
At the beginning of my turning journey, I lacked sizable chunks of wood to turn. I found that gluing pieces of wood together in a single layer to make a larger blank for a plate, tray, or platter was an easy solution to my shortage of large stock. I made several pieces in this fashion and occasionally found wide boards for the same purpose, but I wanted to get more thickness to make deeper bowls.
I spent a few sleepless early morning hours thinking about how to stack layers to create a thick blank. That simple enough task was complicated by a critical factor: I wanted to build blanks that would make the most economical use of my material and minimize the waste in the center, which would only end up mulching my shop floor.
The Design

To determine the thickness of material I would need to build up the vertical outside curves, I made a scale drawing of the cut away profile of each bowl. This elevation drawing includes the approximate size of each recessed foot for my chuck jaws. I did make a slight departure from this design and left the vessel rims thicker than shown in the drawing.
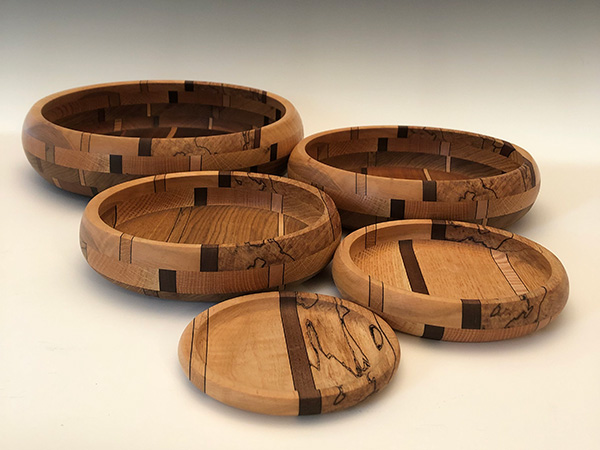
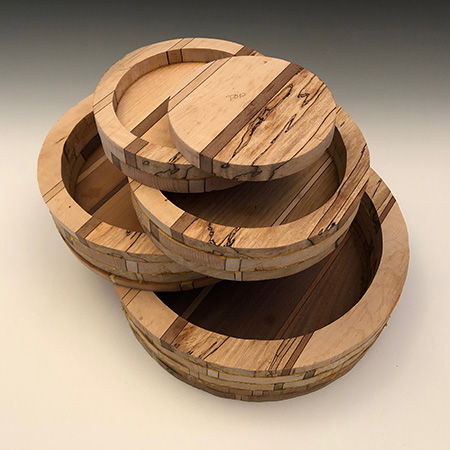
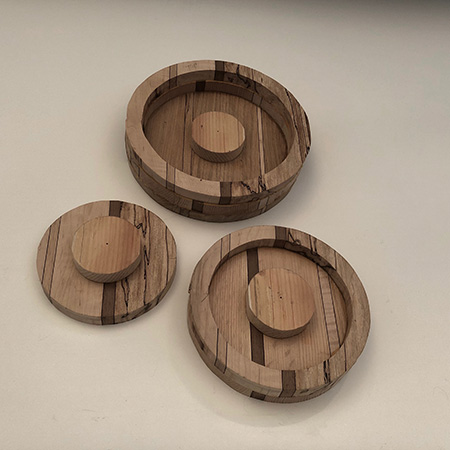
Because these bowls were conceived as a set, the design aesthetic I wanted to achieve would make the stacked bowls appear to be identical, but the unstacked set would reveal each bowl’s unique design. I was aiming for siblings, not identical quintuplets!
This all happens naturally due to the process, since the top layer of each bowl is cut from the same disk and therefore reveals the same patterning. The center blank from that disk becomes the smallest of the vessels, so it automatically will match the rim pattern of the other bowls.
Select Material
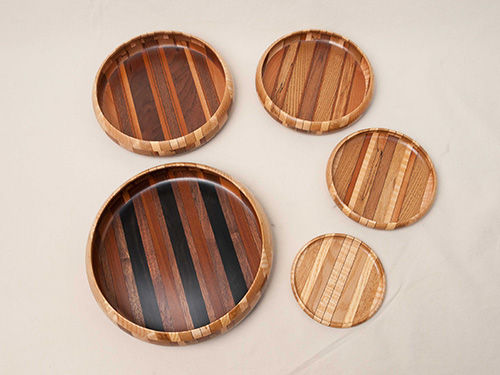
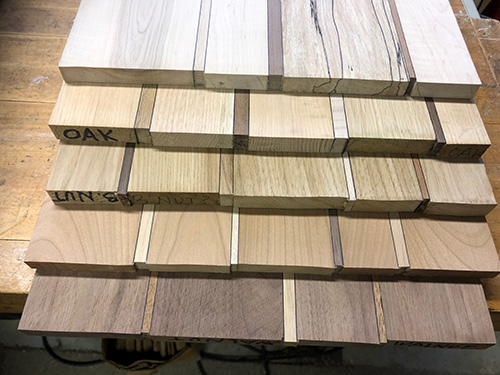
Most of my wood comes from scraps and off-cuts from visiting furniture makers. For this set, I used walnut, cherry, butternut, oak, and maple, arranged more or less from dark-to-light tones.
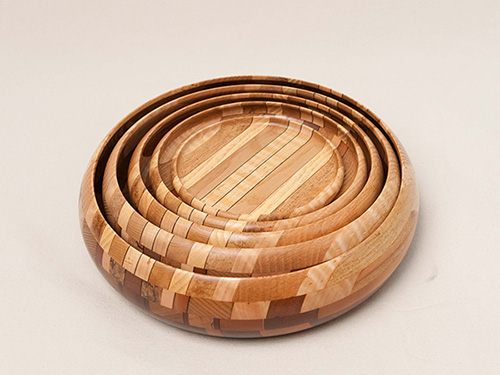
To make a set of five bowls, you’ll need to create five glued-up layers from which to cut disks for your turning blanks. In this example set, each disk was 3/4″ (19mm) thick and 12-1/2″ (32cm) diameter. After cleaning up each layer following glue-up, you should have layers at least 5/8″ (16mm) thick. I started by jointing and ripping each board to width. The number and arrangement of strips in each layer reflect my own design sense, balanced against any limitations imposed by the materials I had on hand.
I decided to use poplar veneer (dyed black) between the boards to accent the joint. I also added thin strips of contrasting woods to further highlight the joints.
Glue Up the Layers
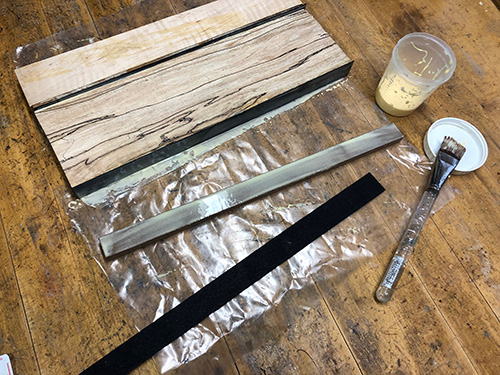
The gluing process is tedious and messy, but this is where the colors and grain patterns start to emerge. This step is a bit like constructing a puzzle. Start by laying out a sheet of plastic or plastic-coated freezer paper to prevent each form from becoming a permanent part of your bench after the glue dries. Then select and arrange your pieces of wood (and veneer if you choose to use it).
When you are satisfied with the arrangement of your selected timber, brush wood glue on the inside jointed edge of the outermost piece. Good adhesion demands an even coat of glue on both surfaces to be joined, with no gaps in the glue coverage. Since I was using veneer, I then brushed glue on both sides of the first piece of black poplar veneer. This takes some juggling, as the veneer is thin and wants to curl until both sides are coated, after which it is just plain messy!
All the pieces should be flush with the bench top; otherwise, the resulting uneven surface will require more work to achieve a smooth surface after the glue dries. I stood the glue-covered veneer against the adjacent glue-coated surface and made sure the bottoms of both pieces were flush with the bench top. Smaller pieces in the assembly are especially prone to exerting their independence by trying to slip out of alignment. There are plenty of details to track as the glue speeds to tackiness, but the good news is the ends of the forms need not be aligned; the ends will be waste material after the disks are cut from the glued-up boards.
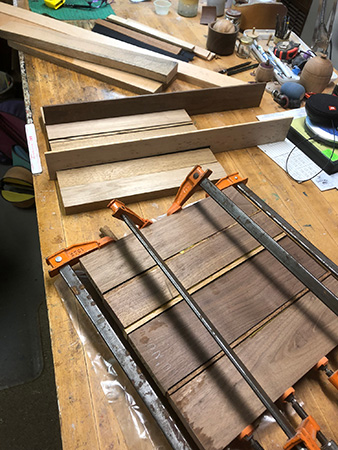
Total open time for the wood glue I was using (Titebond II) is about ten to fifteen minutes, so I worked as quickly as I could to glue and position each component in the layer. When the entire layer is glued up, apply clamps and leave the assembly overnight to dry.
After the glue dried, I ran each layer through a thickness planer and sander. I am lucky to have a friend with this equipment, but with more effort, the same results could be obtained with a belt sander, hand planes, and cabinet scraper. The layers do not need to be the same thickness, but each layer must have smooth, uniform, glue-ready surfaces on both the top and bottom.
Cut Out Disks
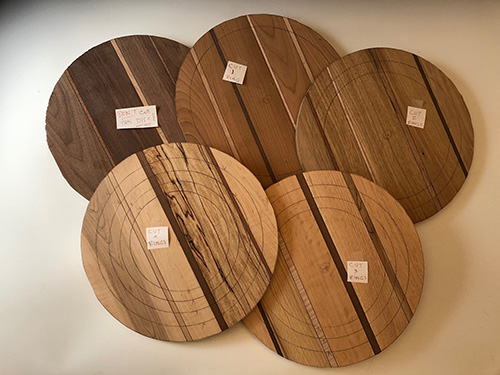
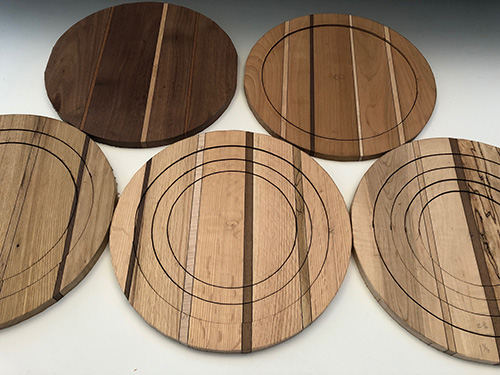
Using a compass, draw a 12-1/2″-diameter circle on each layer, then cut out the disks. For my set, the walnut disk would form the bottom of the largest vessel. The other four disks would produce multiple rings, so being able to reset the compass leg in the center of the disks is important. Make sure the point of the compass leg leaves a detectable indent, and circle it with a pencil for good measure.
Mark the remaining four disks to provide rings to build up the walls of the five vessels, and a bottom for four sequentially smaller vessels. I marked the cherry disk for one ring and one bottom. The butternut disk would yield two rings and a bottom. The oak disk, three rings and a bottom. And the maple disk, four rings and the smallest vessel form.
A key detail is that each rim ring is cut to a different width, depending on which of the vessels it is intended for, as shown in the labeled figure at the top of the page. There are no rings cut from the walnut disk, as its full diameter will become the bottom of the largest bowl. From the second disk (cherry), I cut only one outside ring at 1-1/4″ wide. From the third disk (butternut), I cut an outside ring 1-1/4″ wide as well as a second ring 1″ wide. From the fourth (oak) disk, I cut an outside ring of 1-1/4″, then a 1″ ring, and finally a 7/8″ ring. And the fifth (maple) disk has four rings cut from it: 1-1/4″, 1″, 7/8″, and 3/4″, leaving a small solid center. The pattern emerges: all the rings of a common width and diameter comprise the wall height for a single bowl. This may seem fussy, but varying the ring widths optimizes the use of the material, ensures the vessels will nest, and provides adequate wall thickness for the bowl profiles. It is helpful to track where you are in the process; I used sticky notes on each blank to help keep me focused through this step.
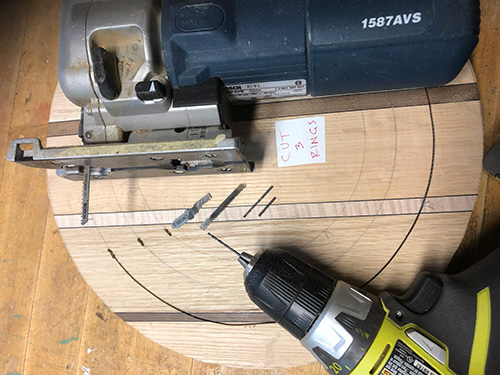
Next, I cut the rings from each disk with a jigsaw. To provide a small opening for the jigsaw blade to enter the blank, I drilled three adjacent holes with a 1/16″ (2mm) drill bit and removed the fibers between the holes with the side of the rotating bit. By taking my time and carefully following my lines, I extracted ten neat circles with little material lost to the kerf.
Assemble the Blanks
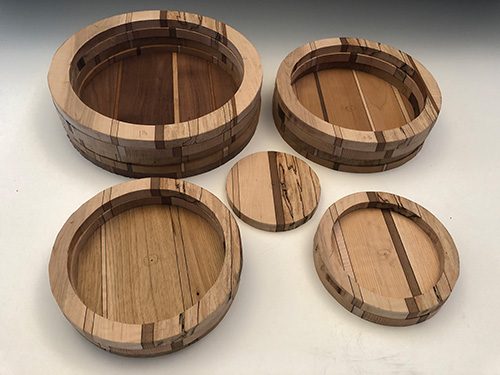
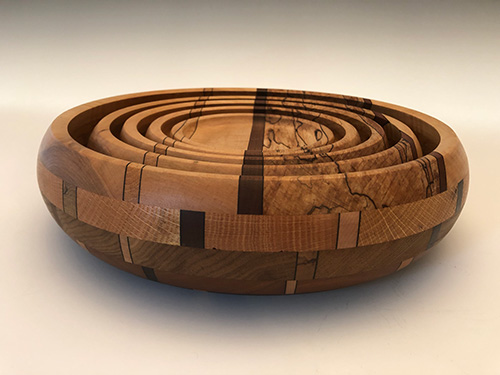
With the rings cut from each disk, it is time to arrange the puzzle pieces. As becomes evident from the cut rings and bottoms, each smaller bowl decreases in height by one ring. The smallest vessel is a platter just one layer thick, made from the remaining center of the maple disk. I stacked the rings in the same order on each blank with the same grain orientation, topping each with a maple ring, and firmly establishing the sibling relationship.
Now—before gluing all the pieces—is a good time to experiment with ring position and orientation. I chose a parallel grain orientation, but you could try the rings in different configurations and ponder the results.
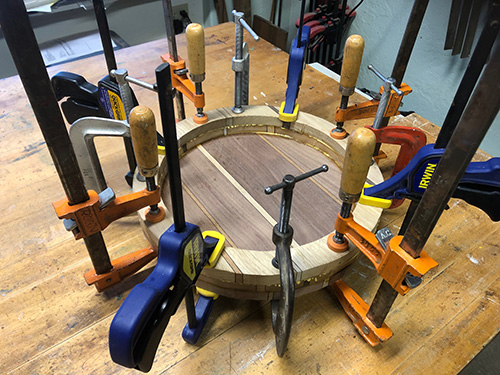
Satisfied with my arrangement of components, I moved on to gluing the segments together. If there is such a thing as having enough clamps and you find yourself in that situation, you can glue up all four disks at once. Otherwise, the task will need to be done in stages. One way or another, the result will be five blanks ready for mounting on the lathe.
Turn the Bowls

My ultimate goal was to affix each vessel to the lathe with the jaws of a scroll chuck expanded into a recess in the base. But several steps are necessary to get to that point.
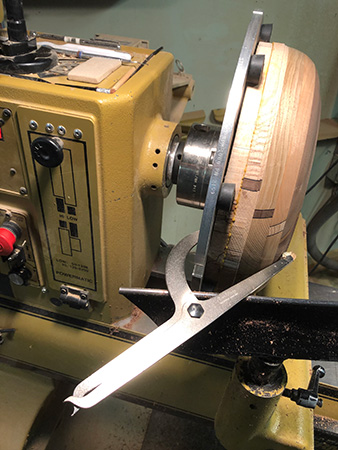
I used different techniques to mount each blank, depending on the blank size. I found that large plate jaws fit the second largest blank and allowed me to turn much of the outside of the form. Another alternative would be a jam or vacuum chuck. For all of these techniques, the tailstock should be brought up for additional support.
Regardless of your chucking method, start by shaping the lower half of the outside profile of the vessel. Check the wall thickness periodically with a caliper, which in my case conveniently fit between the slightly expanded plate jaws. After turning the recess foot for the expanding jaws, I sanded the bottom and lower half of the outside of the form to completion. Some blending of the upper and lower sides will need to be done later, but it is wise to address the bottom as much as possible while it is accessible.
Robin Dustin earned an MFA in weaving and metalsmithing. She built her home in New Hampshire while working as a carpenter. In 2006, Robin lucked into woodturning club meetings, quickly outgrew her midi-lathe, purchased “Puff, the Magic Powermatic Dragon,” and hasn’t stopped spinning wood since.


