This article, “Spindle-Turned Pencil Box,” by Beth Ireland, is from the pages of American Woodturner and is brought to you by the America Association of Woodturners (AAW) in partnership with Woodworker’s Journal.
I often find that for students, learning to turn is the easy part, but coming up with project ideas is limited to step-by-step demonstrations, classes, and articles like this one. Where do ideas come from? Sometimes it is as simple as looking at the objects that surround you on your desk or workbench. A pencil is a great example.
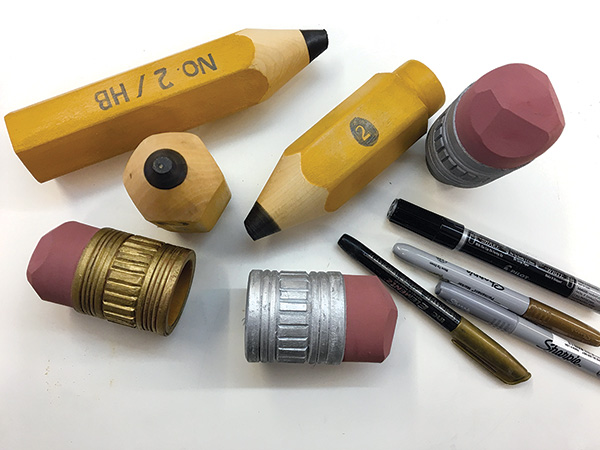
Here, I will be showing you the steps to make a pencil box—a playful and useful project that uses basic spindle-turning methods. The project comprises two parts—the pencil body and an eraser cap—drilled with two different-sized Forstner bits and then friction-fitted together. There is no hollowing by hand, just drilling, making it a good production box. This simple box technique is easy to adapt to mimic other cylindrical objects that are around you all the time: pens, turning tools, markers, etc. A bit of shaping and coloring after turning can easily approximate whatever object you’ve taken as inspiration.
Materials and Tools
For illustrating this article, I chose to use basswood because I knew it would be easy to drill and carve. It is also similar in color to the wood in the pencil I chose to emulate. Other woods I have used include medium-density hardwoods like poplar, cherry, walnut, and soft maple, as they are readily available and require less sanding after drilling. You will also need the following:
• Drill chuck that mounts in your lathe tailstock
• 1″- and 3/4″- (25mm- and 19mm-) diameter Forstner bits
• Four-jaw chuck with small jaws
• Calipers
• Rasp
• V-shaped carving gouge
• Paint and metal-colored markers
Planning and Layout
The dimensions for this project are flexible, depending on the size of pencil you’d like to turn. It can be as long as you want (how many times has this pencil been sharpened?), but consider the maximum drilling depth when drilling with your lathe tailstock. You’ll want the overall pencil length to be suitably longer than the interior drilled depth, allowing for a tapered point on one end and the eraser on the cap end. For the pencil’s diameter, I suggest 1-3/4″ (4cm). This will leave enough wall thickness after the drilling of the interior spaces.
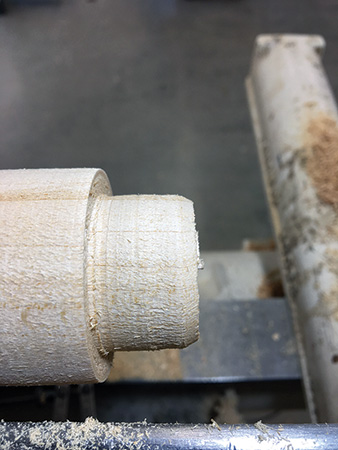
You will need two Forstner bits, the larger being minimally 3/4″ smaller than the largest outside diameter. The smaller bit should be 1/4″ (6mm) smaller than the larger bit. For instance, if my rough-turned cylinder is 1-3/4″ diameter, the larger hole (drilled in the pencil body) would be 1″ diameter, and the smaller hole (drilled in the cap end) would be 3/4″.
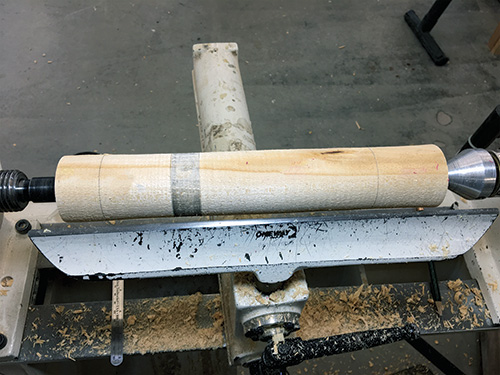
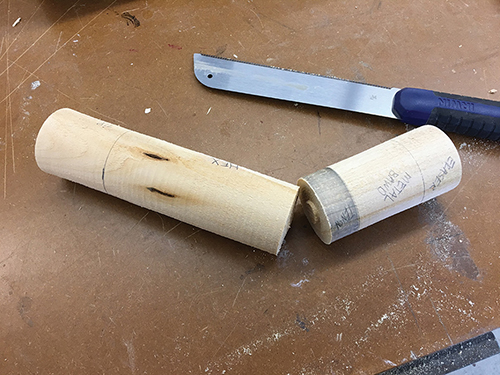
With a cylinder rough-turned to approximately 1-3/4″ diameter, lay out the pencil parts. Be sure to include space for a tenon at least 3/4″ long on the pencil cap, which will be friction-fitted into the hole drilled in the pencil body. Also leave an extra 1/4″ to allow for the width of a parting tool. Part the cap from the pencil body, cutting down only partway and then finishing the cut off the lathe with a handsaw.

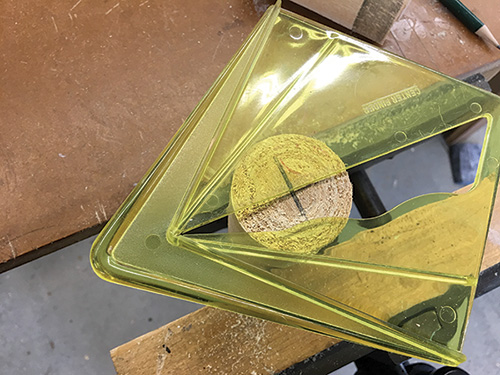
Use a center finder on both pieces to identify the center points, and then punch with an awl. The correct way to use a center finder is to make one line and then turn the center finder to the opposite side and make a second line. This makes up for the thickness of your pencil. Make two lines perpendicular to the first two in the same way, and you will find the exact center.
Drill Pencil Body
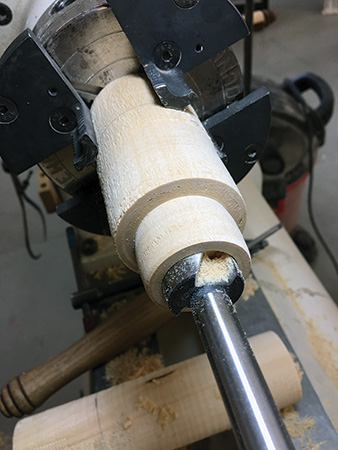
Mount the pencil body section in a chuck. I always use the tailstock to push the piece in and center it, so I can use two hands on the chuck key to tighten the jaws.
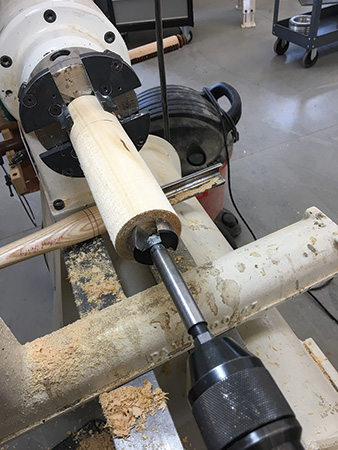
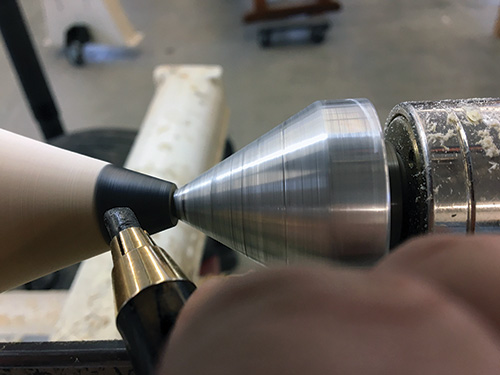
With the larger drill bit mounted in a drill chuck in your tailstock, drill into the pencil body. Leave enough solid wood at the end, so you can turn the pencil point later without interfering with the drilled cavity. I hold the drill chuck with my hand to ensure it will not spin. Make sure you use sharp bits and withdraw the bit often to clear the chips. I often wax the bit with paraffin or beeswax when it gets warm. If you see smoke when drilling, slow your lathe speed and/or get a new drill bit.
Push the tailstock cone center into the drilled hole with only gentle pressure, and true up the end with a skew, parting tool, or spindle gouge.
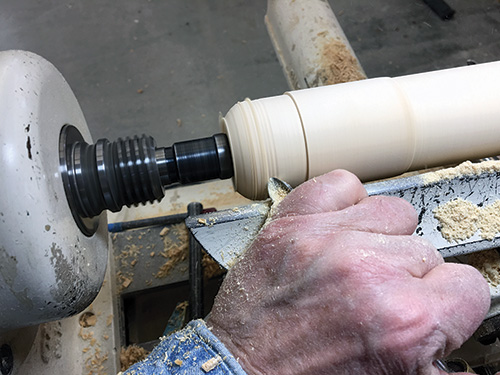
Turn and Drill Cap
Remove the pencil body from the chuck and mount the cap blank. Set your caliper to the diameter of the larger drill bit, and part in to form a tenon of that diameter.
Safety Note: If you apply the caliper to the wood during parting, first file and sand off any sharp corners to prevent the caliper from catching in the wood.
When considering tenon length, keep in mind the longer the tenon, the more wood contact and friction you’ll have holding the cap onto the body.
About 3/4″ would be good, but this doesn’t have to be an exact dimension.
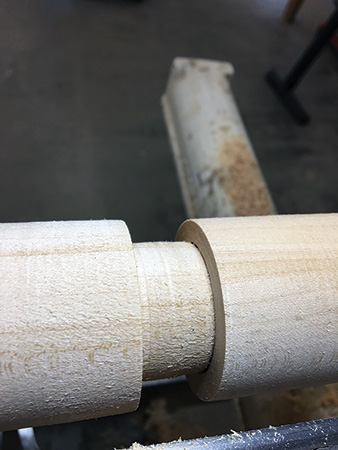
I first turn a small section at the tailstock end and test the fit in the pencil body. Once the proper fit is established, you can work your way back to your desired tenon length. I also leave a little bulge in the middle so I can get a “click” fit.
Press the two parts together. If you see a gap between them, you might need to clean and square, or undercut, the tenon shoulder before drilling the hole in the eraser-end cap.
Using the smaller of the two drill bits, drill into the eraser cap, leaving enough solid material at the end for shaping the eraser.
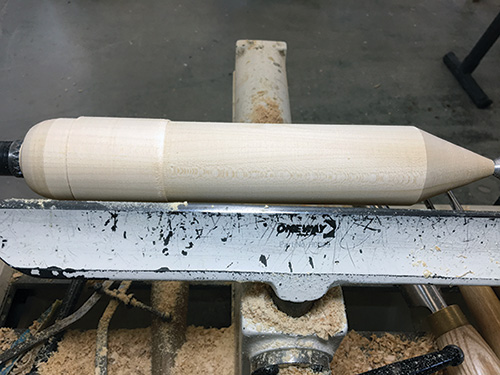
Turn and Shape Pencil
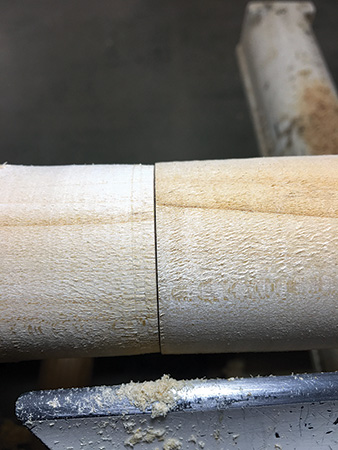
Remove the cap end from the chuck. Transfer the depth of the two drilled holes onto the outside of workpiece so you do not accidentally turn through to the interior cavities. Push the parts together and re-mount them on the lathe between centers—as you would a spindle. Shape the rounded eraser end and tapered pencil point, leaving the ferrule section a little high, just as it is on a real pencil.

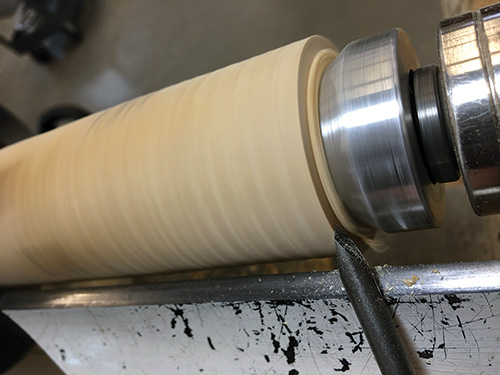
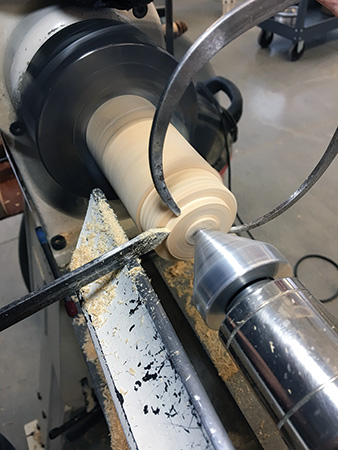
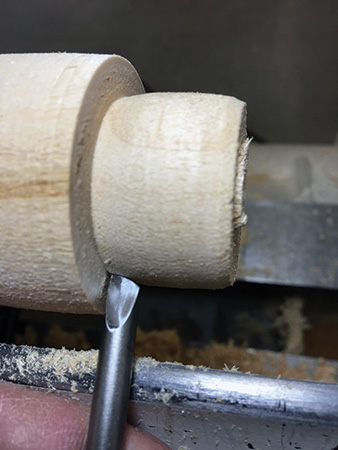
To shape and carve the metal ferrule section, begin by turning beads on either side of a short center area, where horizontal details will be carved. You can use your lathe’s indexing function to divide the horizontal lines into equal increments.
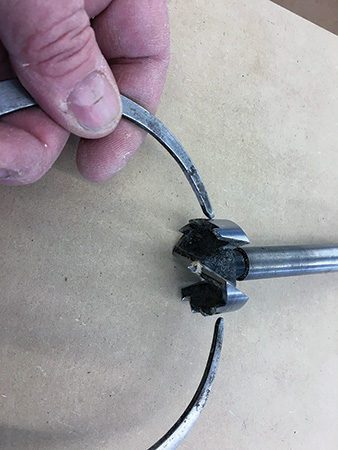
Another trick is to use a length of paper with the increments marked on it. Extend a strip of paper around the circumference and cut it where the two ends meet. Measure the length of the paper strip and divide that length into equal divisions.
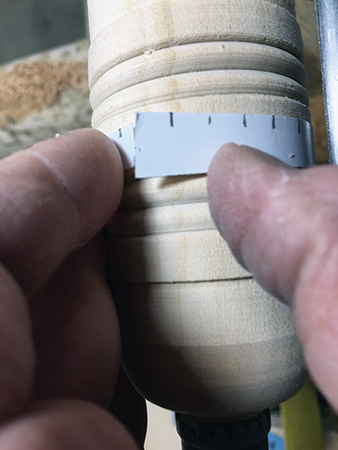
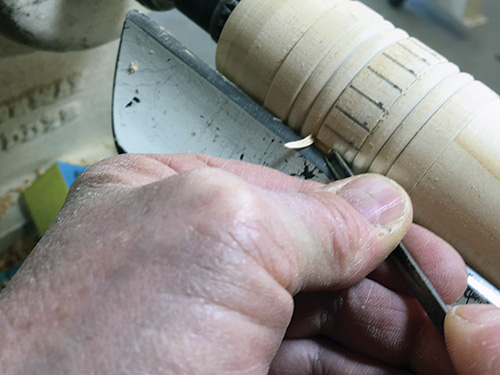
Then wrap the paper around the workpiece and transfer the marks. Using the tool rest as a straightedge, draw the horizontal lines. I use a V-shaped carving gouge to cut the grooves. With your spindle lock engaged, run the V-gouge along the tool rest so you’ll get a straight cut.
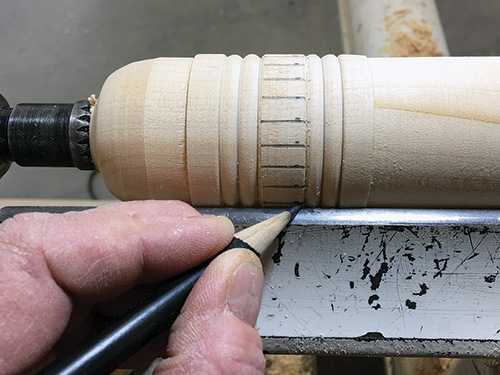
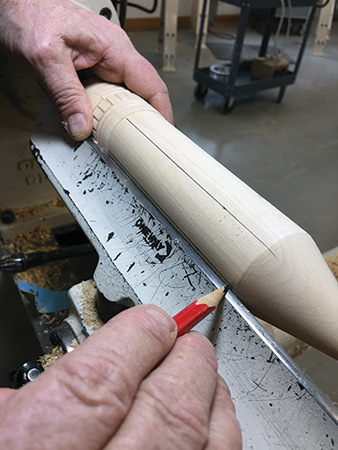
I like to use a rasp to shape the flats of the hexagonal main section of the pencil body. You can use the same paper-strip method to measure and denote the six sections of the pencil’s hexagon shape. Using the tool rest as a straightedge, draw the six horizontal lines onto the pencil body.
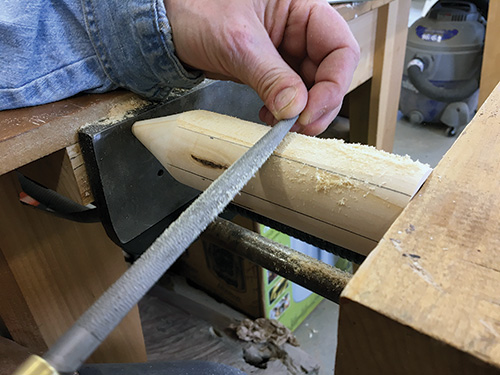
Remove the workpiece from the lathe and separate the cap from the body. Hold the pencil body securely with clamps, on the lathe with a jam chuck, or with a vise on a workbench (my preference).
File flat or rasp all areas between the pencil lines. I always try to stop short of the pencil lines, so they’ll remain as a reference .
Next, I use a belt sander to finish shaping the eraser. Adding several flats will mimic the way a real pencil eraser looks after it has been used a few times.
Adding Color
Once the turning and shaping are completed, it is time to do any final sanding and apply paint. I use milk paint, but acrylic or oil could work fine, too. For the ferrule section, I use metal-colored markers (available from art- or office-supply stores). I use graphite to mimic the pencil lead.
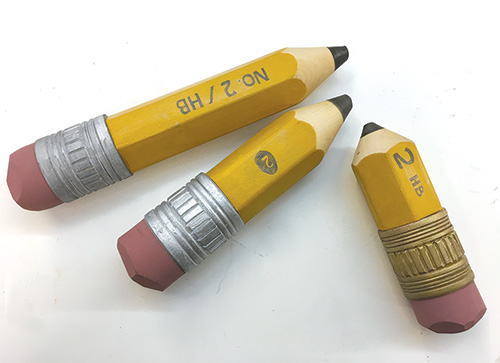
Coloring the project is the fun part. Remember you are making the idea of a pencil—it does not need to be an exact replica. Have fun exploring all the possibilities this project has to offer.
Beth Ireland, a professional architectural woodturner and sculptor with more than thirty years of experience, lives and works in St. Petersburg, Florida. She teaches the two-month Turning Intensive at The Center for Furniture Craftsmanship in Maine, as well as workshop classes at major craft centers around the country. For more, visit bethireland.net.


