This article, “A Stool with Stretchers,” is from the pages of American Woodturner and is brought to you by the America Association of Woodturners (AAW) in partnership with Woodworker’s Journal.
If you can turn a spindle, then making a stool is not above your abilities. I often see turners making simple three-legged stools that look like a milking or foot stool. This is a great beginning point for stool and chairmaking, but with just a few extra steps, it is easy to make a more sophisticated chair, barstool, or bench with stretchers. Stretchers can provide a place for your foot to rest, and they add stability.
Design Your Stool
All of my projects begin with research and development. That means paying attention to every seat I sit on. When I find a comfortable seat, I study it. Why is it comfortable? Is it the shape, the height, the placement of the stretcher, the curve on the edges, the angle of the legs?
I typically begin with a sketch. It does not need to be perfect, just an idea on paper. This allows me to think through details and building challenges before even cutting a piece of wood. When the idea of the stool is clear in my head, I make either a scale or full-sized model using scrap wood and dowels.
The legs of the stool are angled, or splayed. This is the hardest part of the design. My most common stool leg angles range from 11˚ to 19˚. If you set your stool legs at 90˚, like a table, it could be tippy, and if the legs are too splayed, the feet could stick out and become a tripping hazard or cause the legs to break. This is the kind of detail I work out in a model.
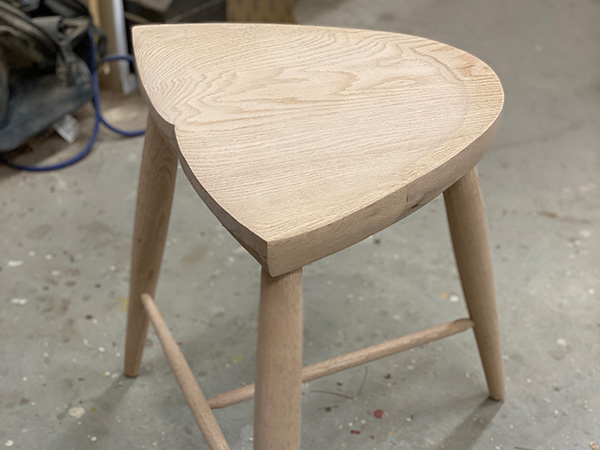
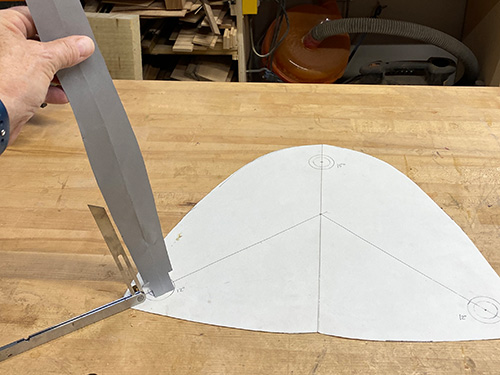
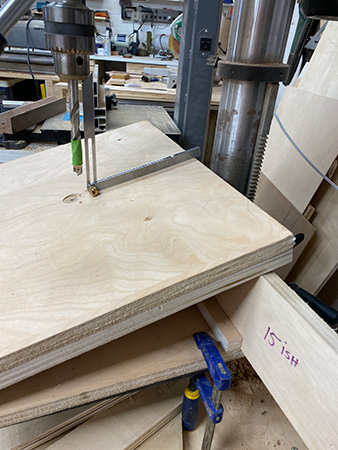
I start by determining the size and shape of the stool’s seat, which can be made from one piece of wood or gluedup pieces. The stool I made for this article has a seat 1-1/2″ thick × 15″ deep × 17″ wide (38mm × 38cm × 43cm), and I decided the stool would stand 24″ (61cm) tall. To determine the shape of the seat, I cut paper half the scale of the seat, folded it in half, and cut patterns until I found the shape that works best with my drawing. I then traced the drawing onto a scrap of wood.
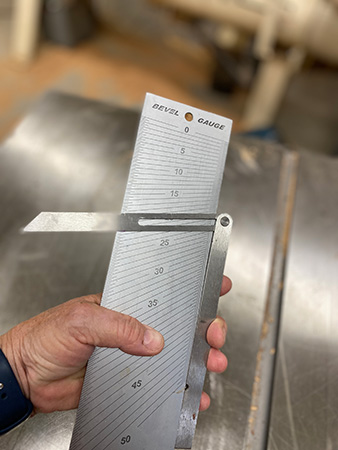
I then grabbed three scrap dowels (not worrying about final leg shape) and cut them to 12″, or 30cm (half the final leg length). Holding them at different angles to the model seat, I was able to determine the leg splay that looked right to me. Keepin mind the two front legs can be a different angle than the back leg. I consider not only the angle from the actual seat, but also the angle I want it to be from the centerline of the seat, splaying out to the sides. To identify the final angle, I used a bevel square and bevel gauge, but you can also use a protractor.
You must also decide how far in from the seat’s edges the legs will be positioned. Too close to the edge might cause breakage, and too far might look odd and/or affect stability. I usually place the center of the legs 1-1/2″ to 2″ (38mm to 5cm) in from the seat edge.
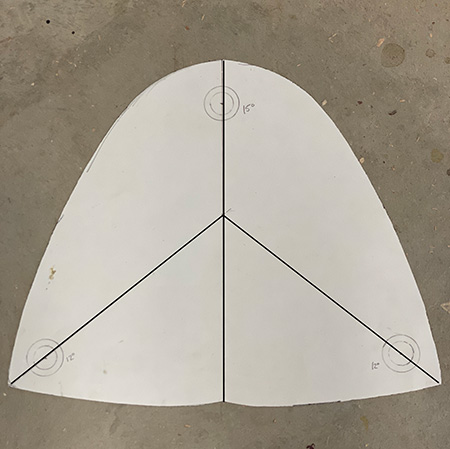
Once you have determined all of these details, make a “map” of the seat by cutting a full-sized version of the paper cutout. This pattern will aid in applying the final shape of your seat to the wood, and it will allow you to reproduce this stool anytime in the future. I write all of the key pieces of information on this map: leg angles, direction of splay, center location of leg holes, etc. I will also note any bevels or sculpting on the final seat, including depth and point of the deepest cut in the seat.
At this stage, you should also decide on a leg shape. Cut out a full-sized paper mockup of a leg and hold it up to the seat cutout, making adjustments until you are happy with the shape.
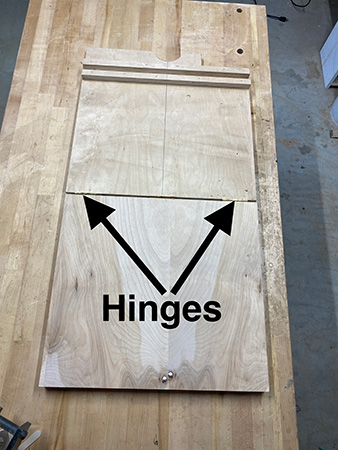
Seat-drilling Jig
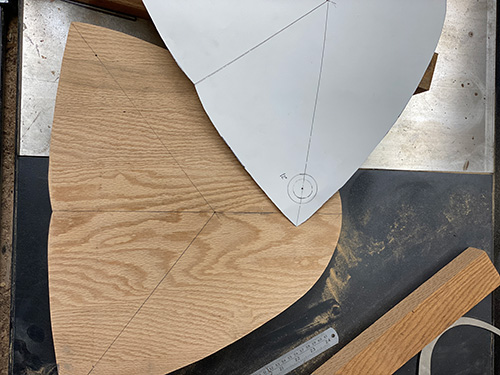
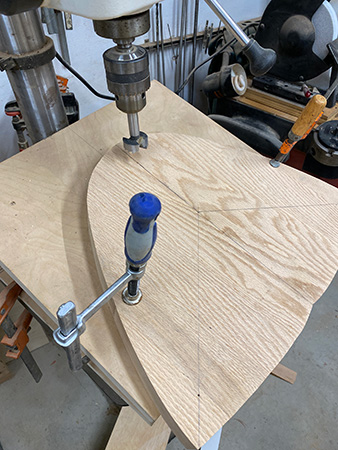
Transfer all of the mapped information from the paper cutout to your seat blank, including all of the drilling locations, and cut out the shape of the seat.
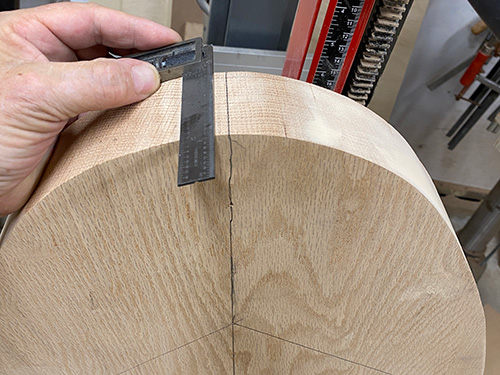
The splay lines will start at the centerline and continue through the center points of your hole locations; continue these lines down the edge of your seat blank.
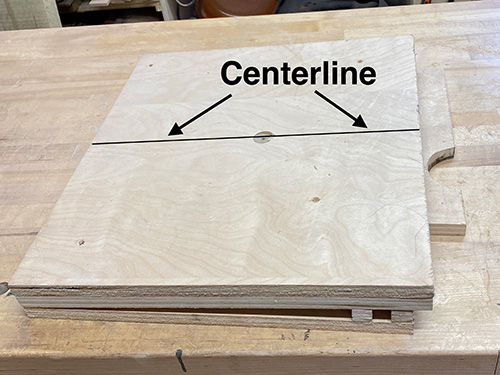
I use a simple shopmade jig for drilling the leg holes in the seat. The jig comprises two pieces of 3/4″- (19mm-) thick plywood, one piece cut about 1-1/2″ longer than the other, with the top overlapping the bottom.
My drilling jig measures 19″ wide × 17″ long (48cm × 43cm), but this may vary for you depending on the size of your drill press table. Two hinges at the bottom edge hold the two pieces together and allow for angle adjustment at the drill press.
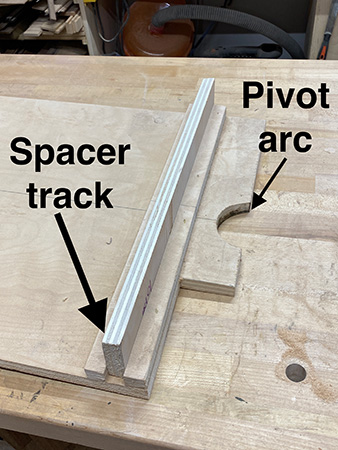
The bottom of the jig is clamped to the drill press table, and a small arc butts up against the drill press post and acts as a centering pivot point.
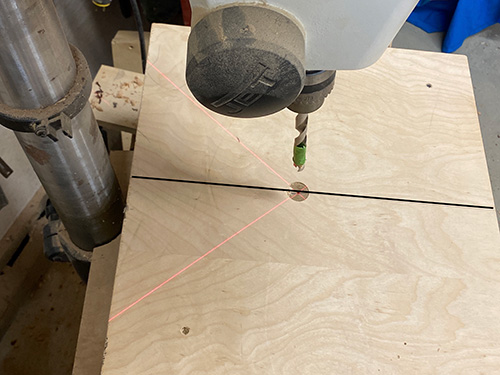
It is important that both pieces of the jig line up edge to edge. Draw a centerline on the top piece from the drill press post to the hinge end. This line will help you align the stool seat on the jig.
Center the jig on the drill press table by pushing the arc against the drill press post and rotating the jig until the centerline aligns with a drill bit chucked in the drill press. Lock the drill press table, and clamp the bottom of the jig to it.
Set Jig Angle
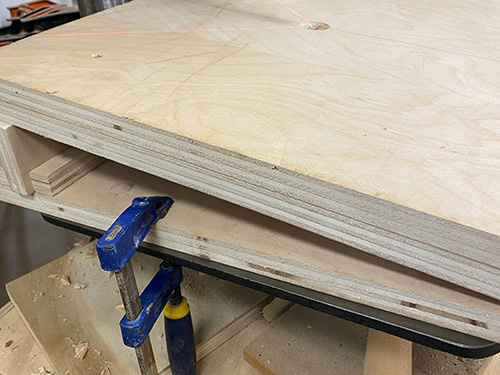
For this stool, the front legs are splayed 12˚ and the back leg is splayed 15˚. I drilled the back leg first. Set a bevel square to 15˚ and set it on the top surface of the drilling jig on the centerline with its blade facing the drill bit. Lift the top piece of the jig until it is at the correct angle, and temporarily shim the jig with scrap wood at this angle.
On the bottom piece of my jig are two strips of wood with 3/4″ space between them. With the temporary shims in place, measure the distance between the bottom and the underside of the top piece at the back edge. Cut a strip of plywood to fill that distance and slide it in between the two strips. Remove the shims and doublecheck the angle. Slight adjustments can be made by adding veneer to the spacer or cutting a little off.
Drill Leg Holes
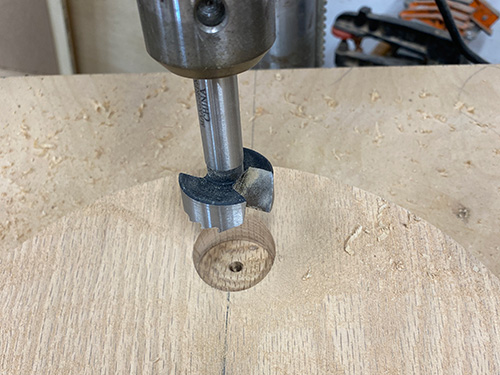
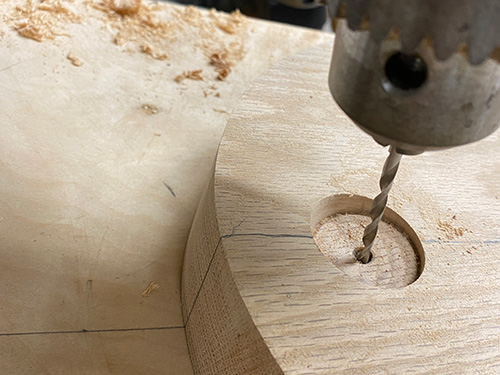
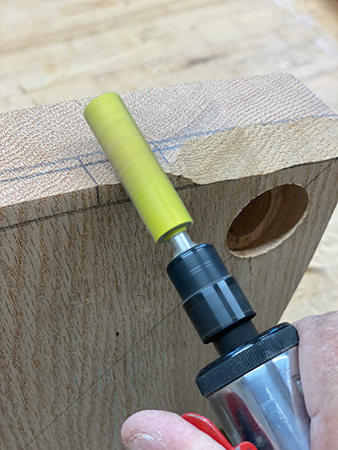
I use one of two ways to join the legs to the seat. If the top of the leg where it meets the seat bottom has a decorative element, I drill one hole. This way, only the tenon is inserted into the hole. But if the top of the leg has no special features, I drill two holes, allowing the top of the leg, in addition to the tenon, to be inserted into the seat bottom. This was the case for the stool shown in this article, and this method provides a very strong, tight union. It also hides any gap that might be seen where a flat and angled surface meet.
Both holes are drilled with the jig at the same angle, but one hole is drilled for the diameter of the top of the leg and one is sized for the tenon. Always drill the larger hole first. In this case, my tenon was 1″ wide, and the top of the leg was 1-1/2″ wide. I drilled the wider hole first, about 1/4″ deep on the shallowest side. Forstner bits are a good choice for these holes.
Place your seat blank onto the jig and position it by putting the point of the drill bit on the center point of the hole to be drilled. Keeping the point of the bit in this location, pivot the seat blank until the splay line over the edge aligns with the centerline on the jig. Clamp the seat to the jig, and drill the first hole for the back leg.
Since I wanted all the hole depths to be consistent, I noted the depth of the first hole (back leg) and set the depth stop on the drill press. I then changed the angle of the drilling jig to 12˚ for the front two legs, using an appropriate spacer, repositioned the seat on the jig, and drilled the holes for the front legs. It is easy to realign the seat on the jig. Just use a smaller centering bit in one of the holes, and align the edge lines with the centerline on the jig.
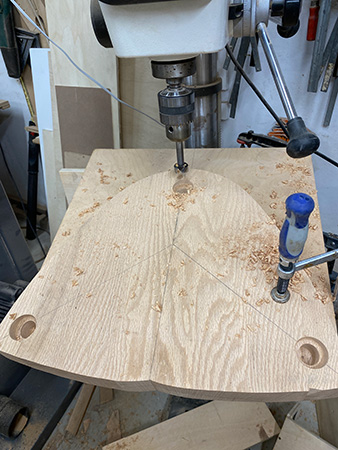
After drilling all four holes for the front legs, first the larger and then the smaller, I repositioned the seat and drilled the smaller tenon hole for the back leg, the depth stop now being set for that hole after drilling the tenon holes for the front legs.
Turn the Legs
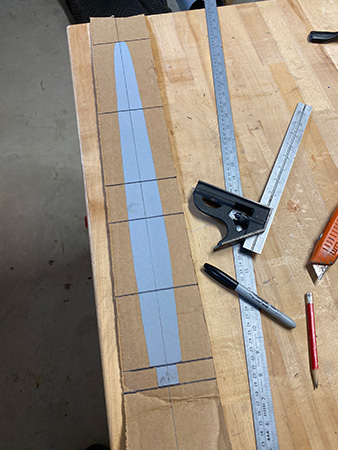
Glue the paper leg cutout to a piece of cardboard, keeping the centerline of the drawing parallel to the edge of the cardboard. To make a story stick, draw perpendicular lines through the leg and to the edge of the cardboard. These lines should include positions for joinery, the widest and narrowest points, and a few lines in between that will help maintain the leg shape.
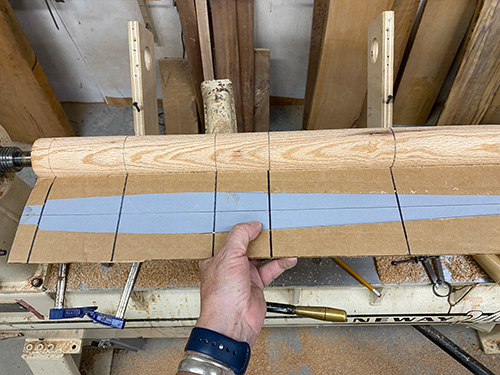
I rough-turned the first leg blank, then used the story stick to mark key positions. I continued shaping the leg by using a parting tool and caliper to transfer all positions and depths to the wood.
As you turn down to the various depths, the overall shape will develop. Take care fitting the top of the leg and tenon.
Hold the drawing up behind the leg and compare the horizon lines as you get close to the final shape.
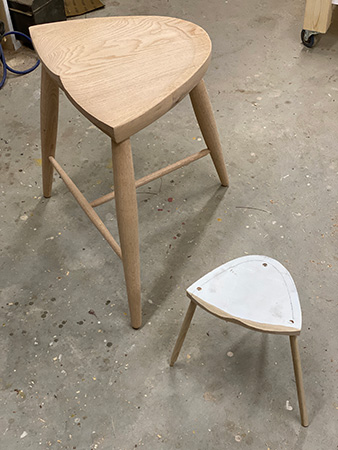
Make Stretchers

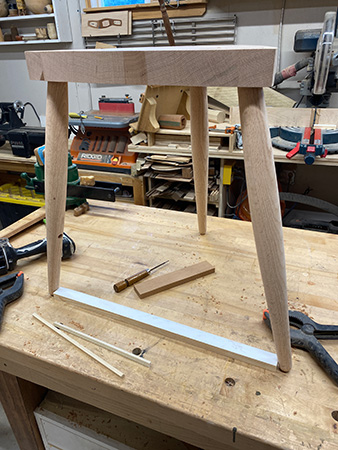
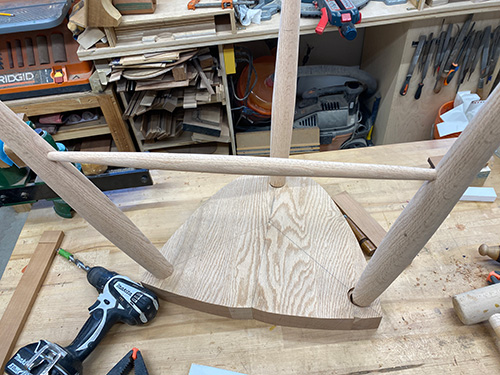
I decided my stool would have two stretchers, one between the front legs and one extending from the center of that stretcher to the back leg.
With the legs tapped but not glued into their holes, place your stool on a flat workbench or table. I decided that my stretcher would be 7″ (18cm) up from the table surface. Cut a block of wood the height of the stretcher’s center, slide it up to one leg at a time, and make a pencil mark on each leg.

Since the holes for the stretchers are drilled by hand, I needed a horizontal reference to drill straight and parallel to the table surface. Use a straightedge clamped to the front legs. To position the straightedge, cut two blocks the same length and a couple inches taller than the 7″ marking block. These blocks need to be tall enough so the ruler will not get in the way of the drill but be as close as possible to act as a guide for drilling. Clamp the straightedge to the front legs.
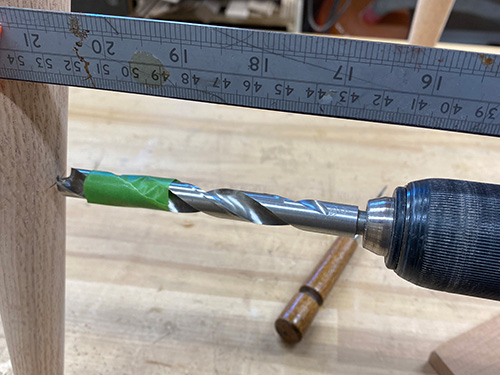
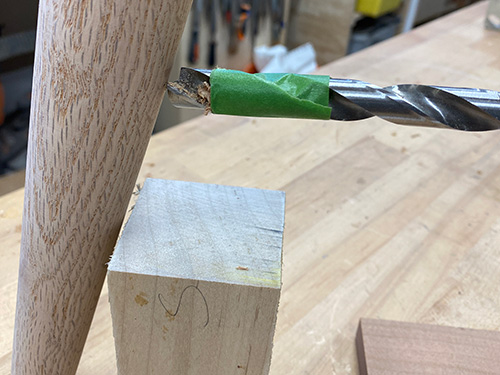
Wrap tape around a bradpoint bit to indicate the depth you want to drill. I usually go 1/2″ (12mm) deep, but that will depend on your design and leg thickness. Drill both of the front legs.
The name stretcher is literal; it pushes the legs apart, “stretching” the width. Holding the bottom of the front legs, pull them apart just to the point of resistance. I cut a piece of scrap wood to fill the span between the bottom of the legs and hold the legs in this position.
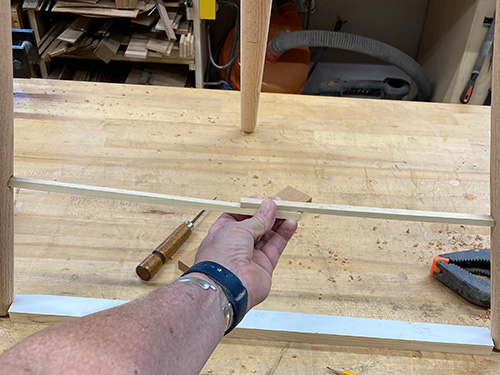
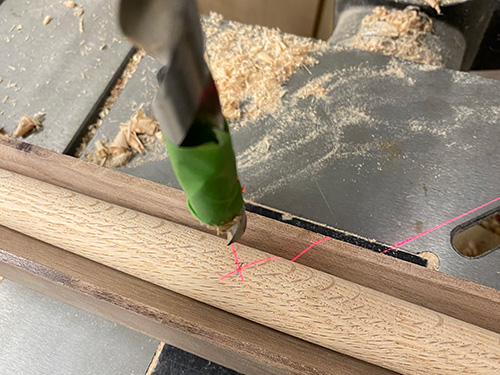
Here is a trick to determine the required length of the stretcher. Cut a thin strip of wood several inches longer than the width of the front legs. Then cut the strip in half. Place the two halves all the way into the stretcher holes, allowing the halves to overlap in the middle. Mark the two halves where they overlap.
Remove the strips from the holes and place them on a work surface, realigning the marks. The two halves taped together indicate the required stretcher length; transfer this length to your stretcher blank, and cut the blank to length.
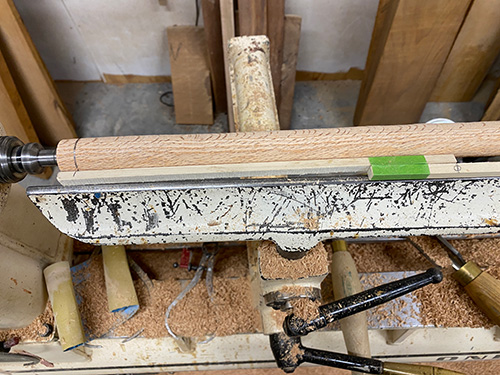
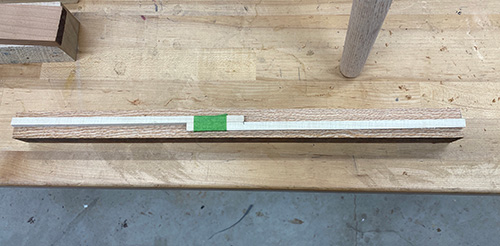
The taped strips can be used as a story stick after rough-turning the stretcher. Use the stick to capture the depth of the holes in each leg, and transfer that depth to the ends of your stretcher blank.
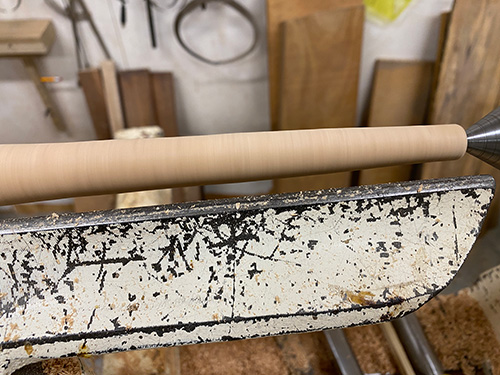
Turn the blank to your desired shape. I drilled a hole in a scrap block using the same drill bit, so I could test-fit my stretcher ends at the lathe. It helps to bevel the end of any tenon before test-fitting.
When testing the stretcher in the stool legs, first insert the two ends into the legs without the seat; then tap the legs into the holes in the seat bottom. If the tenons will not go in all the way, you will need to shorten the stretcher or adjust the leg tenon fit. To remove legs, put a block of wood on the seat and tap down while holding leg and pulling up. Keep trimming and testing until the legs go all the way into the seat and the stretcher fits snugly in its holes.
Once the front legs fit, start on the back stretcher. Locate the center of the front stretcher and then disassemble the stool. I drill into the stretchers at the drill press. To drill straight into round spindles, hold the stretcher in a V-block, first centering the bit over the V-block before drilling the hole. If your spindle is tapered or has decorative details, you will have to shim it in the V-block so it sits parallel to the drill press table.
To keep the drill bit straight and parallel when drilling the back leg, I positioned a wide block beneath the hole height and used its top surface as a visual reference.
To determine the length of the back stretcher, use the same process as before. Turn your second stretcher. When dryassembling the stool, loosely insert the front legs first, then add the stretchers and back leg before tapping the legs into the seat. The stool should feel tight enough to function without glue.
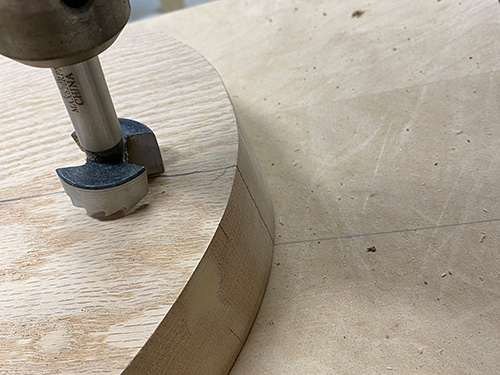
Sculpt the Seat
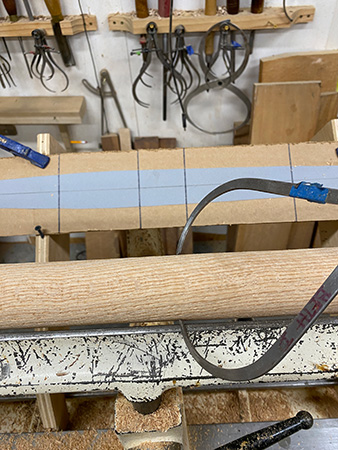
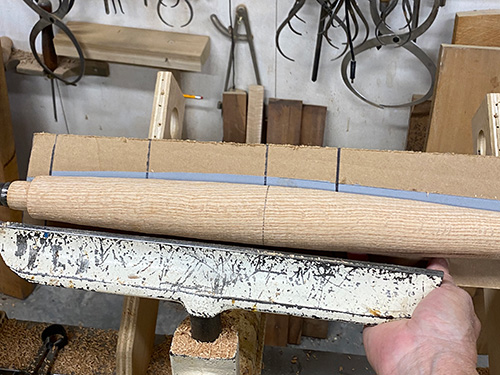
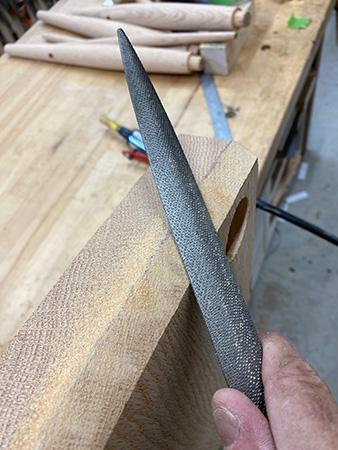
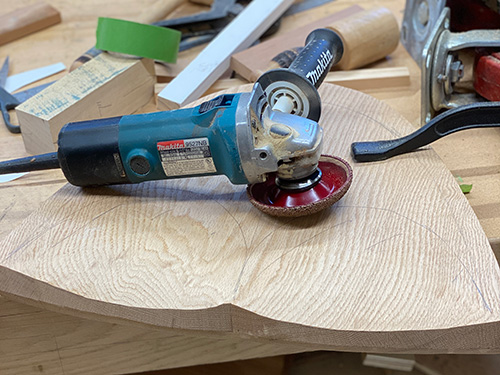
Now you have a stool, but what about comfort? Shape the seat any way you want, but remember it needs to be functional. Softening the front edges and sculpting the seat to the shape of the human body makes the stool look and feel better. I have used carving tools, traversers, scrapers, and grinders.
Recently, I acquired a large air compressor that allows me to run a die grinder, which I use with a variety of rotary rasps, but some people love the relaxation of slowly shaping with hand tools. To sculpt the seat, an angle grinder with a rotary rasp removes wood quickly.
When I finished shaping the seat, I sanded all of the parts before final assembly, using wood glue in the leg and stretcher joints. Now that you have made a stool in this way, it is easy to add a backrest with spindles using the same drilling jig, which turns the stool into a chair.
Beth Ireland, a professional architectural woodturner and sculptor with more than thirty years of experience, lives and works in St. Petersburg, Florida. She teaches the two-month Turning Intensive at The Center for Furniture Craftsmanship in Maine, as well as workshop classes at major craft centers around the country. For more, visit her website.


