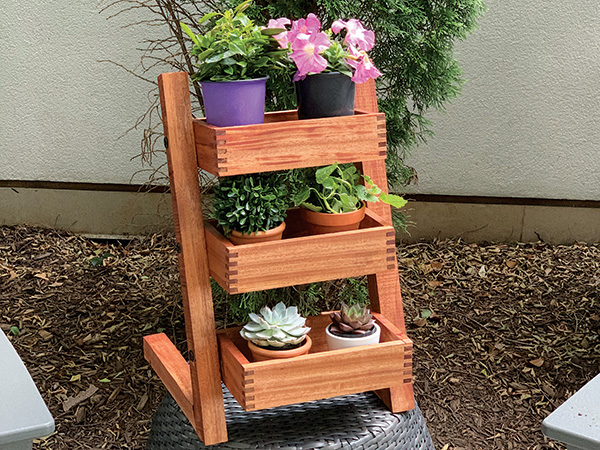
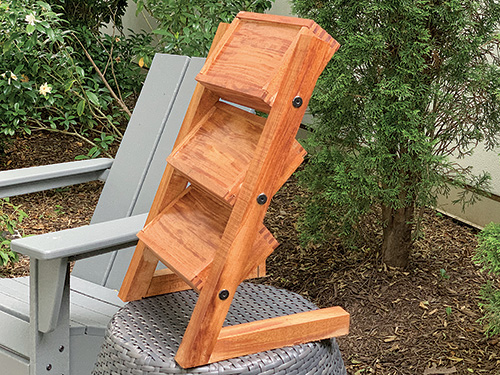
If you have friends or family who live in apartments with balconies or small patios, this little three-tiered plant stand could make a great gift to help them beautify a small outdoor living space. Its three boxes are just large enough to hold a couple of 4″ pots, and the swept-back angle of its framework will ensure that the bottom and middle plants receive enough sunlight and sufficient room to grow upward. In terms of construction, I think the corner box joints are as attractive as they are strong, and they’re fun to make, too!
If you build your plant stand from African mahogany as I did, it will hold up well to sun exposure and regular waterings without prematurely rotting — mahogany is an excellent choice for outdoor projects. Each plant box mounts to the frame’s uprights with a pair of 2″ connector bolts and cap nuts. Tightening them holds the boxes level. At the end of the growing season when plants need to come inside, just loosen the bolts to tip the boxes up for off-season storage.
Forming Box Joints at the Router Table
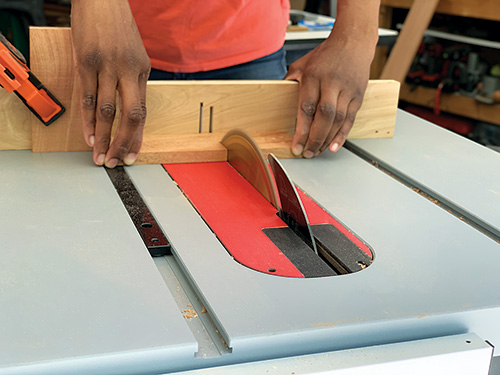
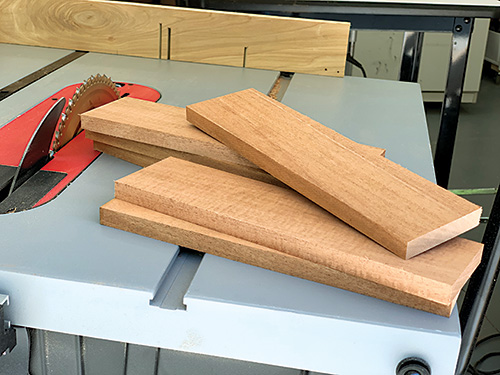
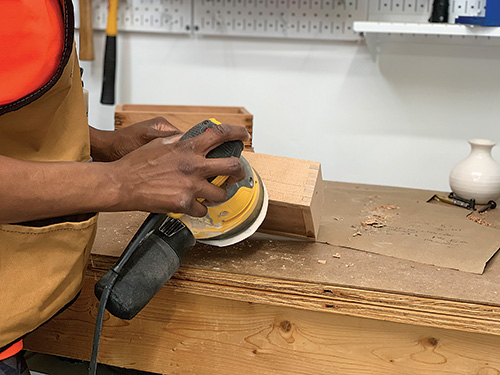
I started construction of the three boxes at my table saw by ripping 1/2″-thick, 3″-wide boards down to 2-3/4″, then crosscutting six workpieces to 10″ long for the box fronts and backs, plus six 5″-long pieces for the box ends. I arranged the panels for each box in the most pleasing grain orientation and labeled them 1 through 4. I also added a “T” for top and “B” for bottom near the long edges. These notations will be helpful to avoid confusion when routing the box joints in the next step.
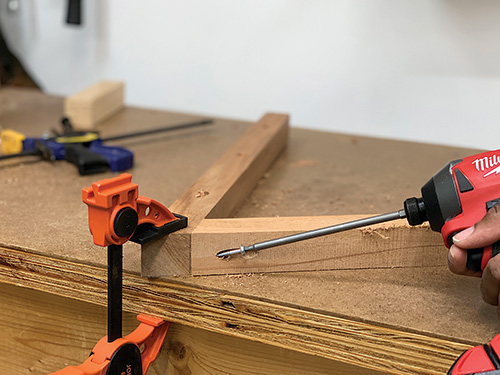
I used Rockler’s Router Table Box Joint Jig and a 1/4″ spiral upcut bit to mill the box joints. The jig is easy to set up and has its own sled for clamping each workpiece vertically to make the slot cuts on the parts. Prepare it for use by installing the 1/4″ brass key in the jig and chucking the bit in your router table. Raise the bit to 1″ (which is 1/2″ above the jig’s base). Now adjust the jig so the brass key is exactly 1/4″ away from the router bit, and tighten the jig’s base securely in your router table’s miter slot with its lock knobs. (Rockler’s instructions will walk you through the setup process in more detail.)
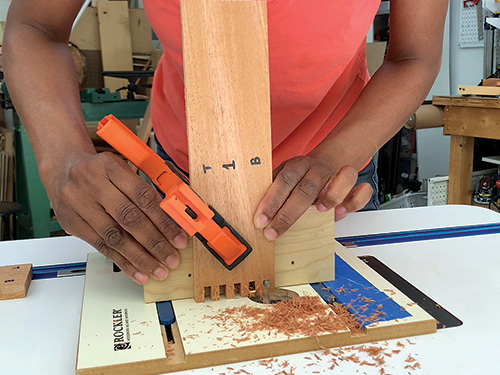
While the photos show me routing an actual joint, you should really test the jig’s settings on scrap wood first to be certain the joints will fit together properly. It often takes small adjustments to the spacing between the jig’s brass indexing key and the router bit to get the pins and slots to fit well.
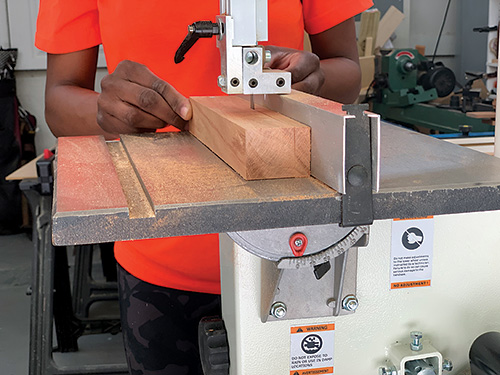
Rout the joints by setting the top edge of a box front or back against the side of the jig’s brass key and cutting the first slot with the workpiece clamped to the jig’s sled (this cut also forms a pin on the part edge). Then fit the slot over the brass key, re-clamping the workpiece against the sled, and make another pass to form the second slot and pin. Repeat this process to form the rest of the slots and pins. Then turn the part over, keeping the same top edge against the indexing key, and rout the slots and pins on the opposite end. Mill the joinery on the other five box fronts/backs.
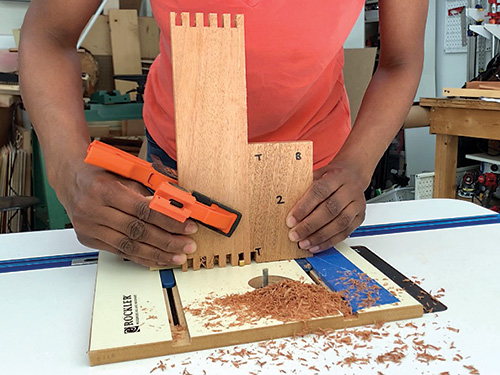
To rout the corresponding pattern of slots and pins on the box ends, set up the pattern by fitting the last slot of one of the front/back pieces over the brass key. Now set the box end so its “T” edge is against the side of the front/back piece. Make a routing pass with both workpieces held in place — it will form a slot on the edge of the box end instead of a pin. Rout the rest of the slots and pins on this and the other five box end workpieces.
Assembling the Boxes

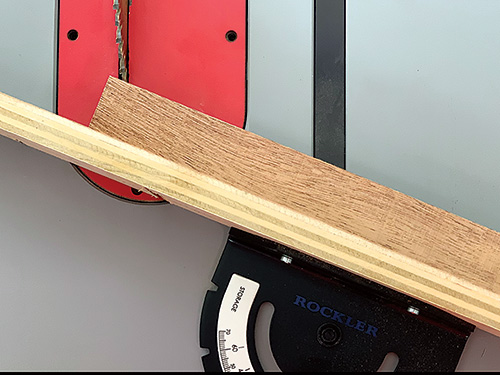
These boxes need a groove cut along the inside faces of the front and back pieces to house the bottom panels. Locate these two grooves 1/4″ up from the bottom edges so they align with the bottom slot cuts of the corner joints. You can cut them on your router table with the same 1/4″ spiral (or straight) bit raised to 1/4″. Set and lock the router table’s fence 1/4″ away from the bit, and plow the grooves all the way along the workpiece faces with their bottom edges held against the fence as you push them through the cuts.
Prepare three box bottoms from 1/4″-thick mahogany rip-cut to 4-1/2″ wide and crosscut to 9″ long. When those are ready, dry-assemble the three boxes with the bottoms in place to make sure the box joints come together well. If they don’t, trimming the ends or edges of the box bottoms slightly often will do the trick to close the joints the rest of the way.
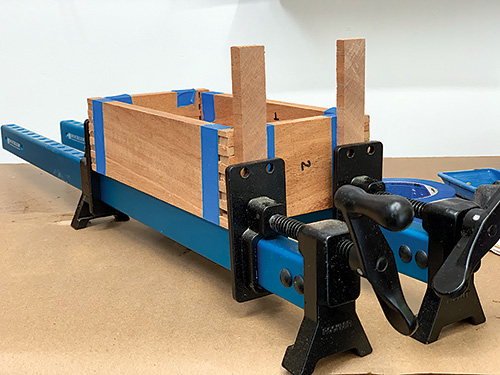
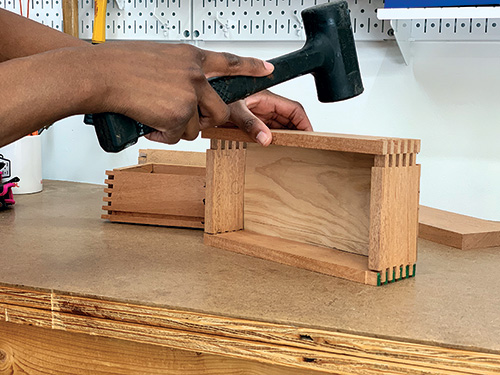
Sand the box parts up to 150- or 180-grit, spread glue on the slots and pins and clamp the boxes together. Since the bottoms are made of solid wood, which will need to expand and contract a little bit with changes in humidity, don’t put glue in the long bottom grooves. Just let these bottom panels “float” in them unimpeded.
Before the glue hardens and when it’s still rubbery, scrape off any squeeze-out as best you can, and scrub the corner joints with a wet sponge to clean up the remaining glue residue. Give the boxes at least eight hours, or even overnight, to fully dry. Then unclamp them and plane or sand the box joints flat, if the pins stand a little proud.
Building the Frames
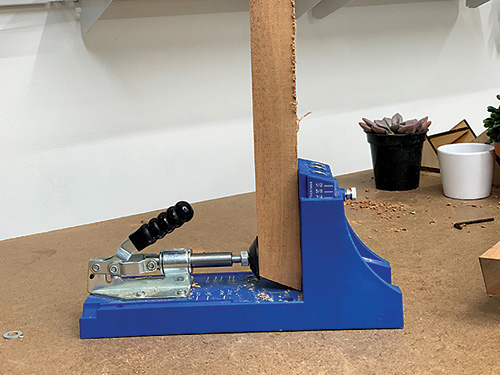
I had some 8/4 mahogany on hand, which is at least 2″ thick in the rough, to use for my plant stand’s framework. I crosscut 9-3/4″- and 20″- long pieces that were wide enough to form both bases and uprights, then ripped this stock into 1-3/4″-square blanks at my band saw. Smooth their faces with a hand plane or on the jointer.
Next, these four workpieces require an angle cut on one end so the assembled framework will tilt backward. You could make these miter cuts on either a miter saw or at your table saw against the miter gauge. Either way, trim one end of each frame piece to 22.5 degrees; the goal is just to trim the ends but not shorten the parts in the process.
Lay out the two uprights with the three hole positions for the connector bolts, using the Plant Stand Frames Drawing. That hardware requires two hole diameters: 7/32″ for the bolt and 3/8″ for the cap nut. At each hole location, drill the smaller hole size (for the bolt) all the way through the upright. Then, on the outside face of the upright, widen each hole with your 3/8″ bit, drilling to a depth of 3/4″ to recess the shaft of the cap nut.
Use the smaller bit size to drill a hole through the end panels of the boxes for the connector bolts, too. Position these holes 1″ in from the back faces of the boxes and centered, top to bottom, on the box ends.

Most woodworkers these days own a pocket-hole jig, and that’s the joinery I used to connect the frame bases to the uprights. To do this, I set up my pocket-hole jig for drilling 1-1/2″-thick stock, and I bored a single screw pocket into the longer bottom face of each frame base, adjacent to its angled end.

Now connect the bases to the uprights with 1-1/2″ pocket screws. Then sand the two frames up through the grits to 150 or 180, and break all of their sharp edges and corners.
Finial Assembly and Finishing Up
You’re ready to put the five pieces of this project together to wrap up its construction. Slide the connector bolts through the holes in the boxes from the inside, fit the frame members onto the bolts and thread on the cap nuts. Tighten the bolts and nuts to hold the boxes level with the ground.
You can stain your new plant stand if you like. But I decided to just wipe mine down with a clear outdoor oil finish to highlight its beautiful grain.


