This article, “A Three-Winged Jewelry Box” is from the pages of American Woodturner and is brought to you by the America Association of Woodturners (AAW) in partnership with Woodworker’s Journal.
A while ago, I was idly twisting a small cube of maple burl by its corners and went on to explore what shape could be made if a cube were held this way on the lathe. The result was a “triangular” bowl (featured in the October 2021 issue of American Woodturner.
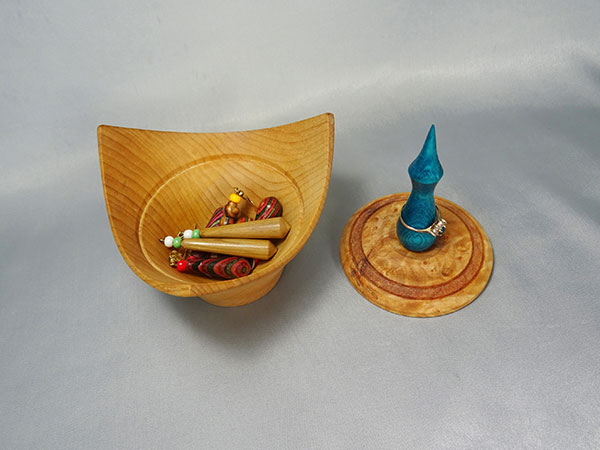
It was while making another such bowl that a further idea came to mind—if the profile at the base started as round and continued outward to the tips of the cube, this would leave three “wings” as the top. The center could then be hollowed, for a three-winged bowl. My wife suggested making it into a jewelry box by adding a lid with a finial. Here is the process in detail.
Mount the Cube
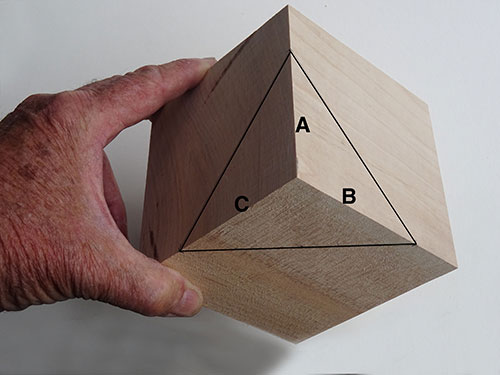
Begin with a 4″ (10cm) cube of hardwood. To get the “wings” to come out at the desired flare, draw a 4″-long line across the three faces at the corner to be held by the tailstock. To do this, make a mark 21-3/16″ (7cm) along each of the three edges, then “connect the dots” by drawing lines across the cube faces. Each of the three lines will be 4″ long.
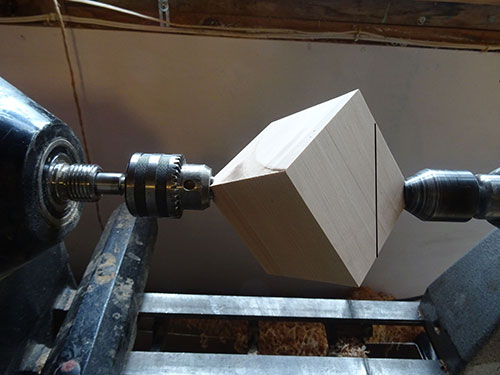
A three-jaw drill chuck mounted in the headstock serves as a drive, and a live center with the point removed provides tailstock support. Fit the tailstock corner of the workpiece into the live center cup, and bring the tailstock forward so the opposite corner engages in the drill chuck. Lock the tailstock and advance the quill to press the cube securely in place.
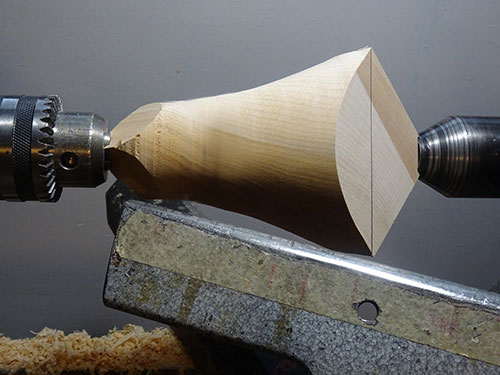
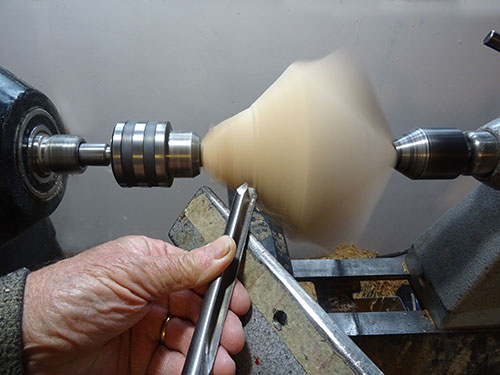
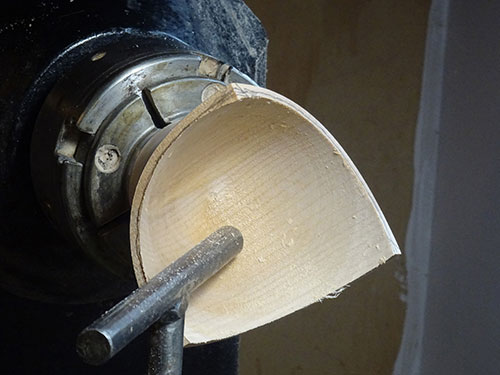
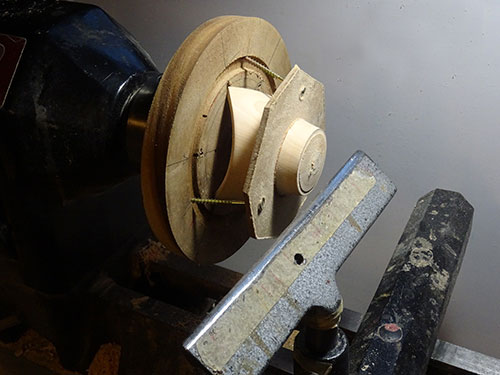
Turn the outside shape Position the toolrest so that it will clear the bottom edges of the cube, and begin to round the lower section, taking light cuts with a bowl gouge. Cut in the direction of the tailstock. Initially, you will be turning across the edges of the cube. To avoid tearout, set the lathe at around 2000 rpm, if you can do so without excessive vibration.
Aim for a diameter of about 2″ (5cm) adjacent to the drill chuck, then form a gentle sweep out towards the three corners at the tailstock end. Stop cutting when the wing tips reach the pencil lines.
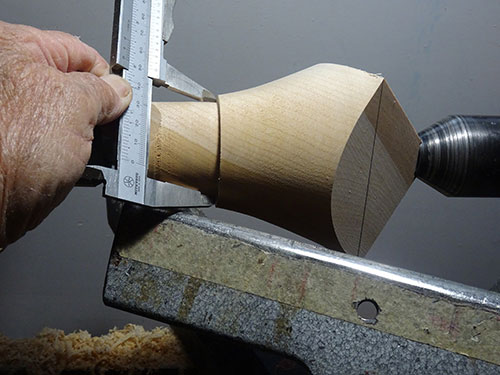
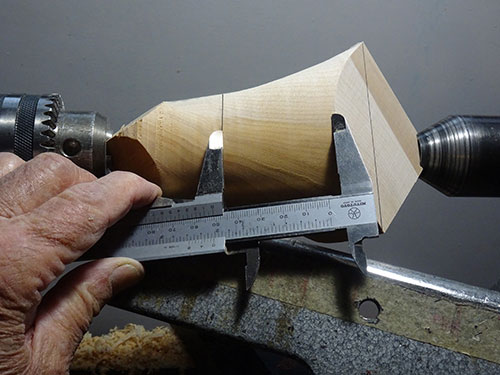
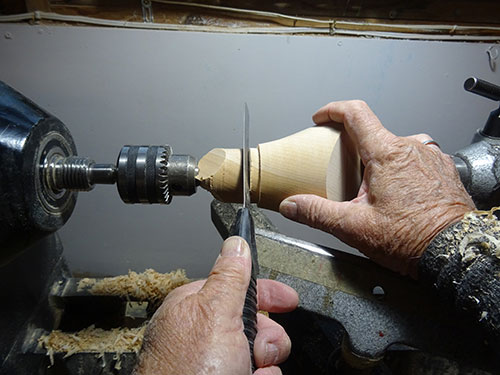
Measure 2″ back down the slope and draw a pencil line to mark the base of the box. The diameter here should be about 2-1/4″ (6cm); if it is wider, re-work the profile to bring it down and re-mark the base line. Now cut straight in at this line and trim the area to the left down to 2″ diameter.
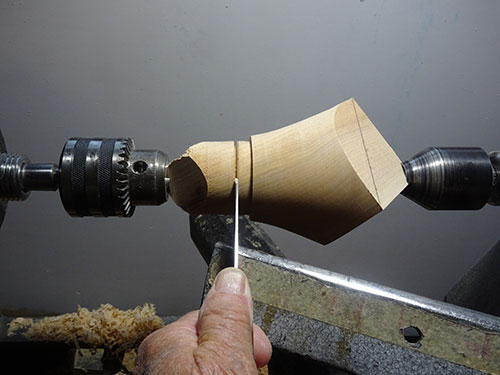
Using a thin parting tool, cut part-way in about 3/8″ (9.5mm) back from the base line, then finish parting the work using a handsaw with the lathe off. Remount the workpiece in a scroll chuck.
To ensure the tenon shoulder sits tight against the face of the chuck jaws, use the tailstock to push the work into the chuck before tightening the jaws. Proper contact of the tenon shoulder to the jaw faces will add important stability for when you are hollowing with the tailstock removed.
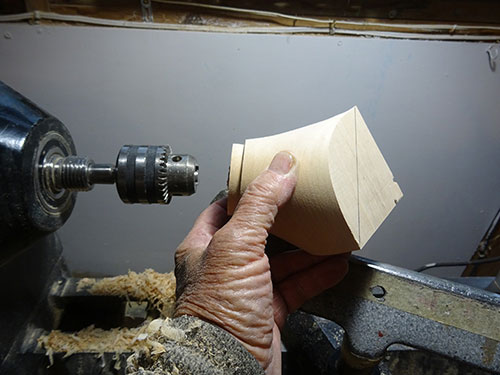
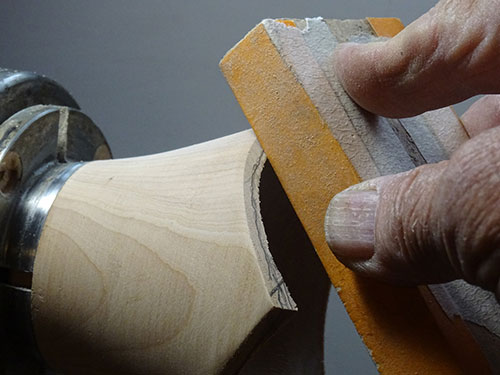
As there may be a slight eccentricity once the chuck is tightened, take a cut or two on the outside profile to re-true it, then sand the outside. It will not be practical to do this later.
Hollow the Box

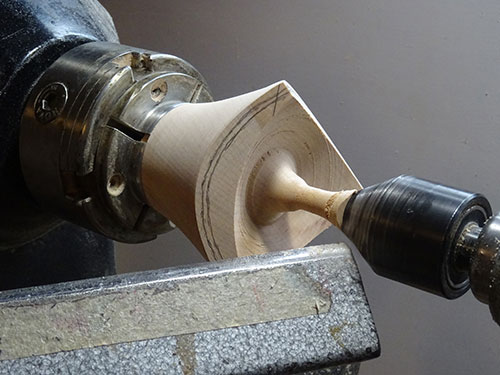
With the lathe stopped, add two pencil lines on the three unturned cube faces, one 1/8″ (3mm) from the curved edge and the other, 3/16″ (5mm) from the curved edge. Position the toolrest so it is parallel with the edges running in to the tailstock, and begin to hollow the box.
Since, as before, you’ll be cutting across the cube’s edges, I suggest at least 1500 rpm with gentle cuts. And since the tailstock is still in place, a central spindle will remain, which I cut away with a handsaw before continuing to hollow.

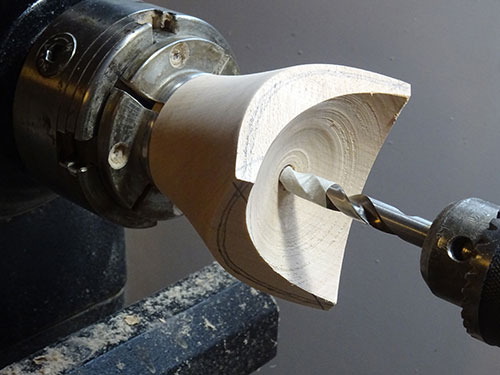
To ensure a minimum base thickness of 1/2″ (13mm), I prefer to drill a depth-indicator hole before continuing the hollowing. When hollowing near the outer edges, take care when approaching the pencil lines on the three faces.
I cut away the inside line and preserve the outer line, cutting the wall parallel to the outside profile. With the relatively thin walls and increasing depth, it is not practical to try smoothing cuts, as chatter marks are likely to form. The bottom of the box should curve in to meet the bottom of the depth indicator hole.
When the hollowing is completed, sand if necessary, but take care not to catch the wing tips. Sand the rim edges by hand, with the lathe off; to avoid rounding the edges, use a sanding block.
The final step is to cut a shoulder for the box lid to sit on. The lid will be 3″ (8cm) in diameter. Cut a disk of this width out of stiff cardstock and a simple dowel handle attached with a dab of glue.
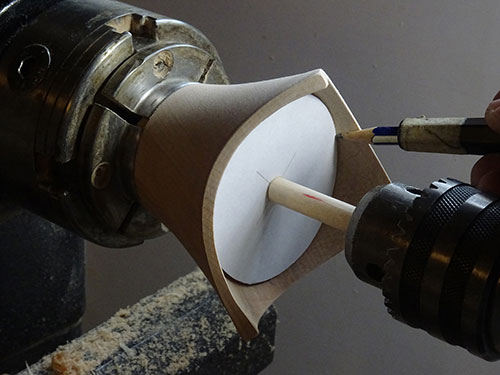
The dowel can then be fitted into a drill chuck in the tailstock and the disk brought up to contact the inner wall. Scribe a pencil line around the cardstock.
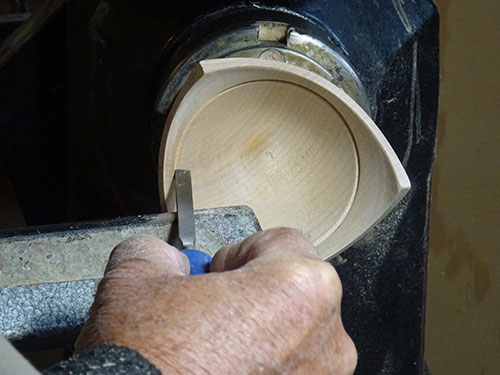
The shoulder can then be cut with a straightedge tool, just 1/16″ to 3/32″ (1.5mm to 2.5mm) deep.
Complete the Base
Remove the workpiece from the chuck. To reverse-mount the box and complete the bottom of the foot, I use a shop-made donut chuck. The chuck features a scrap faceplate held in a scroll chuck. The workpiece is held quite securely to the faceplate by a ring of thin scrap with a hole in the middle and hold-down screws. To avoid marring the piece, the ring should be made of hardboard or similar material, and the hole should be chamfered to match the outside slope of the box.
Turning at a slow lathe speed and taking light cuts, clean up the bottom of the box, shaping it to a slight concave profile and sanding as needed.
Make the Lid and Finial
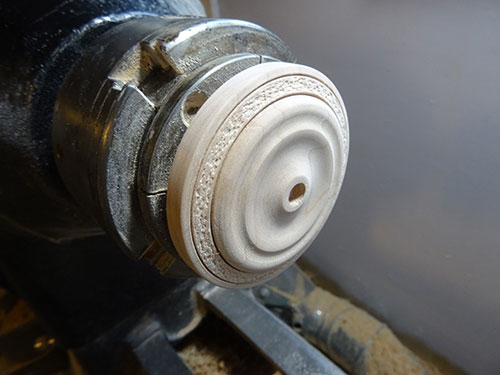
The lid can be in matching wood or another for color/grain contrast. It should be formed as a 1/2″-thick disk from stock that can be final-turned to just over 3″ in diameter; this will allow for fine-tuning the fit of the lid to the shoulder. I turn a 2″-diameter recess in bottom of the lid, so it can be mounted on a scroll chuck in expansion mode. Once mounted, the diameter can be trimmed to a comfortable fit on the box shoulder. Use a caliper to confirm dimensions. A central 5/16″- (8mm-) diameter hole in the top of the lid will anchor the finial. To avoid drilling through, place a piece of masking tape on the drill bit to mark 1/4″ depth. The top of the lid can then be profiled/decorated per your preference.
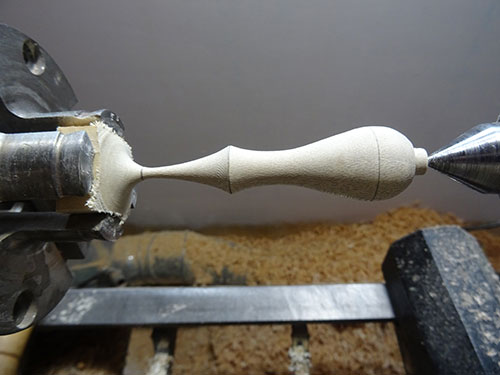
The function of the finial is twofold: to hold rings and to serve as a handle for lifting the lid. After some experimenting, I found that an overall finial height of 3″, plus the 1/4″ tenon to anchor the finial in the lid, looks nice. A 7/8″- (22mm-) diameter bulge near the bottom of the finial is about right to catch the rings. I use holly for finials, as its close grain takes colorants well. If you do add color, this is best done before installing the finial.
Finishing
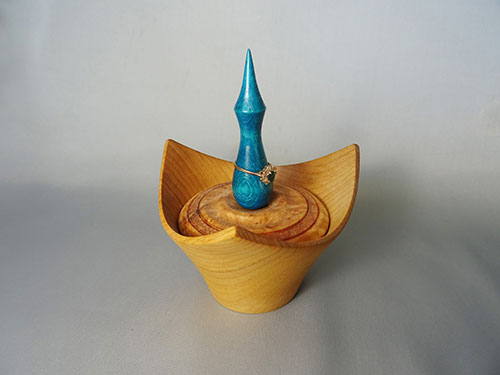
Apply your choice of finish to the box and lid. On this piece, I applied dye and then wipe-on polyurethane to the finial, and walnut oil to the box and lid. Glue the finial tenon into the lid, and the project is complete. A three-winged jewelry box makes for a unique gift. All it needs now is some earrings inside and a ring or two on the finial.
Michael Hamilton-Clark, a retired civil engineer, has been turning wood for seventeen years. He lives in the Fraser Valley, British Columbia, and uses local woods to produce a variety of items. He is a member of the Fraser Valley Woodturners Guild, the AAW, and the Craft Council of British Columbia. For more, visit his website.


