This article, “Make a Timeless and Elegant Hourlass,” is from the pages of American Woodturner and is brought to you by the America Association of Woodturners (AAW) in partnership with Woodworker’s Journal.
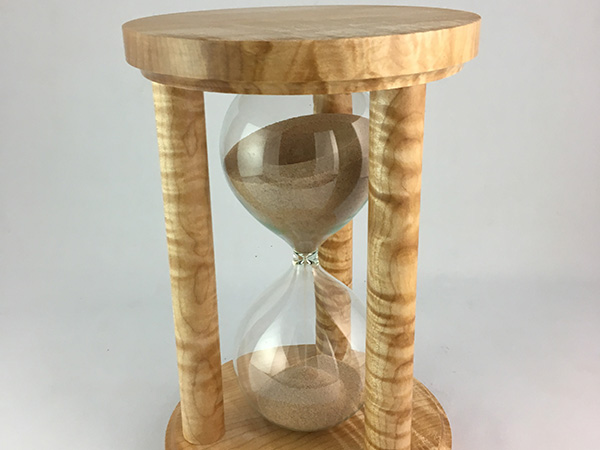
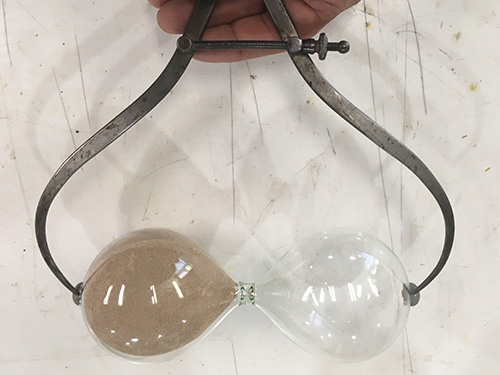
The first step is to measure the glass you are going to use and calculate the size of wood needed for its structure. For this sample project, the height of the glass, not including the knobs at the ends, is 7-5/8″ (19cm), and its largest diameter is 3-1/4″ (8cm). I like to make a scale drawing, or paper template. This process takes only about twenty minutes, and it saves a lot of frustration and mistakes down the line.
Design and Materials
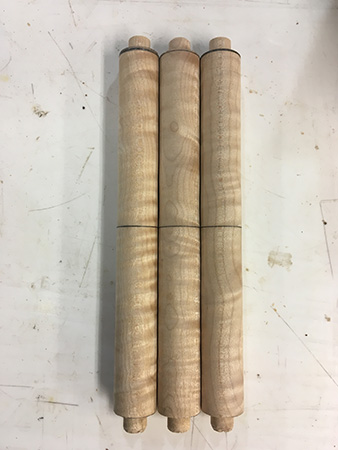
For this glass timer, you will need two ends, or bases. (Both end disks are considered “bases” because the timer is flipped repeatedly in use.) Each base is 3/4″ (19mm) thick and 6-1/4″ (16cm) in diameter. You will also need three spindles, each 7/8″ (22mm) in diameter and 8-3/8″ (21cm) long.
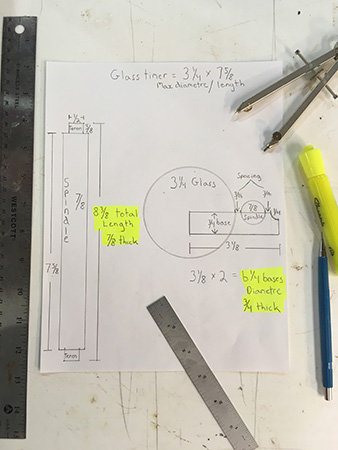
Don’t cut your wood to these final sizes at the start. Always allow a fudge factor for truing things up on the lathe. For the two bases, I generally leave 1/8″ (3mm) extra thickness and a 1/4″ (6mm) extra diameter. For the spindles, add 1/8″ to the diameter, but it’s OK to cut them to final length — 3/4″ longer than the length of the glass to allow for a 3/8″- (10mm-) long tenon at each end.
It is important to choose wood that is thoroughly dry. Even slightly green wood will shrink over time, and this would likely cause the glass timer to crack. I was able to cut all the pieces from a single slab of dry, nicely figured broadleaf maple. By using a single piece of wood in this manner, all the elements of the structure will have similar color and grain.
Buying a Glass Timer
When shopping for a glass timer online, search for an “unmounted” hourglass to find the glass only, without a supporting structure. Most of the hourglasses available online are flat-bottomed and are meant to stand alone, but a cup or recess can be turned on both bases to accept the ends of the timer.
In my experience, U.K.-based Day-Impex, Ltd. and Wisconsin- based T & K Young produce the finest hand-blown hourglasses available, but they do cost more. The times range from one minute to three hours. Best to purchase a timer that suits the needs of the owner-to-be, or just stick with the traditional one-hour timer. Glass timers also come in a variety of sand colors, and in a wide variety of shapes and sizes.
Given the low cost of timed glasses with a structure on the Internet, it would be reasonable to purchase one, cut away the wood structure, and use the glass timer in your own hourglass design. This way, you can choose some beautiful wood and turn the wooden parts to a higher standard.
Turn and Drill the Bases
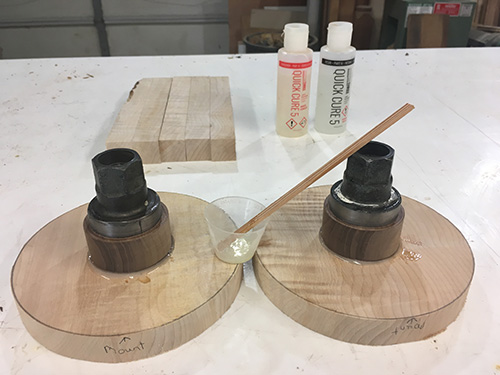
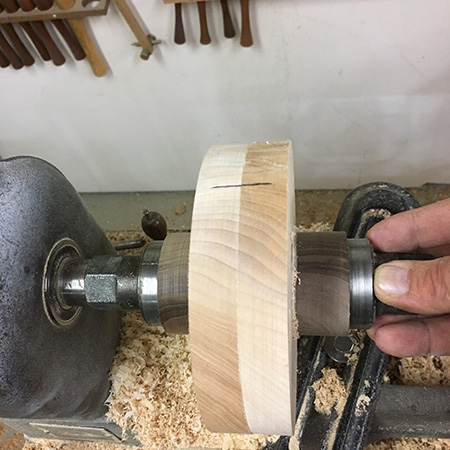
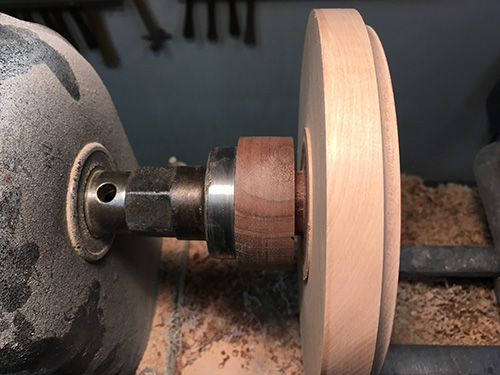
My favorite way to mount the bases on the lathe is with a glueblock attached to a 2″ (5cm) faceplate. I use two faceplates with glueblocks for added efficiency and ease of comparing and remounting the two bases while they are in progress. I attach the glueblocks to the bases using five-minute epoxy.
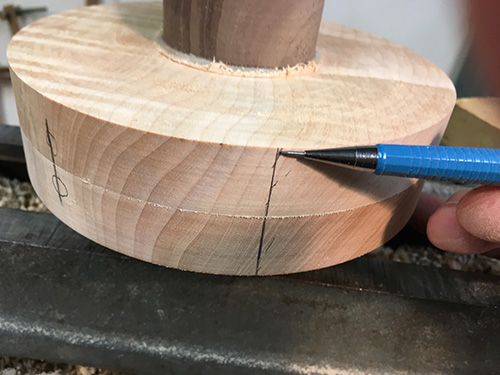
Once the outside edges of both bases are trued to 6-1/4″ diameter and the fronts and backs are flattened, compare them. When their sizes match up, align the grain and scribe a single pencil line across both pieces.
Using my paper template, I determine that the center of each spindle is 2-3⁄16″ (6cm) from the center of the base. With the lathe running, I transfer this measurement to the base.
There are three spindles on a traditional hourglass. Having marked the distance of their holes from the center of the base, I now have to determine their even spacing and exact locations.
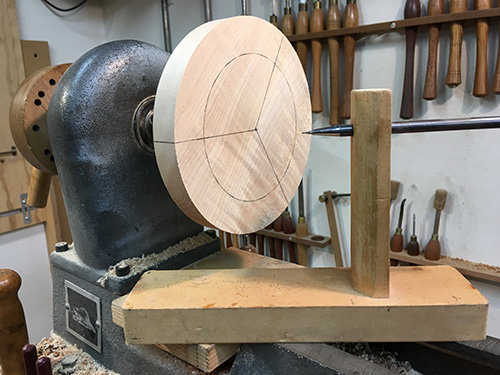
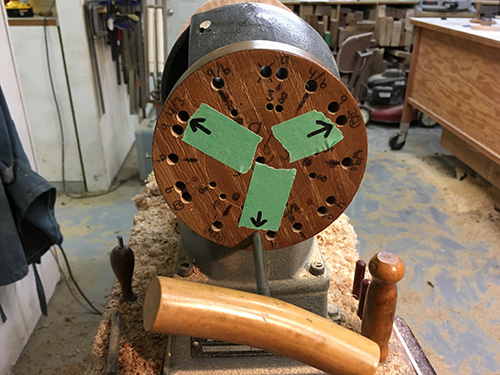
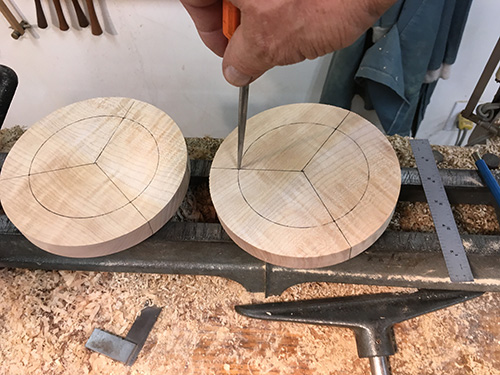
I do this using the indexing head on my lathe, along with a jig that holds a mechanical pencil at center height. Divide the circle into three equal parts and apply those marks to one of the bases.
Now align both bases and transfer the spindle hole divisions from one base to the other. This process ensures that the grain on both bases will run in the same direction on the completed project.
Then I use a sharp awl to indent the location of all six spindle holes. Make sure these punctures are quite deep because they need to endure through the sanding of the bases.
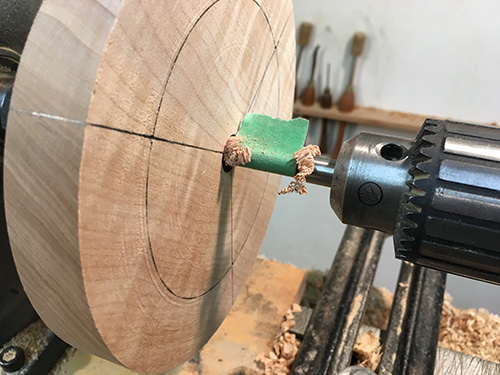
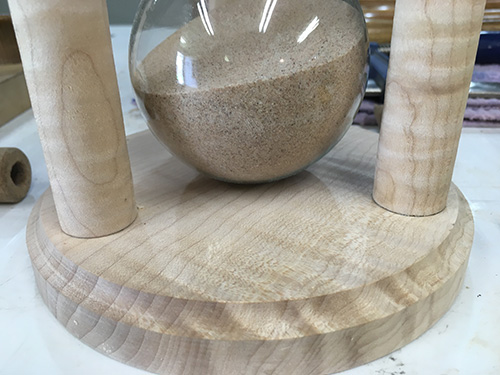
Next, drill a hole in the center of each base to accept the knob at each end of the glass timer. (If your glass doesn’t have knobs, turn a cup or recess to accept the ends of the timer.) I determine that a hole 9⁄16″ (14mm) in diameter and about 3/8″ deep allows the knobs to seat nicely in the wood. Mount a drill chuck in the tailstock of your lathe and use a Forstner bit to drill this hole in each base.
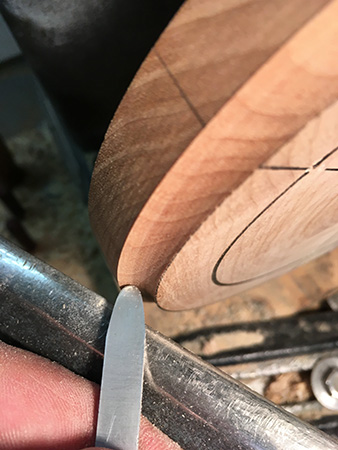
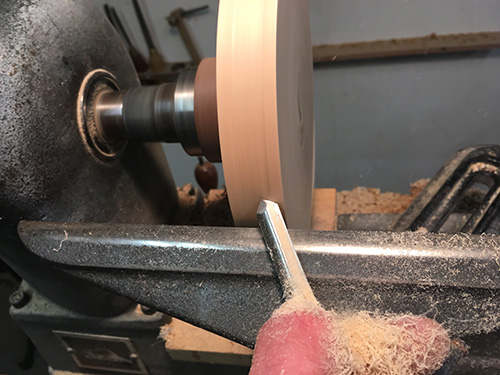
For a simple embellishment on the bases, turn a cove at the outer edges using a small bullnose scraper. To sand this cove, I wrap sandpaper around a small drill bit and apply it to the spinning wood.
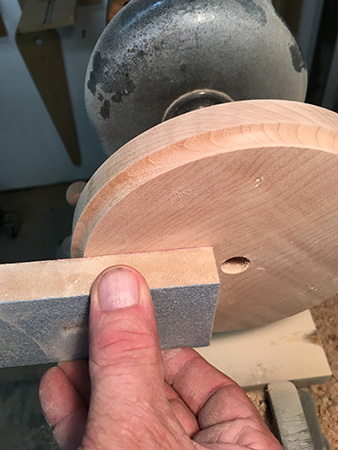
I then sand all the flat areas using sanding blocks. Start at 100-grit abrasive and progress to 220.
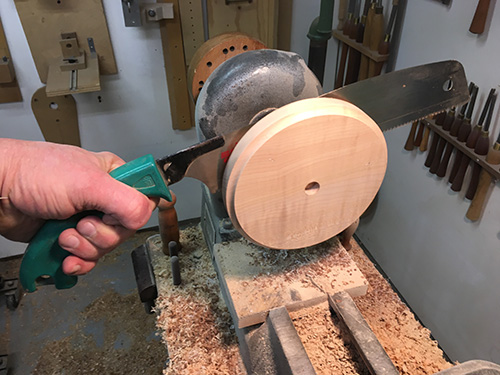
To remove the base from the waste block, part halfway through the scrap wood, then, with the lathe off, use a handsaw to cut the base free. Do this for both bases, leaving as little scrap wood as possible.
A piece of 60-grit sandpaper pulled over a block of wood quickly removes any sign of the extra wood and glue from the waste blocks. Use the shopmade sanding blocks to work your way back to a 220-grit surface on the top of both bases. Always finish your sanding by moving the block back and forth in the direction of the grain.
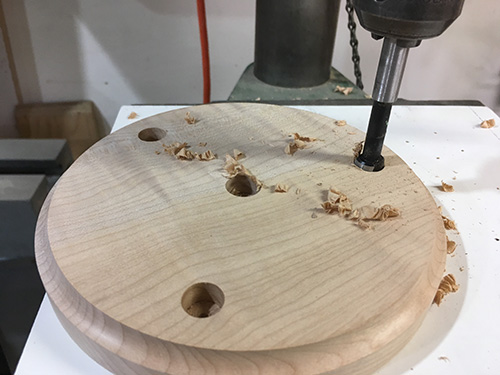
Use the drill press to bore the six spindle holes using a 1/2″ (13mm) bit, drilled 3/8″ deep . Leave the bit in the drill press for now, as it might be necessary to make the holes deeper after the spindles are turned.
Shopmade Sanding Blocks
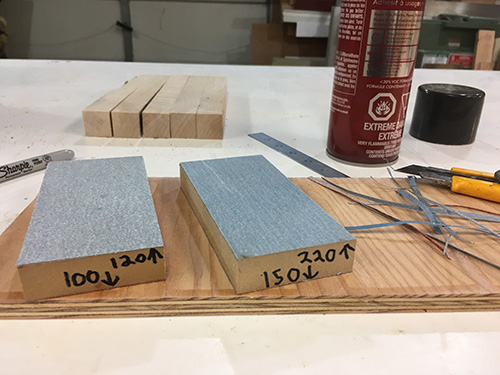
Perhaps the best way to sand wood flat on the lathe is with the aid of a sanding block. You can make your own double sided sanding blocks by adhering sandpaper to opposite sides of a block of medium-density fiberboard (MDF). I made two blocks, one with 100- and 120-grit sandpaper and another with 150- and 200-grit paper.
Cut the sandpaper 1/8″ larger than the block on all sides. Use a spray adhesive to join the sandpaper to the block, one side at a time, working in a well-ventilated area and following the instructions on the adhesive spray can. When the adhesive has dried, use a pair of scissors or a sharp knife to trim away the excess sandpaper.
Turn the Spindles
Before mounting the spindles on the lathe, I like to mark and drill a center hole in both ends of the blank. These holes help to accurately guide the placement of my spur drive and live center. Use a drill gauge to find the right size bit for the points in your drive and live center. The center points should fit in the hole but still leave the spur blades and live center cup ever so slightly off the wood.
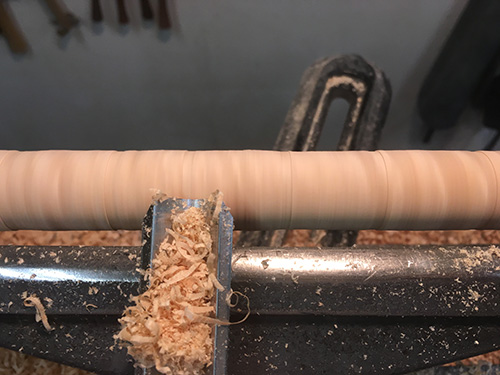
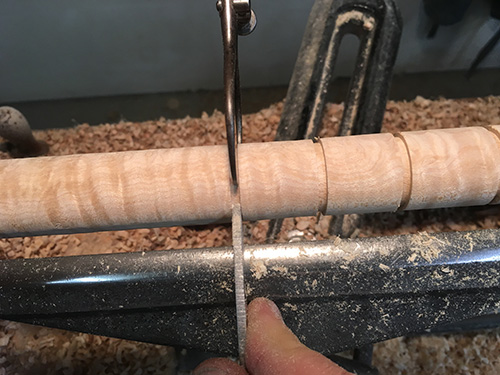
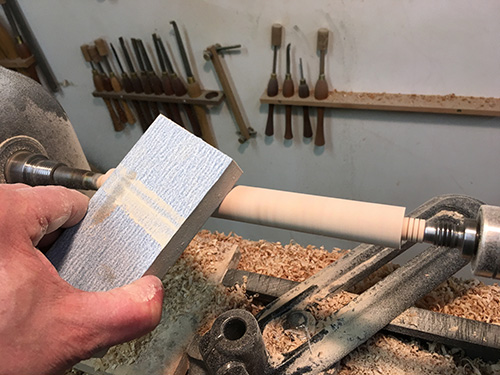
Mount one of the spindle blanks on the lathe and turn it round. Set a caliper to 7/8″ and use a parting tool to cut to that depth. Do this about every inch along the spindle. Turn away the excess wood until you reach the bottom of the parting cuts. Repeat this process on the other two spindles, comparing measurements along the way.
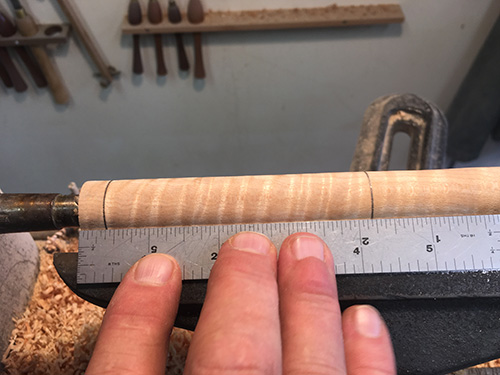
Measure and mark the center of each spindle, then measure out from this line to either side to achieve the overall length needed for the glass you are using (7-5/8″ for this sample project). The wood left on the ends can now be cut to the tenon diameter, 1/2″.
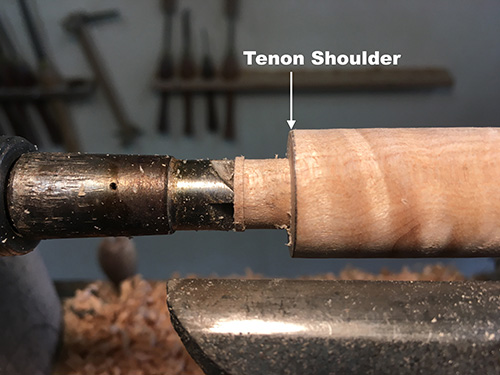
Cut away any scrap at the end of the tenons with a sharp knife, and test fit the tenons by placing them in the holes drilled in the bases. The tenons should be slightly loose in the holes, and the shoulder of the tenon should lay flat on the base. It may be necessary to drill the holes deeper or remount the spindle to reduce the tenon diameter.
A simpler approach is to make the spindles tapered at the ends, without using a tenon and shoulder. This way, you can simply trim the ends of the spindles in order to get them to the perfect length for your glass.
Adding a tenon and shoulder makes the project more technically challenging—you have to make the three spindles exactly the same length shoulder to shoulder, or there will be gaps where the shorter spindles meet the bases. But a tenon/shoulder effectively hides the glue hole, is a more elegant solution, and is my preferred method.
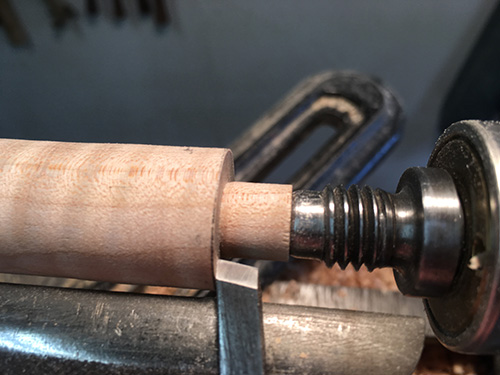
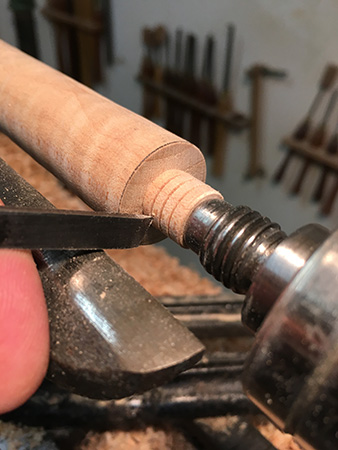
Once you achieve the perfect lengths, remount the spindles and slightly undercut the tenon shoulder at both ends. This undercut ensures that only the outside of the spindle shoulder touches the base. This cut is best made with a small skew.
Remounting Tip!
You will likely need to remount and tweak these spindles several times to get the length just right for the glass timer you are using. If the spindles are too long, the glass will have a loose fit; too short, and you’ll crush the glass during assembly.
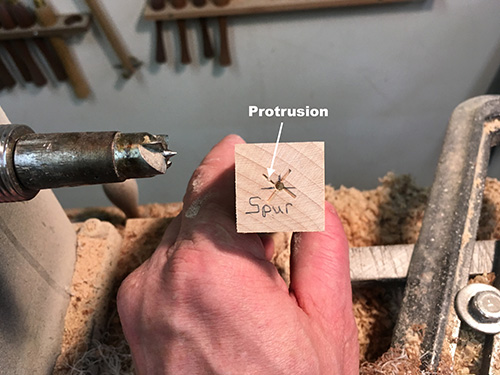
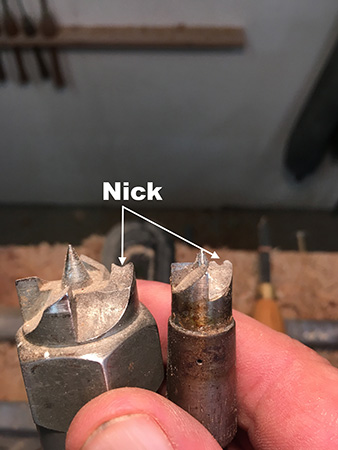
To make remounting the spindles easier and more precise, grind a small nick in one of the blades on your spur drive. This nick leaves a tell-tale sign on any blank you mount and compress. If you need to remount a blank, the exact orientation of the spur should be obvious.
Dry-fit the Glass Timer
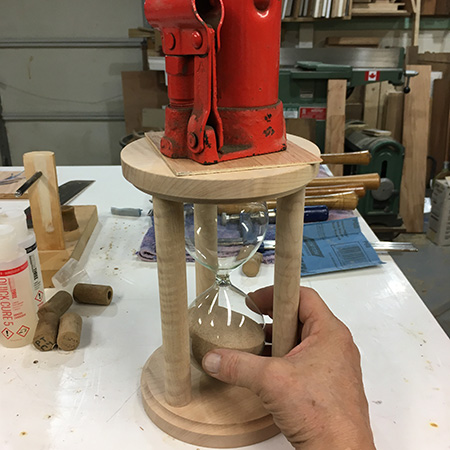
Now you can dry-fit the glass timer with the wood pieces to test the fit. I like to place a heavy object (about 5 lbs.) on top to press all the elements together and provide a good reference for inspection before glue-up. Check that you can easily spin the glass in this compressed setup. Then check to see if the glass can be moved up and down. If there is too much play vertically, the spindles will need to be uniformly shortened. Check that all six of the tenon shoulders are touching with no gaps where they meet the bases. Remount the spindles and reduce their length with tiny cuts on the ends until this is achieved. The tip of a small skew does this job well.
Considering that wood moves with changes in humidity, it is always better to have a timer that is a little loose than one that is too tight.
When you have a good fit of the glass with the wood, remount the spindles and form small grooves on all the tenons. I do this using the long point of the skew. These grooves increase the strength of the glue joint of the tenons. This is also a good time to sand the spindles, using a sanding block to maintain flatness.
Apply Finish, Assemble Hourglass
Before gluing the wood pieces together, apply your finish. I prefer a hand-rubbed oil such as Minwax’s Antique Oil.
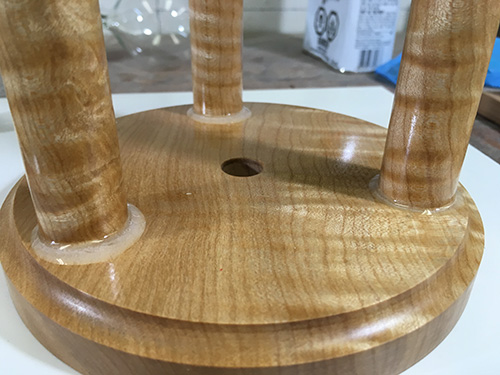
I prefer to glue one base at a time, rather than the entire assembly all at once. First, I apply some fresh oil around the glue holes and at the ends of all three spindles (but not on any gluing surfaces). Then I mix up some five-minute epoxy and apply a liberal amount into all three holes and on the three tenons. Once the hourglass is reassembled and the 5-lb. weight is set on top, the excess epoxy oozes out of the glue joints. This is the perfect time to twist the spindles until the grain direction lines up with the base.
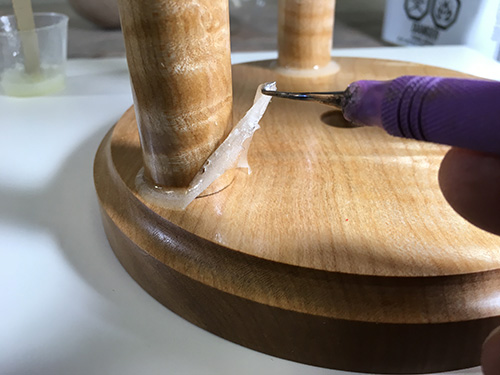
The undercutting of the tenon shoulders and the application of fresh oil around the glue joints now come into play. The outside of the tenon shoulder “cuts,” or separates, the excess epoxy, and the extra oil creates a surface that the epoxy can’t bond to. It’s just a matter of waiting until the epoxy goes from sticky and elastic to the consistency of a rubber eraser. I poke the epoxy continually to monitor its consistency. When the glue resists the pick, I can pull away all the excess epoxy, leaving three clean joins. Then I do a vigorous rub with a clean rag to remove the fresh oil I had just applied. I can then insert the glass and repeat this process for the other base. Note that the glass does not receive any glue; it “floats” between the two bases.
Final Thoughts
Understand that most people pick up an hourglass by a single spindle to flip it and get the sand running. Keep this in mind as you design your hourglass and decide on the diameter of the spindles.
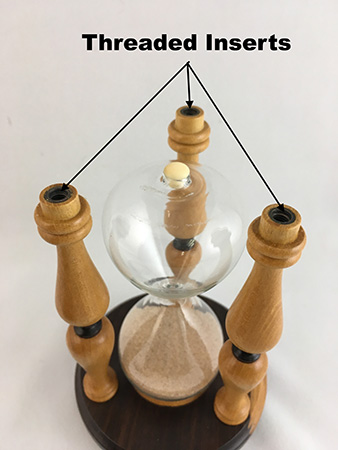
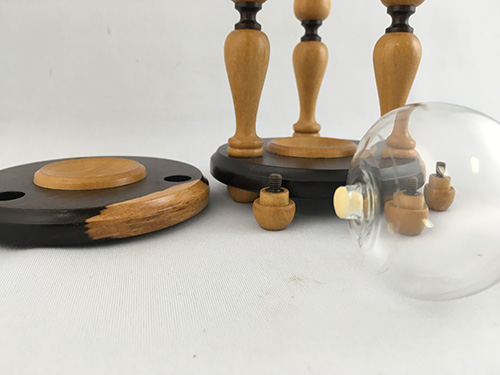
I now typically make my hourglasses with a removable end, in case the glass should need to be replaced.
This is accomplished with threaded inserts in the ends of the spindles and decorative feet that serve to hide the screws.
Scott Belway is a woodturner based in British Columbia, Canada.


