This article, “Turn a Toothpick Holder,” is from the pages of American Woodturner and is brought to you by the America Association of Woodturners (AAW) in partnership with Woodworker’s Journal.
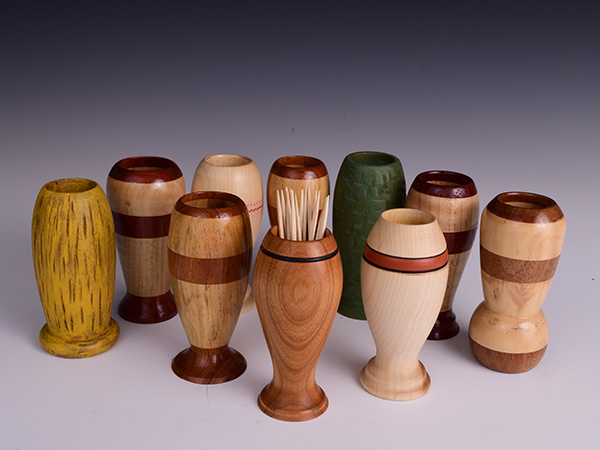
A functional first project will continue to remind a turner of the joy of woodturning for many years. A honey dipper, muddler, or candlestick holder are frequently the objects of first efforts, but another good choice — and one with daily usefulness — is a toothpick holder.
I had been casting about for an ideal first project when a fellow turner, Jeff King, showed me his toothpick holders. His design met all of the requirements. His toothpick holder is useful in today’s homes, little wood is needed, one can be completed in an hour, it is turned between centers and in a chuck with tailstock support (reducing the risk of the blank flying off the lathe), and it allows for some design creativity.
Rough the Blank
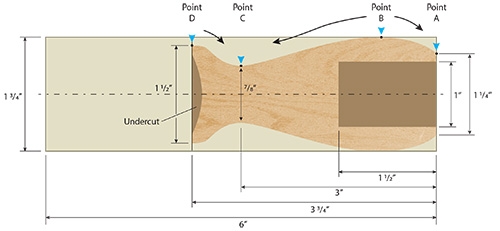
The project begins with stock selection. The wood can be any species of dry wood or a blank that has been glued up of contrasting colors. The wood must be seasoned and the blank square and true on all four sides. I typically start with a blank of hard maple or cherry 1-3/4″ (4cm) square and 6″ (15cm) long. The Drawing shows the dimensions of both the rough blank and the completed form.
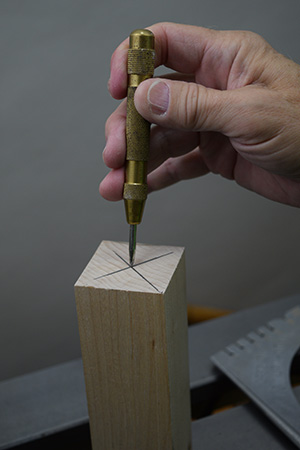
Mark the center point on each end of the blank using a center punch or awl. The indentations make registering the drive and tail center spurs easier.
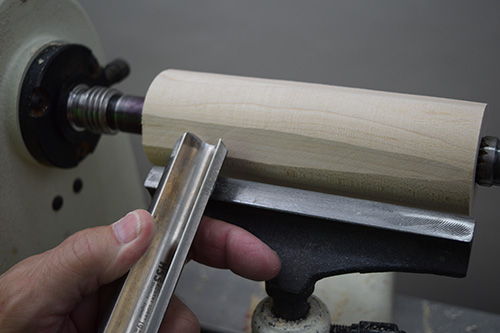
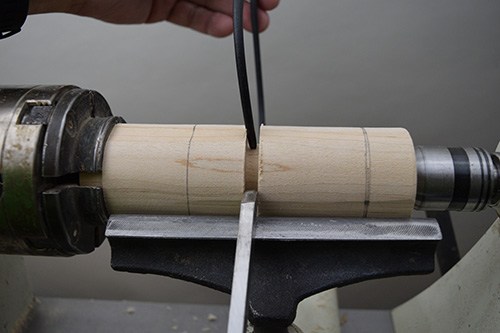
Mount the blank on the lathe between centers and use a spindle-roughing gouge to turn the blank round. Turn away only enough wood to create a round cylinder. Better that a few flat spots remain than have a cylinder that is too small.
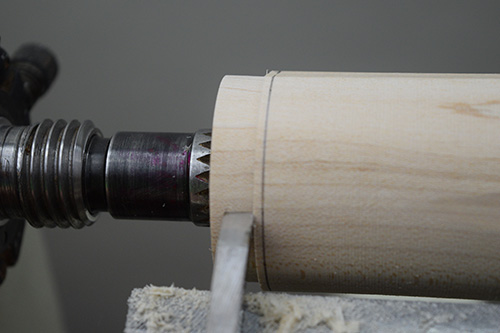
Use a parting tool to create a tenon at one end of the cylinder. For a project of this size, a smaller chuck will work well; size the tenon to fit your chuck jaws. My chuck jaws are 1/2″ (13mm) deep. For a solid hold, the bottom of the tenon must not touch the bottom of the jaws. The step wall, or shoulder, needs to be crisp and true for the jaws to have maximum holding power.
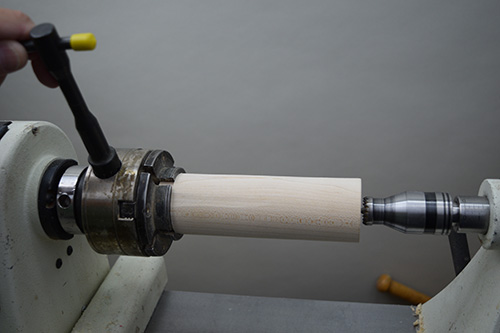
Remove the blank from between centers and mount it loosely in your chuck. Bring up the tailstock with the live center at the marked center point and finish tightening the jaws. This sequence assures that the cylinder runs true. Use the handwheel on the tailstock to snug the live center until it exerts firm — but not excessive — pressure on the blank. This provides additional support, ensuring the blank will continue to run true when you are shaping the outside.
Drill the Center Hole
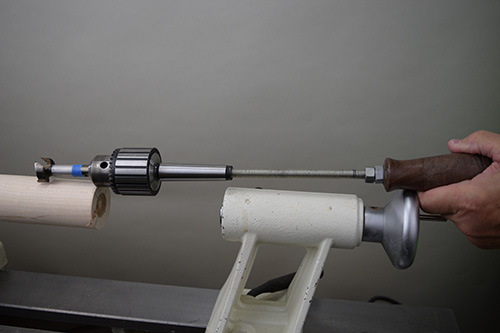
The center hole is drilled prior to forming the outside shape. Greater mass in the blank makes drilling safer. The hole in the toothpick holder should be deep enough that the toothpicks stand upright, but not so deep that the toothpicks are hidden. A standard toothpick is 2-1/2″ (6cm) long, so a 1-1/2″- (38mm-) deep hole fulfills the need. I set the lathe to 700 rpm and use a 1″ (25mm) Forstner bit mounted in a drill chuck with a drawbar to drill the center hole.
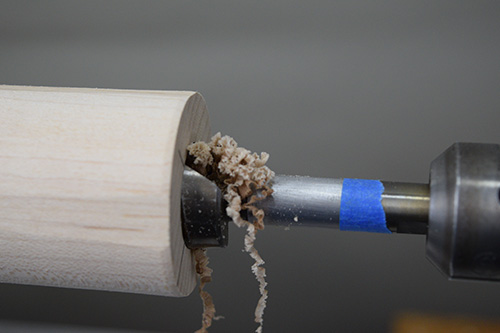
After drilling the center hole, remount the live center and bring up the tailstock for added support.
Form the Body
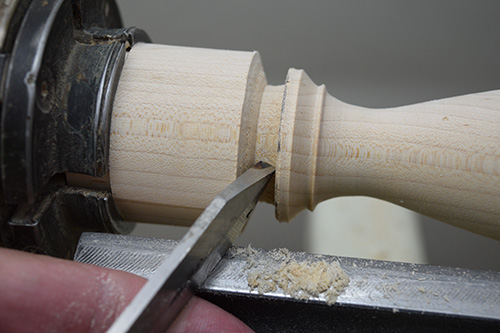
The next step is to establish the form for the toothpick holder. Use the dimensions shown in the Drawing to lay out the locations of the bottom and the widest diameter of the holder. With a caliper set to 1″ and a parting tool, I cut a groove into the blank to the target depth where the waist will narrow. The finished dimension is 7/8″ (22mm), so 1″ leaves room for perfecting the curve. Wiggling the handle of the parting tool left to right as I make the cut provides clearance for the tool as it penetrates deeper into the blank. In the same manner, I set a caliper to 1-1/2″ and establish the diameter of the base.

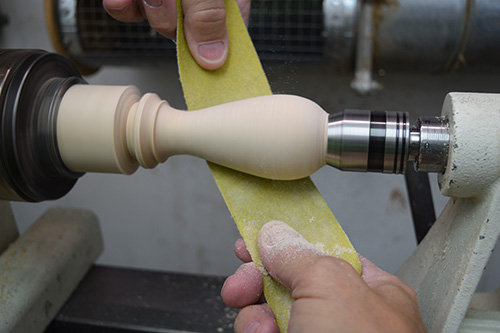
With the key dimensions set on the cylinder, begin to form the toothpick holder’s outside shape, starting at the tailstock end. There are a number of tool options for shaping the exterior. I typically lay out my 1/4″ (6mm) bowl gouge, and 3/8″ (9mm) and 1/2″ spindle gouges. Scraping tools can be used, but I prefer bevel-rubbing tools because they create less dust and the surface off the tool is better.
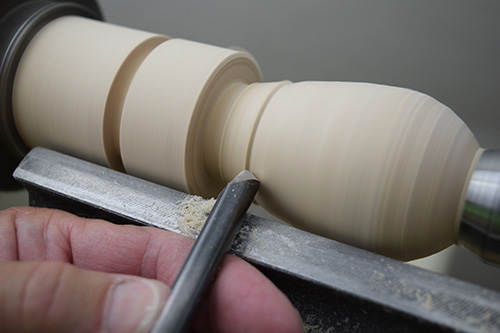
Shape the holder, cutting downhill from wider-to-smaller dimensions, using either a small bowl gouge or a spindle gouge. Cutting downhill minimizes catches and slices rather than tears wood fibers, resulting in a clean cut.
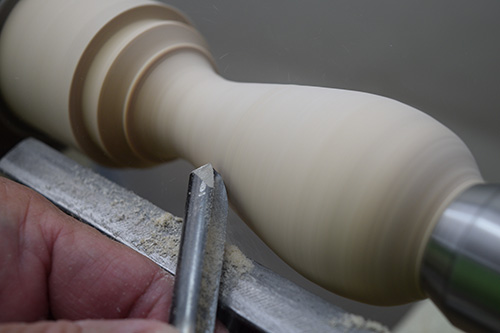
The objective is to create flowing, connected, and consistent curves. I cut from Point B to A, then B to C, then D to C. The final step is to blend all the curves together with the edge of the gouge in a slicing cut. With the body formed, I begin sanding on the lathe. Sanding dust is a known health hazard. I always wear a dust mask approved by OSHA for wood dust and run my dust collection system with an intake just behind my lathe.
I start sanding with strips of 180-grit abrasive at a moderate lathe speed. Presenting the abrasive strip at an angle to the blank sands away grooves and ridges left by the gouge. I sand carefully around details to avoid rounding over edges and losing crisp lines. Over-sanding can take all the life out of a form, while under-sanding leaves tool marks and scratches from the previous abrasive.
I work through 220-, 320-, 400-, and finally 600-grit abrasives. With each grit change, I wipe the blank to remove grit from the pores of the wood. I also reverse the direction of the lathe with each grit change.
Parting-off
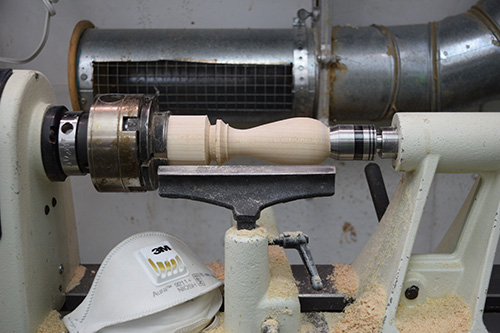
With sanding complete, separate the form from the blank. Under-cutting the base ensures that the toothpick holder will sit solidly on the table without wobbling. The parting tool makes a peeling cut, and I present the tool with the handle held low and the bevel rubbing just behind the cutting edge at the axis of rotation. I initiate the cut by raising the handle, then push the tip of the tool through an arc towards the center of the blank.
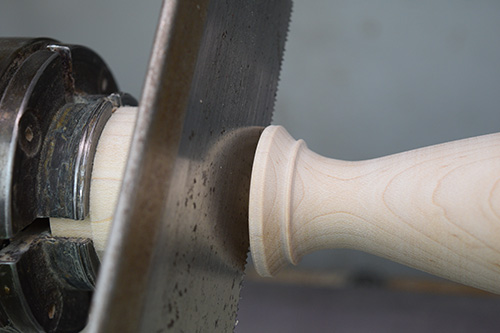
Once the cut is established, I also begin to angle the tool to undercut the base. I gently wiggle the tool handle left to right. I stop the cut with about a 1/4″-diameter tenon connecting the blank and the form, and finish parting with a small, fine-toothed saw with the lathe off.
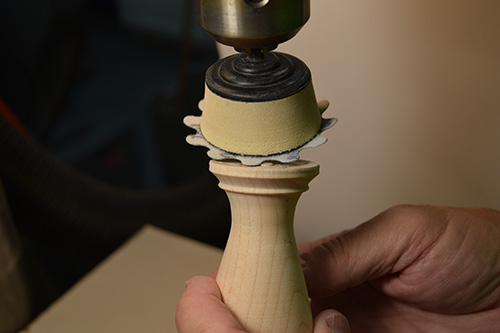
Parting leaves a small nub of wood on the bottom of the form. The nub can be removed with any sharp blade that can reach it—such as a knife, skew chisel, or carving chisel. I prefer to grind away the nub with a sanding disk mounted on a holder in my drill press. I start with a 120-grit disk for rapid wood removal and then work through the grits, removing the nub and then sanding and blending curves across the entire base. I am careful to avoid over-sanding the outer edge of the base where removing too much material could cause the toothpick holder to rock or sit unevenly.
Apply a Finish
Finish options for a small utility piece are flexible. I like the way a coat of tung oil finish highlights the grain. After the tung oil cures for three days, I apply a topcoat of matte acrylic spray finish with UV resistance. The finish’s UV resistance seems to retard the color shift wood exhibits when exposed to sunlight.
Although small in stature, the toothpick holder offers room to explore a wide variety of shapes, wood species, textures, and finishes. This is an excellent project for exploring your own creativity as you build your woodturning skills and create lasting memories.
Dennis Belcher retired from a 30+ year career in the investment world to his lifelong passion of working with wood. A member of the Wilmington Area Woodturners Association (North Carolina), Dennis demonstrates for clubs and participates in juried art shows. For more, contact Dennis at dennis.m.belcher@gmail.com or visit his website, seabreezewoodworks.com.


