This article, “Turn a Wooden Tea Strainer,” is from the pages of American Woodturner and is brought to you by the America Association of Woodturners (AAW) in partnership with Woodworker’s Journal.
Project ideas come from many places, but I often find need is a powerful creative force. I started drinking tea made from loose leaves two years ago but became frustrated with the teapot I was using—a ceramic pot with a mesh filter. In order for the water to reach the loose leaves in the filter, I had to make a lot of tea. Plus, the mesh filter was difficult and messy to clean. While teaching last winter at The Center for Furniture Craftsmanship in Maine, I invited Mark Gardner to be a guest instructor. Mark had the students create their own plates, bowls, and spoons. These functional items inspired me to customize a strainer for tea that would fulfill my needs.
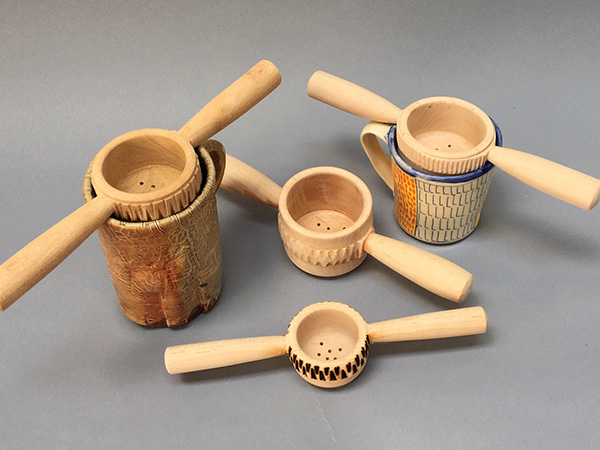
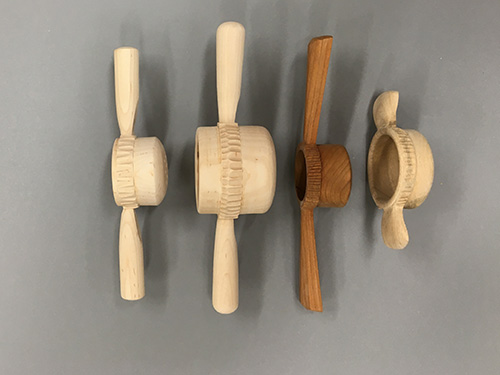
The first version I made had a spoon shape, but it did not balance well on the cup and required one-handed use. I reasoned that two handles would allow the strainer to rest on the cup. I went through four designs before I found the one that was right for me, illustrated in the steps shown here. I always encourage students to play with the form of an object to achieve their own purpose, whether it’s a scoop, strainer, cup, or whatever.
Materials and Design
Students at the school were processing bowl blanks from two large maple trees, and I was able to use wood from their offcuts. When choosing wood, stick with varieties that have no tannin. I have used maple, birch, cherry, and avocado. Cherry does have some tannin, but it works well nonetheless and does not impart any flavor to your tea.
When designing your strainer, think of what you need it to do and how it will be used. I have a special teacup at school and another at home. They are two different sizes, so I needed to make different-sized strainers. Measure your cup’s inside diameter, subtract at least a 1/4″ (6mm) and that will be the outside diameter of the bowl part of your strainer. You might also check your chuck sizes to know the distances that the jaws open and close, what Forstner bits you own, and the size stock you have available. These elements will affect the product you make.
The depth of the strainer bowl is another consideration. If the tea leaves are really strong, I make the bowl of the strainer shallow so it will not reach the water in the cup after I pour. But if the tea is herbal and needs to steep, I make the bowl deeper so it will be submerged in the water.
I like the look of long handles, but they really have to overhang just long enough to rest on the cup’s rim.
Blank Prep
For this article, I made a strainer to fit a cup with an interior diameter of 2-1/2″ (6cm). My starting blank was roughly 2-1/2″ wide, 9″ (23cm) long, and 2″ (5cm) thick. Ensure the top of the blank is flat. You can achieve this by hand-planing, sanding, or running it across a jointer. (Safety Note: It is not safe to run a piece shorter than 12″ (30cm) across a jointer, so process a larger piece and then cut it down to size.) The sides of the blank do not have to be flat, as you will be cutting them away. After flattening the top, I took a cut at the bandsaw with the flat top surface against the fence. This gave me a bottom surface somewhat parallel to the top.
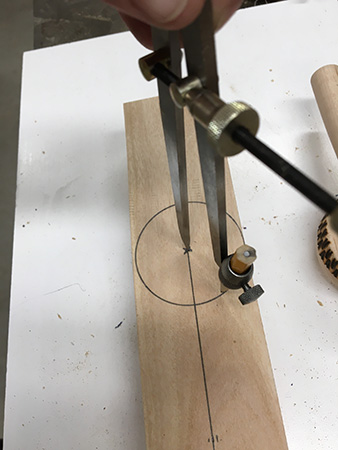
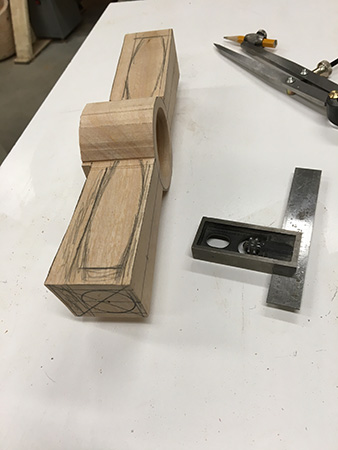
Next, I drew my strainer concept on the top surface of the blank using a ruler and compass. Draw a centerline along the blank’s length, then find the center of that line. Using a compass, draw circles representing the outside and inside diameters of the strainer bowl.
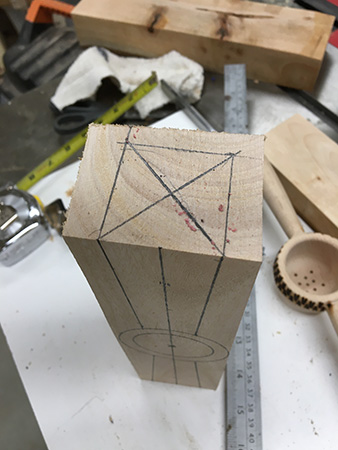
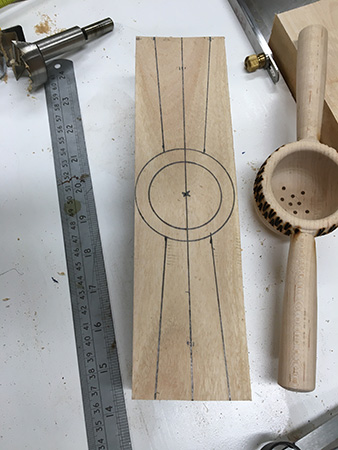
I typically keep the handles large in the layout stage, so I can decide later what shape I want. Here, I drew angled handles, but they could also be straight. Carry the handle lines to the end of the block. I made a square at the endgrain, for ease of turning a cylinder.
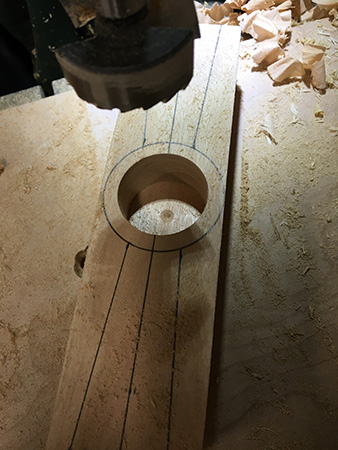
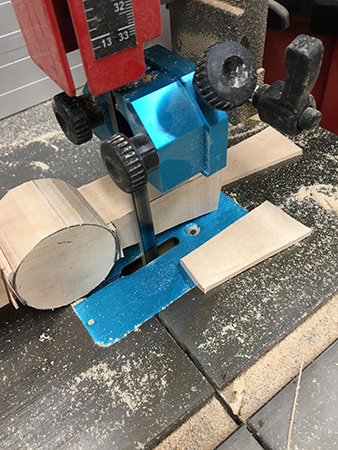
Choose a drill bit to remove most of the bowl’s interior. A drilled hole serves two purposes: it sets the depth of the bowl and adds efficiency when I am in production. I used a 1-3/4″ (4cm) bit, but if you don’t have a bit that large, it’s fine to use a smaller bit, as you can simply turn away the interior.
Set the depth on your drill press, ensuring at least 3/8″ (9.5mm) thickness at the bottom of the bowl. This will leave room for a chucking tenon and, later, a curved bottom. Drill the blank.
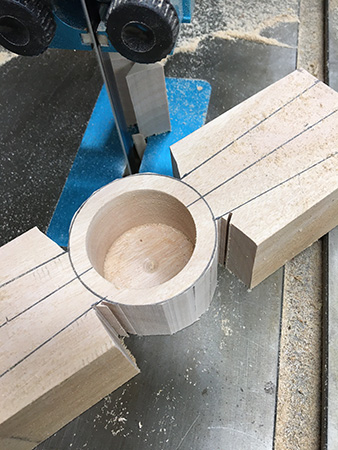
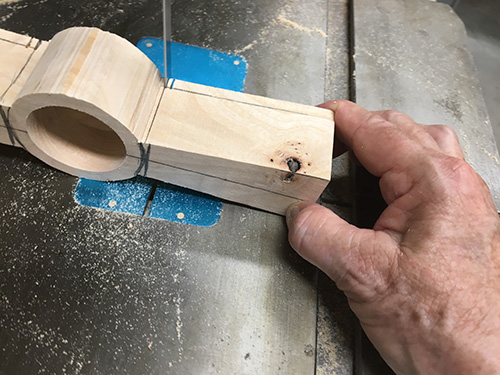
Now you’re ready to cut the blank out at the bandsaw. First, I cut into the lines where the bowl and handles meet. Straight in and out, this is a relief cut. I cut the bowl shape next.
When the shape drawn on top of the blank is cut out, prepare to cut the side profile. I carried the line where the bowl and handles meet across the unmarked bottom to remind me not to cut into the curve of the bowl’s exterior. I also drew cut lines from the bowl to the handle ends so I could cut away the remaining material there.
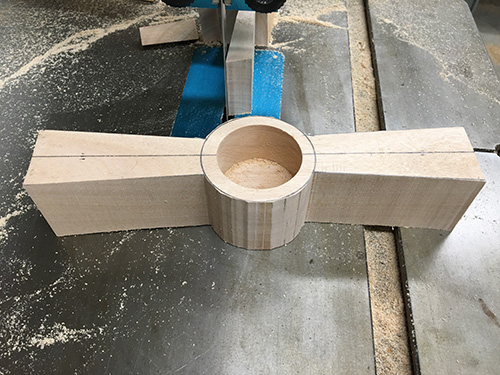
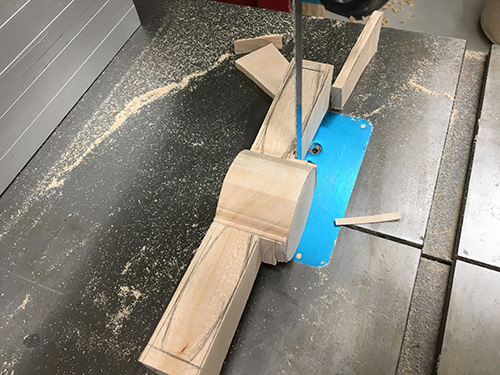
I tipped the piece in one direction to make the first bottom relief cut, then tipped it to the opposite side and made a second relief cut—always cutting on the stable side with two points touching the bandsaw table.
Next, cut the length along the bottom, again maintaining workpiece stability on the bandsaw table. Do not worry if the workpiece doesn’t look perfect—you are just rough-cutting the blank in preparation for turning on the lathe.
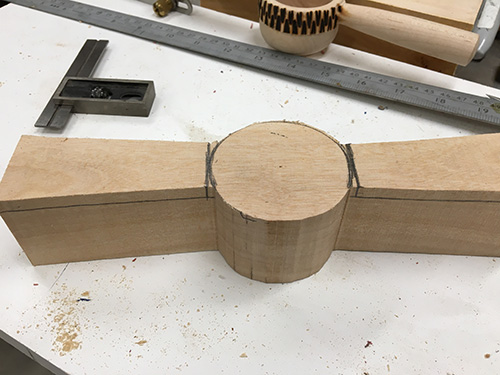
After the blank is rough-cut on the bandsaw, draw different handle shapes on the wood until you see something you like. Then trim the workpiece to match your idea. It doesn’t matter if the handles are not square—the lathe will make short work of rounding them. The important thing is to locate your centers before mounting the work on the lathe.
In this case, I positioned the centers closer to the top so the bowl would hang deeper into the teacup in use. If I had left the centers where they were initially, the handles would have been closer to the middle of the bowl.
Design Options
To me, the most important part of any project is the design, but designing is a process that takes time. When I have lots of extra wood and an idea in my head, I just start turning — it’s like sketching in 3D. When wood is precious, I refine my idea on paper before touching a tool. If I let the wood “speak to me,” I might start with a log and end up with a toothpick. Starting with a plan helps you think through all the steps.
Turning Tools
For the turning of the tea strainer, use the tools you are most comfortable with. Following are the tools I typically use for this project.
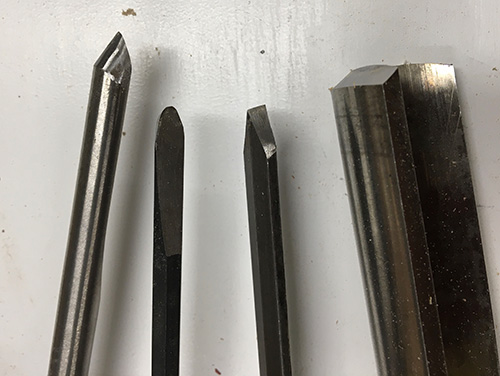
Spindle gouge. I have been a production turner for thirty-five years and am very comfortable with my spindle gouge. I grind it to an extreme fingernail profile, which means it has an elongated bevel and a thin, sharp cutting edge. This profile gives me the finish cut of a skew, but the rounded corners make it easier to sneak into tight details without catching. I also use a spindle-roughing gouge at the ends of the tea strainer handles.
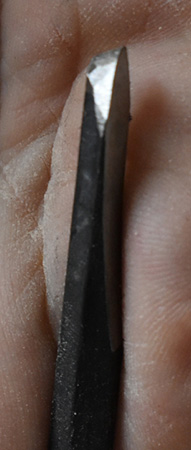
Angled parting tool. I use a parting tool ground with an angled cutting edge, which leaves a sharp leading point on one side. This profile makes it easy to scrape on the side and reach into tight corners.
Hex wrench scraper. I also use a long-armed hex wrench ground as a scraper to match whatever profile I want. For this tea strainer, I have ground it to a round-nosed shape. I also pull a burr on it and use it as a shear-scraper.
Tip!
When you buy a new spring caliper, its ends will be sharp. File the ends until they are smooth and round, finishing with 320 grit abrasive. The caliper’s points will touch the wood as it spins, so it is import they will rub and not engage in the wood.
Turn the Handles
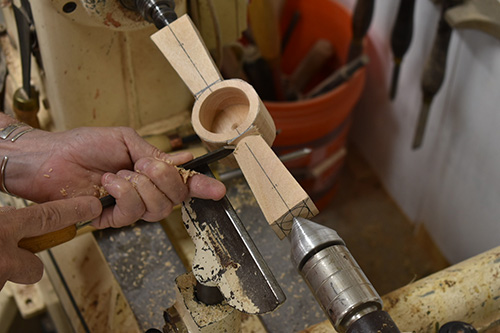
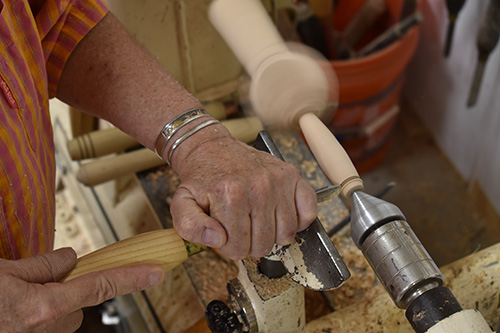
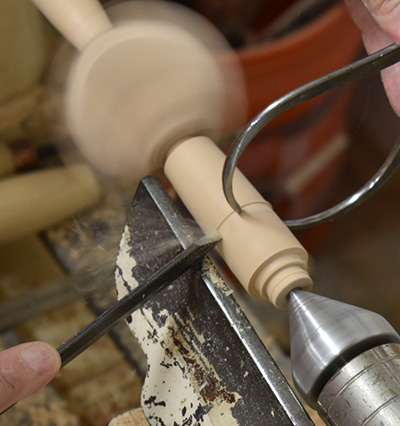
Mount the partially shaped workpiece between centers. I used the angled parting tool with the longer side next to the bowl. With the lathe spinning at 1200 to 1800 rpm, I skimmed a smooth edge on bowl’s side while moving the tool forward until it reached the cylinder that lives within the square of the strainer handle.

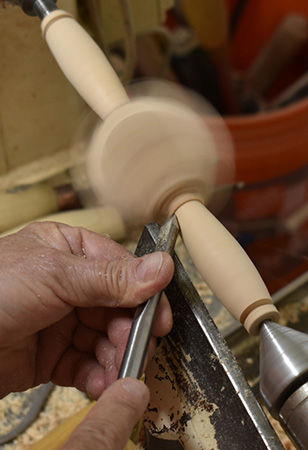
Now turn the rest of the handle to your desired shape. I used my spindle gouge, with the bevel facing the wood to make a skewing cut, moving from handle end toward the bowl.
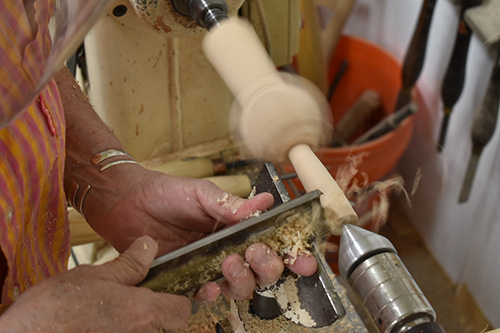
With the roughing gouge, cut in the other direction and remove the stock closest to the end. It is difficult to use the roughing gouge for the entire handle because of the limited visibility caused by the spinning bowl section. Be careful not to get your hand or tool too close to the bowl.
With one handle shaped, mark your desired handle length. I always leave at least an extra 1/2″ at each end so the center points from the drives will not remain in the finished piece. Make a partial cut with the spindle gouge to denote the length of the handle and to begin defining the shape of the end. Then take the piece off the lathe and flip it end for end so your body will be in the same stance when you turn the other handle. It is always easier to repeat a shape if you come at it from the same body position.
Replicating the handle shape from one side to the other is not as difficult as you might think. Mark three places on the completed handle (now at the headstock side) — its two ends and the largest diameter at the center. Then transfer the locations from those marks to the roughed cylinder on the tailstock side using a ruler.
Use a spring caliper to capture the diameter of the completed handle’s end. Hold the caliper to the wood with just enough pressure that its points slide across the dimension with a little friction.
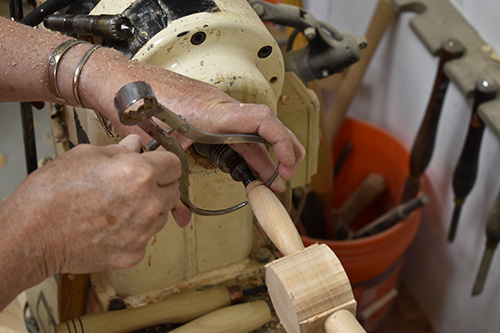
Now transfer this diameter to the unfinished handle end (tailstock side). Hold the caliper in your non-dominant hand and the parting tool in your dominant hand, and push the tool forward to make a groove in the wood.
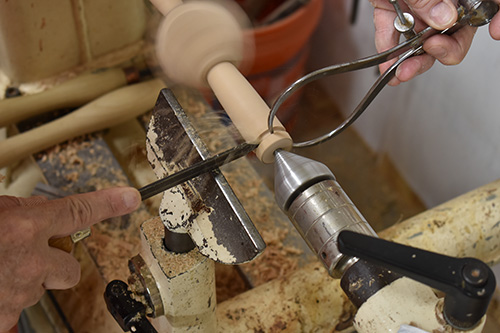
Position the pre-set caliper in this groove and let its smooth ends gently rest while the piece is spinning. Do not force the caliper down, but let its points pass over the piece when you reach the correct diameter.
Do this dimension transfer from the other two marked locations. When you connect the three parting tool depths, your duplicated handle shape will appear.
Custom-Made Scraper
I routinely make custom scrapers from long-arm hex wrenches. I buy them by the dozen, as they are cheap, hard, and hold an edge pretty well. I make tools to suit my needs quite a bit, as they can cut hours off my time spent on a project. You could also use an extra-long Phillips-head screwdriver to create a scraper.
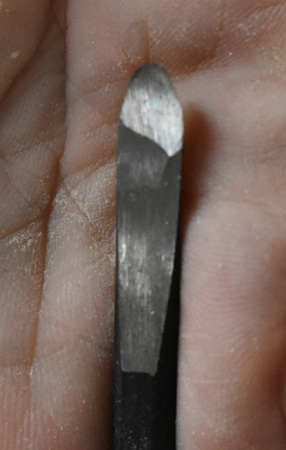
I have ground it to a round-nose profile. It should be flat on top, where the cutting edge is located. The bevel angle can vary, depending on the cut. If I find the tool is not cutting well, I will make the bevel longer. You must grind all edges sharp that will touch the wood.
Turn the Bowl
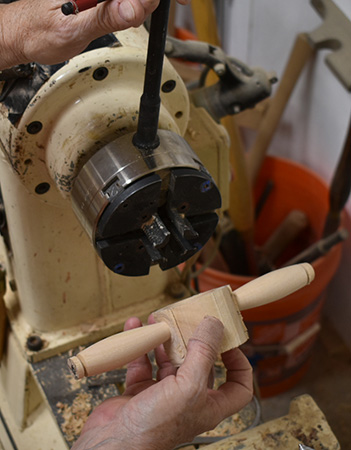
The first step in turning the bowl section is to reverse-mount it so you’ll be able to form a chucking tenon on the bottom. This will allow you to then turn the piece around and excavate the interior. I am not a proponent of expanding jaws inside a workpiece.
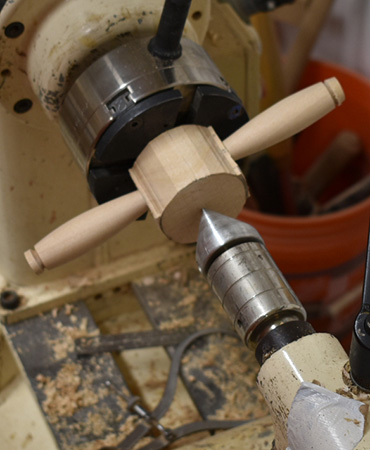
In my years of turning, the worst accidents I have seen are from this practice. I only use the jaws as a jam chuck. The bowl opening goes over the jaws, and I expand the jaws just enough to ensure the piece is centered. I then use the tailstock to push the bowl against the chuck body.
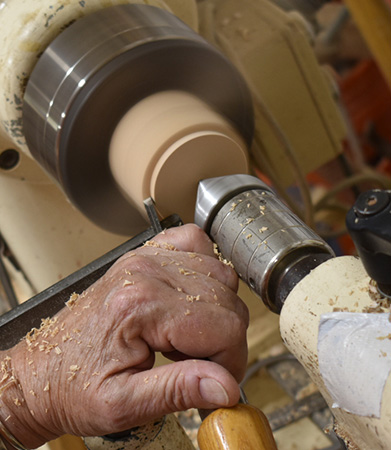
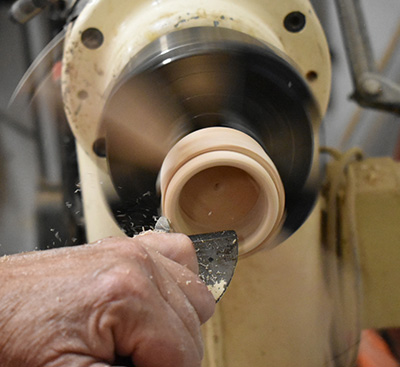
Once the piece is mounted, turn a tenon to fit your chuck jaws. I used my angled parting tool. Beware that now the handles are spinning. Position yourself so you are pushing the piece onto the chuck as you turn. This will keep your hands away from the spinning handles.
Next, I took a skimming cut on the side of the bowl, down to the handles. This is where the angled parting tool shines; its sharp leading edge cuts cleanly as you scrape the side of the bowl.
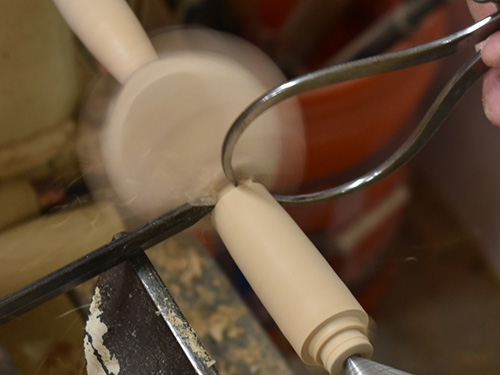
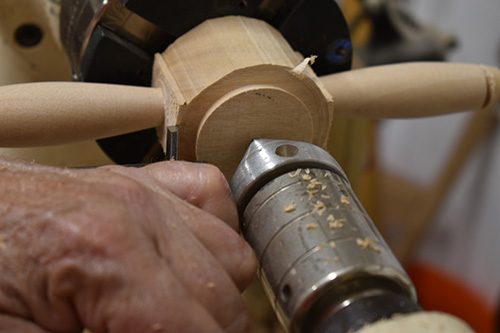
Remove the bowl, flip it around, and hold it in the chuck, tightening the jaws as much as possible. I cut the outside edge of the bowl with the parting tool, exactly as I had done from the bottom, working my way right up to the handles.
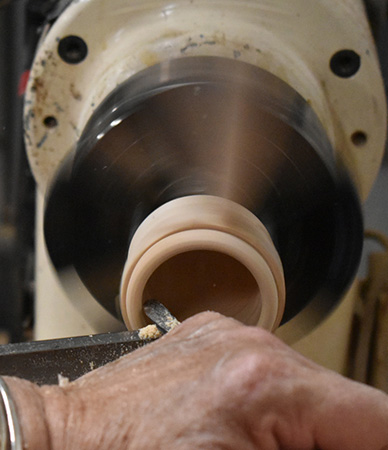
I used my custom hex tool scraper to shape the rim and the bowl’s interior. Then, with a burr on the tool, I presented the edge at an angle to shear-scrape the interior and exterior down to the handles. This gives a smooth surface that needs almost no sanding. If you do sand the rim, interior, and sides, always be mindful of the spinning handles. When I make these from wet wood I hand-sand when they are dry.

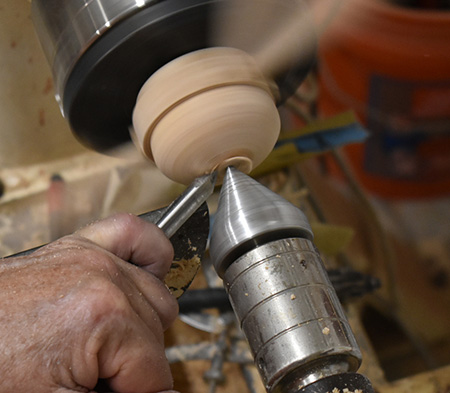
The next step is to reverse-mount the piece so you can remove the tenon and shape the bottom. My chuck jaws have sharp edges for grabbing pieces, so I positioned a rubber band around the jaws to protect the finished surface inside the bowl. Once again, I do not want to exert any pressure from inside the bowl, but gently turn the chuck key just enough to center the work and then use the tailstock to push it against the chuck. Don’t worry about the point of the cone (or live) center indenting the wood, as later that can be the location of a strainer hole.
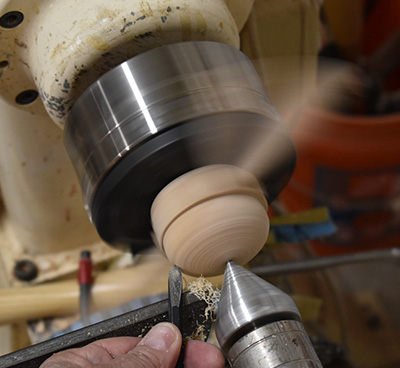
I used the hex wrench tool to shape and then shear-scrape the bottom. At the very bottom, I used a spindle gouge to finish my shape right up to the cone center. Strive for a bottom thickness of about 3/16″ (5mm).
Using the jaws as a jam chuck allows you to take it off any time you want to check the thickness. Sand, being careful of the spinning handles.
Final Steps
Remove the piece from the lathe and remount it between centers to sand the handles. Then, with the piece off the lathe, cut the handle ends to final length.
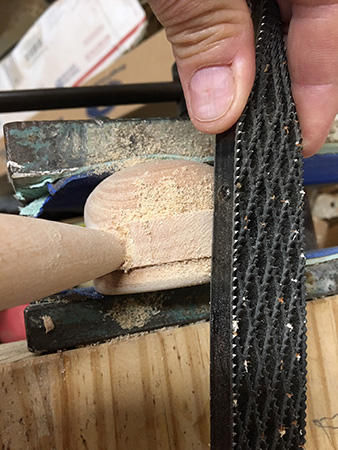
The rim, or band, of wood between the handles is still rough from the bandsaw. I used a Shinto rasp to smooth and even out this rim. I like the Shinto rasp for this operation because it is smooth on the sides and allows you to work easily around the handles without nicking them.
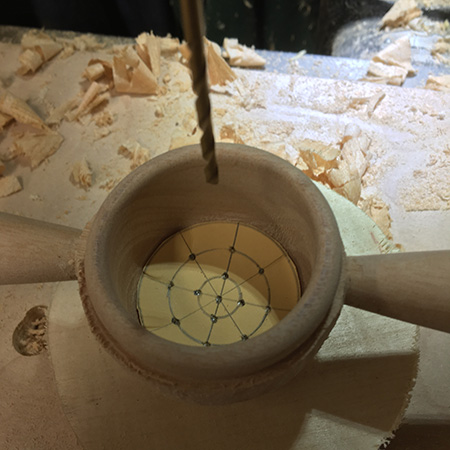
Now drill the holes in the bottom of the bowl. On a piece of paper, I drew a circle slightly smaller than the interior dimension and bisected it with a ruler and compass. Decide on the location and number of holes you want, and poke holes in the paper at those points. I put a small piece of two-sided tape on the back and pressed the paper into the bottom of the bowl. Set the piece on a sacrificial scrap of wood so it does not tear out in the back as you drill. I used a 1/8″ (3mm) drill bit.
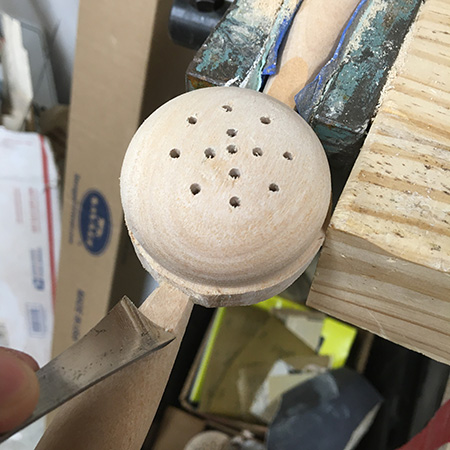
The tea strainer will sit on the edges of a cup, so use a carving tool or flat chisel to make little flats to rest on the rim of the cup. This will prevent the strainer from tipping as you pour hot water.
The rim band is the perfect place to put your mark. Burning, carving, inlay, painting, and drawing are all great ways to decorate your piece. Most importantly, when your tea strainer is completed, sit down and have a nice cup of tea!
Beth Ireland, a professional architectural woodturner and sculptor with more than thirty years of experience, lives and works in St. Petersburg, Florida. She teaches the two-month Turning Intensive at The Center for Furniture Craftsmanship in Maine, as well as workshop classes at major craft centers around the country. For more, visit bethireland.net.


