A custom-turned bottle stopper is one way to transform a fine bottle of wine or spirits into an even more sentimental gift that will be remembered long after the libation is gone. Better still, turning these attractive doodads doesn’t take much time and offers a great way to use up some small, attractive offcuts you may have been stockpiling in your scrap bin from other projects. Rockler’s solid stainless steel bottle stopper hardware, made in the U.S.A., comes in cone or teardrop shapes as well as a self-standing style and sells for around $7 apiece. They’re even more affordable if you buy a 10-pack of the cone-shaped style, as I did for this article. So while these little gems don’t cost a great deal to make, they have the appearance and heft in hand of a quality keepsake that can be used over and over again. They’re also a hoot to make!
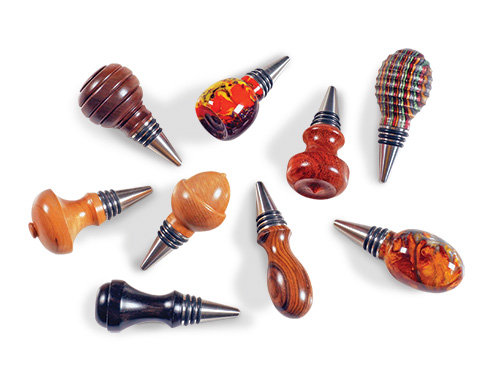
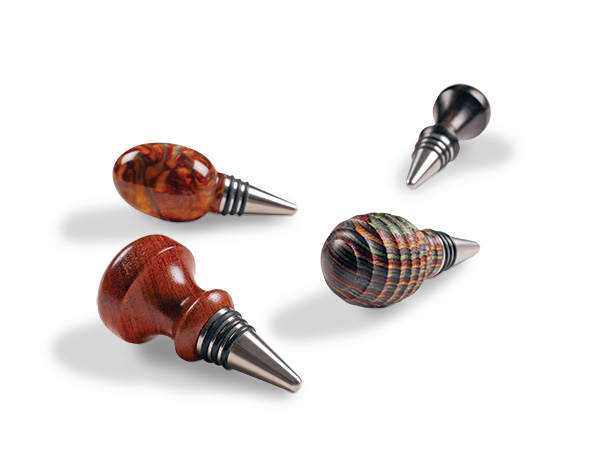
I made a total of nine different styles of stoppers, each from a different wood species or material type. That’s another aspect of this little turning project you’ll enjoy: you have the freedom to create nearly any “knob” profile that suits your fancy, as well as the potential to turn the top portion from a wide variety of wood colors and grain patterns. I used cherry, maple, Bolivian rosewood, ebony and figured walnut for mine. I also turned three from color-laminated birch Spectraply and two varieties of swirly multi-colored resin blocks from Rockler.
Stopper Turning Tool Options
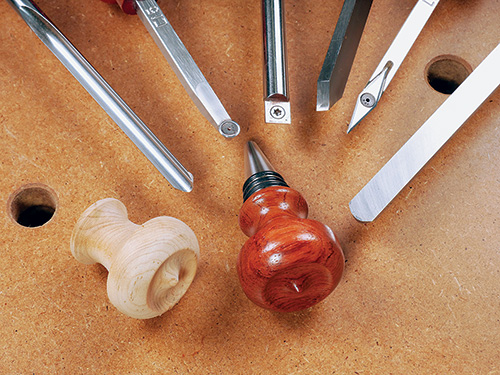
If you’re new to woodturning and apprehensive about using conventional high-speed steel turning tools, today’s carbide insert tool options offer a simpler way to dip your toe into spindle turning without requiring special tool-handling skills or the need for sharpening. I used flat, round and diamond-shaped options extensively here. I also found that “negative rake” carbide cutters worked particularly well to reduce tearout and chipping, especially on resin and splintery Spectraply. A variety of steel turning tools will also work for this application, of course. Small spindle gouges, scrapers and parting tools — the same ones you’d use for any other spindle project — will make quick work of your turning efforts here.
A Quick Exercise in Simple Spindle Turning
Forming the tops for these stoppers is a simple example of spindle turning. You’ll need a threaded mandrel for holding the turning blank in the lathe’s headstock. Rockler offers two options — one with a #2 Morse taper end that I used here or a variation that can be clamped to a drill chuck installed in the lathe instead.
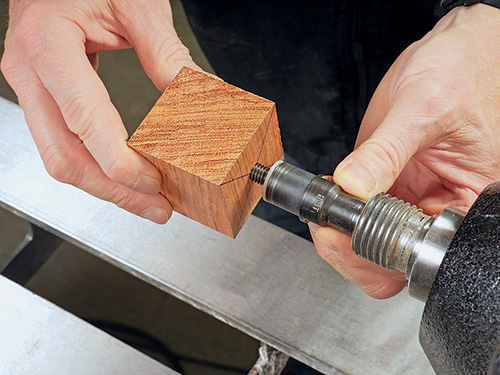
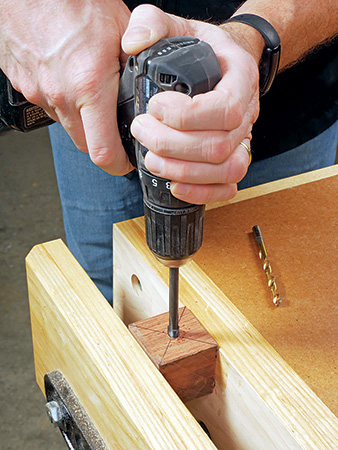
Start this project by cutting a blank for the stopper top from at least 10-1/2″-thick material about 2″ long. Find the center points for both ends by drawing diagonal lines from corner to corner. The stopper hardware is threaded with a 3/8″-16 stud, so drill a pilot hole for it using a 19/64″ or 5/16″ twist bit. Bore the hole around 5/8″ deep. Now tap the hole for threads using either a tap for wood or metal; both will work. Install the mandrel in the headstock and thread the blank onto the mandrel. Then bring the tailstock, equipped with a live center, up against the open end of the blank to support the initial “rough” stages of turning.
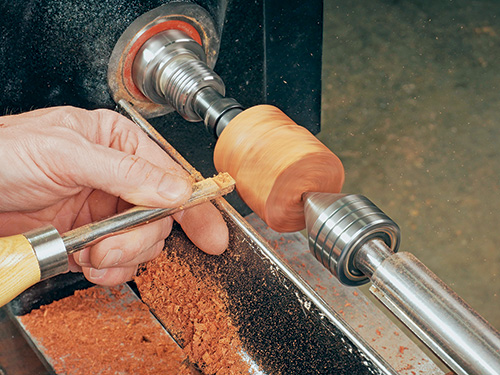
Here’s when the fun starts! Using either a flat-edged carbide-insert turning tool or a small spindle roughing gouge, turn the blank from a block shape into a cylinder with the tool’s cutting edge aligned with the lathe’s axis of rotation and the lathe set to around 800 to 1,000 rpm. Once the corners are removed, you can increase the speed to around 1,500 to 1,800 rpm.
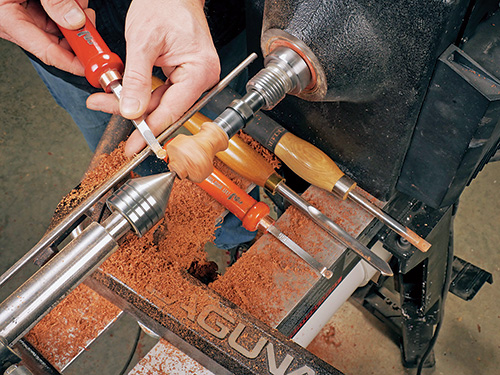
From here, let creativity guide you as you turn the top’s outer profile to shape. Turn down the end closest to the mandrel so its diameter matches the mandrel’s end diameter. This will ensure that the steel stopper hardware transitions nicely into the turned piece. I used various tools to shape the tops of my stoppers, including a small spindle gouge, round- and diamond-shaped carbide-insert tools and even a few small conventional high-speed steel scrapers, depending on the cuts I was after. When mapping out your top’s profile, remember to leave enough thickness so the threaded portion will form a strong connection, and make sure the shape offers a comfortable way to grip and pull the stopper from a bottle. Other than that, the top’s style is open to your imagination!
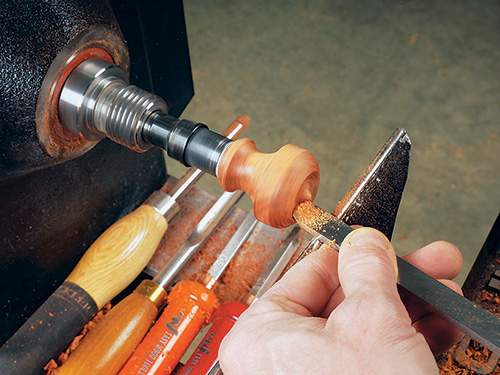
Once I was happy with the general shape of the side profile, I removed the tailstock and live center and turned the end of the stopper tops to various coves, roundovers and scallops to create a pleasing end to the form (see photo 4). Consider the end of the top to be another opportunity to flex your creativity.
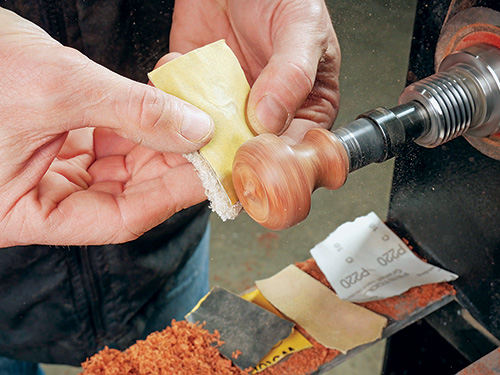
No matter how skilled you are with a sharp lathe tool, a final regimen of sanding is always in order. I started with 120 grit and progressed up through 180-, 220- and 320-grits, holding the sandpaper against small pieces of synthetic scrub pads to prevent burning my fingers. On my two resin stopper tops, I used micro-abrasive pads and sanded all the way to 12,000-grit for a silky-smooth surface. That was followed by buffing to a shine with liquid Novus® #2 Fine Scratch Remover for Plastics and a soft cloth. You can finish wooden tops for these bottle stoppers however you like. Ordinary paste wax, a friction finish or even thin CA glue could work, applying the finish with a cloth while the top spins on the lathe. Super-hard species such as ebony, cocobolo or various other rosewoods may look great just by sanding to a very high grit and burnishing the bare wood to a polish. Another option would be to topcoat with aerosol polyurethane. Since these stoppers will be subject to wine or liquor, keep in mind that shellac can be dissolved by alcohol. Avoid it here for durability’s sake.
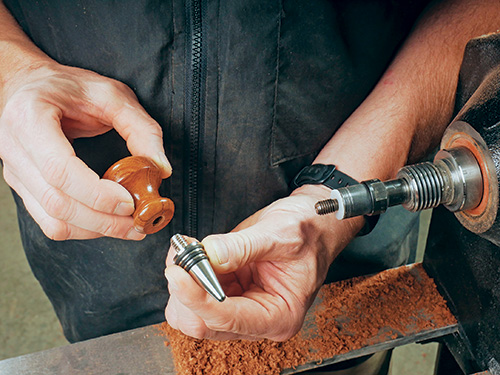
Once finished, simply unscrew the top from the mandrel and thread the stopper hardware onto it. Your little handmade jewel is now ready for its inaugural bottle.


