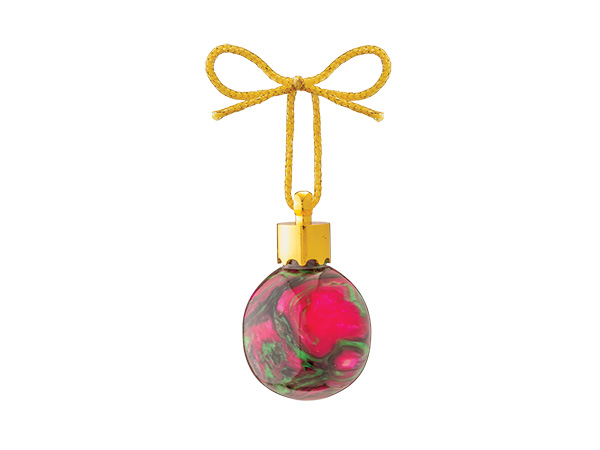
Holiday ornaments are the kind of treasures that continue to bring smiles, long after you bestow them on family and friends. In fact, I’ll bet that every year when the decorations come out, hand-turned tree ornaments trigger fond memories, like little gifts that get opened over and over again!
Thanks to some new hardware kits from Rockler, you now can create festive baubles for a Christmas tree that will rival any you can buy in a store. Even better, they’ll be “custom,” because you’ve made them yourself. This polished brass hardware can be used in tandem with any showy or exotic scrap wood you have on hand to create your little masterpieces. But I think it’s also the perfect complement to Rockler’s line of Acrylester 1-1/2″ x 1-1/2″ x 6″ handle blanks, which come in a variety of vibrant colors and patterns.
Because if you’re going to turn holiday ornaments, why not make them really dazzle on the tree, right? While two of the three kits shown above will require that you use a pen-turning mandrel to mount the turning blank between centers, the photo series on this and the next two pages will show you how to turn a simple orb-shaped ornament with a brass cap. That option doesn’t require a special pen mandrel, just the drive and live centers that already come with your lathe.
I’m also using Acrylester for this example, because its swirly colors and ability to take a high degree of polish makes me think of fine blown glass. But the good thing about acrylic is it won’t shatter into oblivion if it happens to fall from its branch over the holiday season. The material is also quite easy to turn, either with sharp traditional turning tools that I’ll be using in these photos, or with today’s carbide insert turning tools instead. Negative-rake cutters in those tools will really help with turning acrylic by reducing the incidence of chipping.
Straightforward but Small Spindle-turning
 |
 |
 |
|
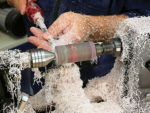
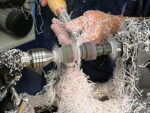
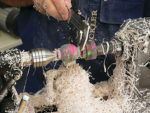
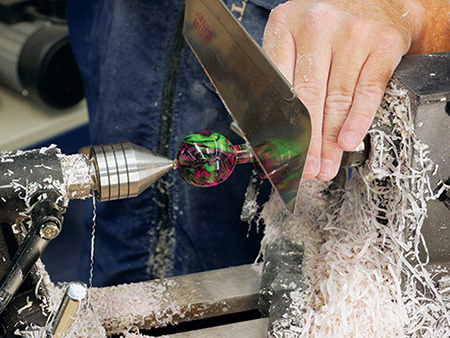
Install the blank in the lathe, and use a flat-ended scraper or carbide-insert tool to turn it into a cylinder. Acrylic often chips at first, but it will produce ribbon-like shavings once the corners are turned away. |
Use a pencil to mark off an area on the blank to a length that’s equivalent to the cylinder’s diameter. Locate this area for the sphere so you leave sufficient room for a tenon on the drive center end and a nub on the other. |
Use a parting tool to define the layout marks you made in the previous step and to establish a first depth of cut to begin forming the sphere. Verify its length with a calipers. Turn down the waste areas some on both ends. |
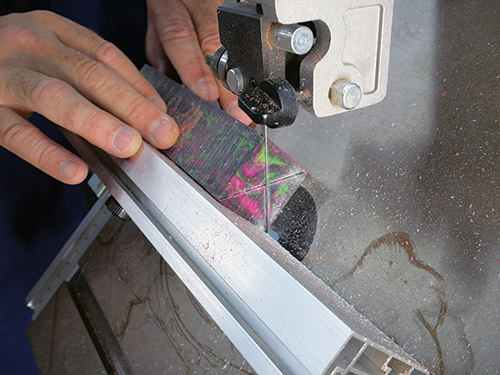
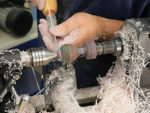
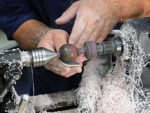
Turning this spherical ornament is really just an exercise in basic spindle-turning. I cut a piece of Acrylester to about 2-1/2″ long, so I’d have some waste material on either end of the sphere — one end becomes a short tenon for the ornament’s cap, and the other end captures the point of the lathe’s live center in the tailstock.
 |
 |
 |
|
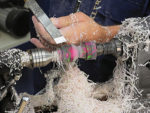
Working out from the center of the marked area, begin to shape the blank into a sphere. |
The author used a narrow skew chisel, but you could also use a spindle gouge or a carbide-insert tool for this task. |
Once you’ve rounded the sphere down to the first cutting depth left by the parting tool, deepen these end cuts again. Then continue to shape the rounded ends by removing more material. |
After turning the blank into a cylinder and marking off a portion of it that matches the circumference of the sphere, I used a small skew chisel to turn either end of my marked area into half spheres, working outward from the center. I transitioned the end of the sphere closest to the drive center into a short tenon to receive the cap.
 |
 |
 |
|
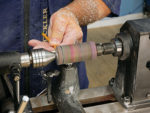
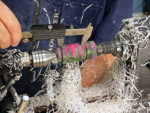
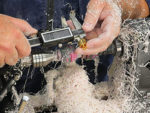
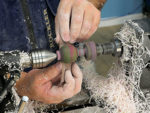
Before removing too much waste on the tenon end, verify the inside opening of the ornament’s cap with a calipers. Lock this setting. |
Use a narrow parting tool, a square-ended scraper or a carbide-insert tool to reduce the tenon’s diameter until it just matches the caliper setting created in the previous step. Use the caliper as a gage to access progress. |
The author shaped the sphere in several stages by turning the ends, sanding those areas, then turning more material from the ends. Wet/dry sandpaper works well for this initial round of rough sanding. |
I made sure to check the diameter of the tenon periodically while reducing it so it would fit snugly inside the hardware. I turned the other end of the sphere closest to the tailstock more completely round, but I left a small nub of material that seated the live center’s pointed tip.
 |
 |
 |
| Reduce the tailstock end of the sphere to a nub that’s just large enough to keep the live center’s tip secure but also nearly brings the bottom of the sphere to completely round. | Once the author was satisfied with the overall shape of the sphere, he switched from turning tools and wet/dry sandpaper to padded microabrasives. | The author continued sanding up to 12,000-grit. |
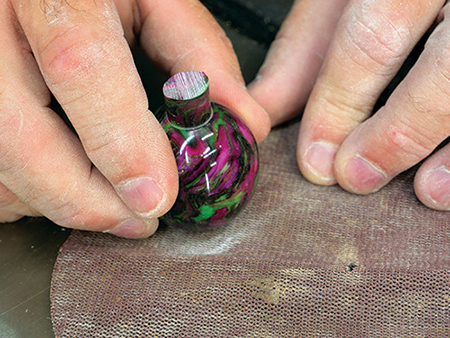
As I shaped the overall sphere, I removed material slowly to assess my progress. Turning something round is tricky at first, so take your time. Once I was satisfied with the shape, I sanded it through progressively finer grits of wet/dry paper, then switched to Micro-Mesh cushioned abrasive pads and continued sanding up to 12,000-grit.
 |
 |
|
Liquid scratch remover for plastics can raise the sheen of the sphere’s super-smooth surface to a mirror finish. Apply the polishing compound to the spinning sphere with a soft cloth. |
With the lathe turned off, mark the tenon length on the ornament, and saw through the layout mark to release the turning from the lathe. This is a more foolproof option than parting off the ornament while under power. |
I followed that by buffing the sphere with Novus® #2 liquid scratch remover for plastics, which polished the ornament until I could see my reflection in it. That wrapped up the turning process. I sawed the tenon to final length, freeing the ornament from the lathe.
 |
 |
|
Sand away the live center nub on the ornament’s bottom end, working up through the grits to match the rest of the surface finish. Then buff away the sanding scratches with liquid scratch remover. |
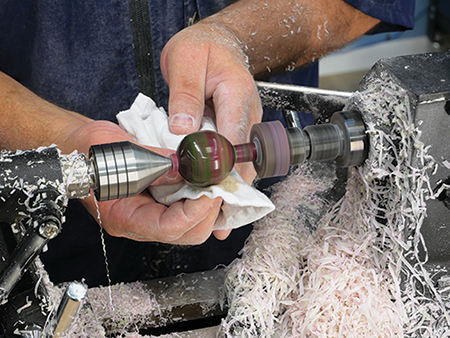
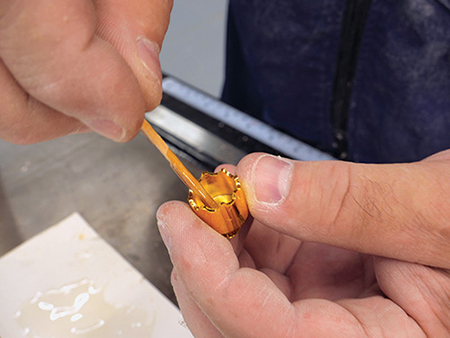
Mix up a small amount of 5-minute epoxy and apply it around the inside of the ornament’s cap with a toothpick. Press the cap into place on the tenon and hold it there until the epoxy sets. |
A little sanding and polishing on its bottom end removed the nub. Then I mixed up a dab of five-minute epoxy to glue the cap onto the tenon. That’s all it takes to create a little holiday magic to brighten any tree!
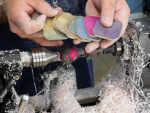
Ornament Hardware Kits
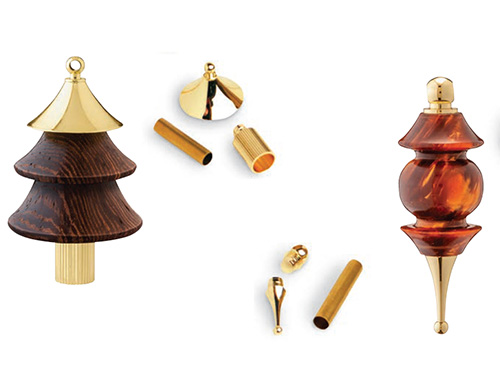
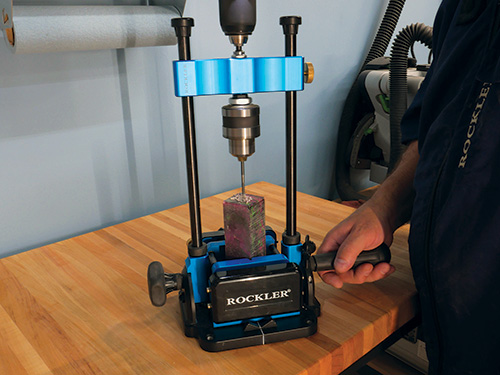
Rockler now offers several brass hardware kits for creating turned holiday ornaments. Options include caps for making spherical or other simple-shape ornaments, as well as Christmas tree and finial tip designs. The kits can be used with the wood species of your choice, as well as Acrylester handle blanks or epoxy blanks you pour yourself. Note that Tree and Finial kits require the use of a 7 mm drill bit, pen mandrel and mandrel bushings, sold separately.
Rick Hammerlund is a Rockler associate who often teaches woodturning.


