This article, “Turn a Pumpkin” is from the pages of American Woodturner and is brought to you by the America Association of Woodturners (AAW) in partnership with Woodworker’s Journal.
Glass pumpkins have turned into a huge industry, and my wife loves them, so I wondered how a wood pumpkin would go over. Turns out, they go over very well. They are fun to make, and I have sold every one I’ve ever made. Let’s take a look at how to make them. The basic process involves turning, hollowing, and carving, which is quite similar to processes used by John Jordan and Avelino Samuel, but with a vessel shaped like a pumpkin.
Sometimes, I color the pumpkins with wood bleach and/or paint. Oh, and you have to make the finial look like a pumpkin stem, which is also turned and carved. There are myriad ways to carve in wood; the following is the process I use, but certainly other methods can be used to achieve excellent results.
Shape the Pumpkin
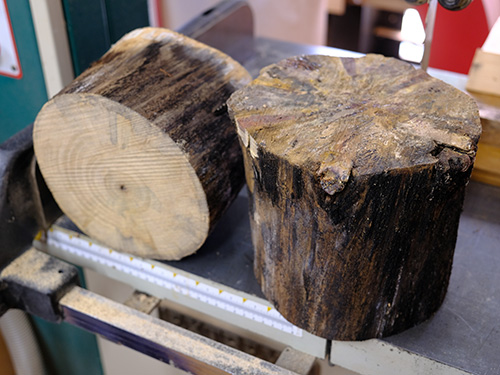
For the pumpkin I made to illustrate this article, I chose a piece of Norfolk Island pine. A set of branches was at the top of the log, so I decided to see if I could incorporate them in the top of the pumpkin. The log initially was about 14″ (36cm) long and 7″ (18cm) diameter, so the first thing I did was cut it to length for a good height-to-width ratio for a pumpkin; I kept the remainder of the log for the stem.
Before I mounted the log on the lathe, I searched the Internet for photos of real pumpkins to help guide me as I shaped my pumpkin. Since I wanted to retain the Norfolk Island pine branches on top, I wanted a pumpkin with a fairly flat top. I often print a picture and keep it near the lathe for easy reference during turning.
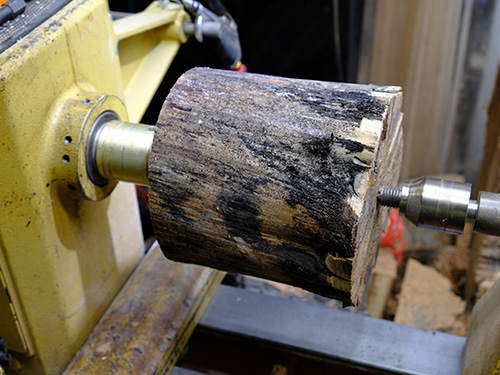
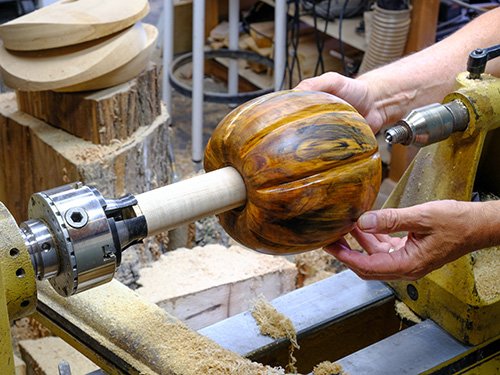
Mount the work between centers, rough-turn your pumpkin, and form a chucking tenon at the headstock side. Then begin refining its shape. The apex of a pumpkin’s curve is usually about midway up, and that worked well for my pumpkin. I was able to start at the center, make similar shaping cuts in both directions, and then come back and blend the curves in the middle.
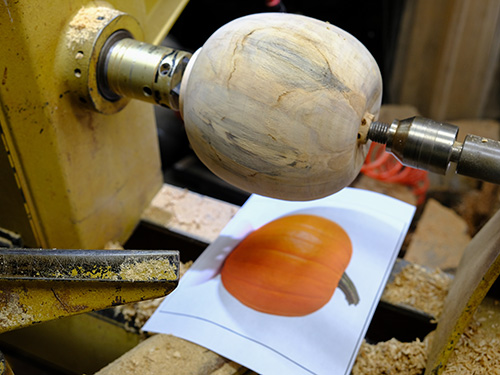
Since I was turning a larger workpiece in spindle orientation (with the grain running parallel to the lathe’s bed ways), a spindleroughing gouge was a good choice for most of the shaping. As I started seeing what the piece would look like, I decided to deviate from the photo and make my pumpkin a little taller than I had intended. A taller pumpkin would enhance the lines of the Norfolk Island pine branches and the spalting in this log.
Hollow the Pumpkin
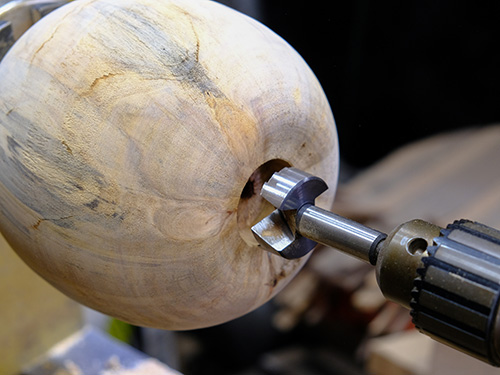
Remount the work in a chuck, and begin the hollowing process by drilling a hole with a large Forstner bit. This creates a good starting point for hollowing, using whatever hollowing tools you are comfortable with.
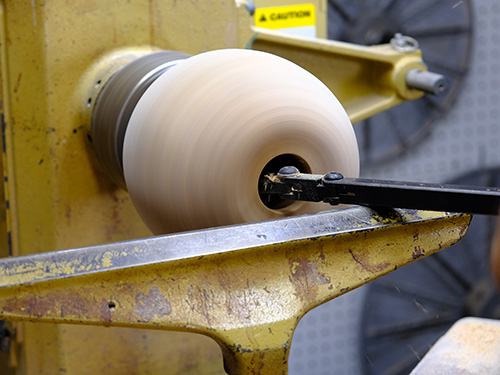
When I hollow my pumpkins, I leave the walls quite a bit thicker than I do for most hollow forms. There are two reasons for this. First, you will be carving into the sides, so a little extra wood for the grooves is needed. And second, real pumpkins are pretty heavy.
One of the things I remember from my youth is picking pumpkins at the pumpkin patch that were too heavy for my young body to handle; I want to evoke that feeling with my wood pumpkins. I want them to feel like you are picking up a real pumpkin, so my final wall thickness is typically about 3/4″ (19mm).
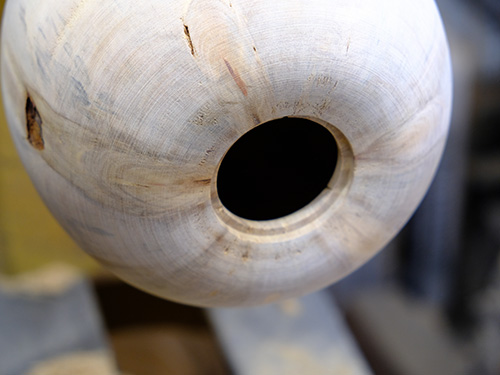
After the piece is hollowed, turn a recess in the top to later accept a spigot at the base of the stem. I have made pumpkins with wide openings, like you might see if you carved a jack-o-lantern at Halloween, but generally I prefer a small opening, where just the stem is removable.
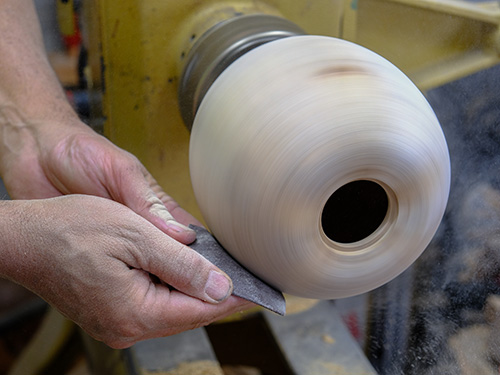
After I have completed the hollowing, I give the piece a light sanding so I can evaluate the wood for the placement of the grooves. In this case, there were two bark inclusions that stood out.
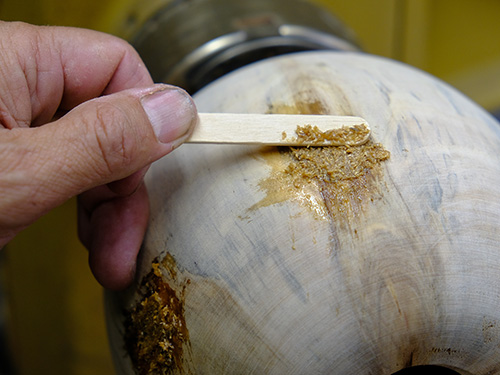
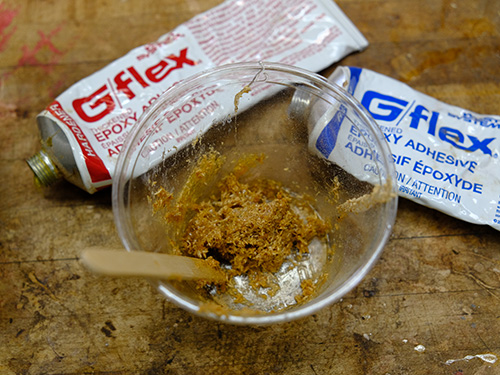
I could have left the inclusions, as real pumpkins aren’t perfect, but I decided to fill them with epoxy and sawdust. I prefer West System’s G-Flex epoxy, as it is designed to accommodate wood movement, so I mixed up a small batch and added some of the shavings left over from hollowing.
Form the Pumpkin’s Grooves
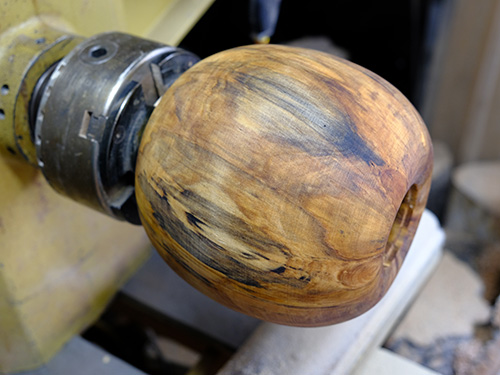
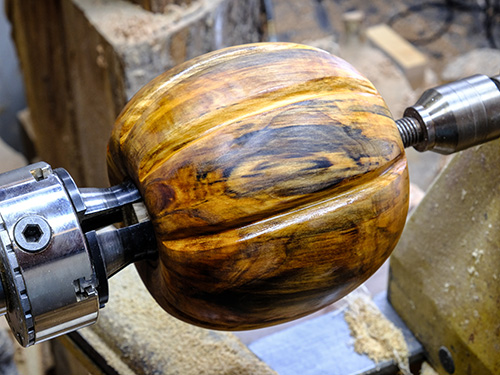
Norfolk Island pine can look rather plain until you oil it. To better see where I wanted the grooves, I added oil to the piece, which really made the grain and spalting stand out.
Pumpkins come in all shapes and sizes and can have many thin grooves, a few bold ones, or anywhere in between. Using the Norfolk Island pine branches as a guide, I decided to make eight deep grooves; good thing I left plenty of wall thickness to work with.
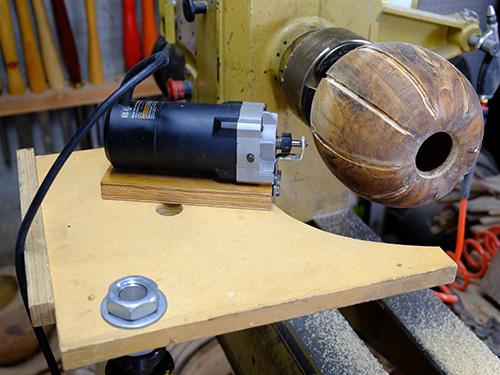
Using my Harvey Fein-inspired router setup with a small-radius grooving bit, I routed the grooves into the pumpkin. This step could be done by power-carving or even handcarving, but I find the router makes quick work of this process.
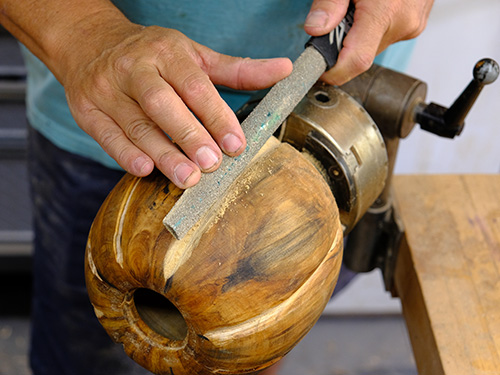
After routing the grooves, I rounded their edges over using a series of rasps, then refined them with files and sandpaper. I have found that for carving on curved surfaces, especially in endgrain wood, Kutzall rasps are great tools. They aren’t as sensitive to grain direction as traditional rasps, and they cut on both the push and pull strokes, making this process quick and easy.
Make a Stem
The stem does not have to be from the same wood as the pumpkin, but I decided to use the remaining piece cut off from the Norfolk Island pine log. When I started making the stem, I hadn’t yet decided how I wanted to color it, but having grain that matched the pumpkin offered some nice options.
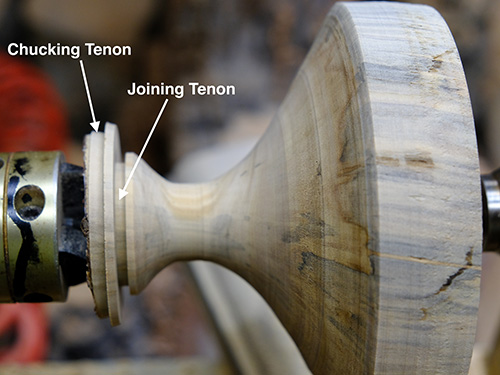
To make the stem, you could simply start with a scrap of wood and begin carving, but since I had a pretty big chunk of wood, I decided to use the lathe to remove the bulk of the material, accounting for a curve in the stem. Using the lathe also allowed me to form two tenons—one for mounting the stem in a chuck and one for fitting the stem into the recess at the top of the pumpkin. It is important to measure the tenon that will fit into the pumpkin accurately, as it will be difficult to re-turn it once the stem is carved. Ultimately, you may have to fine-tune the recess in the pumpkin to fit the stem.
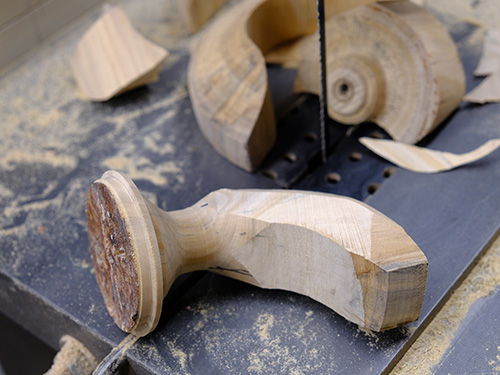
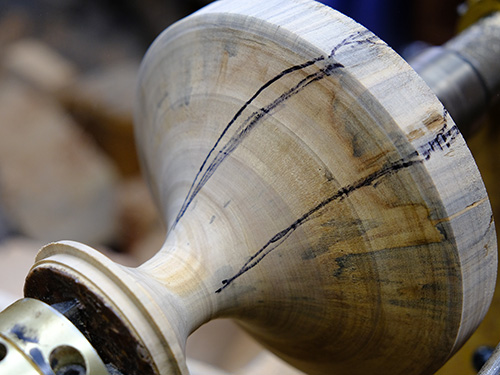
After turning the stem, I still had a lot of wood to cut away, but you can see from the lines I drew that the turned curve established the basic shape of the stem. At the bandsaw, I cut away more of the wood in preparation for carving.
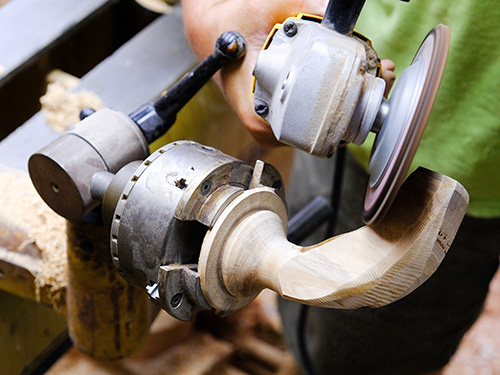
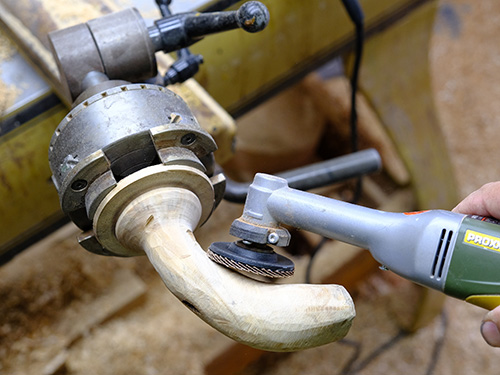
With the stem remounted in the chuck, I held the chuck in my Trent Bosch carving stand. With the work held securely, I was able to shape the pumpkin stem using first an angle grinder and then a Proxxon long-neck grinder with sanding flaps. The Proxxon tool is excellent for finessing the final shape and leaving a decent surface.
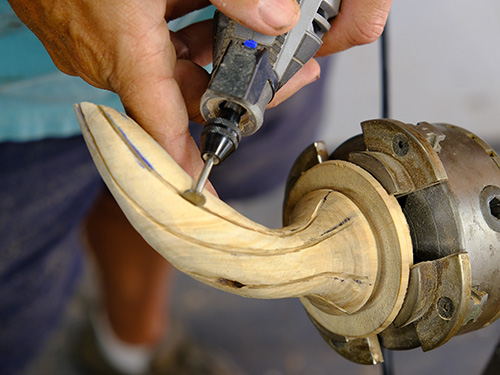
With the basic stem shape formed, you can begin carving the grooves in the stem. I like the grooves to have a twist to them, so I started by drawing their locations freehand. I then used a rotary tool to cut grooves along the lines I had drawn. Finally, I eased the edges of the grooves using a round carving bit, then completed the grooves with rasps, files, and sandpaper. Since actual pumpkin stems are pretty rough, I did not feel the need to make mine too smooth. Often the surface off the rasp or file is just about right.
Use a parting tool to separate the stem from the chuck, or simply cut it off using a hand saw (with the lathe off).
Remove Chucking Tenon
Once the stem is separated from the chuck, check its fit in the recess in the top of the pumpkin. It may be necessary to remount the pumpkin on the lathe to refine the width of the recess.
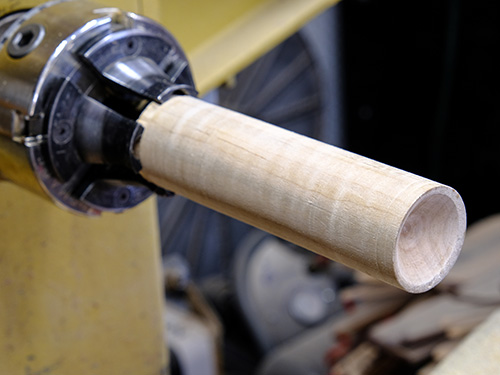
When you have achieved a good fit of the stem to the pumpkin, it is time to remove the chucking tenon from the pumpkin. Since there is no easy way to reverse-mount the pumpkin in a chuck, I create a custom jam chuck in the form of a long dowel that reaches into the bottom of the pumpkin.
Turn a dowel small enough to fit through the pumpkin’s opening, then form a slight recess in its end. The recess ensures the pumpkin is pressed against a wider base and not a small point. Applying pressure from the tailstock to hold the pumpkin on the jam chuck, turn away the chucking tenon.
Color at Will

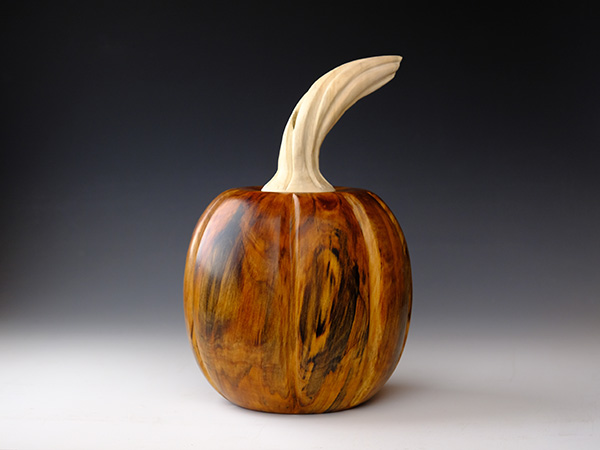
6″ × 5-1/2″ (15cm × 14cm)
The final decision is whether to color the pumpkin and/or stem or leave them natural. In this case, I wanted to see the grain of the wood but give the stem some contrast, so I bleached the stem with two-part wood bleach.
Just about anything goes when it comes to coloring—don’t be afraid to use bold and crazy colors on your pumpkin and stem. Above all, have fun.
John Beaver lives in Pacific Palisades, California, where his proximity to the ocean inspires his signature Wave Bowl turnings. You can see more of his work at johnbeaver.net.


