This article, “Turn a Beehive Ornament,” is from the pages of American Woodturner and is brought to you by the America Association of Woodturners (AAW) in partnership with Woodworker’s Journal.
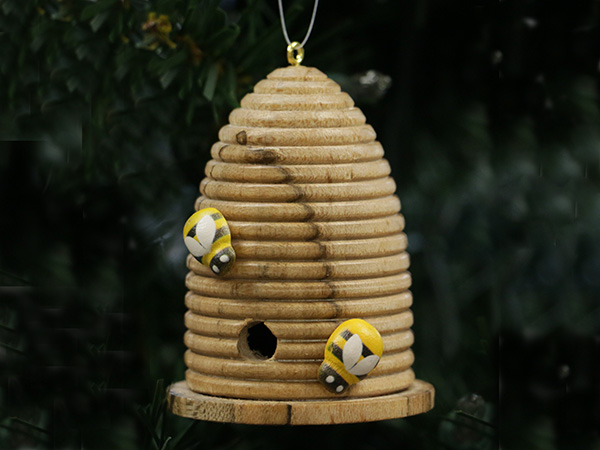
Every year, I try to come up with a unique holiday ornament. In 2018, my wife suggested I turn a beehive ornament. Beekeeping has become a serious concern in our county in Florida, as bees are under attack from several dangers, such as pesticides and mites. Bees are so important to our agricultural community that they deserve a special place in our consciousness. The beehive ornaments have been very popular in my holiday sales, and they are relatively easy to make.

Although today’s beehives are essentially wood boxes, in the past they were made of woven straw coils formed into an upside-down, basket-like structure called a skep. Skeps are seldom used today because the wood box hive is so much more efficient. Yet the skep
Rough-turn the Blank
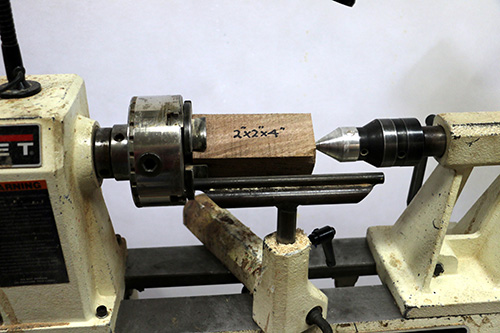
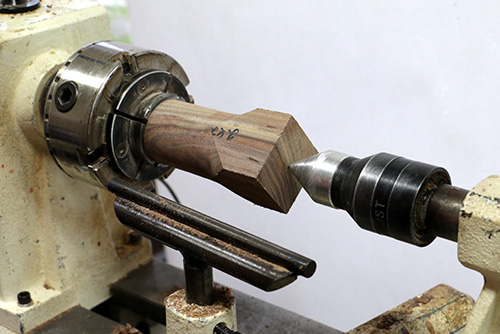
Start with a blank 2″ (5cm) square and 4″ (10cm) long. The first step is to rough-turn part of the blank and then form a chucking tenon. In this case, my initial work-holding method was to capture the square blank in the chuck jaws and bring up the live center for added support.
Note: When chucking a square blank, always use the tailstock live center to prevent it from being pulled out of the chuck during turning.
An alternate initial holding method is to mount the blank between centers. Rough the tailstock end of the blank to round and form a tenon sized for your chuck.
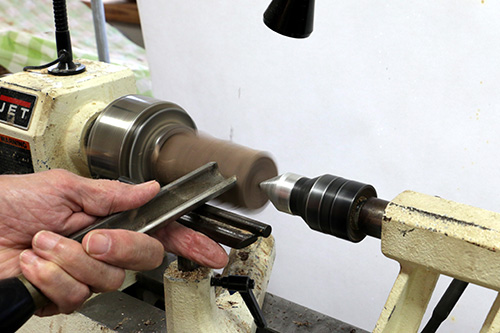
Reverse the blank and secure the tenon in the chuck. Using a proper tenon (as opposed to proceeding with the square blank chucked in the jaws) provides lateral support for the blank, so it can be drilled and turned without the live center in place.
Still, it is always safer to use the live center when possible for the greatest amount of support. Finish roughing the blank to round, and square up the end of the blank using a spindle gouge or parting tool.
Drill, Shape, and Hollow
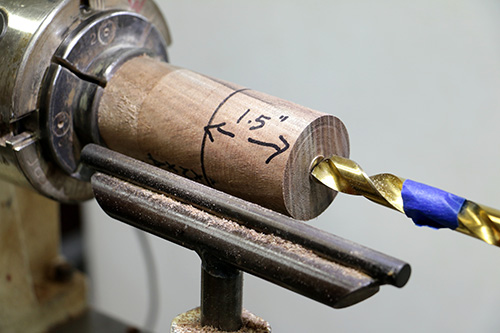
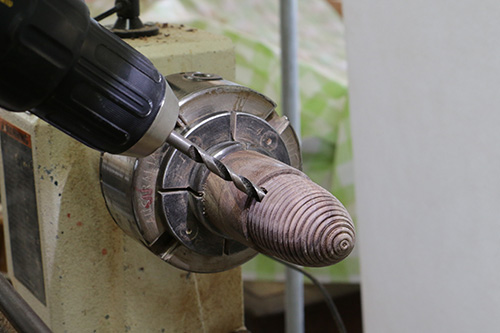
Draw a line 1-1/2″ (38mm) from the end to indicate drilling depth. Using a 1/2″ (13mm) drill bit mounted in a drill chuck in your tailstock, bore a hole 1-1/2″ deep; this hole will aid in hollowing the beehive later.
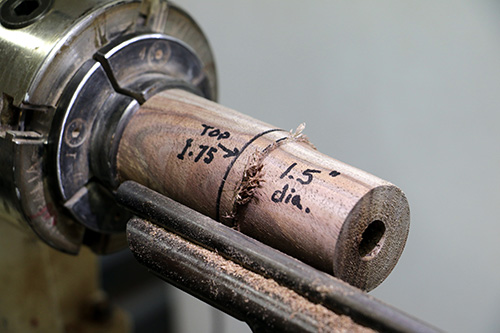
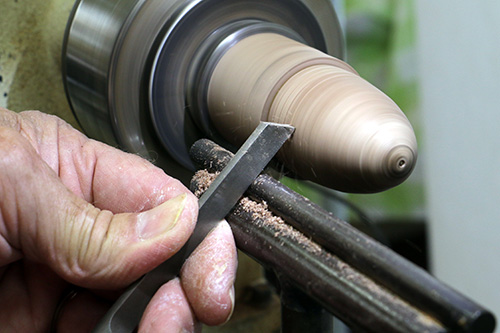
Now draw another line 1-3/4″ (4cm) from the end to indicate the top of the beehive. Using a bedan or parting tool, reduce the diameter of the blank from the tailstock end to the 1-1/2″ mark to 1-1/2″ diameter. Don’t reduce the diameter of the rest of the blank, as it will later become the base of the beehive.
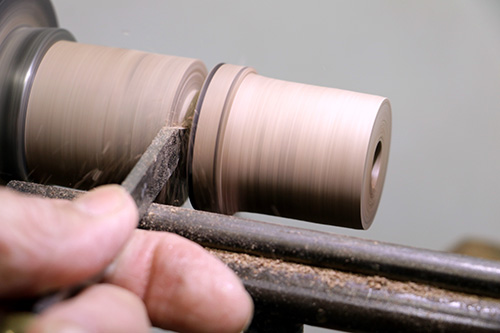
Using a parting tool, form a groove just to the left of the 1-3/4″ mark, defining the length of the beehive. Leave at least 3/4″ (19mm) diameter to support the beehive while you hollow the inside.
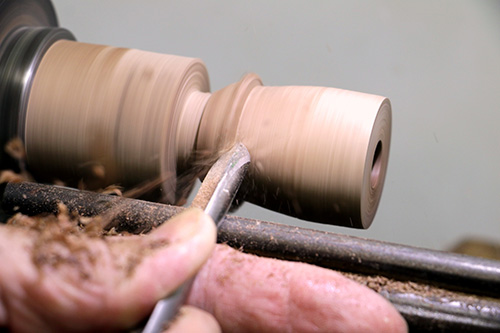
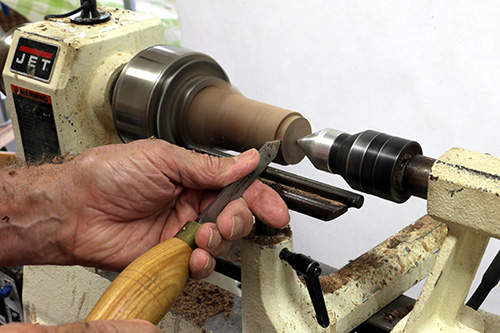
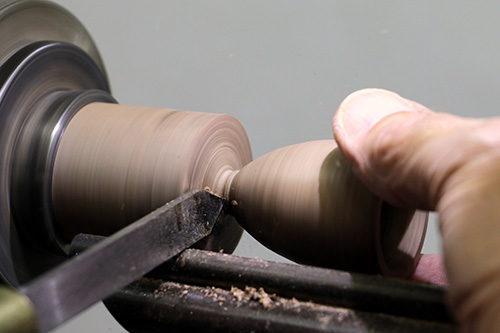
Start shaping the outside of the beehive. I like to use a small spindle gouge, cutting from the largest diameter downhill to the smallest diameter — in this case, from right to left. The rough-turned outer profile will aid in determining wall thickness when you are hollowing.
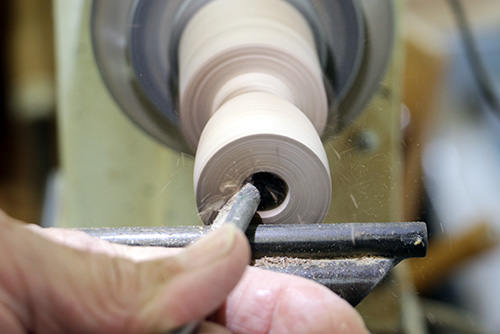
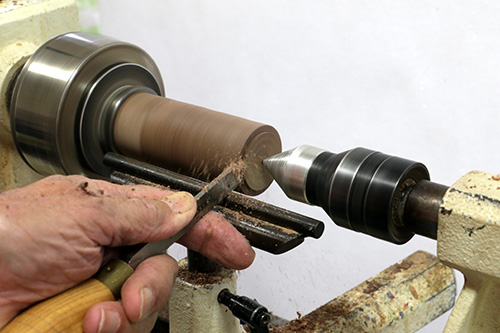
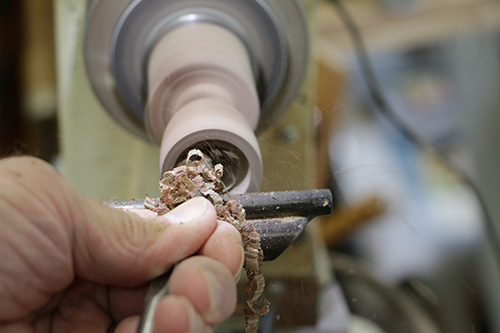
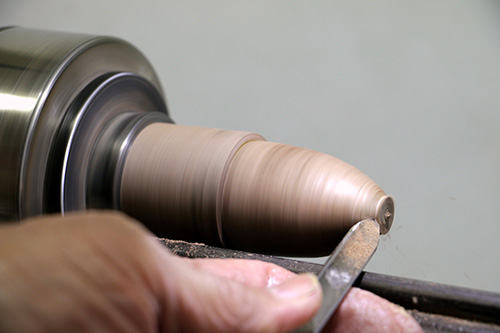
Move the toolrest to the end of the beehive and set the height so that the point of a 3/8″ (9.5mm) spindle gouge will be cutting at the centerline of the hole when the gouge handle is parallel to the lathe bed. To hollow the beehive, rotate the flute of the spindle gouge to the left so that it faces the 10 o’clock position.
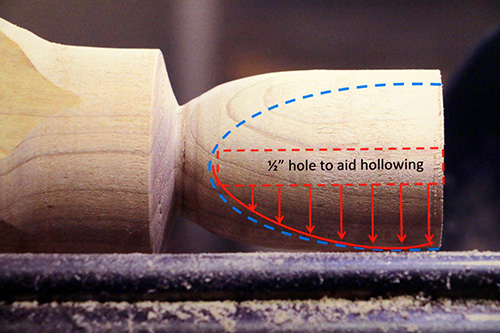
Pull the tool from the center hole toward the outside rim of the beehive. The image shows the direction of the hollowing cuts, from the center hole outward. As you hollow deeper, pull the gouge along the inside edge to remove the chips and to cut the walls to an even thickness.
The final wall thickness should be 1/8″ to 3/16″ (3mm to 5mm); don’t make the outer wall too thin because later you will form beads on the exterior surface that will go 1/16″ (1.5mm) deep.
You can now use the spindle gouge to shape the top a bit more before parting it off. You will have a chance to finish the top in a later step.
Reverse-mount, Form Beads
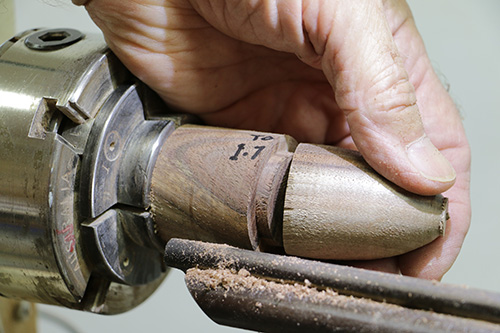
Use a parting tool to form a tenon about 1/8″ deep on the waste wood that remains in the chuck. Then glue the beehive to the tenon. When the glue has set, use a spindle gouge to finish rounding the top of the beehive.
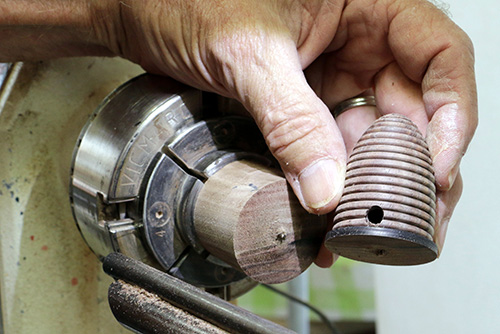
A creative alternative, if you have the tools and skills, is to thread the bottom of the beehive to the top, rather than gluing it. This would create a beehive box such as the one shown in this article’s opening image.
Make a line about 1/8″ past the glue joint to indicate where the bottom of the ornament is going to be.
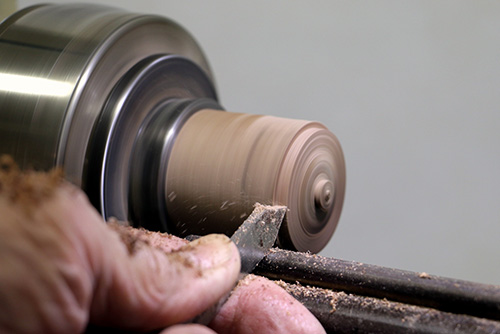
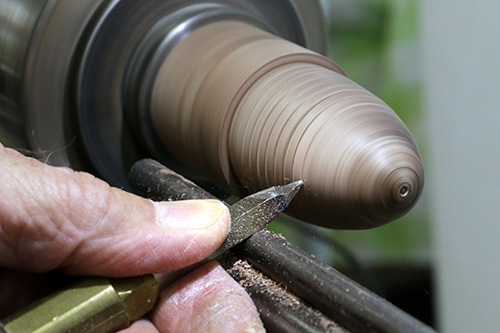
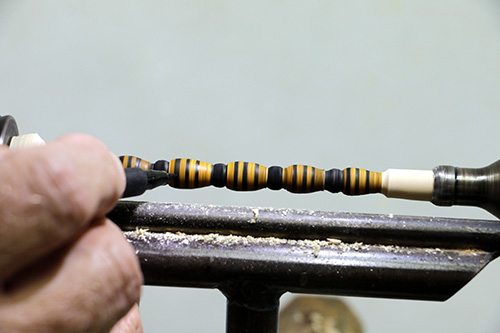
The next few steps involve turning and finishing the beads. Shown above is a commercially available beading tool. While this is a handy way to make nice, even beads, it isn’t necessary. You can also use a shop-made point tool to form the beads.
When you have finished forming the beads on the outside of the beehive, sand between the beads with the edge of a piece of 220-grit sandpaper.
Drill an entrance hole into the hive just above the base using a 1/4″ twist bit. This is also a good time to drill a small hole in the top of the beehive for an eye screw.
For this ornament, I used a black ink marker to emphasize the base of the hive before parting it off. Sand the bottom and apply the finish of your choice. I prefer a lacquer sanding sealer, which I can buff using a buffing wheel.
Turn the Bees
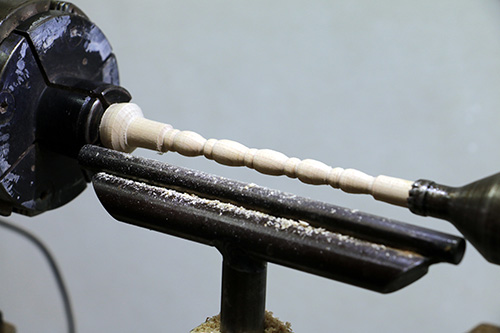
You can purchase ready-made bees from a craft supply store, but I have found that customers buying these ornaments prefer my shop-turned bees. Start with a length of 3/4″-square scrap wood. Mount the blank in spigot jaws and support it using the tailstock live center. Turn the blank down to a 3/8″ cylinder. You could also simply use a 3/8″-diameter dowel secured by gluing it into an appropriately sized hole in a wasteblock.
Turn a series of bee body shapes using a small spindle gouge. This is basically a series of beads . The head and thorax of a finished bee will be about 5/8″ (16mm) long, with the head being 1/8″ long and the thorax 1/2″ long. I use India ink markers to color the heads and thoraxes of the bees After coloring the bees, apply a fixative spray so you can paint wings over the colored bodies later.
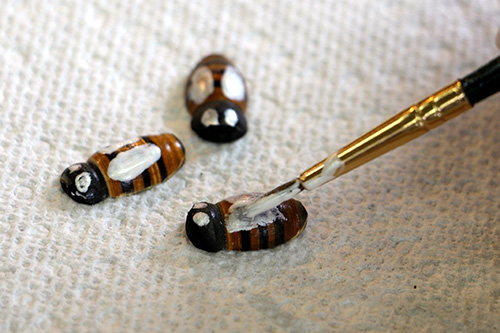
Cut the turned bees in half using a scroll saw, thin-kerf bandsaw, or a thin-kerf Japanese pull saw. Safety Note: When cutting round pieces on a scroll saw or bandsaw, be sure to hold the work securely in a V-block or other jig. Then crosscut the bees apart and use a sanding stick (made by gluing sandpaper to a craft stick) to smooth the cut ends. Use the same color markers to touch up the cut ends.
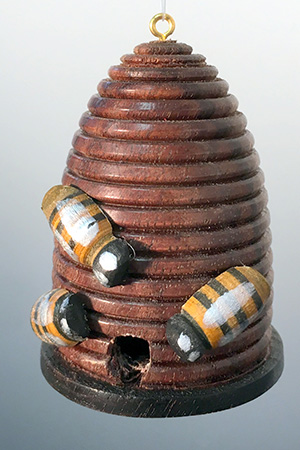
To add wings to the bees, use a small brush to dab a touch of pearlescent paint to the thorax . Glue the bees to the surface of the hive using silicone or craft glue.
Your completed beehive ornament will make a great gift any time of year. They always remind me of the importance of honeybees as pollinators for our vegetables, fruits, and flowers.
Walt Wager has been an active member of the AAW since 2002. He teaches woodturning at Camelot’s Woodworking Studio in Tallahassee, Florida. View Walt’s work on his website.


