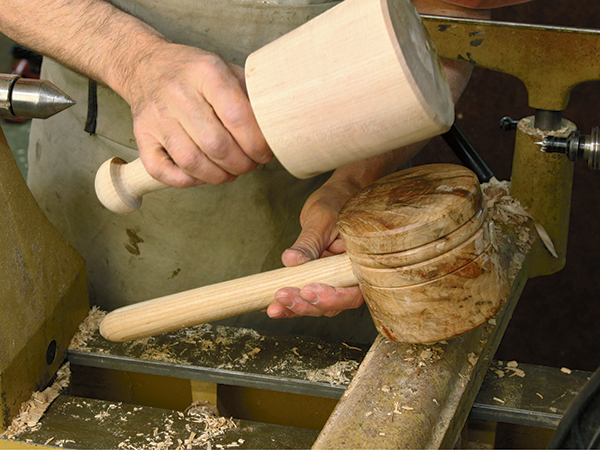
Here are two useful shop tools: a carver’s mallet and a wooden assembly hammer.
The carver’s mallet is necessary for driving the gouge if you haven’t gotten around to carving a bowl yet. This is a nice beginning spindle exercise that I throw at aspiring turners. While the carver’s mallet is straight spindle turning, the assembly hammer includes some unique lathe drilling techniques that are not easily accomplished on a drill press.
Adding to the fun factor of these projects is that the mallet and the head of the hammer can be turned from green wood. It can be a freshly fallen tree or even a piece of firewood — seasoned or unseasoned. If you use an 18″ billet of firewood, use the middle section and discard the ends. Turning green wood or even seasoned firewood (which is 15% water content) is really fun! With sharp tools, it’s like turning on steroids with long flowing chips flying from your tools.
Carving Mallet
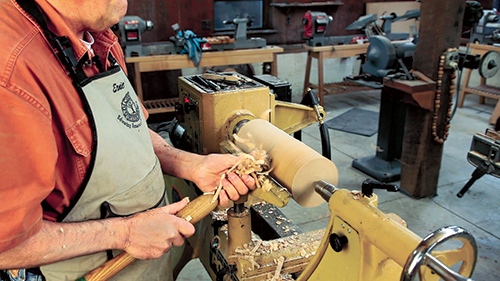
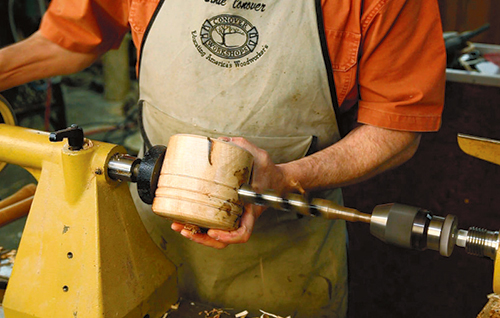
The carver’s mallet needs to start with a 3″ to 5″ cylinder between 10″ and 12″ long depending on the starting diameter. Once you have a suitable billet, find as near the center of each end as possible and turn it cylindrical with a sharp spindle roughing out gouge. I prefer to orient the head of the mallet to the headstock end of the lathe. Face both ends dead square with a spindle gouge. It is very important that the head have a dead square end so it can strike close to an edge.
Mark the head section and narrow down the handle area with the spindle roughing-out gouge. It is important to stay on the bevel at the juncture between the head and handle or the gouge will ride up onto the head section, requiring a change of design. This means that you’ll hold the spindle roughing-out gouge angled to the right if you follow my chucking scheme.
The head needs a bit of back taper to make a serviceable mallet. Tapering makes the surface of the cone that forms the head parallel to your workbench as you strike, allowing for better transfer of energy to chisels and carving tools. I rough the taper with the roughing-out gouge and finish it with a skew; however, nearly as good a finish may be obtained by angling the gouge to the work and walking it down the conical surface.
The slope between the head and handle will be quite gentle as left by the roughing gouge. I employ a spindle gouge to steepen this angle to approximately a 15° angle, segueing to a radius as it meets the handle itself. The handle is really two gentle coves with a bead between them. This is all seamless but leaves you with an ergonomic handle. The swelling fits your palm and gives great control. I finish 90% of this area with a skew, negating the need for sanding. The butt of the handle is a sharp cove ending in a half-round bead. This ensures the mallet won’t fly from your hand regardless of the intensity of your pounding. This is simple turning, but the variation in diameters is challenging. Wander off the bevel and gouges will climb up to the greatest diameter with harsh consequences.
Assembly Hammer
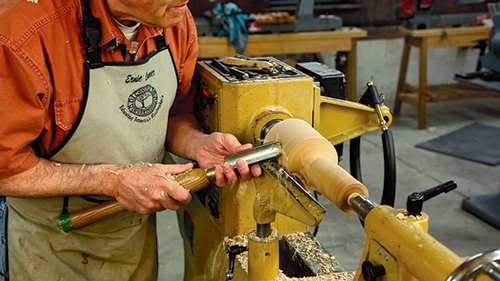
The assembly hammer ratchets up your skills with some interesting drilling techniques. The head can be turned from green or dry wood, depending on what you have available. Start with a billet that will yield 4″ to 5″ diameter by 4″ to 4-1⁄2″ long (depending on the diameter). Turn it round with a spindle roughing-out gouge and face the ends dead square with a spindle gouge. Make a finishing cut with a skew, or use the roughing-out gouge technique I outlined on the carver’s mallet. Find the center of the head with dividers and make a very small V-groove with the toe of your skew.
Now bring one face to a gentle convex shape with your spindle gouge. The other face should remain dead square, but put a heavy chamfer at the edge to ameliorate splitting. I now strike two grooves about 3/8″ apart, equidistant between the center groove and the convex face. I turn a bead between the two grooves to quickly identify the convex face.
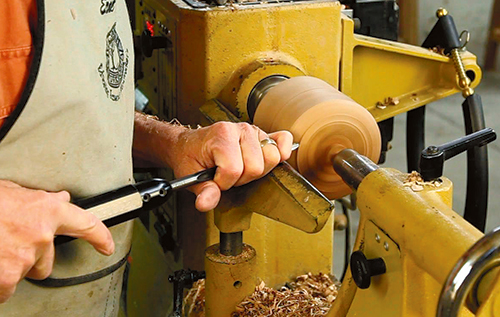
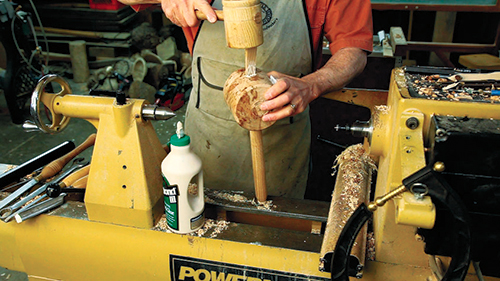
The next step is drilling a hole that passes through the center of the cylinder that forms the head, which is tricky on a drill press. A time-honored lathe accessory is a crotch-center that makes the task simple. While crotch-centers were a common listing in old Delta catalogs, you will have to find one used today, or make one as shown at right. It works with the cylinder nested in the V that runs flat through the crotch-center while you advance the tailstock wheel against a drill running in the headstock. The resulting hole has to pass through the center axis. I use a 1-1⁄16″ drill because I have an open-end wrench of that size, and I use it as a sizing gauge when turning the tenon on the end of the handle. End the tenon with a slight shoulder, leaving the rest of the handle a bit fatter.
In preparation for assembly, cut a slot about two-thirds down the length of the tenon. Cut a 15/16″-wide wedge that has a long gradual taper in the 3° to 5° range. Smear glue on the tenon, the wedge and the walls of the hole in the mallet head. Tap the handle home until it bottoms out on the shoulder with the slot aligned so that it is across the head and will apply pressure along the grain of the head. Trim the turning bosses and the wedge, and you now have a great assembly mallet. Finish with shellac, oil or varnish. If the head is from green wood it will dry better with some finish on the end grain, but if turned from dry wood, no finish at all is a good option. And always remember the woodturner’s motto: Mallets towards none.
Make a Crotch-Center
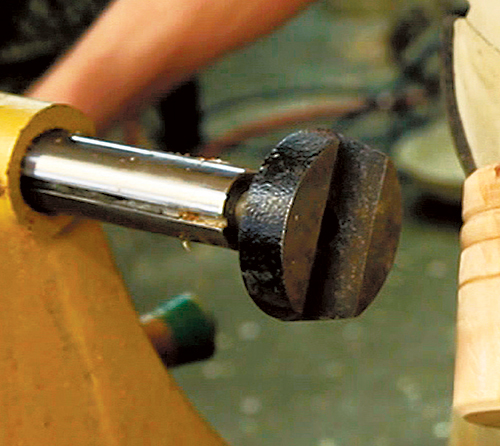
To make a wooden crotch-center, turn a Morse taper 3-1⁄8″ long; small end to 17/32″ diameter and the big end at 45/64″. Turn down a 1/2″-diameter tenon. Make the plate as shown above. The author recommends cutting the V into a larger piece of wood and then cutting the plate down to size.


