Calabash bowls are part of the cultures of Hawaii. They have been made for centuries, and many Hawaiians have examples that have been handed down for generations. Historically, wood calabash bowls were intended for royalty while common people used ones made from calabash gourds. Because of their royal connection, Hawaiian wood bowls have always exhibited superb craftsmanship and were made from tropical woods (deemed sacred) that exhibit stunning figure, grain pattern and color. After 1819, they could be owned by anybody, so wooden calabash bowls have prevailed.
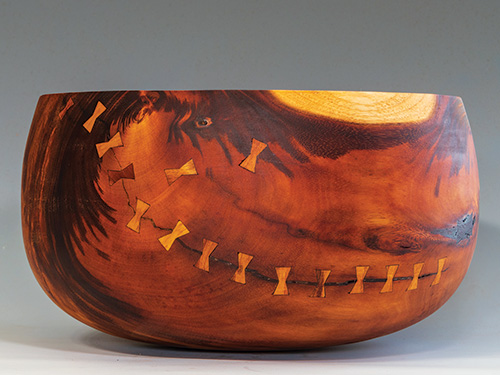
Until the last quarter of the nineteenth century, Hawaiians did not have lathes, so their bowls were made by using stone and coral to shape and then pumice and shark skin to bring them to a very high polish. The calabash shape is not flat on the bottom but rounded with the sides tapering slightly inwards. The height varies from shallow to very deep, and there is usually sap wood at each edge. Many extant Hawaiian bowls are quite curved on the bottom; the lack of a flat bottom may seem off-putting, but it works out fine on tables and counters as well as on the ground. That Hawaiian craftsmen could bring a piece of wood to look like it had been turned but without the use of a lathe is truly amazing, but craftsmanship in woodworking offers much to amaze us.
Thoughts Before Turning
With all of this in mind, we should try to incorporate the following thoughts into our rendition of the Hawaiian calabash motif so as to best honor the people and culture of our fiftieth state.
• Use a close-grained wood with some sapwood at each edge. Choose wood that will exhibit beautiful grain and color as it ages. Cherry and hickory are good, widely available North American woods, but tropical woods are fair game as well.
• Be faithful to the shape. A round bottom to the bowl is part of the fun and will be a good topic of conversation with guests.
• Sand and finish a calabash bowl to a very high sheen, both inside and out.
• The size of a calabash bowl can be anywhere from 6″ in diameter to very large, with depth generally going down as the diameter increases. Small bowls can be spindle-turned, allowing them to be much taller.
Turning Process
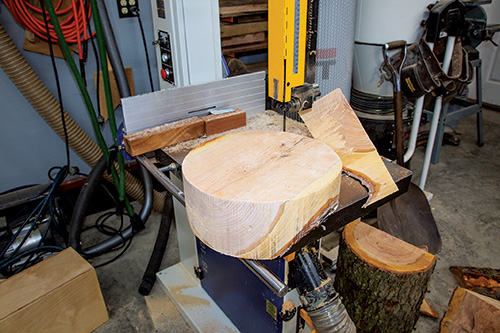
Most modern turners of this art form start with green wood, which makes the shaping and hollowing much faster. Because of the round bottom, if you turn your calabash bowl all the way to completion, expect that the rim will become slightly warped as the wood continues to dry.
But that’s just part of the fun. The wall should be in the 1/4″- to 1/2″-thick range, becoming thicker as the overall bowl size increases.
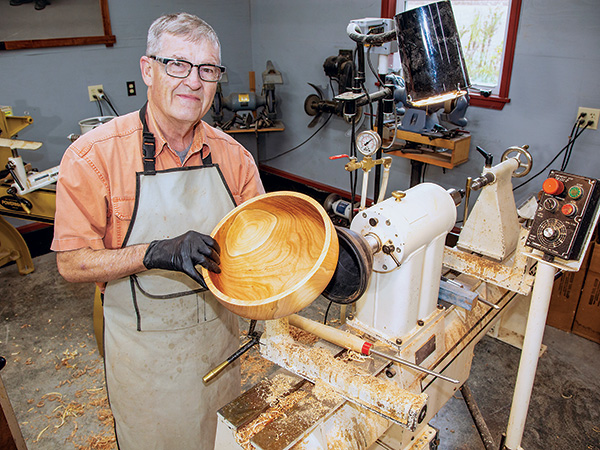
If you’re familiar with basic bowl-turning procedures, the photo series in this article should be familiar territory
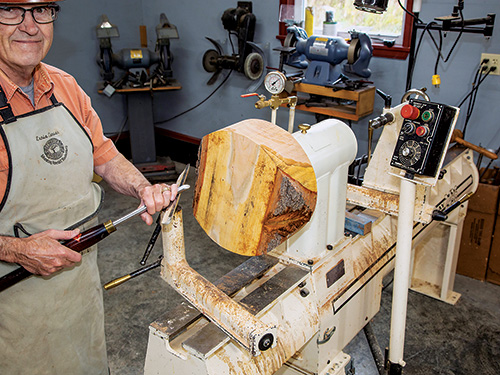
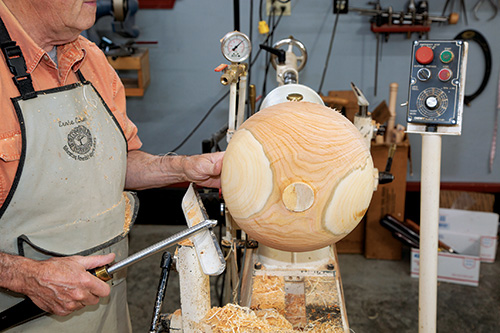
to you already. Start the turning process with your green bowl blank mounted to either a faceplate or a worm screw held in a four-jaw chuck.
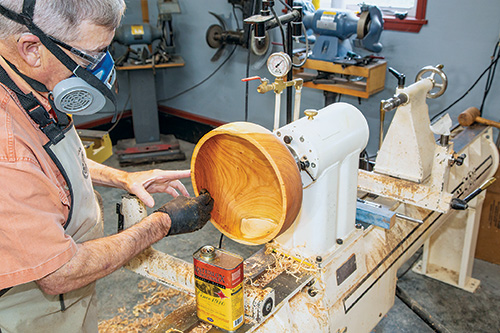
Turn the bowl’s outer profile as well as a short tenon or a shallow recess for re-chucking. Sand the bowl’s outer surface extremely smooth, to 180-grit. Remove all evidence of tearout during the sanding process — remember, one of the signature features of calabash bowls is that they are sanded to a high polish.
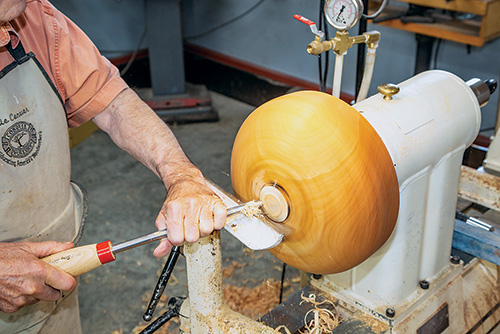
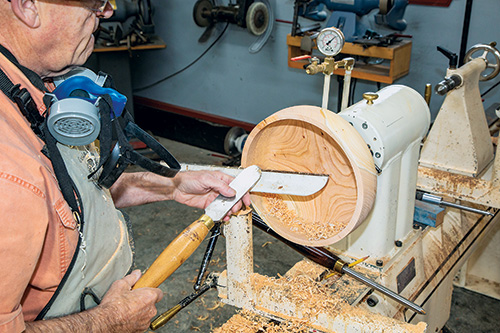
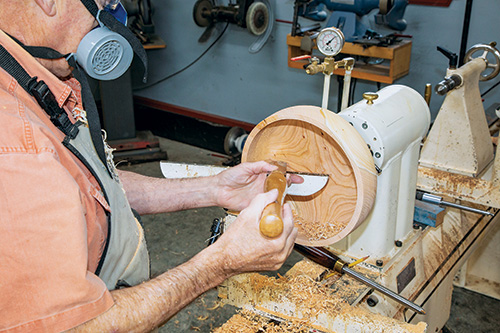
When you’re satisfied with the exterior, remount the bowl in a four-jaw chuck so you can hollow the bowl’s interior with a gouge and scraper. Leave extra material at the bottom in order to complete this area in the next step by reversing it again on the lathe. Sand the interior up to 220-grit.
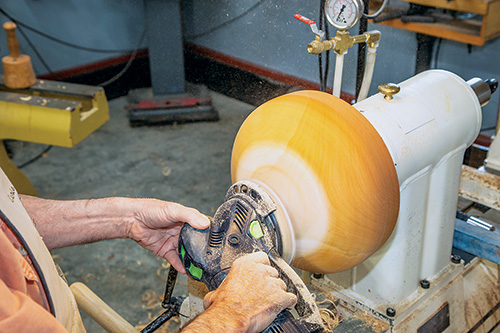
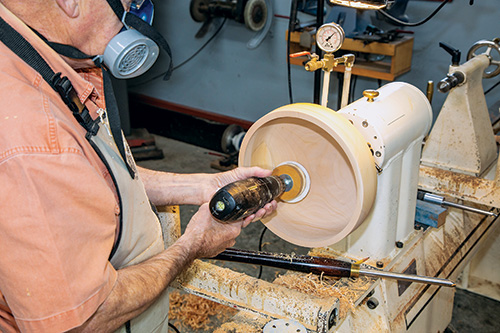
Apply finish to the interior before remounting the bowl on either a jam or vacuum chuck. Turn the bottom to a uniform, convex shape, and bring the wall of the bowl to a uniform thickness from the rim to the center of the base. Then, while the bowl is mounted on the lathe, sand the bottom and outside up to 220-grit and apply finish to the exterior to complete it.

Once your bowl is finished, go on a picnic and think of the warm sands of a Hawaiian beach as you eat lunch out of your calabash. It will sit nicely on the ground and be a thing of beauty at the center of the tablecloth.
I want to thank Emiliano Achaval, an expert Hawaiian bowl turner, for all his help and sound advice with this article. You can watch an interview between the two of us as a “More on the Web” extra. Be sure to visit his website too.
.


