This article, “Turn a Square Box,” is from the pages of American Woodturner and is brought to you by the American Association of Woodturners (AAW) in partnership with Woodworker’s Journal.
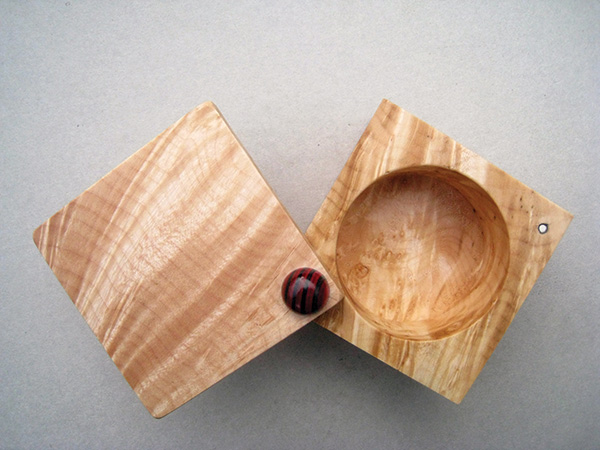
When I came across two offcuts in the oddments box at a local mill, the wood’s intriguing grain patterns caught my attention. They were figured maple, with beautiful patterns on the square faces. It occurred to me they could be made into attractive small bowls. But back in my shop, as I turned one piece around and over to decide which face would best be uppermost in a bowl, I changed my mind. Recalling that I had some cylindrical magnets left over from a previous project, I decided the block of wood should become a square box with a turned interior and a lid attached with a magnetic hinge at one corner. I have since made several boxes in this style, using the following methods.
Turn a Square Box
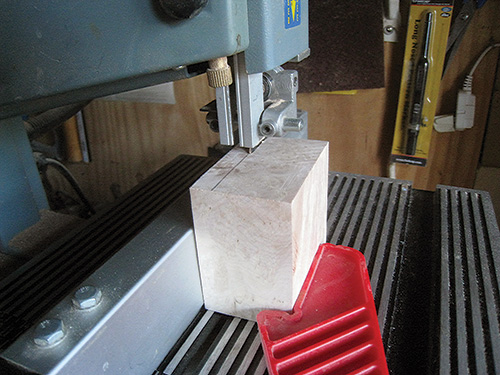
You can use any type of wood, but start by dimensioning it to 2″ (5cm) thick and 3″ (8cm) square. Identify the side of the block with the most attractive grain and cut off a 3/8″ (9.5mm) slab for the lid.
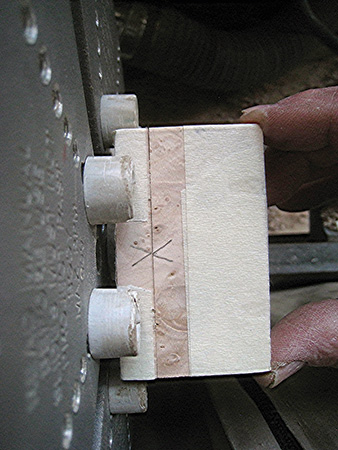
Next, hold the lid piece in place on what will be the box body, and make a reference mark across the joint so you’ll know later how to match them up again.
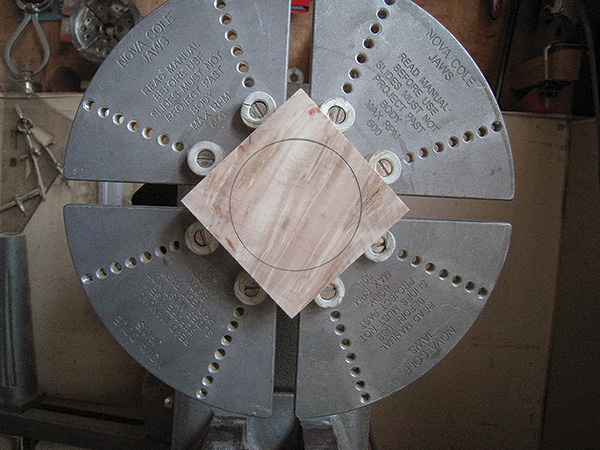
Mount the body block on the lathe and hollow the box’s interior as you would a small bowl, leaving 1/4″ (6mm) at the outer edges for the magnetic hinge.
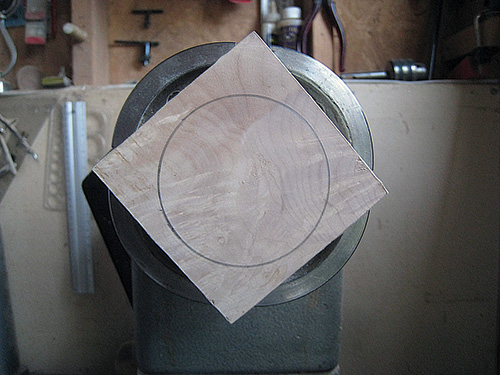
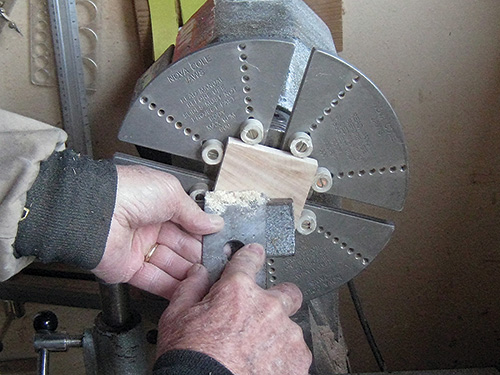
I prefer using Cole jaws for this mounting, but you could also use regular chuck jaws if they are large enough.
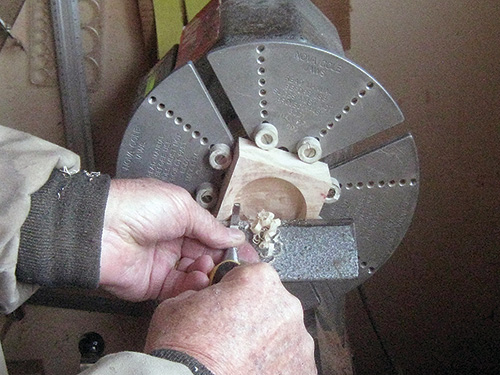
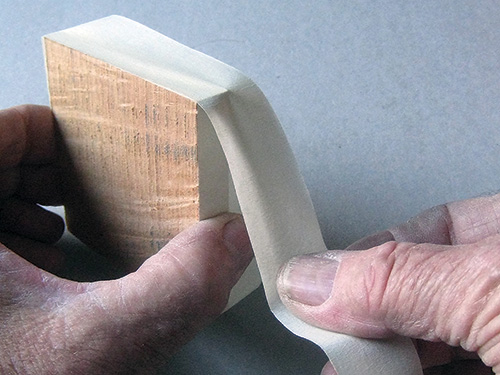
To prevent jaw marks or bruising, wrap masking tape around the block several times. If you prefer a straight-sided interior, use a small bedan or square-nose scraper. In any case, leave about 1/4″ thickness in the bottom.
After you have hollowed the box interior, the flat top surface should be scraped to remove any saw marks and to ensure there is a good interface between lid and body. For this scraping, or skimming, I use the blade from a 2″ jackplane. The blade is wide enough to cover the entire width of wood being scraped, and I find it gives a better result than using a gouge for a truing cut.
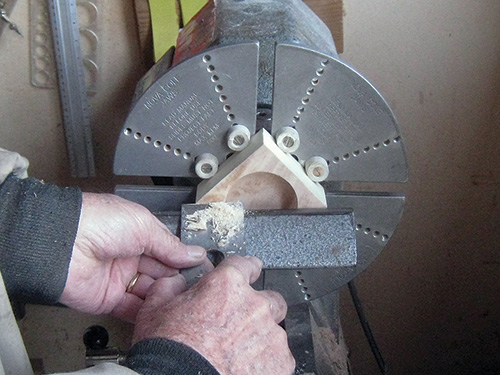
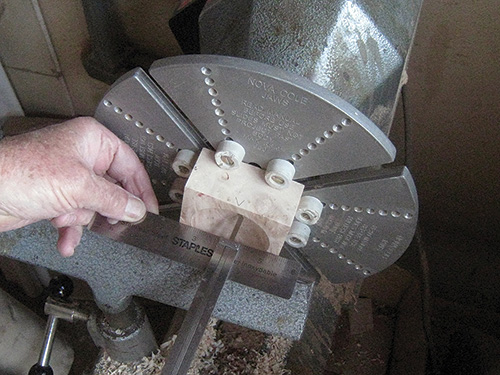
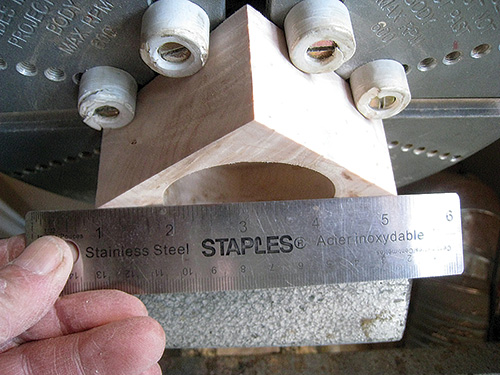
Check the surface for flatness with a straightedge — no light should be seen between the wood surface and the metal edge. The tape wrapping also helps prevent tearout/chipping when turning the flat surface at the outside corners. Do not use abrasives here, as they will likely round over the edges.
The block should then be reverse-mounted so the bottom can be scraped in a similar manner as the top and checked for flatness.
Turn the Box Lid
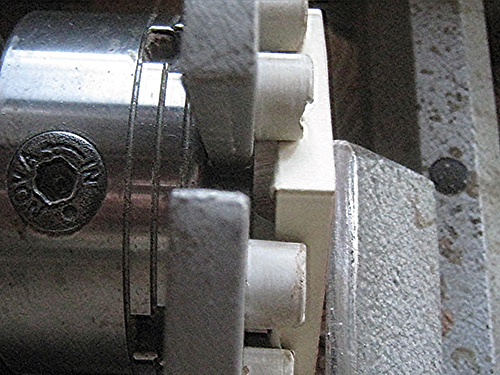
Now mount the box lid in a similar fashion as the body, except a flat spacer should be positioned behind the lid so the lid’s surface will protrude above the jaw’s grips.
Both sides of the lid should be given the same surface scraping treatment; again, I use a plane blade for this.
Upon completion of the scraping, match the body to the lid to check that the surfaces adjoin nicely. Scrape more to flatten the lid as needed.
A Magnetic Hinge
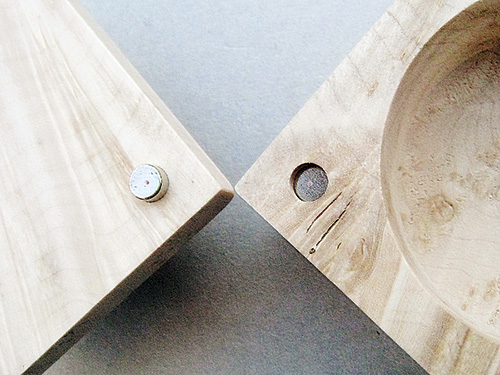
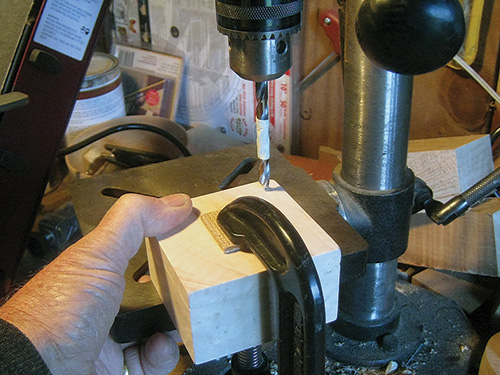
The box lid is attached to the body using two 1/4″-diameter × 1/4″-long cylindrical magnets set in holes at one corner. One is installed in a corner of the body, countersunk 1/8″ (3mm) deep, and the other is installed in the matching corner of the lid and protrudes just slightly less than 1/8″. To ensure the lid and body will line up when assembled, clamp the parts together prior to drilling. Drill a 1/4″-diameter hole on the corner-to-corner diagonal and centered between the corner and the box’s cavity. A piece of tape positioned on the drill bit indicates the hole’s depth, which should run through the lid and a bit more than 3/8″ into the body.
The magnets will be a “press fit” in the holes, so once the body magnet is in, there is no way to remove it. The lid magnet should be pushed in and adjusted as necessary by tapping it further in or down from the top. Prior to installing the magnets, take care to mark their matching faces with the correct polarity to ensure they will face the right way. Once the smooth operation of the lid is obtained, both magnets should be secured with a drop of instant glue.
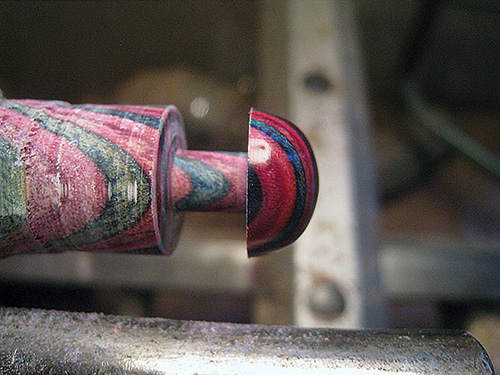
The exposed upper part of the hole in the lid should be plugged with a decorative turned button, as shown in the opening image. Turn the button with a 1/4″ shaft and 1/2″ hemispherical crown. An off-cut of a pen blank could be used.
A Magnetic Catch

The lid catch, which holds the box closed, is also magnetic, though I used smaller magnets for this purpose — 1/8″-diameter × 1/8″-long cylindrical magnets installed in the corners opposite the hinge set. The catch magnets are installed flush with the wood surface. To ensure the lid and body line up properly when installed, a template should be used to drill the ⅛”-diameter holes. I made a template from a piece of thin aluminum sheet, forming a 1″ (25mm) square with two edges cut so half can be folded up and the other half folded down. This will allow the template to fit snugly on the corner of both the lid and body, locating the hole in the same position on each.
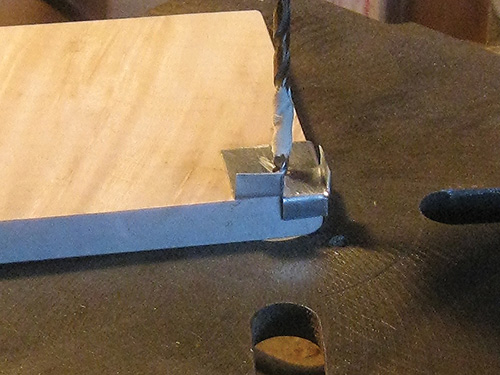
Drill a 1/8″ guide hole through the template 3/8″ from the corner on the diagonal. Mark one face of the template “up,” so you’ll be able to position it one way to drill into the box and the opposite way (flipped) to drill into the lid. All of this is meant to ensure the two holes—and magnets—will be properly aligned.
If all goes well, the lid should revolve quite freely on its hinge and close onto the catch magnet with a satisfying “click” without any over-travel.
Finishing Up
To finish the box, lightly sand and apply an oil or polish. To keep the flat surfaces flat, sand them on a sheet of abrasive applied to a flat surface. Apply light pressure, alternating between circular and side-to-side motions.
I like to use an oil/varnish mix: 25% pure tung oil, 25% boiled linseed oil, and 50% satin wipe-on polyurethane, together with odorless mineral spirits at 20% by overall volume. This mixture brings out the grain nicely, feels velvety to the touch, and affords a degree of protection. I wipe on three coats, with light sanding between applications.
Michael Hamilton-Clark, a retired civil engineer, has been turning wood for fourteen years. He lives in the Fraser Valley, British Columbia, and uses mostly locally available woods from felled trees, branch trimmings, and mill offcuts to produce a variety of items. He is a member of the Fraser Valley Woodturners Guild, the AAW, and the Craft Council of British Columbia. For more, visit alberystudiowoodturnings.com.


