This article, “Turn Your First Bowl – A No-Chuck, No-Gouge Approach” is from the pages of American Woodturner and is brought to you by the America Association of Woodturners (AAW) in partnership with Woodworker’s Journal.
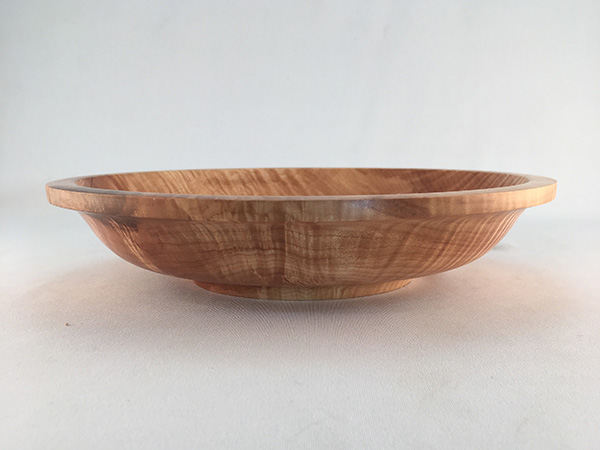
I have taught this bowl-turning project to more than 500 beginning woodturners over a twenty-year period, and I’m proud to say my students have had excellent success with it. If you have never turned a bowl, this project is a good one to start with; you’ll shape the bowl using only scrapers, and no chuck is required—just a faceplate, which comes with most lathes. It’s true that scrapers tend to cause more tearout than a gouge, but if you are just getting started, the scraper can be less intimidating and simpler to use.
Choose the Wood
Since the shaping of this bowl is done with scrapers, choose a hardwood, such as maple, walnut, cherry, or oak, that has been dried to a moisture content of 14% or less. Scrapers do not cut wood effectively in green or partially dried wood. They also tend to tear out the endgrain of soft woods such as cedar.
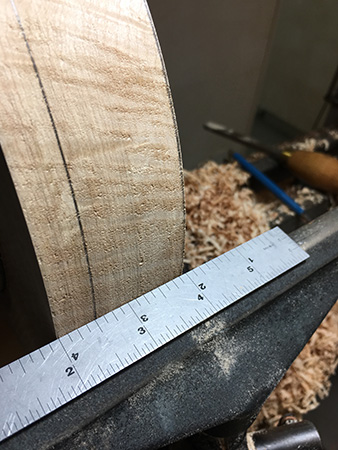
Start with a round blank about 10″ (25cm) in diameter and 2-1/4″ (6cm) thick. This is a good size for a functional bowl.
Attach Faceplate
Always inspect your blank before mounting a faceplate to it. Consider the grain, defects, and figure. Try to imagine the shape of your completed bowl and how it would best fit in the cleanest parts of the blank. Consider that you can turn away minor defects during the shaping process, as long as they don’t impede on the area that will become the finished bowl.
I use a 6″- (15cm-) diameter faceplate to mount the work to the lathe. Mount the faceplate to the side that will be the top of the bowl, as you’ll turn the bottom/foot first. Find the center of your blank, and use that center to place a compass point and draw a circle slightly larger than the diameter of your faceplate. This helps to center the faceplate.
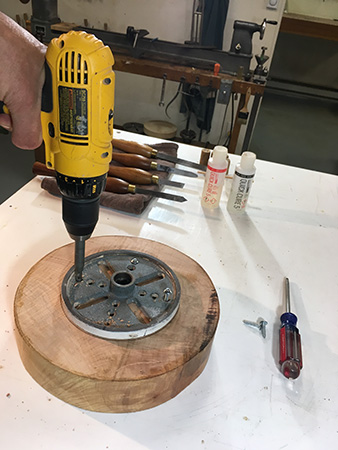
While holding the faceplate in place, drill a 1/8″- (3mm-) diameter hole about 1″ (25mm) deep in one of the faceplate’s outer holes. I use a self-centering bit, which ensures the holes are positioned properly. Four 1″-long screws will safely hold this blank during turning. It is fine to initially drive the screws with a drill, but always finish by hand-tightening each screw with a screwdriver and double-checking that there is no movement in the faceplate before mounting it on the lathe.
Sharpening a Scraper
Edge Up or Down?
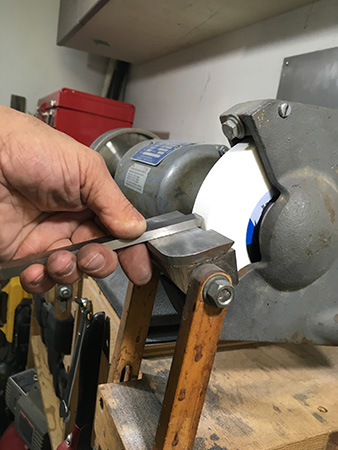
Most turners sharpen their scrapers with the cutting edge up—so the grinding wheel strikes the top of the tool first. I prefer the opposite approach, with the cutting edge down. In this orientation, the direction of the grinding wheel naturally produces a burr on the bottom of the grind, which in this case is the cutting edge. It is this burr that produces the cut on the wood, so there is no need to hone a scraper. Try presenting the tool to the grinder both ways, and see what burr you prefer.
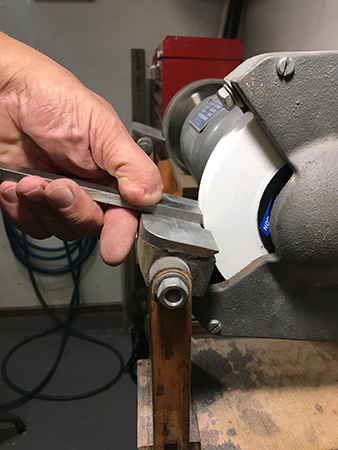
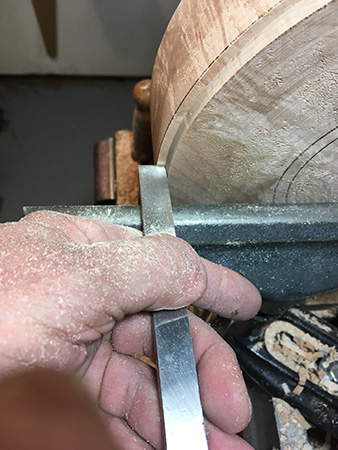
A traditional scraper has one bevel. Adjust the grinder’s toolrest angle to produce your desired bevel angle (typically 70 to 85 degrees). For a square-end scraper, gently press the bevel into the wheel, then glide it across the rest using gentle pressure from the back to maintain contact.
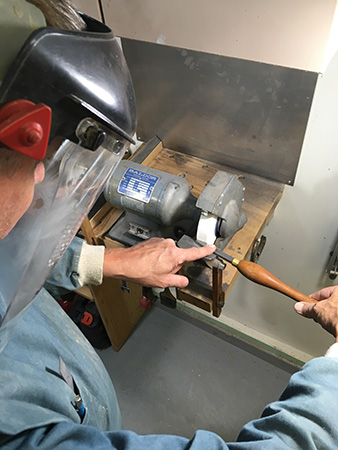
For a roundnose scraper, you will need to stand back from your grinder far enough to pass the tool handle in front of you. With the grinder off, practice swiveling the tool 180 degrees without pausing.
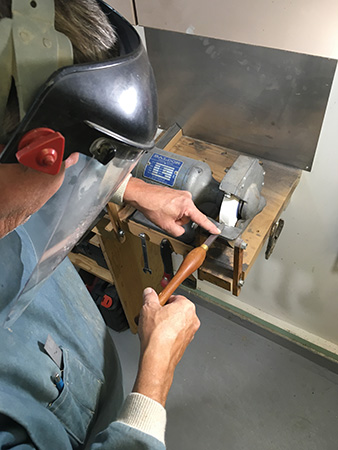
The key pressure point is the tip of the index finger, which helps hold the tool flat on the rest. Then try it with the grinder on, keeping the tool in contact with the wheel at all times.
The Story of the Sparks
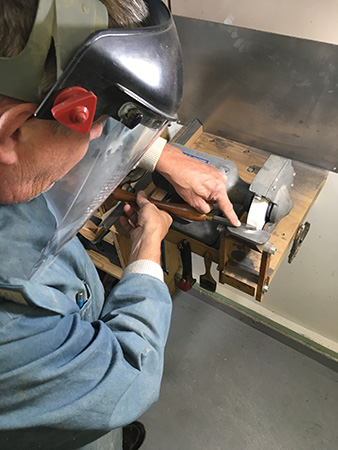
How do you know when you are done sharpening? The sparks tell a useful story. If the top of your tool bevel is not touching the wheel, the sparks will go down, under the tool. Use this as in indicator: when the sparks begin to come over the top edge of the scraper, you’ll know you are making contact with the entire bevel, top to bottom. Inspect your tool after each pass. When you have achieved a single facet on the bevel, from bottom to cutting edge, you are ready to get back to the lathe.
Rough It Round
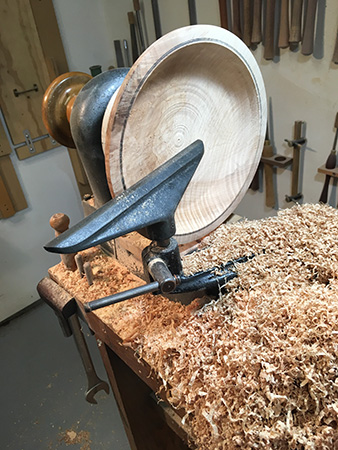
During initial roughing, I set the lathe speed to about 500 rpm. If your lathe has a pulley-and-belt system, rather than electronic speed control, use the slowest setting possible to start. A small amount of lathe movement, or vibration, is normal when the blank is not yet trued up. Nonetheless, never stand in the direct line of the mounted blank; stand at the foot or head of the lathe when turning it on, and have your hand on the stop button, just in case the vibrations are too great. Having a well-rounded blank and a centered faceplate will help reduce initial vibration.

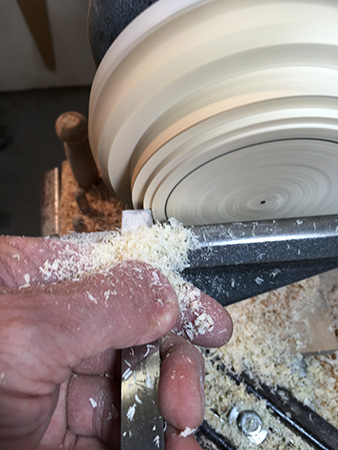
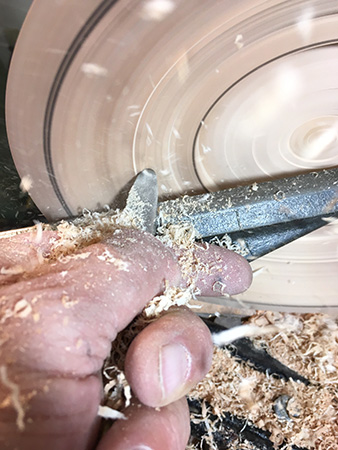
Set the toolrest slightly below the center of the wood, and use the tip of a bullnose, or roundnose, scraper to make tiny cuts along the blank’s outer edge until you are cutting wood continuously with no intermittent gaps. Stop the lathe on occasion and check that the tool marks made by the scraper cover the entire width of the edge’s circumference.
Now bring the toolrest to the bottom of the bowl, at a height that puts the tip of the scraper at the center of the blank, with the back of the tool slightly elevated. Starting from the center and cutting outward to the left, make gentle passes along the bottom face. Cut a little deeper with each pass, until you are cutting all wood with no intermittent gaps. Now the blank should run true, so you can increase the lathe speed to 1000 to 1200 rpm. This higher speed will produce a much cleaner cut. If your lathe vibrates too aggressively at the higher speed, however, reduce the speed to a safe level before proceeding.
Form a Rough Foot
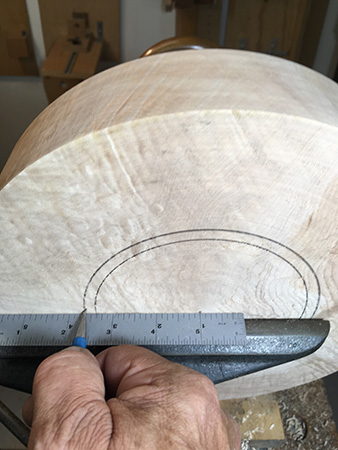
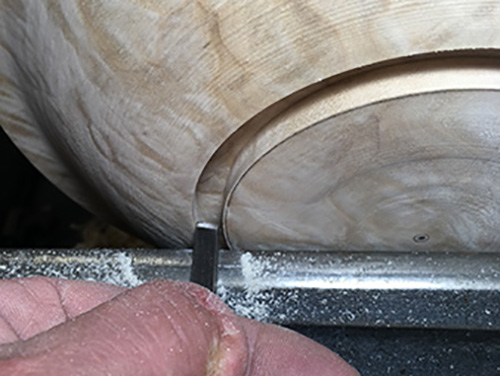
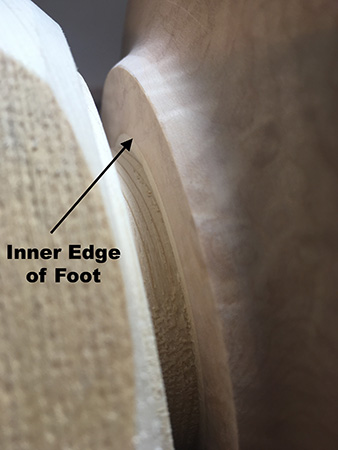
Mark the outside edge of the foot by measuring out from the center. My rule of thumb for a functional bowl is to make the foot slightly smaller than half the diameter of the bowl. So for this 10″ bowl, I marked a 4-3/4″ (12cm-) diameter foot. Then add another line 1/4″ (6mm) outside the foot mark. This second line will become useful later, when shaping a smooth transition to the foot.
Next, draw a line on the outer edge of the bowl, 1/4″ from the bottom surface. Using half the blade of a square-end scraper, or about a 1/4″ of the blade, make a slow gentle plunge cut into the bottom surface, up to the 1/4″ depth.
Continue making cuts like this, working toward the center, until you are just shy of the mark for the foot. Try to keep your cuts consistent and flat.
A plunge cut with a square-end scraper should begin slowly, with gentle but consistent pressure from the right hand. Just as the cut nears the bottom, slow your feed rate and finish just as the unused part of the blade touches the wood.
Rough in the Rim
Bring the toolrest back around to the outer edge of the bowl. Always try to set the toolrest so you are not working at its ends; applying the tool as close to the center of the toolrest is best, as that is where you’ll have maximum support.

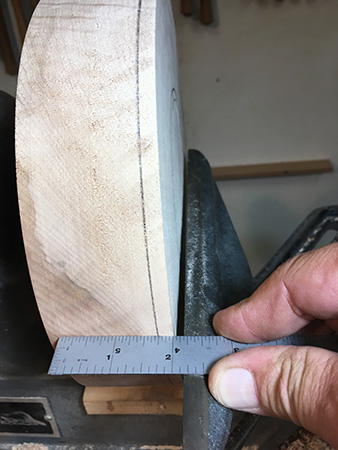
Mark a line on the outer edge 1/2″ down from the top surface. Then draw a line on the bottom surface 7⁄16″ (11mm) from the outer edge.
Starting at the bottom, use a square-end scraper to make a series of plunge cuts into the outer edge, 1/4″ deep. Work your way toward the rim, until you are just shy of the 1/2″ line.
Wood is much more resistant to cutting or scraping in this orientation, and you will notice this in your plunge cuts. Take a lesser cut, don’t push as hard, make sure your tool is sharp, listen to what your lathe is telling you, and find a happy place.
Shape the Bowl’s Profile
To shape the outside of the bowl, we will connect the two elements you just defined—the edge of the foot and the bottom of the rim.
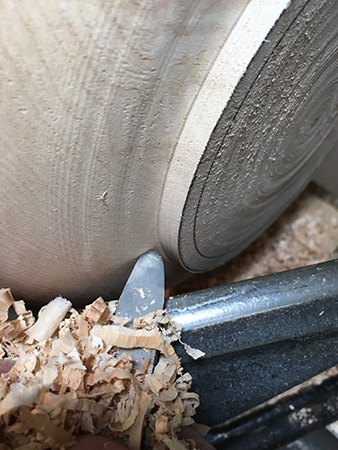
Use the tip of a roundnose scraper to begin rounding the profile. These are sweeping cuts, and working from the bowl’s bottom to the top works best. After just a few cuts, your toolrest will be too far away from the cut to be safe; stop the lathe and move the toolrest as needed, keeping it about 1/4″ from the wood.
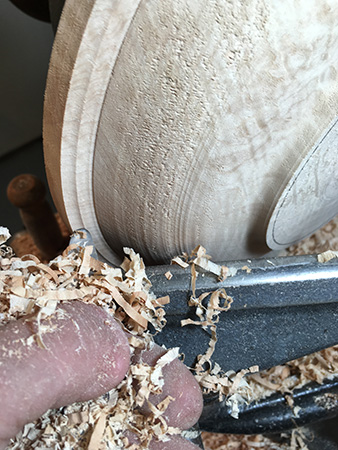
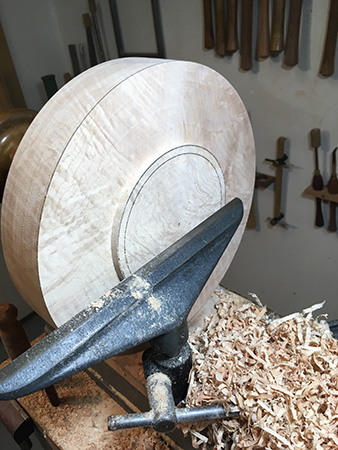
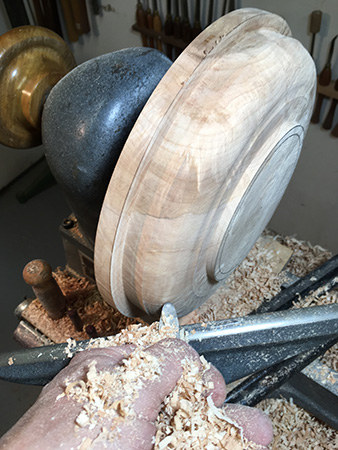
The next step is to round off the foot and rim. Start at the bottom of the foot’s edge, and engage a cut about 1⁄16″ into the wood. Carry the cut from foot to rim, all along the bowl’s shape. When the edge of your tool begins to cut the rim, ease off and pull the tool away. A couple of cuts like this, and the lines of the foot and rim will blend into the bowl smoothly.
The beauty of the roundnose scraper is that you can cut any part of the bowl in any direction without a catch—as long as the tool is presented flat on the toolrest, with the handle slighted elevated, and moved with gentle pressure.
Cut Foot Recess
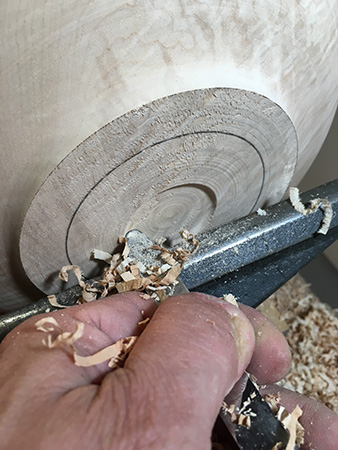
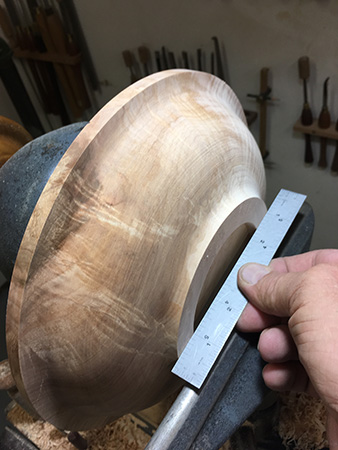
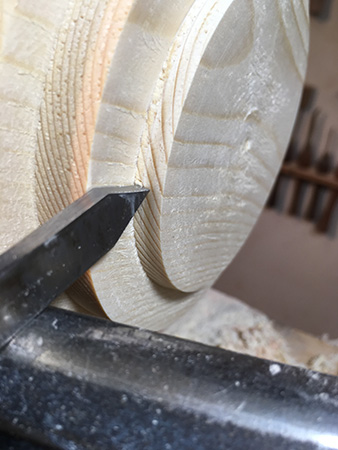
Mark a line 5/8″ (16mm) inside the foot rim. Using a roundnose scraper, press the tip firmly into the center of the blank. The tool should begin to create a hole. Stop pushing but maintain the depth of cut, then drag the tool to the left to widen the hole. Stop cutting just shy of your 5/8″ line, and repeat this process until you have reached a depth of 1/4″ (6mm).
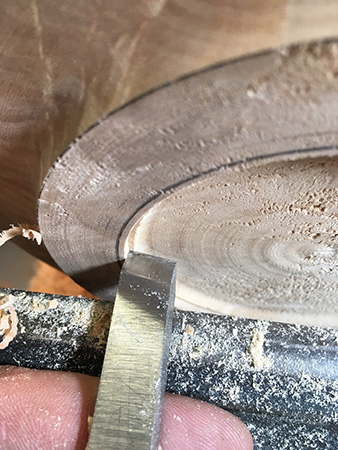
Now use a square-end scraper to flatten the bottom of the recess. When the bottom is flat, use the long point of a skew chisel to make the last cut at the outside edge. Strive to make this cut square and in a single push, stopping just as you reach the bottom.
Use a square-end scraper to turn the foot flat, and use the edge of a small ruler to confirm flatness.
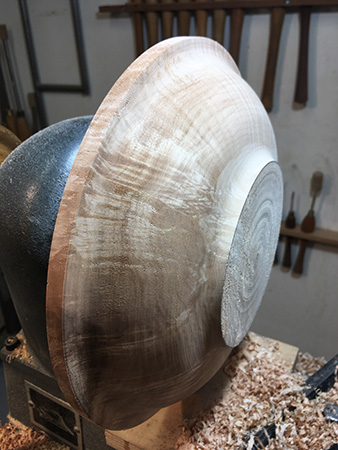
Sand the Outside
Scrapers are easy to use, but it can’t be denied that they do not shear the wood like a gouge. As a result, scrapers tend to tear endgrain and, in doing so, create the need to begin sanding at a coarser grit. The most important thing to know about sanding is that rough grits like 60, 80, and 100 shape wood and remove defects like torn grain. Grits 120 and finer are best for removing the marks that the shaping grits create. All the torn grain and tool marks must be removed with the coarse grits before moving on to the finer grits.
Start with 80 or 100 grit. Tear a 2″ (5cm) strip of sandpaper and fold it to better insulate your fingers from the heat that will develop during sanding. Always keep the sandpaper in motion on the wood, sand with the lathe turning at a slow speed, and use your fingers to bend the sandpaper to the contours of the bowl.
Turn the lathe off before you proceed to the next grit. Spin the bowl by hand and inspect the entire surface. When you see only the lines from the current grit and no tearout, move on to the next grit. Proceed in the same fashion through the grits, up to 220. The final sanding should be done with the lathe off and in the direction of the grain where possible.
Sand the entire outside of the bowl, but not the very bottom of the foot. That surface should remain perfectly flat, and hand-sanding could round its edges.
Reverse-mount for Hollowing
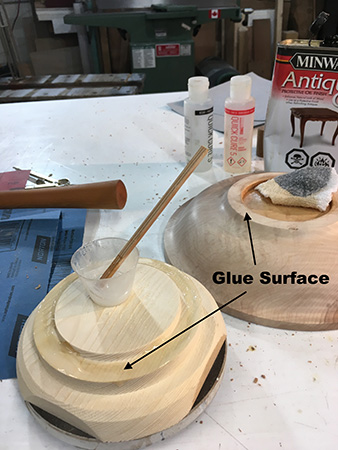
Since we are making this bowl without a chuck, the way I reverse-mount the bowl for hollowing is to fit the foot’s recess onto a tenon turned from scrap wood. The trick is to apply glue to only the bottom surface of the foot (no glue in the recess). After you hollow the bowl, it is easy to part it from the scrap wood.
The scrap wood I use is a 5-1/2″ (14cm) length of dimensional 2″ × 6″ lumber. I use my bandsaw to cut off the corners. Mount a faceplate onto the scrap wood, then mount it on the lathe.
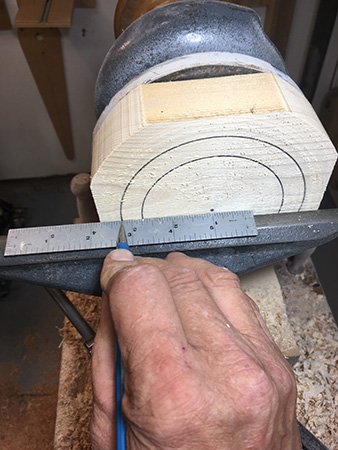
The object is to turn a peg, or tenon, that fits snugly into the recess in the foot of the bowl. Start by truing the face of the scrap block, then transfer the diameter of the foot’s recess and the outside diameter of the foot to the scrap block.
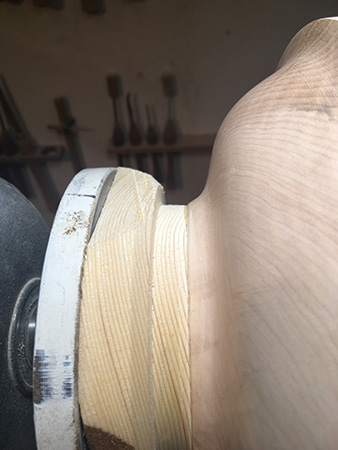
From the outer edge, make plunge cuts with a square-end scraper, up to the outer foot line. Now draw a line on the outer edge, 1/4″ from the front surface, and part down to this line, starting from the outer edge and working toward the inside pencil line. Ensure this area is flat, as it will be the mating surface for gluing the wasteblock to the bottom of the foot.
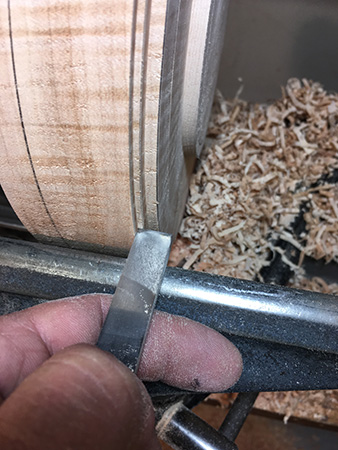
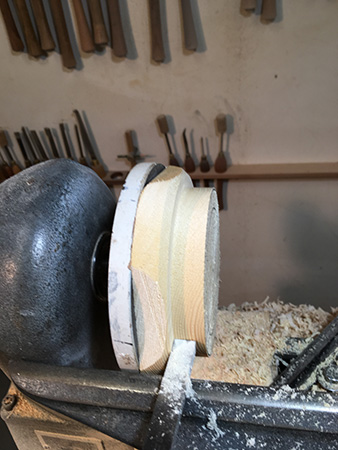
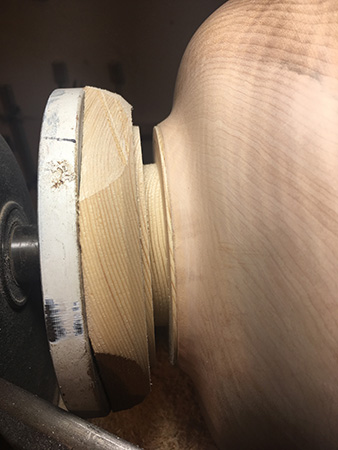
To form the tenon that will fit into the foot’s recess, bring the toolrest to the side and use a parting tool to gradually shape the tenon to a slight wedge. Now test fit the bowl foot on the wedge.
You want just the top of the wedge to fit in the foot’s recess. Now mark the point on the wedge where the recess becomes too tight to advance any further. Cut squarely from this mark to the bottom of the tenon and retest the fit. If the bowl does not seat to the bottom of the tenon, use 150-grit sandpaper to fine-tune the fit. This will ensure a snug fit of the bowl on the tenon.

When the bowl fits on the tenon with no movement side to side, it is time for glue-up. But first, I apply a coat of oil (in this case, Minwax Antique Oil) inside the recess, both to the bottom and the sidewalls. This will prevent any excess glue from adhering to those surfaces and will allow an easy parting of the bowl later. I use five-minute epoxy and apply a generous layer to the scrap block around but not on the tenon. The idea is to apply glue only to the bottom of the foot. Press the pieces together using firm pressure.
Hollow the Bowl
When the leftover epoxy in the mixing cup is hard, the bowl is ready to turn. Confirm this by trying to twist the two components apart. If everything feels solid, it is safe to proceed.
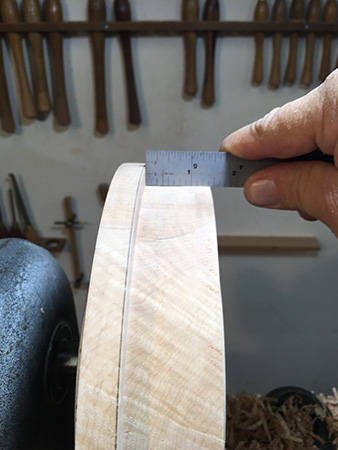
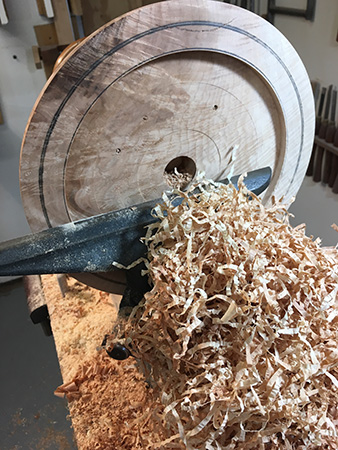
To determine the depth the bowl should be hollowed, measure the distance from the top of the foot to the top of the bowl. Mine is 1-7/8″ (5cm). I would like the walls of the bowl to be 1/4″ thick, so I subtract that from 1-7/8″ and determine I need to drill a depth hole 1-5/8″ (4cm) deep. I do this using a Forstner bit with a piece of masking tape on it to indicate the depth.
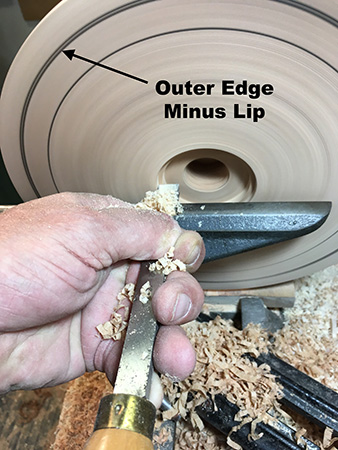
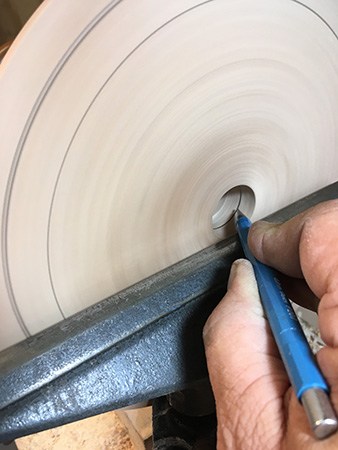
With the lathe running, peer over the top edge of the bowl on the lefthand side, and use a pencil to mark the outside edge of the bowl, minus the width of the rim. Then add another line 1/2″ inside that mark. Mark the inside of the center hole at 1/2″ deep.
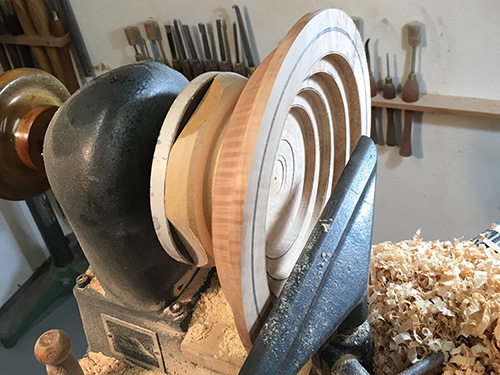
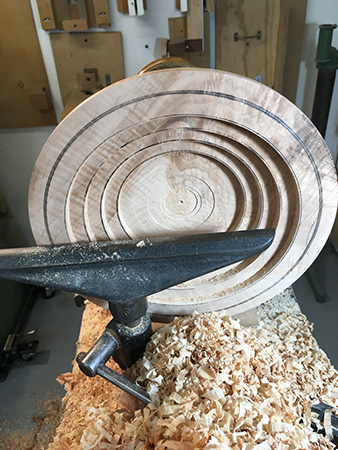
Start the plunge cut at the edge of the hole, and carry that depth to the innermost line near the rim. Now make another 1/2″ mark at the edge and inside the center hole and repeat the next plunge cut, carrying the new depth from center to the line near the edge. When you reach the bottom of the center hole, leave the indent from the drill bit for now. This process should have created a series of “steps” leading down to the bottom of the bowl.
Now switch to a freshly sharpened roundnose scraper to turn away the tops of the “steps” until they are all level with the bowl wall. Stop the lathe and pinch the wall up and down to feel the thickness. Don’t just look into the bowl—peer over it to gauge the shape of the outside relative to the inside. Strive to make the two contours similar.
You can move the scraper in either direction inside the bowl—from rim to bottom or bottom to rim. Make the top of the bowl wall a thickness that feels right to you, then carry this thickness to the bottom. Once the walls are close to their finished thickness, cut away the indent left by the drill bit, blending this area with the sidewalls. It is important to stop cutting the bottom as soon as the indent is gone.
Again, since we are using only scrapers for this project, some coarse sanding may be required to remove tearout. Sand through the grits, as you did on the outside of the bowl.
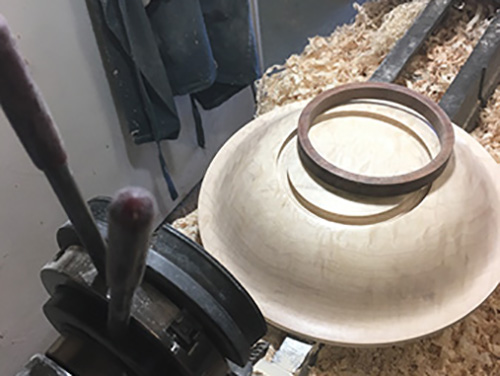
Alternate Foot Design
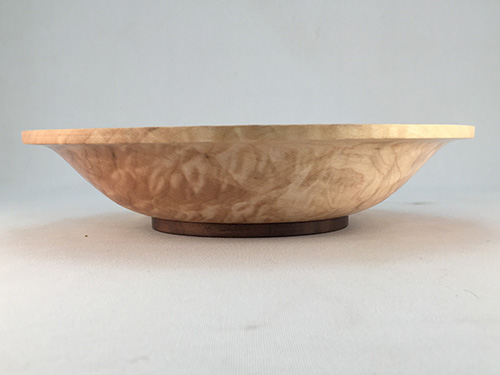
Here is an alternate foot idea that looks great when using contrasting woods. It can be produced easily, with just a few variations from the basic bowl process.
Separately (not shown), turn a ring in a contrasting species. Rather than forming a foot with a recess in the middle, make a groove to accept the foot ring you have turned.
Ensure your chuck jaws will fit into this groove. Mount the bowl for hollowing using a chuck, either in compression or expansion mode.
Hollow the bowl as described in the article. Glue the ring into the groove for an elegant foot.
Part Bowl from Wasteblock
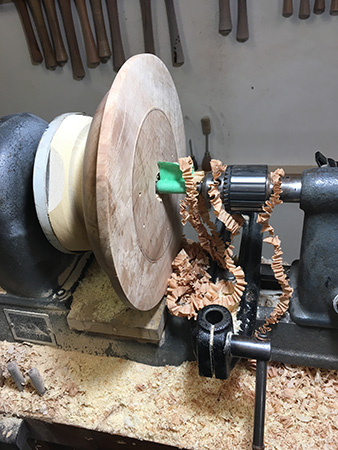
To remove the bowl from the wasteblock, it is a simple matter of parting through the glue joint at the foot. But this should be done slowly and carefully. I bring up the tailstock with a large cone center, wrapped in electrical tape, to support the bowl without marring it.
Use a parting tool to begin removing scrap wood from behind the bowl, under its foot. Remember, the foot is 5/8″ wide, so these cuts must go at least that deep in order to separate the bowl from the scrap. Sneak up on the glue joint, so that the final thin cut just removes the glue line where the bowl and scrap meet.
Guide the tool in at a slight angle toward the bowl, leaving the outside of the foot a bit higher. Once you see the foot of the bowl end and a tiny bit of the scrap emerge, stop cutting. The bowl can now be removed from the lathe by retracting the cone center and pulling the bowl off the tenon by hand. The oil inside the foot’s recess should have stopped the tenon from adhering to the bowl. I like to use a hardening oil, such as Minwax Antique Oil, as a bowl finish. In this case, an oil finish is best since I had already applied oil in the bottom recess.
Scott Belway is a woodturner based in British Columbia, Canada.


