Learning to turn is easy; it’s learning to properly sharpen the tools that’s the bugaboo. The idea of woodturning is fairly straightforward. It requires an understanding of the process, and of course there is a sense of “feel” you must develop at the lathe. That said, it actually only takes about 40 hours of turning to get sufficiently proficient so you can make usable turnings.
The proviso, however, is that you must have correctly shaped and sharpened tools. In this article, let’s set up a dry grinding system so you can sharpen most steel turning tools quickly and easily.
In the past, grinding turning tools was done freehand at a bench grinder and had a long, difficult learning curve. Some never got it right and gave up in frustration. Most got inconsistent results. A large part of the problem was (and still is) that standard bench grinders have tool-rests designed for grinding machine-tool bits and not woodturning tools. While scrapers could be ground on such rests, gouges could not. Most of us mounted a 1/4″-diameter steel bar at the center height of the grinder and balanced our tools on that to sharpen, the same way we would use the lathe’s tool-rest for turning.
ONEWAY Jig Solution
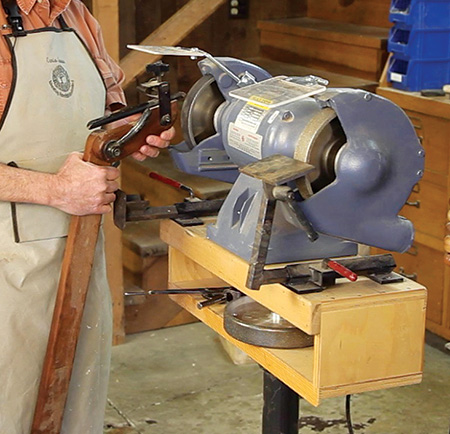
In 1982, Jerry Glaser introduced a wooden gooseneck jig that pivoted on a wood block glued to the floor in front of the grinder. Anyone of average skill could suddenly grind gouges perfectly.
Tim Clay at ONEWAY Manufacturing improved the Glaser jig with the Wolverine Jig and Vari-Grind gooseneck holder that allows precise grinding of spindle, bowl and roughing-out gouges. It has become the universally accepted sharpening method for the turning community and the system that almost all turning clubs have for visiting demonstrators like me.
The Wolverine Grinding Jig (available at Rockler) consists of a pair of black, hollow bases that mount beneath the grinding wheels. They replace the grinder’s factory tool-rests. The bases accept a long steel V-arm that cradles either the Vari-Grind Jig or the end of a tool handle, for sharpening gouges. The system also includes a pivoting platform rest, similar to a standard grinder tool-rest, for sharpening scrapers. Both the V-arm and platform rest are held in the bases with cams activated by long levers.
An 8″ slow-speed grinder with 1″-wide wheels, such as RIKON’s 1/2 hp model 80-805, which is shown here, or the more powerful 80-808 (1 hp), are good choices for use with the Wolverine system.
Setting Up the Grinding Jig
In order to allow clearance for the Wolverine bases beneath the grinder’s wheel shrouds, it must be raised on blocking so the arbor shaft is about 6-1/2″ above the work surface. (Remove your grinder’s rubber feet, first.) On the RIKON 80-805, you can achieve this by gluing scraps of 1/2″ and 3/4″ plywood together. (Blocking thickness will vary among grinder models.) Make the blocking piece large enough to suit your grinder’s footprint.
The Wolverine bases also must be aligned directly beneath each grinding wheel and screwed in place. While you could mount your Wolverine system permanently to a benchtop, an 8″ to 10″-wide by 20″ piece of 3/4″ plywood or solid wood creates a portable workstation that can be stored, then clamped to a benchtop wherever and whenever it’s needed.
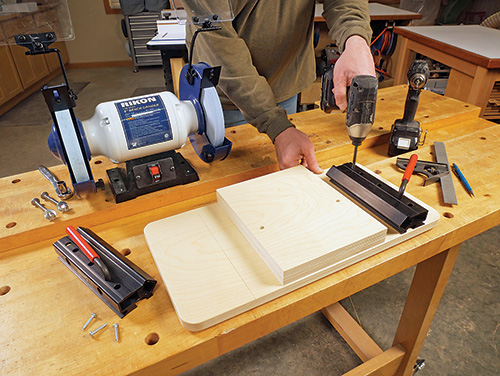
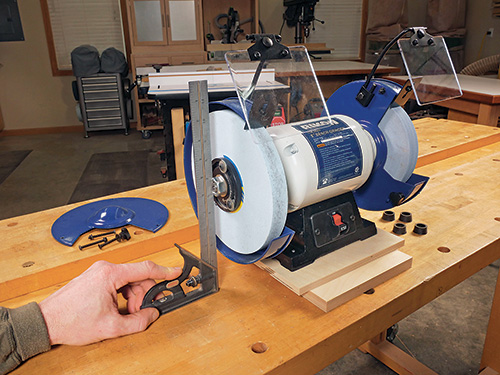
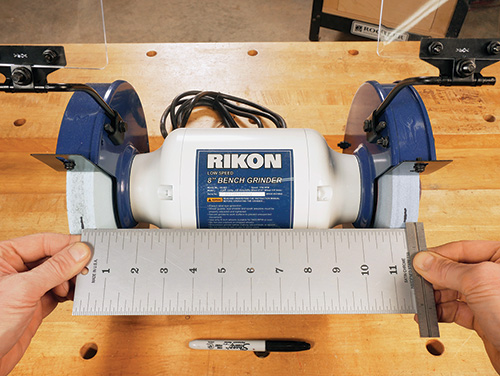
Glue and nail or screw the blocking piece to the center of the baseboard. Then carefully measure the span between the grinding wheels, from the center of one wheel’s thickness to the other. Mark the baseboard to center this span on its length.
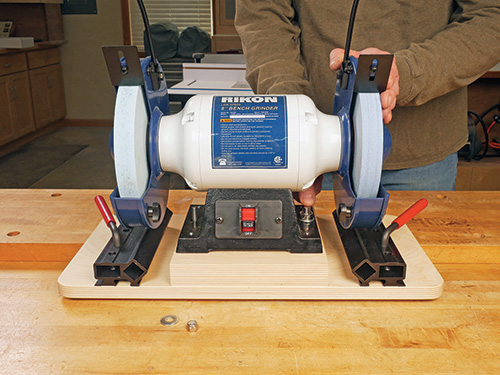
Arrange the Wolverine bases so their diamond-shaped opening (for the V-arm or platform base) is aligned with the wheel-span layout lines, and set the front faces of the bases flush with the front of the baseboard. Secure each base to the baseboard with panhead or flathead screws.
All that’s left to do is mount the grinder to the baseboard. Position it on the blocking so the rims of the grinding wheels are flush with the front edge of the baseboard and the wheels are aligned correctly over the Wolverine bases. A pair of 5/16″ or 3/8″ carriage bolts, driven up through the baseboard and blocking into the grinder’s base holes, will secure it. Fasten the components with washers and nylon-insert locknuts or lock washers and regular nuts.
CBN Wheel Considerations
In the photos shown, I replaced the aluminum oxide wheel originally supplied with the grinder on the right side with an 80-grit CBN (cubic boron nitride) wheel. This 1-1/2″-wide wheel is covered with a manufactured abrasive that is nearly as hard as diamonds but can cut dry without fracturing, as diamonds will. CBN grinding wheels have a metal core that conducts heat well, to draw heat away from the tool being sharpened. While pricey, CBN wheels will last a lifetime. They’re wider than standard wheels, so you’ll need to remove the grinder’s wheel shroud to install them. But since CBN wheels can’t fracture and explode like typical bonded abrasive wheels can, this is not a dangerous modification to the machine.
Whichever wheel types you use, an 80- and 180-grit pair is a good combination for sharpening high-speed steel lathe tools.
Wolverine Accessories
Several accessories can be used with the Wolverine Jig for sharpening the gamut of turning tools.

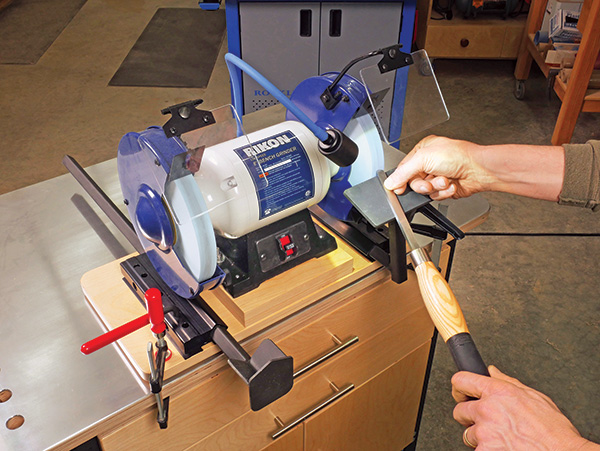
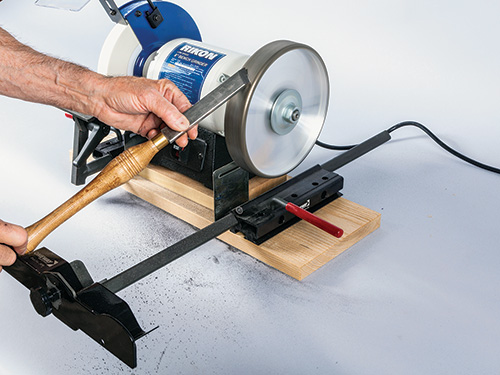
Platform rest: Perfect for grinding scrapers of all shapes, the rest tilts to match the scraper’s bevel angle.
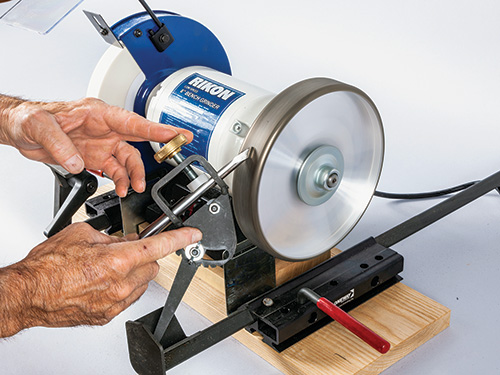
Vari-Grind Jig: Nests in the V-arm to sharpen fingernail or side grinds on spindle or bowl gouges. Adjusting the angle of the gooseneck changes the angle of the sides of the fingernail, while sliding the V-arm in or out changes the nose angle.
Skew jig: Attaches to the end of the V-arm and provides two offset pockets for grinding the angled bevels on both faces of skew chisels.
For under $500, a slow-speed grinder equipped with a Wolverine Grinding Jig will make the path to proficient turning much gentler. Once you get the hang of using it, sharpening turning tools won’t be the hassle many turners believe it to be.


