This article, “Shopmade Beading Tool,” by Bob Patros, is from the pages of American Woodturner and is brought to you by the America Association of Woodturners (AAW) in partnership with Woodworker’s Journal.
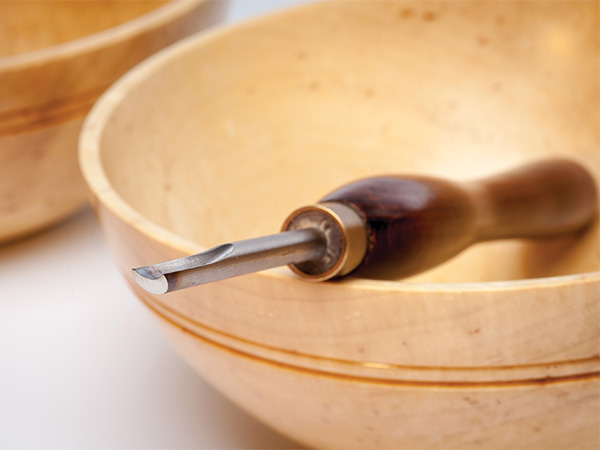
Improving your woodturning skills is a progressive journey. When you feel comfortable turning bowls, what is the next step? For me, it was finding an efficient way to add a decorative element—beads. I have tried commercially available beading tools, but the best beads I have turned were made from an old 3/8″ (10mm) spindle gouge converted into a beader. Repurposing and custom-grinding tools is an inexpensive and creative way to get the results you want. So if you are ready to add a simple decoration to your bowls and have an old spindle gouge that is ready for a new life, take to the grinder and make this simple tool.
New Life for an Old Spindle Gouge
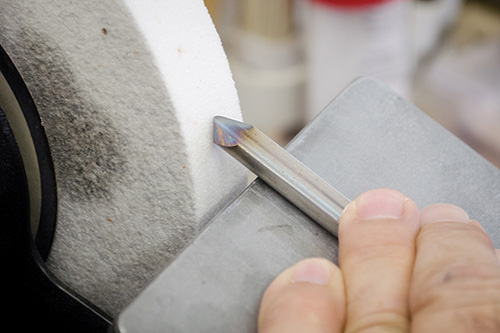
Before you start grinding your spindle gouge into a beader, know the integrity of the tool steel you are converting. If not done carefully, grinding anything other than high-speed steel (HSS) could yield problematic results. What’s more, not all tools marked HSS are alike, and some may not be made of the quality of steel advertised. Tools made of carbon steel, or even HSS that contains some carbon steel, can overheat easily. “Bluing” results when a tool is overheated, and this can permanently alter the hardness of your tool steel. So the rule of thumb is to take your time when grinding to avoid overheating the tool, especially with carbon steel. Once converted, either an HSS or carbon steel tool will do the job.
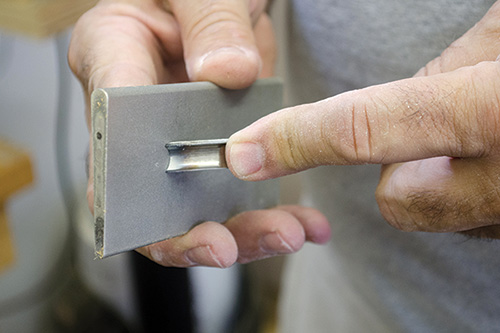
To start the conversion, set your grinder’s toolrest to about 50 degrees. Using a rough-grit shaping wheel, place the spindle gouge flat on the toolrest with the flute facing upward and slowly push it straight in, being careful not to overheat the tool. Since the round profile of your tool is the part that is resting on the toolrest, you will have to hold it even and steady as you proceed. Take your time and grind until a flat bevel and two points are established.
A 3/8″ gouge will produce a bead of the same size; use different sized gouges to vary the size of your beads. What size bead would look best for the size bowl you are decorating?
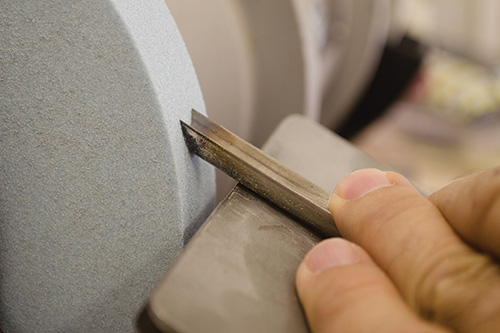
Sharpening your “new” tool is easy. You can quickly hone the tool’s edge or take the beader back to the sharpening wheel for a gentle touch up. If you sharpen the tool at the grinder, present the tool as you did when first shaping it. With either method, be careful not to round the two points.
Using the Tool
It is worthwhile to plan your bead enhancement to your newly turned bowl. I have been told you should never turn an even number of beads side by side, as this detracts from the bowl’s balance and aesthetics. The distance from the rim of the bowl to the bead is also worth careful consideration. Drawing pencil lines on the bowl prior to cutting will help you visualize the final look.

With the location of your bead indicated in pencil on the bowl, present the beader flat on the toolrest with the flute facing down. Ensure that both points touch the surface of the bowl at the same time. This will facilitate exact placement throughout the process.
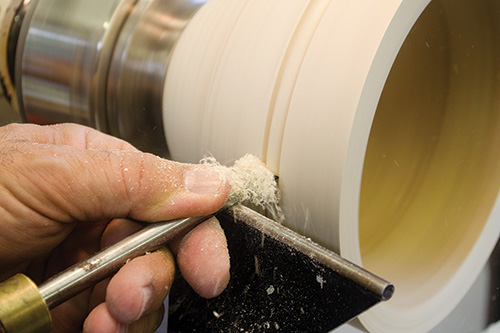
Once you have established both point marks on the surface of the bowl, the tool action is to rock the tool gently from side to side while applying forward pressure. The tool always remains flat on the toolrest with the flute facing down, and the shaft of the tool remains close to horizontal. During the cutting process, pull your tool back frequently and stop the lathe to see how your bead is taking shape. With the lathe still off, rotate the bowl by hand to ensure you are forming the bead completely. When re-engaging the beader after evaluation, be careful to present the points in their original location.
Sanding
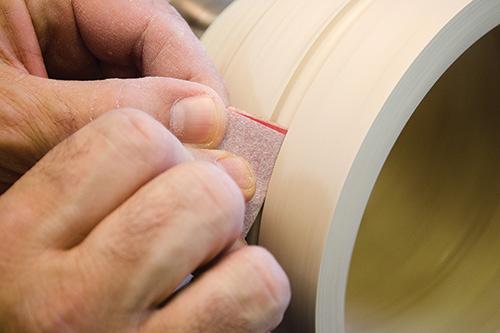
With its flat top bevel pointing down, this beader essentially cuts like a negative-rake scraper and leaves a smooth surface that requires minimal sanding. To touch up your bead after tooling, use a small, folded piece of abrasive and sand lightly from the groove toward the top of the bead with the lathe speed at about 500 rpm. By sanding the bead within the grooves and working your way carefully toward the top, you will avoid flattening the round of the bead you have created.
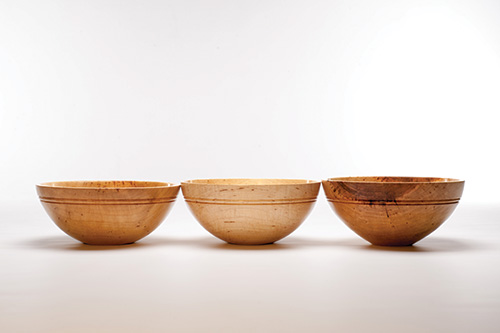
Woodturners are known for making their own tools—or adapting an existing one—for the job at hand. This shopmade beading tool is no exception. It works great on bowls and spindles alike.
Special thanks to John Sake, Paul Fisch, and Kristin Royalty for the photographs in this article.
Bob Patros enjoys a wide variety of turning projects, including pens, bowls, and hollow forms. Living in La Crosse, Wisconsin, Bob has been a member of the Coulee Region Woodturners for ten years and of the AAW for almost as long.


