This article, “Simple and Useful Split-Turned Spoons,” is from the pages of American Woodturner and is brought to you by the America Association of Woodturners (AAW) in partnership with Woodworker’s Journal.
Some years ago, I bought a carved wooden sugar spoon. I still use that spoon daily at breakfast and have often considered how to make such a spoon fully on the lathe.
The problem I always encountered when trying to figure out a method of turning spoons was how to deal with the handle. When attempting to turn the outer rim of the bowl section, the handle prevents a full outer cut, which would leave part of the rim to be carved off the lathe. One morning, a light bulb, metaphorically, came on. If the piece were split-turned, the outer bowl and handle could be fully turned in profile. When the blank was split after turning, each identical half would be spoon-shaped. All that remained was the hollowing of the bowl to make a fully turned spoon.
Here’s how I turned my own sugar spoon using only the lathe.
Prepare a Spoon Blank
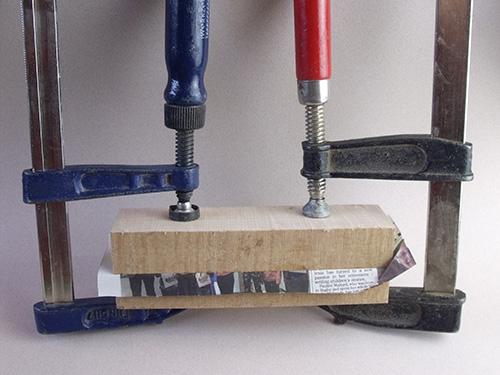
Take two pieces of your chosen wood (I used maple), each 6-1/2″ (17cm) long, 2″ (5cm) wide, and 1″ (25mm) thick. Plane the faces flat and true. Glue and clamp them together with white glue and a layer of newspaper between them. The glued-up blank will measure 6-1/2″ × 2″ × 2″.
Safety Measures for Newspaper/Glue Joints
1. It is vitally important that the two gluing surfaces be planed perfectly flat and true.
2. Apply white glue to both of the prepared surfaces, sandwich a sheet of newspaper between them, and clamp firmly. Leave the assemblage overnight for the glue to dry fully.
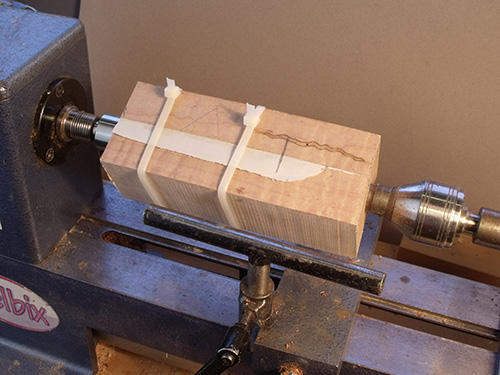
3. When you are satisfied that the glue is dry, mount the blank between centers, but note that single-point centers should be avoided, as they could act as a wedge and prematurely split the joined halves. At the headstock end, fit a steb center and at the tailstock, a cup center. Both centers should straddle the joint line.
4. As added safety measures, use cable ties to temporarily secure the blank while turning from square to round and wear a protective faceshield.
Key Dimensions

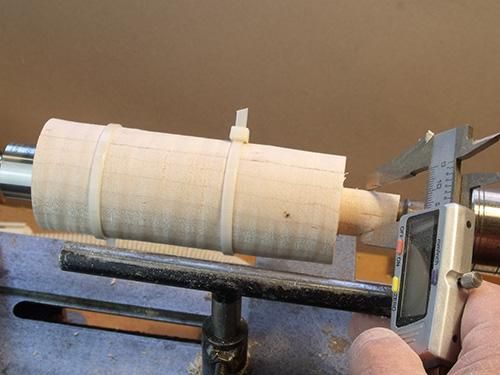
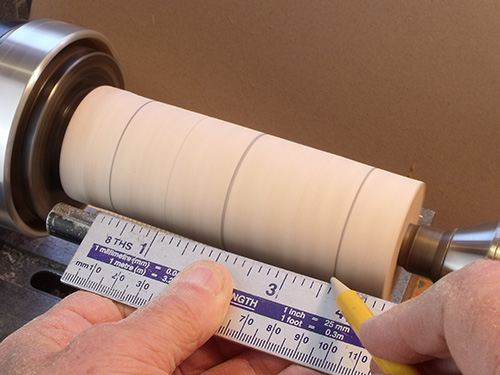
Carefully turn the blank to a 1-3/4″- (4cm-) diameter cylinder. As you turn the blank round, slide the cable ties to the newly turned area, retighten them, and trim away their excess ends. Then turn the area of the blank previously restricted by the cable ties. In this way, your newspaper-glued blank is always protected by tight cable ties during turning.
At the tailstock end, turn a 3/4″- (19mm-) long tenon. Remove the blank from the lathe and remount it in a chuck at the headstock.
Carefully recenter the workpiece at the tailstock end on the cup center.
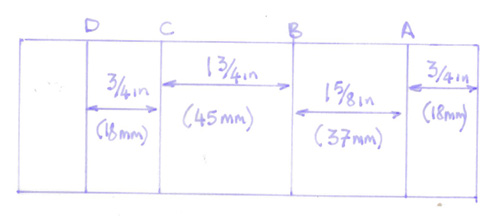
From the tailstock end of the blank, mark a series of pencil lines as shown.
Turn the area between line A and the tailstock down to 3/4″. Then reduce the area between lines A and B to 1/2″ diameter; this will be the handle of the spoon.
The area between lines B and C will be the bowl of the spoon but at the moment remains untouched while the area between lines C and D is turned to 1/2″ diameter.
Shape Outside Spoon Profile
Mark a center guideline between lines B and C, and turn down either side of this line to produce a fluent curve: a quarter circle to the left of center and a quarter circle to the right.
Make a card template to the dimensions shown and use this template to check the outside shape of your spoon as you turn. Adjust the shape as necessary to match the card template.
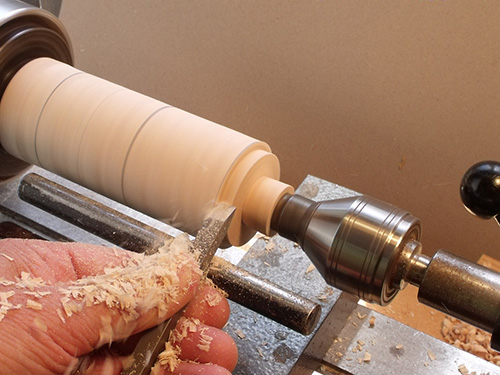
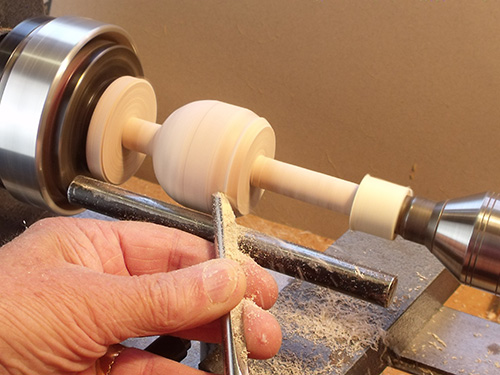
At the moment, the handle of the spoon is unattractively straight, so, before parting off, turn a gentle curve in the handle. Then sand the workpiece.
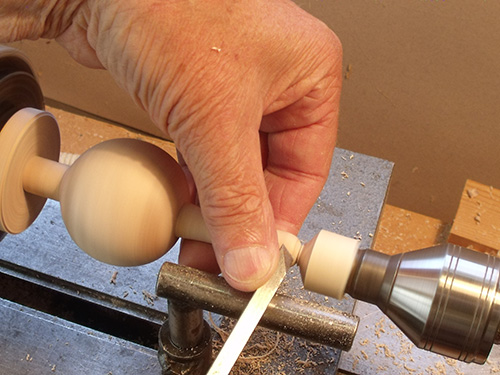
Make sure the work is supported while you part it from the lathe. I use my fingers to support the turning while paring away the end of the handle to a nice curve.
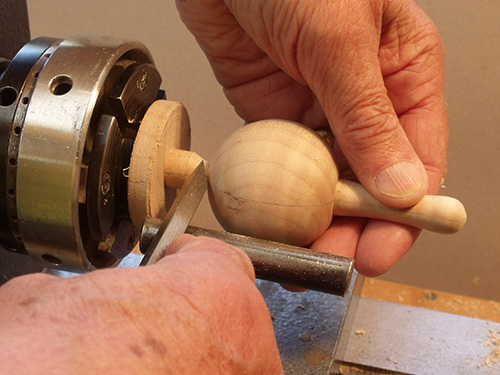
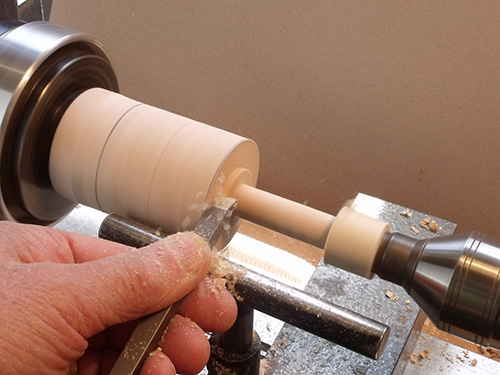
Similarly, support the whole spoon blank while parting off at the headstock end. Make sure the parting cut flows smoothly as part of the shaping of the “bowl”.
Split the Newspaper/Glue Joint
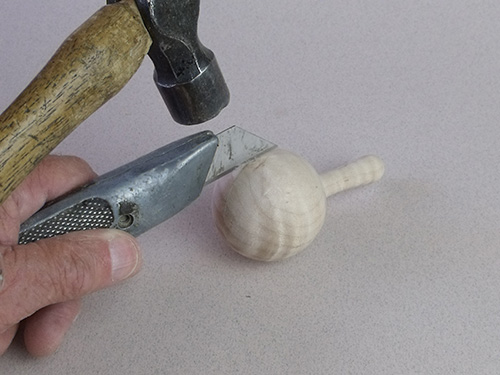
Carefully place the blade of a utility knife exactly on the joint line and tap the blade with a hammer. If this does not immediately split the blank into two halves, tap a thin wood wedge into the opening made by the knife, and use it to break the joint.
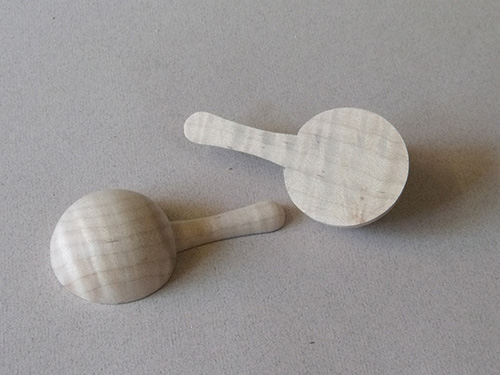
A wood wedge will prevent damaging the internal surfaces. Carefully sand away the residual newspaper and glue from the flat surfaces of the half blanks. Each half will make a spoon, so every blank will produce two spoons.
Make a Custom Chuck
A shopmade chuck will hold the spoon safely for hollowing its bowl section. Fit a 1″-thick softwood disk 6″ (15cm) in diameter to a metal faceplate and mount it on the lathe. Turn its surface flat and true. Onto the softwood surface screw a 6″-diameter disk of 1/4″- (6mm-) thick medium-density fiberboard (MDF). At the center of the MDF, turn a 2-3/4″- (7cm-) diameter “window.”
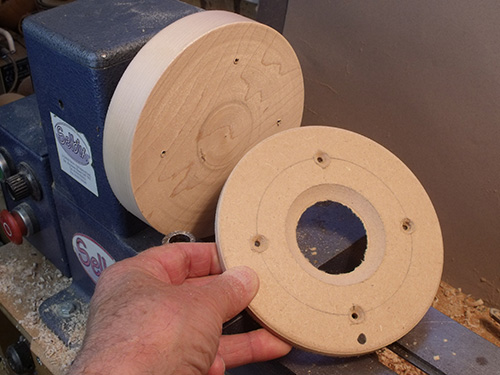
Chamfer the edge of that opening, but do not turn into the softwood beneath. Make reference marks aligning the MDF to the softwood disk, then remove the MDF disk and temporarily set it aside.
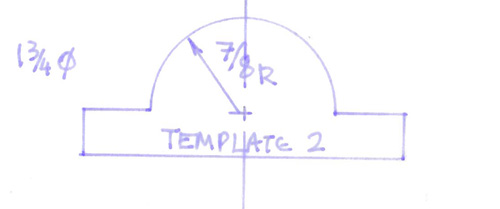
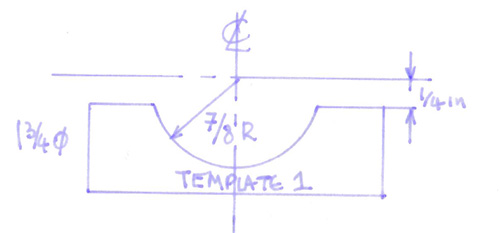
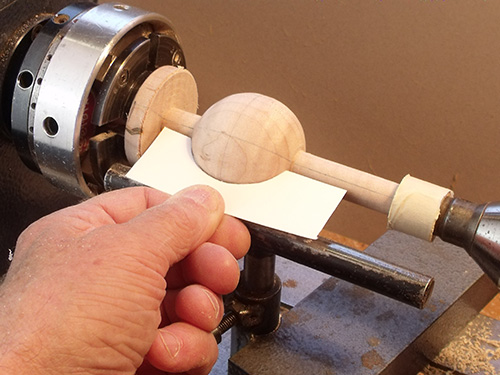
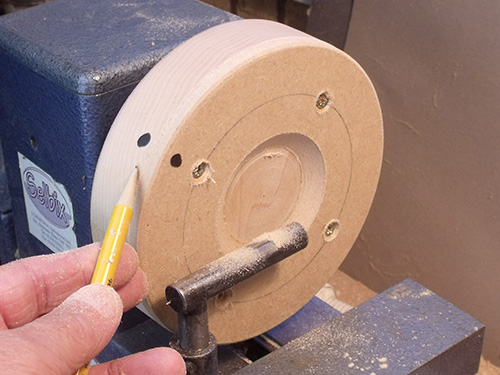
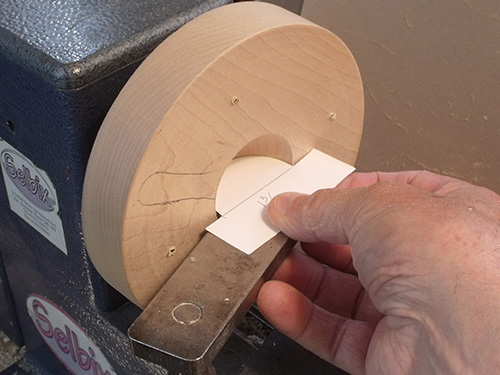
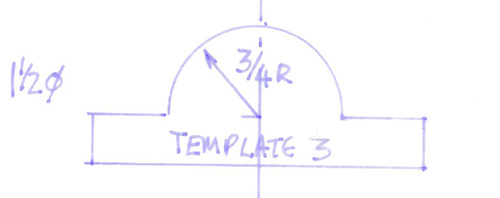
At the center of the softwood disk, mark a 1-3/4″ circle with a pencil. Turn a hemispherical hollow within this marked circle, confirming the shape with a card template made to the dimensions shown.
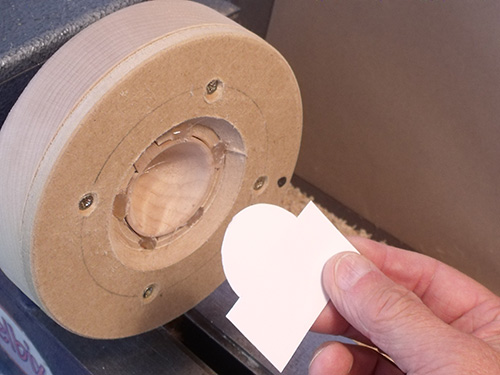
When you are satisfied with the hollowing, mark out the spoon’s handle position on the softwood disk and carve a recess to accept the handle.
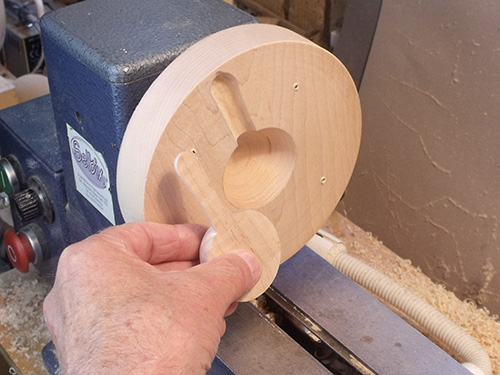
Check that the spoon and handle are a good fit, and make adjustments as necessary.
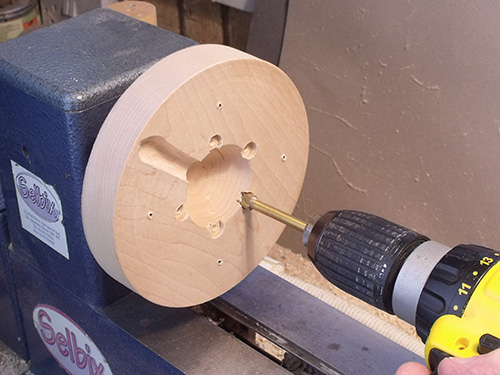
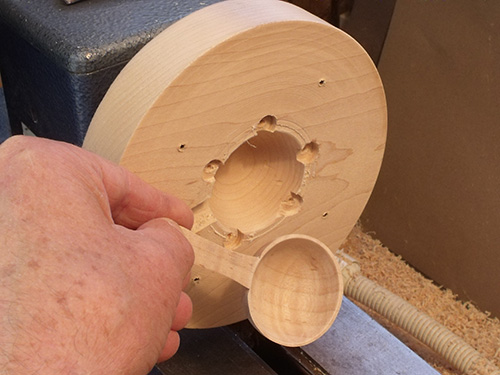
Around the outer edge of the hemispherical hollow, carefully drill five 3/8″- (10mm-) diameter holes 1/4″ deep. These holes should “break” into the edge of the hollow.
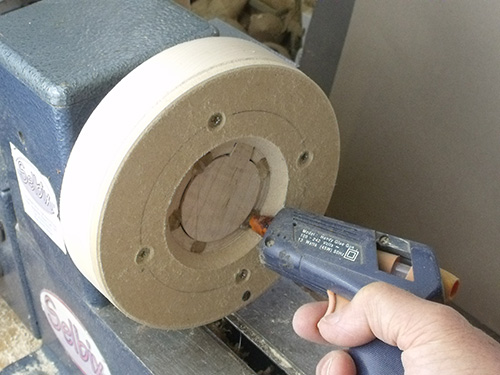
Fit the spoon blank into the prepared hollow and screw the MDF disk back in place. Squeeze hot-melt glue into the 3/8″ holes to firmly secure the blank.
Turn the Bowl
On the face of the spoon bowl, mark a 1-1/2″- (38mm-) diameter pencil circle.
As shown, hollow the bowl of the spoon and use a card template made to the dimensions as a guide. Sand the interior of the spoon bowl.
When you are satisfied with the hollowing, remove the MDF disk. The hot-melt glue is now all that holds the spoon in place. It can be carefully picked out to release the finished spoon. Lightly sand the handle edges to make it more comfortable to hold.
Once the card templates and simple shopmade chuck have been made, it’s so easy to go into production and make several spoons. Like me, you will probably find plenty of uses for them beyond spreading sugar over your breakfast cereal.
David Springett wqs a British woodturner known for his inventive creations. He authored Woodturning Wizardry, Woodturning Full Circle, Woodturning Magic, and, with Nick Agar, Woodturning Evolution.


