This article, “The Basics of Workholding,” is from the pages of American Woodturner and is brought to you by the America Association of Woodturners (AAW) in partnership with Woodworker’s Journal.
At the heart of woodturning is how to hold a workpiece on the lathe. For a beginner, this can be a complicated, confusing question. A recent woodturning catalog offered 205 different holding devices. What makes it even more confusing is that there are multiple ways to hold a workpiece for the same operation, and many projects require a sequence of different holding methods. Yet another source of confusion comes from the evolution of holding methods; consulting older woodturning books will result in different answers than current day practices.
To find your way through this maze, it is good to understand the basic concepts of workholding on the lathe. I think of holding methods in terms of four categories—squeeze it, expand in it, push on it, and screw it — which encompass all holding methods. For any given workpiece, think about each of the four categories and whether a holding device, or method, is a safe way to hold your blank.
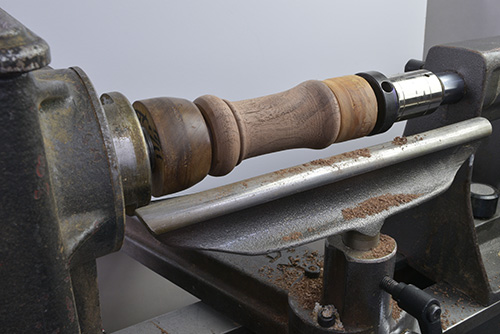
I find it helpful to write out the steps when I know I’ll need multiple holding methods for a project. When determining the sequence, start with the holding method for the last procedure and work through ways to get there. For example, to hollow the inside of a bowl mounted in a scroll chuck, a tenon or recess is needed to hold the blank with the chuck. How can you mount the blank to create that tenon or recess? There are several possible answers, but the point is to start at the final holding method and work backwards. Thinking in terms of squeezing, expanding, pushing, or screwing will help you visualize the options.
Squeeze It
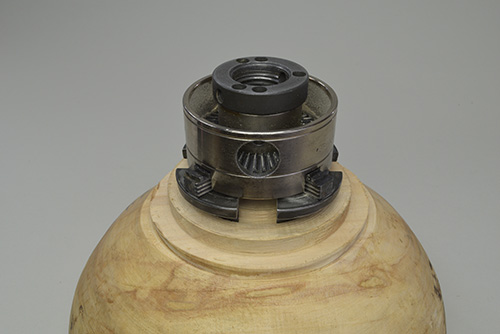
Four-jaw Chucks

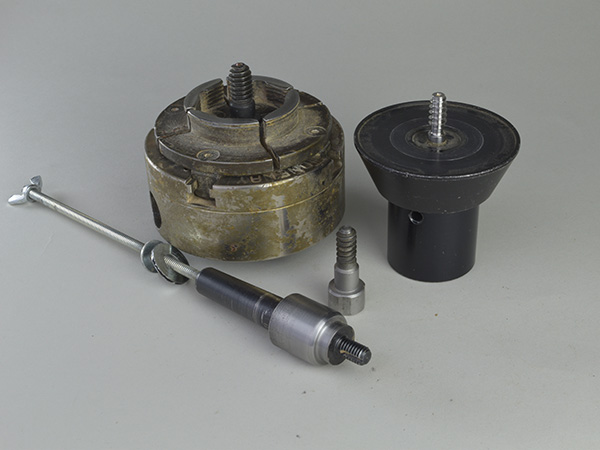
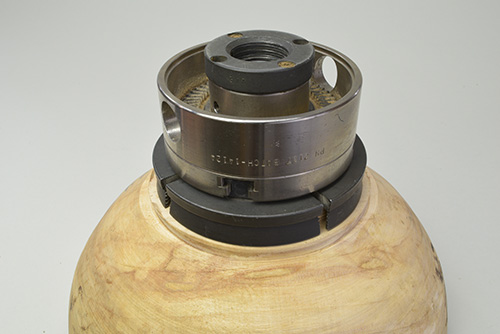
The scroll chuck, or four-jaw chuck, is the most commonly used device in the squeeze category. When used in compression mode, the chuck jaws squeeze down on a tenon to hold the workpiece. Chuck bodies come in different sizes, with a wide variety of jaw sizes and types Some chuck jaws are serrated and straight-sided, and others are smooth and angled for a dovetailed tenon. Generally, jaws are interchangeable on chucks made by the same manufacturer.
Different chuck jaws are designed for different uses. For example, large, 4″- (10cm-) diameter jaws excel at holding big blanks for coring because the larger diameter of the tenon provides more strength. Smaller jaws are suitable for more delicate work. Jumbo jaws are made to hold a bowl by the rim so the bottom, or foot, can be completed.
The size of your chuck should also be a function of the size of your lathe. The mass of a large chuck on a small lathe means the motor will be strained at startup. You can run a small chuck on a large lathe, but a large chuck on a small lathe is a bad combination.
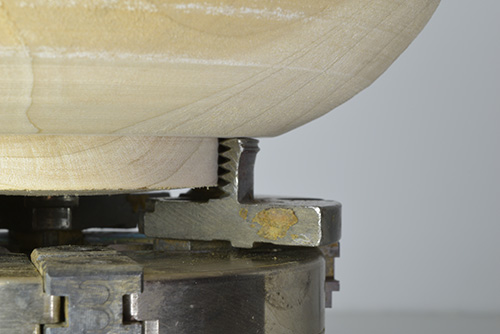
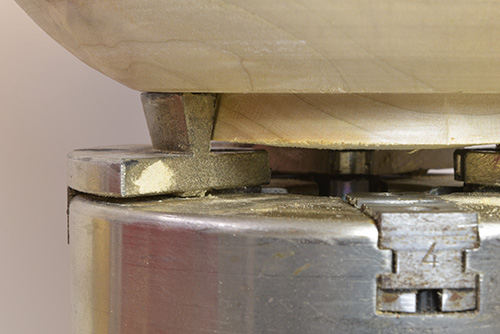
New turners frequently allow their chuck jaw size to determine the size of the completed form’s base. But this practice generally dictates proportions that are not ideal; it can result in pieces that are squat and bottom-heavy.
One way to avoid this design flaw is to use a tenon size and jaws that are smaller than the intended base. The photos show the same bowl blank on the same chuck, one with 4″ jaws and one with 2″ (5cm) jaws. For each case, can you visualize how you would complete the bottom?
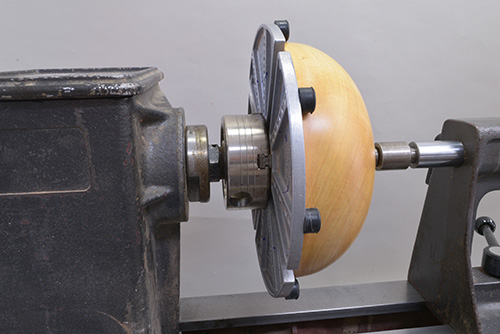
The largest of the holding devices in the squeeze category is a chuck outfitted with jumbo jaws. These jaws are designed to hold a bowl so its bottom can be completed. As the chuck is tightened, rubber bumpers compress and hold the outside of the rim, though it is also possible for the bumpers to expand inside the rim, depending on the bowl’s shape. There is a greater fly-off risk with this type of mounting; it is best to bring up the tailstock for added support and turn at a slow lathe speed.
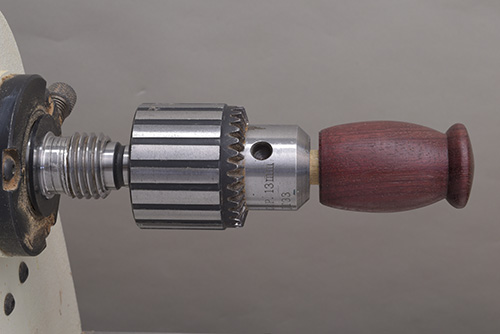
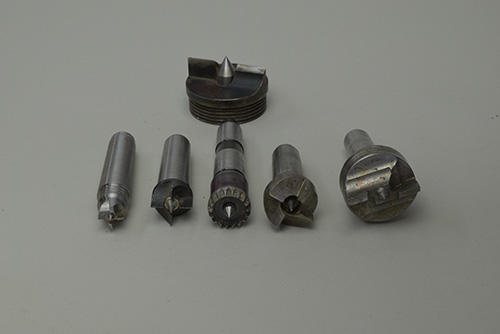
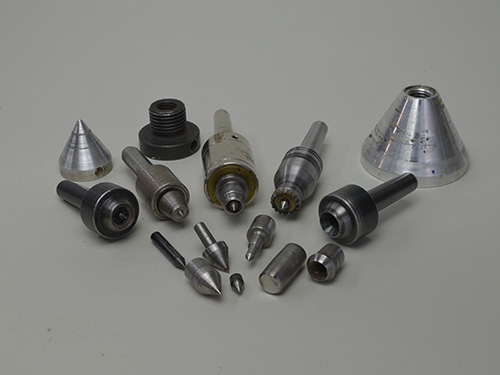
Collet Chucks
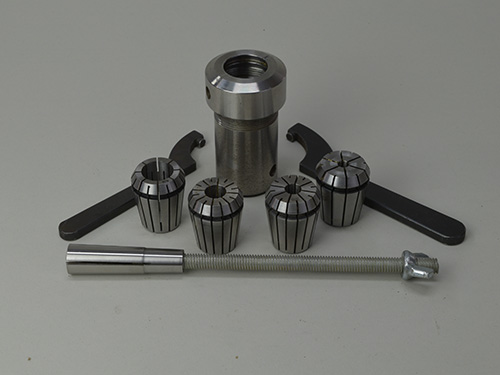
A collet is another “squeezing” type of chuck. It exerts a clamping force on the workpiece when it is tightened by means of a tapered outer collar. Collet chucks excel at holding small-diameter blanks or tenons.

Collets offer limited adjustment of capacity. That is why typically they are sold in sets, rather than individually. However, collets have two advantages for holding small-diameter blanks: they provide a strong hold on the workpiece and will not mar the wood. A variation of a collet chuck is the dedicated collet with drawbar. In this case, the drawbar runs through the headstock spindle and pulls the tapered collet tight. The taper causes the jaws to contract, holding the workpiece firmly. This holding method is used frequently when making bottle stoppers.
Drill Chucks
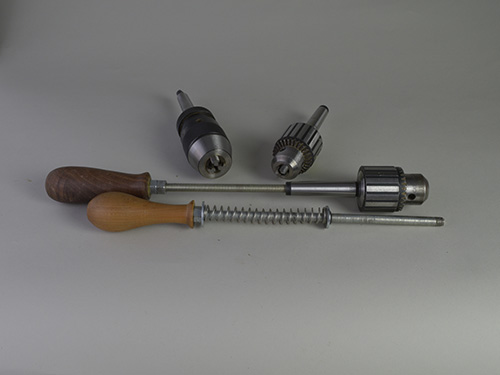
Drill chucks are another example of holding devices in the “squeeze” category. A drill chuck has an advantage over a dedicated collet in its wider capacity.
A disadvantage of drill chucks is that they leave compression marks on the wood. Like collet chucks, drill chucks should be used only for small workpieces.
Expand in It
Scroll Chucks
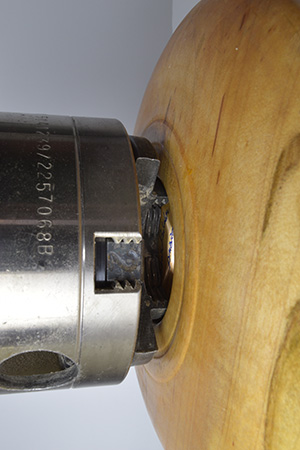
Scroll chucks can also be used in expansion mode, which means the jaws expand inside a recess in the workpiece. Expansion mode has the advantage of greater repeatability; a piece can be chucked, removed from the jaws, and then re-chucked and will usually still run true. This rarely happens when using a scroll chuck in compression mode.
A second advantage of expansion mode is that it uses less wood. The recess needed for chucking ultimately becomes part of the base, so no wood is wasted. When a chuck is used in compression mode, the tenon being held in the chuck typically becomes waste if it is not to be included in the base/foot design. Losing 1/2″ (13mm) of wood from a piece of 2″ stock is significant. Push on it
Between Centers
A traditional way of holding wood on the lathe is between centers. The work is pinned between the headstock and tailstock, with pressure exerted from the tailstock end. The headstock and tailstock points have evolved to today’s improved drive and live centers. Drive centers are inserted into the headstock and transmit rotational force to the blank.
Live centers are inserted into the tailstock. Ball bearings in the live center allow it to rotate freely. The combination of the two centers allows a blank to be held securely on the lathe and yet rotate.
Drive centers vary in size and type. When turning large, green blanks, a drive with a larger crosssection provides more “bite” in the wood. This minimizes the problem of a drive center “drilling” a hole into the wood and spinning freely. A two-prong drive center allows greater adjustment of the blank and still produces a good bite into the wood. Drive centers with a small cross section excel at multiaxis work.
Live centers also are available in a wide variety of configurations. The variety of turning forms has given rise to specialized configurations of live centers. Live centers can come as a kit that offers specialized points for different types of work. Some live centers have the option of an adapter that allows a scroll chuck to be threaded onto the tailstock. The live center allows the chuck to rotate freely, which can be useful when reverse-mounting a form. Mounting the piece on the tailstock while still in the chuck ensures concentricity is maintained.
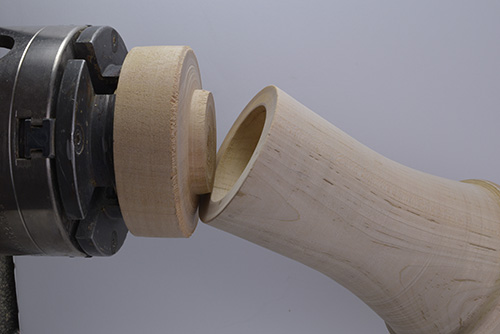
Jam Chucks
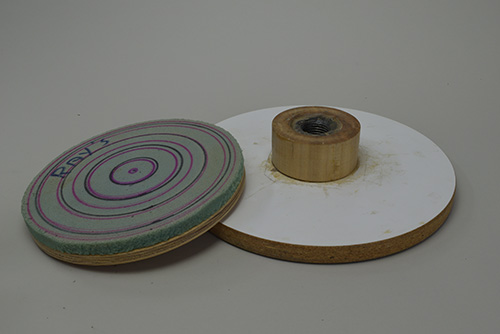
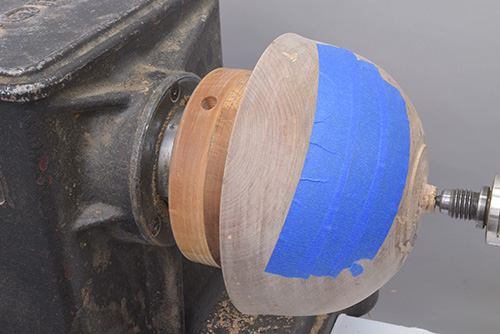
The “push on it” category also includes jam chucks. The photos show how a shopmade jam chuck can be used to reverse-mount a bowl to allow the bottom to be completed. The foam-covered disk is threaded onto the headstock, the bowl is centered on the foam disk, and the live center in the tailstock is brought up to push the bowl against the foam disk.
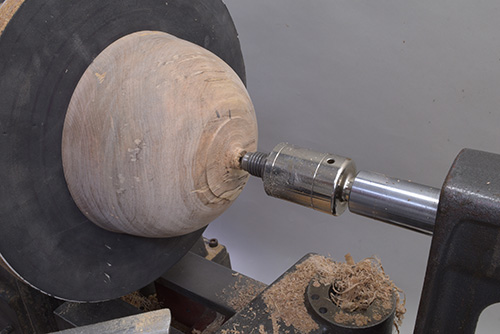
The foam protects the rim of the bowl from damage. This method is an alternative to the use of jumbo jaws, though here the tailstock must remain in place during the entire process, leaving a nub that can be carved away after turning. Turning should be done at slow speeds with this type of mounting.
A very common type of jam chucking is the use of a wasteblock custom-turned to accept the work at hand. Very often, turners will shape a spigot so a project can be friction-fit for reverse-mounting. This works well for small vases and endgrain boxes. Another variation, without friction-fitting, is for a bowl to be placed over an appropriately shaped wasteblock and held in place with tailstock pressure, allowing access to turn the base.
Another form of jam chuck is useful for mounting projects that involve a through-hole. In this application, a block of wood has been threaded and screwed onto the headstock spindle, and a second piece of wood has been threaded and mounted on a live center adapter. Each jam block is shaped to match the hole in the middle of this small pepper mill. The tailstock is advanced to apply the needed force to both hold and turn the pepper mill blank. Using wooden jam blocks means that if my tool goes off the blank, it will contact wood, not metal.
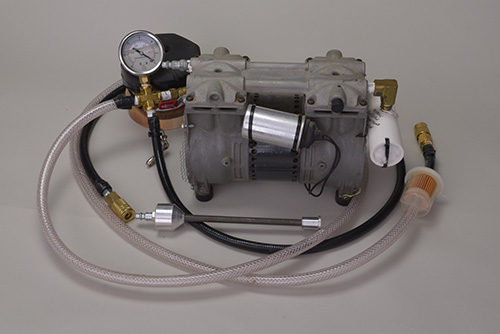
Vacuum Chucking
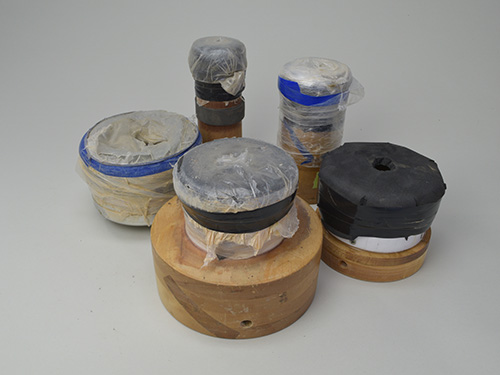
Another form of jam chucking is vacuum chucking. A pump is used to draw air through the lathe spindle to create a vacuum that holds the workpiece against a specialized chuck. The size of the vacuum chuck determines the amount of holding power. As the diameter of the chuck increases, the holding power of the vacuum also increases.
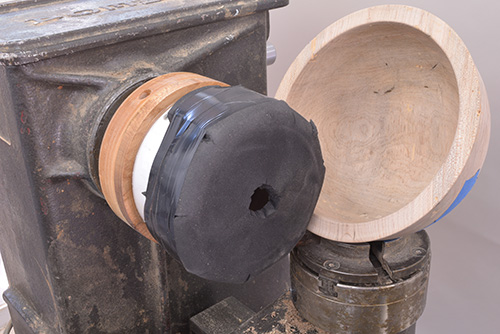
Vacuum pumps are classified according to the amount of vacuum they can create and the volume of air they can move. The amount of vacuum is denoted by how many inches of mercury the pump will lift (inHG), and flow is measured in cubic feet per minute (CFM).
Vacuum pumps used in woodturning are not able to achieve a perfect vacuum, so the flow rate of your pump is important. Wood is porous, so some air will pass through it. Regardless of the extent of the vacuum, if the flow rate of the pump is too low, air moving through the wood will keep the vacuum below the level needed to turn safely. Be sure to compare flow rate as well as inches of vacuum when considering the purchase of a vacuum system. Use the tailstock for support as long as possible during turning.
A rule of thumb is that your vacuum gauge should register at least 20 inches for safe workholding. As with all rules of thumb, use common sense. Airflow through the wood can be minimized simply by rubbing wood dust over the workpiece. The flow of air will draw the dust into open wood pores, closing the airways and improving the vacuum. A second way to stop air from being pulled through the wood is to put masking tape over the porous areas of the workpiece.
Screw It
Faceplates
Faceplates are second only to between centers in the amount of security they offer. They were the holding method of choice before today’s scroll chucks and still retain the advantage of being one the most solid holding methods available.
The holding power of a faceplate is dependent on the strength and length of the screws. Common drywall screws are prone to break and should not be used. A better choice is sheet-metal screws. The critical element is the shear strength of the screw you select. Use longer, thicker screws for larger faceplates and workpieces.
When using a faceplate of any type, ensure that the entire surface of the plate is in contact with the wood. Note that when a screw is forced into wood, there will be a bulge of dislodged wood around the screw, which can push the faceplate up and cause a gap, compromising holding power. Pre-drilling pilot holes will help reduce this concern.
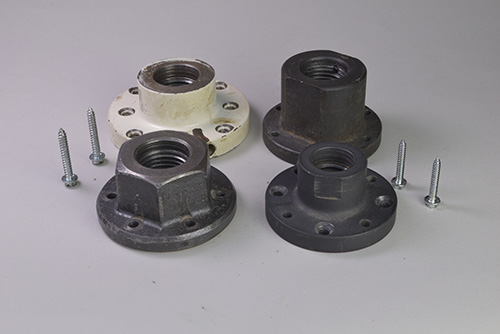
Screw Chucks
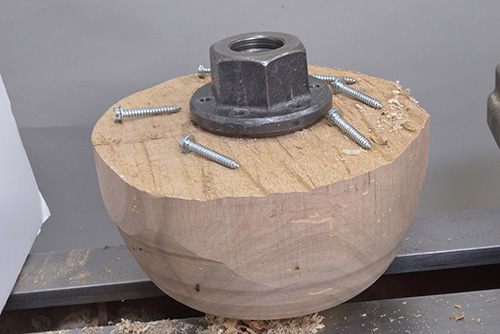
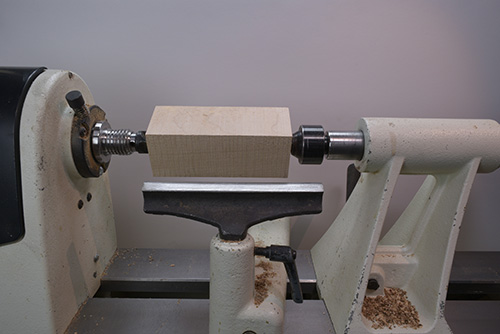
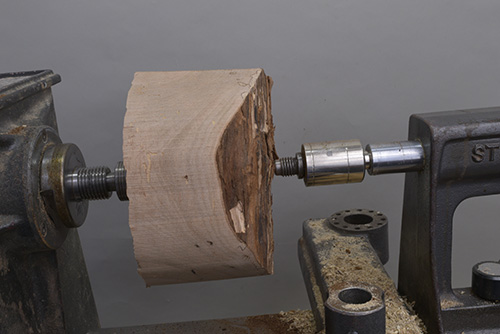
Screw chucks, or woodworms, are another holding method in the “screw it” category. Common types of screw chucks can be threaded directly onto the headstock spindle, inserted in the taper of the spindle, or used in conjunction with a scroll chuck. An appropriately sized pilot hole is drilled in the turning blank, which is then threaded onto the screw chuck.
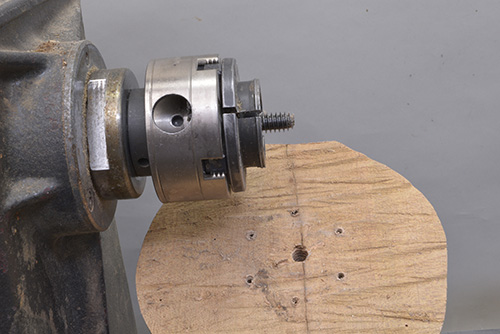
The holding power of this method comes from both the screw itself and fully mating the blank with the face of the screw chuck. The holding power can be so great that it can be difficult to remove a blank from the screw chuck when the turning is completed. Waxing the threads and/or using a spacer plate diminishes the problem. Large screw chucks excel at holding large, green blanks. As always, bringing up the tailstock to provide additional support is a recommended practice.
Final Thoughts
Developing a mental library of holding methods is critical to developing your skill as a woodturner. If the choices seem overwhelming, think in terms of each of the four categories of holding methods and work through the possibilities.
One final thought on holding methods: not all pieces of wood can be safely mounted and turned. Sometimes, the wisest decision a woodturner makes is the decision not to turn a specific blank. There is always more wood.
Dennis Belcher retired from a career of 30+ years in the investment world to his lifelong passion of working with wood. A member of the Wilmington Area Woodturners Association (North Carolina), Dennis demonstrates for clubs and participates in juried art shows. For more, visit his website, dennisbelcher.com.


