This article, “The Magic of Milk Paint,” is from the pages of American Woodturner and is brought to you by the American Association of Woodturners (AAW) in partnership with Woodworker’s Journal. Kimberly Winkle will be a featured presenter at AAW’s upcoming event Woodturning Fundamentals LIVE. Learn more here.
Have you often heard of milk paint but don’t know what it is or how to use it? I have used this product for many years to paint furniture and turned items. Milk paint gets its name because it contains the protein casein, which is found in milk.
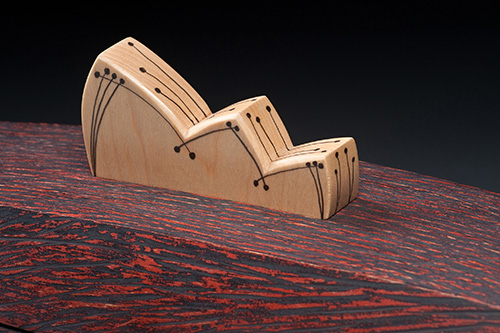
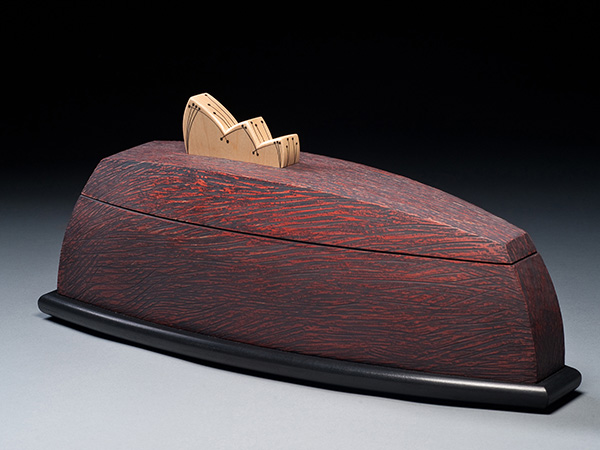
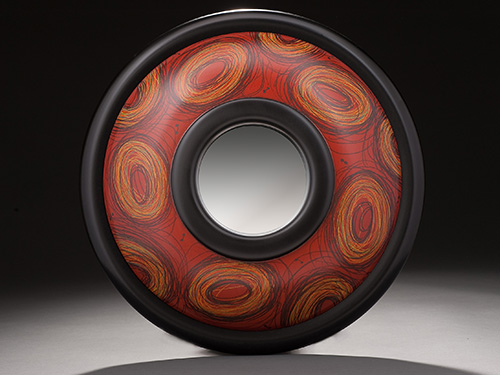
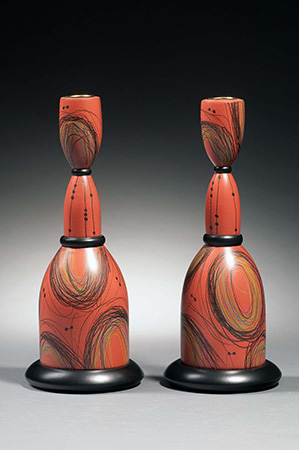
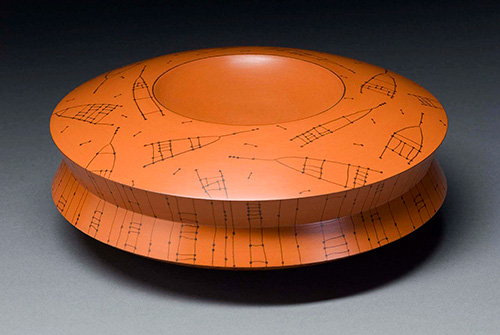
Milk paint has a long history with Colonial and Shaker furniture forms, but it can be used on practically any surface or format, including turned objects. Milk paint is beautiful as a solid color over a smooth surface or as a thin color wash. It can be layered to accentuate textured surfaces or to create the illusion of age. Let your creativity flow!
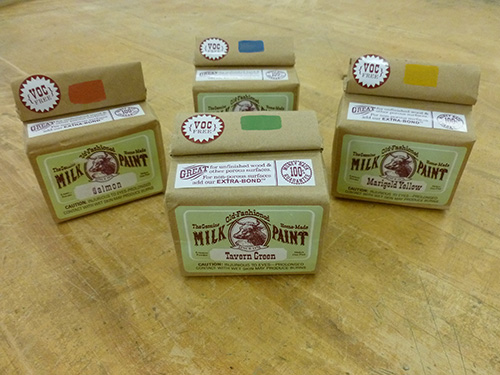
Milk paint is durable, versatile, eco-friendly, and comes in a delicious color palette that uses natural earth pigments. Many woodworking companies carry milk paint, so a quick search on the Internet will reveal a variety of options for purchasing a supply.
Milk Paint Safety
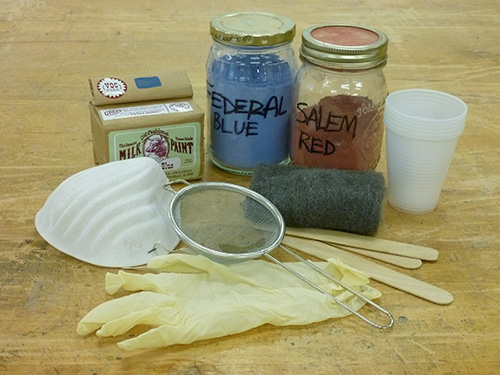
Milk paint is sold as a powder, which is made up of a mixture of casein, clays, lime, and earth pigments, and is mixed with water before use. Because milk paint is made of fine powder particles, it is important to wear a dust mask while mixing the powder with water or when sanding dry paint. It is also advised to wear finishing gloves while working with milk paint to help protect skin from the alkalinity of lime, which is activated when water is introduced. The alkaline lime reacts with acidic milk casein to create the paint’s binder. This catalytic reaction allows the paint to adhere strongly to surfaces, making it durable. Milk paint is volatile-organic-compound- (VOL-) free and is safe to wash down the drain.
Shelf Life
Like milk, milk paint has a shelf life. In dry form, the paint will last indefinitely; however, it is important to store it in a dry container, such as a well-sealed jar—jelly jars are the perfect size. Once water has been added to the paint, the mixture should be used within a day or two. It is best to mix only the amount you plan to use that day, if possible.

If you happen to have any leftover paint, or if your project will take longer than a day to paint, refrigerate the unused paint in a sealed container for up to three days. Over time, the alkalinity of the lime is lost, which turns it to chalk. Once this occurs, the catalytic reaction with the casein will not occur and the paint will not stick to the surface of the object you are painting: Do not use mixed paint that is older than a few days.
Mixing
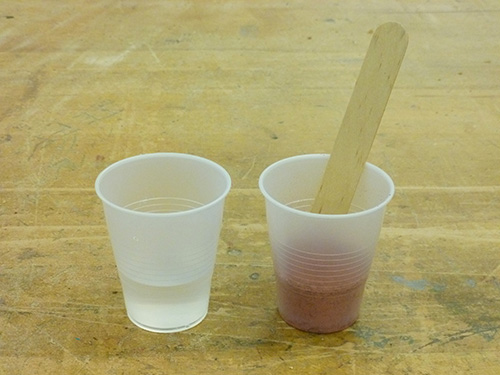
Measure equal amounts of warm water and paint powder into separate containers. I like to use small ribbed disposable cups and tongue depressors for mixing the paint. The ribs can be used as measuring lines and they also help to work out lumps in the paint.
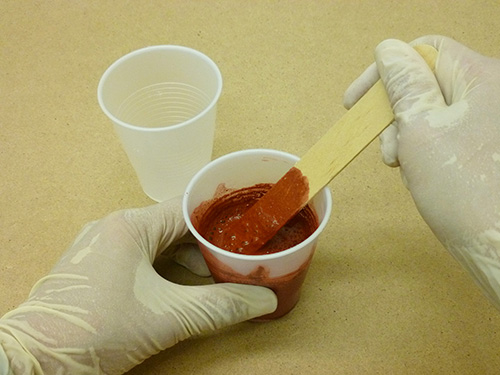
Create a paste by gradually adding part of the warm water to the powder, while mixing with the tongue depressor. As you mix, try to eliminate any lumps by pressing the paste against the sides of the cup with the tongue depressor. Continue to add the remaining water while mixing. Mix the paint thoroughly for several minutes, then let it sit for 15 to 20 minutes to allow the moisture to disperse completely. It may be necessary to add a bit of water if the paint has thickened during the waiting period. For most projects, the consistency should approximate the thickness of heavy cream.
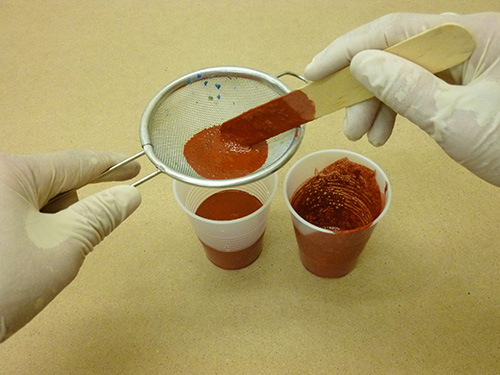
Some of the lumps may not completely dissolve during the mixing process, so it is important to strain the paint into a clean container before using it. Straining will remove any undissolved lumps. I like to use a reusable wire mesh kitchen strainer to strain paint. You can also use a paper mesh funnel, a piece of cheesecloth, or a piece of nylon stocking as a strainer. To strain the paint, simply pour the paint through the strainer and gently stir it around to help prevent the lumps from clogging the strainer.
Creating Colors
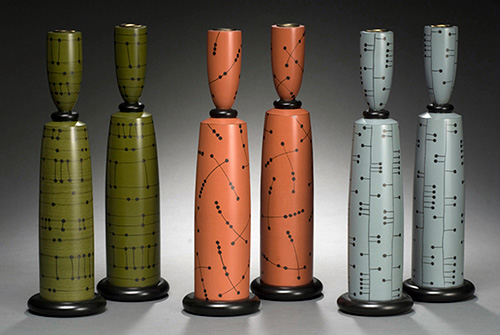
Photo by John Lucas
If you want a custom color, I recommend mixing the paints in wet form rather than in dry powder form. The colors darken slightly when water is added; it is easier to evaluate the color changes in the wet form. When mixing colors, always add dark colors to light colors since dark colors easily overwhelm light colors.
Milk paint utilizes earth pigments, so the color range is not as vibrant and saturated as chemical colorants. If you want to increase the brilliance of color in milk paint, universal tinting colors or other water-soluble pigments can be added to wet milk paint to increase color intensity.
Applying Milk Paint
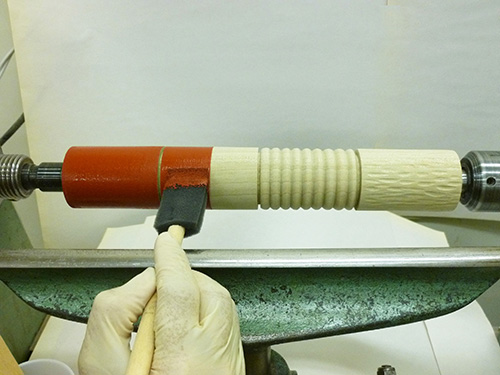
I like to apply the paint with the piece mounted on the lathe. This method is quick and easy because the object is securely held in place, eliminating any unsightly fingerprints. The spinning action makes application easy and even, and the toolrest keeps my hand steady. It is important to protect the bed of the lathe with a drop cloth before starting and to position the toolrest farther away from the wood — approximately three to four inches—than when turning.
With the lathe spinning in reverse at a low speed (200 to 250 rpm), begin applying the paint in even coats with a brush. I prefer foam brushes because they leave fewer brush marks and provide good coverage. It is best to apply several light to medium coats versus one thick coat, which will easily sag, drip, or pool.
It is not necessary to prime the material beforehand because the first coat of milk paint acts as the primer on most woods. If you are using a hard, close-grained wood such as maple, however, I suggest that you use Extra Bond in the first coat. Extra Bond is a product that is added to the first coat of milk paint to increase adhesion on nonporous or slick surfaces. The ratio for usage is one part Extra Bond to two parts mixed milk paint in the first coat only. Subsequent coats should not include Extra Bond.
Allow each coat to dry thoroughly, which usually takes about 20 to 30 minutes or until the paint appears flat and chalky. After the first coat of paint has dried, lightly sand with 220-grit abrasive to smooth the surface and to remove any raised grain. Sanding can be done with the lathe on and while wearing a dust mask. I typically apply a total of three to four coats of paint, but this will depend on what effect I am trying to achieve.
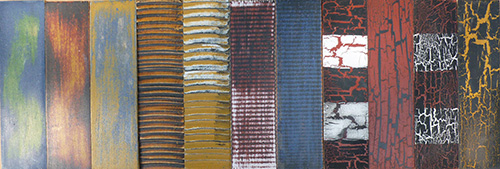
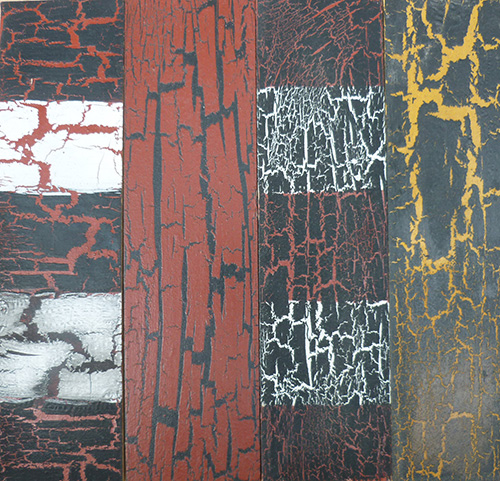
Special Effects
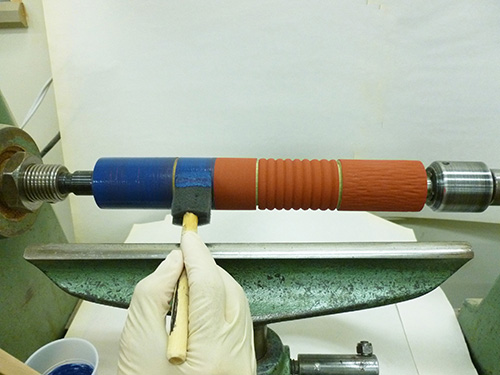
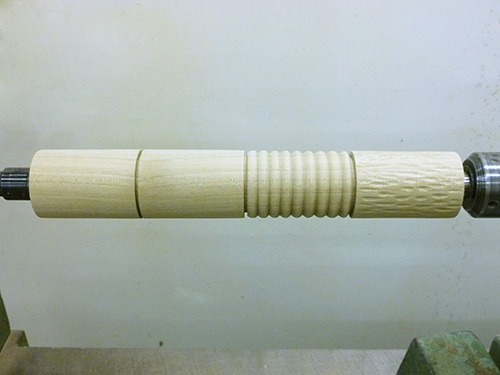
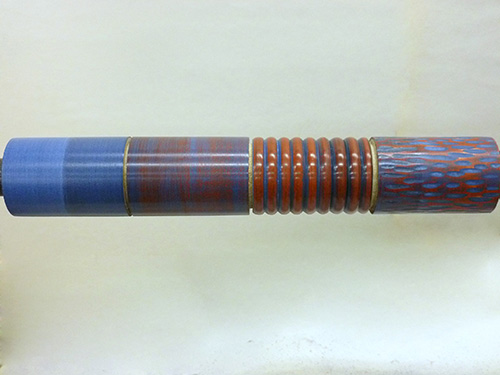
The visual versatility of milk paint is remarkable. It can take on a wide range of appearances, limited only by your imagination and experimentation. The sampler spindle shown is receiving two base coats of Salem Red and two topcoats of Federal Blue.

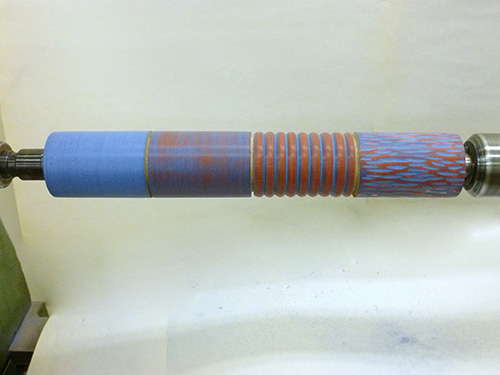
To achieve an aged appearance, with the lathe running in reverse, I gently applied 150-grit abrasive to the surface to cut through the blue layers to reveal the red layers beneath. I used the same procedure to highlight the changes in contours of the row of beads and to add highlights to the carved segment. The longer I applied the abrasive to the surface of the spinning object, the more red was revealed.
The sampler spindle now displays a variety of effects that can be achieved easily with milk paint: a solid-color segment, an antiqued segment, a segment of changing contours, and a segment of texture.
Finishing
special effects.
Milk paint dries to a flat chalky surface, but when burnished becomes smooth with a subtle sheen. To burnish the paint on the lathe, move the toolrest out of the way and turn the lathe on in reverse at approximately 400 to 450 rpm. Using your hands and an abrasive pad or 0000 non-oiled steel wool, apply moderate pressure to the surface of the spinning painted object. The pressure and gentle abrasion create a smooth glowing surface. It is not, however, waterproof.
Without a sealer, the paint will last indefinitely, but it will water spot and absorb dirt and oils. Most sealers will work over milk paint, but the appropriate sealer will depend on how the object will be used. Wax creates a soft sheen but will provide minimal protection.
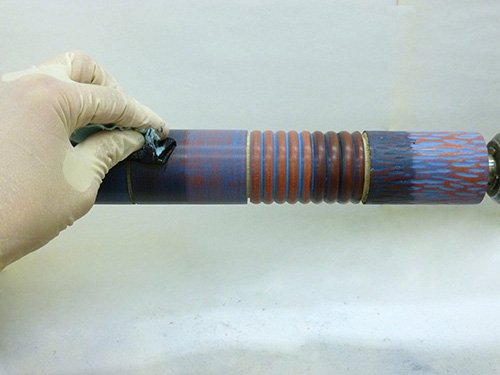
I often use paste-style black shoe polish to create depth and achieve an aged quality. Clear wax can also be used. Other finishes such as penetrating oils and sprays can be used for more protection—they will deepen the color somewhat. With all sealers, it is important to test them over a painted scrap to be sure you like the finished result before applying it to your painted project.
When applying wipe-on finishes on the lathe, it is important to use soft paper towels versus fabric rags, which can easily wrap themselves around and pull your fingers into the spinning object.
Design Considerations
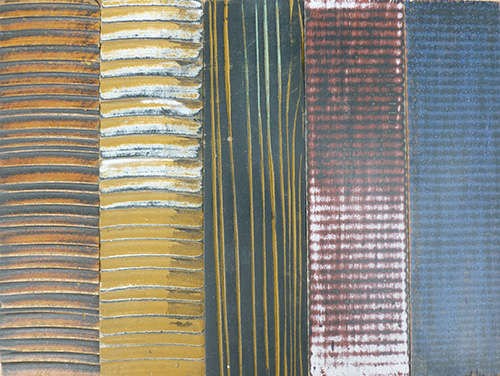
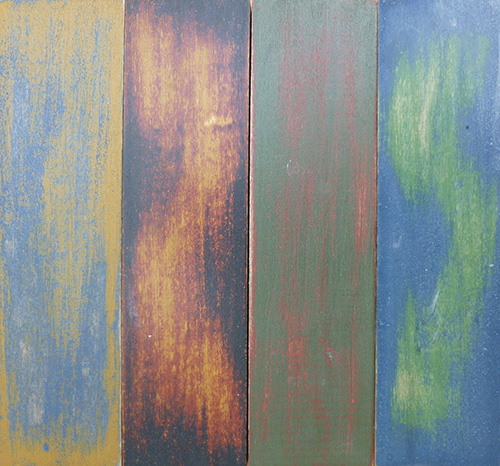
When trying to decide what color combinations to use, I suggest looking at textile and wallpaper designs as a starting point. They often display wonderful color combinations and use of pattern. Typically, contrasting colors, such as cool colors (blue, green, violet) combined with warm colors (red, orange, yellow), will accentuate textures because they complement each other.
If you plan to combine painted elements with natural wood elements, consider the tone and color of the wood before selecting the paint color so that you do not select a paint color that is too similar. When colors are too similar, each will be camouflaged by the other. A contrasting color will highlight the warmth of the natural wood rather than blending in with it.
Whatever design you settle on, it is important to test and record every step of your painting project on a scrap or test area before applying the first coat on your project. There are no right or wrong ways to approach design; we all have our own preferences and aesthetic sensibilities.
Take your time to explore the possibilities of embellishing the surface of turned objects using milk paint. Experiment, be patient, and have fun. The possibilities and magic are endless.
Kimberly Winkle is a turner, furniture maker, and educator. She is an Assistant Professor of Art at Tennessee Technological University in Cookeville, TN. Her work has been published in American Woodturner and has been exhibited nationally and internationally. She regularly teaches workshops at craft schools and demonstrates woodturning. She can be contacted at wimkinkle@yahoo.com.


