This article, “Tuning Up a Bench Grinder,” by Don Geiger, is from the pages of American Woodturner and is brought to you by the America Association of Woodturners (AAW) in partnership with Woodworker’s Journal.
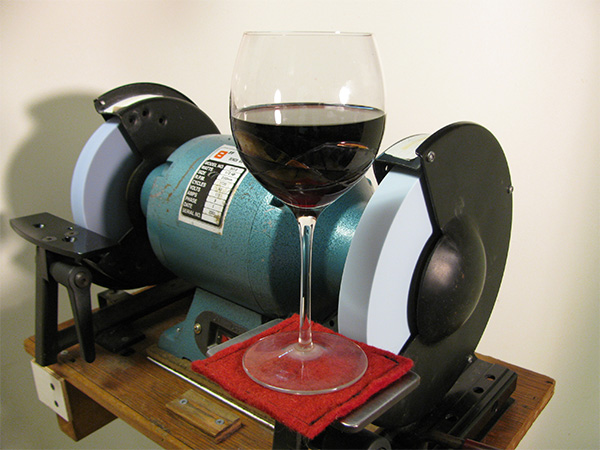
Most woodturners use a bench grinder to sharpen their turning tools. Quite some time ago, I recognized that many people were unhappy with the performance of their grinder. If yours produces significant vibration and your tools bounce on the surface of the wheels, there is a problem. Tools bouncing on the surface vibrate at a harmonic frequency, like a chatter tool on spinning wood. This type of vibration is easily recognized because it leaves evenly spaced dark spots on the surface of the wheel—solid evidence that the wheel is not concentric to the grinder’s axle.
I developed a process for tuning up a bench grinder at minimal cost and only about forty minutes of your time. I have performed this tune-up on numerous grinders myself and have instructed others, who have reported good results. A well-tuned grinder will produce a better edge on your turning tools.
What You’ll Need
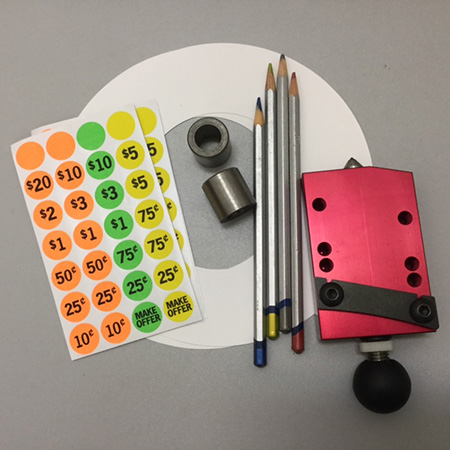
Tools and supplies you will need to tune up a grinder as described in this article are as follows:
• Two ring-shaped card stock disks with an outside diameter about 1/4″ (6mm) smaller than your wheel and an inside diameter about 1/2″ (13mm) larger than the cup washers on your grinder
• Spray adhesive (re-positionable photo mount works well)
• Several 3/4″- (19mm-) diameter adhesive paper dots (price marking dots work well)
• Two steel bushings (headless drill bushings work well)
• Two or three pencils of contrasting colors
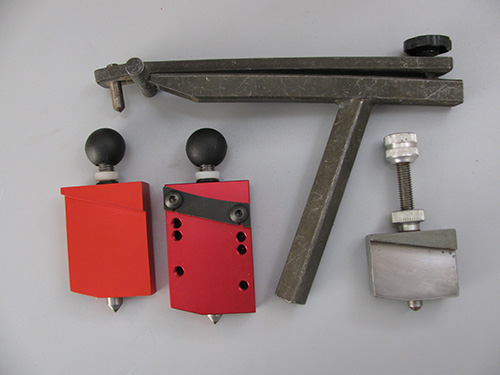
• A wheel truing/dressing device with a mechanically guided single diamond that is micro-adjustable
• A wrench to fit the axle nut on your grinder (not shown)
Wheels and Bushings
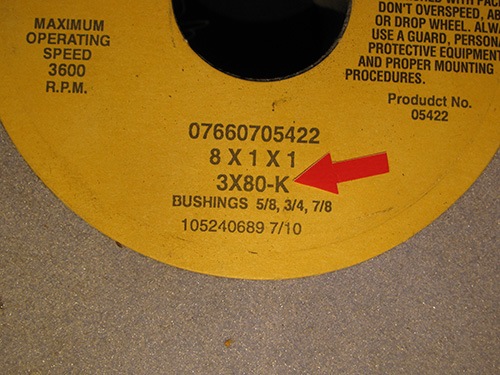
Most woodturning tools (except carbide) can be effectively sharpened with an aluminum oxide wheel with 30% to 60% ceramic content. The correct hardness of the wheel is important. Wheel hardness is rated on a scale from A to Z, with A being the softest. A “K” hardness wheel is ideal for sharpening most woodturning tools. The identification code printed on the wheel manufacturer’s label should include the hardness rating. An 80- to 120-grit wheel is a good choice for sharpening most woodturning tools, and a 46-grit wheel is good for producing a burr on scrapers and for rough shaping tools. A properly dressed 80-grit wheel can produce excellent results on most woodturning tools.
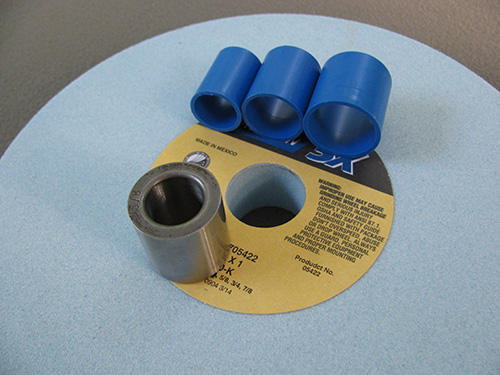
I recommend using wheels that have an outside diameter made for the size of your grinder, with a 1″ (25mm) width and 1″-diameter hole in the center (arbor hole). Most 8″ (20cm) bench grinders have a 5/8″ (16mm) shaft diameter (some have a 3/4″ shaft). Wheels with a 1″ hole are usually supplied with three or four tapered plastic bushings of different diameters to fit various shaft diameters. The plastic bushings are usually loose fitting, which allows the mass of the wheel to be mounted off center — a major source of vibration. I recommend discarding the plastic bushings and replacing them with precision-made steel bushings. Steel bushings provide a solid foundation, center the mass of the wheel on the axle, and improve the perpendicular position of the wheel in relation to the axle. Steel bushings are readily available in a variety of useful sizes.
Note that when installing a steel bushing, do not force it into the wheel’s hole. Never attempt to adjust the size of the hole in the wheel; if the bushing does not fit, try another bushing and/or wheel.
Ring Test
Prior to mounting a grinder wheel, inspect it visually for any cracks or chips. The Occupational Safety and Health Administration (OSHA), which regulates worker safety in commercial and educational facilities, recommends testing the integrity of a grinding wheel by performing a ring test prior to mounting. Details about this test can be found at osha.gov.
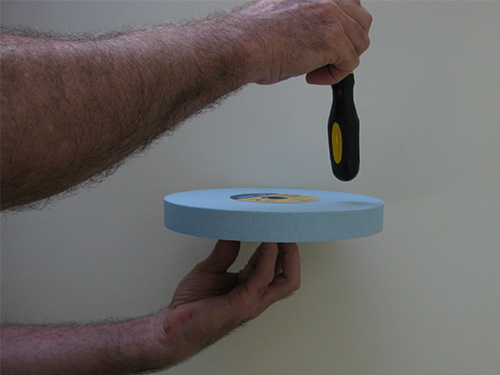
Support the wheel in a horizontal position on your finger tips and tap the wheel using the plastic handle of a screwdriver about 1″ from the edge in each of the wheel’s four quadrants. The sound of an undamaged wheel will give a clear ringing tone. If cracked, there will be a dead sound, and the wheel should not be used. Make sure the wheel is dry and clean before applying this test. After you test one side, turn the wheel over and repeat on the other side.
Mount the Wheels
Remove the nuts, wheels, and cup washers from the axle. Note that the nuts on either end of the axle have opposing threads. The right side has a right-hand thread, and the left side, a left-hand thread. This is a safety feature designed to allow the nuts to loosen, thus stopping the wheels, if an object inadvertently jams a wheel.
Visually inspect the shoulders on the axle where the diameter changes. Remove any rust and debris. Test fit the steel bushings to ensure they slide over the shaft and fit well. If you have difficulty sliding the steel bushing over the shaft, use sandpaper to remove obstructions such as burrs, rust, or paint.
Unevenness in some grinders’ stamped metal cup washers can be a source of sideto- side wheel wobble. If you suspect your wheels do not run true, consider replacing the washers with machined circular saw blade stabilizers. These are available from several sources to fit perfectly over a 5/8″ diameter axle (though I am not aware of any sources for stabilizers designed to fit a 3/4″ shaft). For each wheel, mount the inboard washer, wheel with new bushing, outboard washer, and nut.
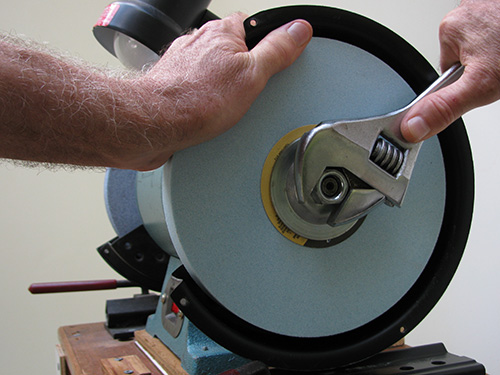
Most wheel manufacturers recommend tightening the nuts to 8 to 10 footpounds of torque. Determine the specified torque for your wheels. Never use a tool to hold the axle or wheel stationary while tightening an axle nut; use your hand to avoid damaging the wheel. Excessive tightening could result in breaking the wheel. Once the wheel is secured, stand safely off to the side of the grinder and turn the grinder on. Let it run for five to ten minutes to ensure the wheel remains intact and spins without excessive vibration.
Correct Wheel Wobble
Never attempt to correct side-to-side wheel wobble by dressing, or truing, the sides of the wheel—a very dangerous practice. Side-to-side wheel wobble is usually the result of the wheel being poorly mounted, not an inconsistency in the wheel itself. In rare cases, the axle may not be running true. The accurate placement of paper shims between the edge of the cup washers and the wheels can minimize wobble. Keep in mind only so much adjustment is available. Here’s how to determine where to position the shims and how to install them.
Identify the apex of the wobble
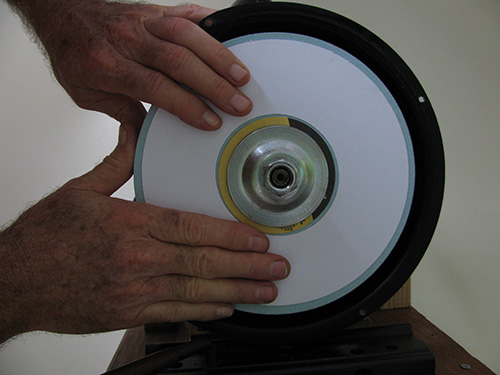
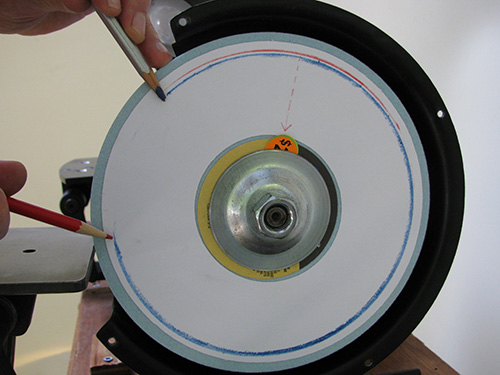
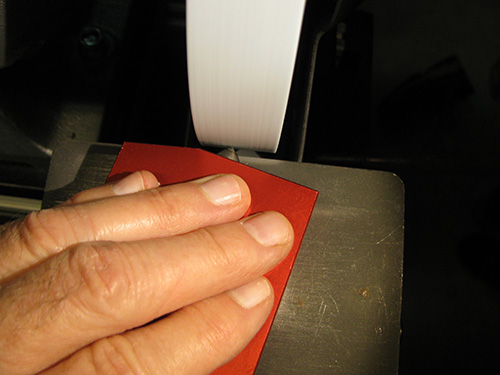
1. Adhere paper disks to the outboard side of each wheel to provide a smooth surface for marking the apex of the wobble.
2. Position the grinder’s tool-rest about 1/8″ (3mm) from the wheel and secure it in place. Rotate the wheel by hand to verify it clears the tool-rest. Wearing a faceshield, turn on the grinder.
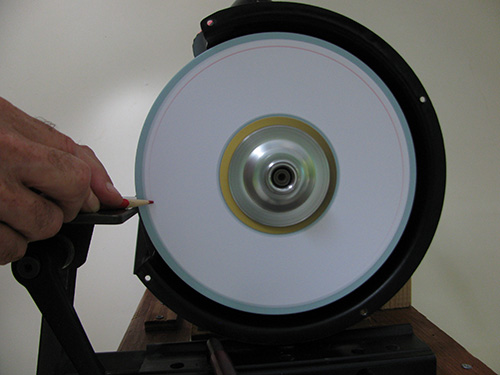
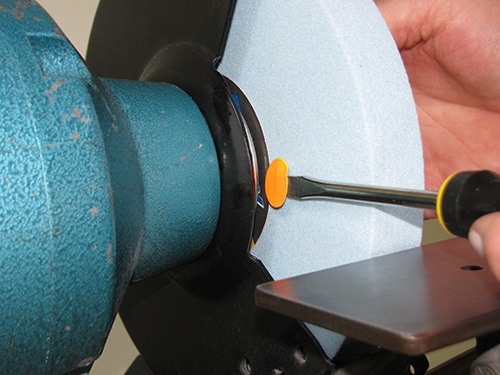
3. Use the tool-rest to support a colored pencil, and lightly touch the paper disk about 1/4″ from the outer edge. Since you are trying to identify “high spots,” do not use much inward force on the pencil; simply touch it to the side of the spinning wheel.
4. Stop the grinder and inspect the mark you’ve made. The center of the length of the pencil mark indicates the apex of the wheel wobble on the outboard side of the wheel and where shims should be installed to correct the problem. The length of the mark indicates the severity of the wobble. If the pencil mark is very short (2″ to 3″, or 5cm to 8cm), the wobble is pretty severe. The longer the mark, the less severe the problem is.
Install Shims and Retest
Note: Use only paper shims; hard shims such as metal, wood, or plastic can concentrate too much pressure, possibly cracking the wheel, and could become a safety hazard if they fly out while the grinder is running. I recommend using adhesive paper price marking dots, available inexpensively from numerous sources.

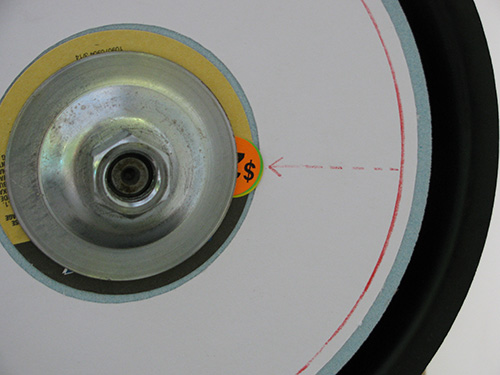
1. Rotate the wheel so the pencil mark you made is toward the rear of the grinder, and mark a line or arrow from the center of the test mark to the edge of the cup washer. This line indicates where shims need to be installed on the outboard side of the wheel. Shims also need to be installed on the inboard side, 180° from the outboard location.
2. Install the shims on the inboard side first. Loosen the axle nut about 1/4″ away from the outboard washer. Slide the wheel and the outboard cup washer in the outboard direction against the loosened nut. This provides space between the inboard cup washer and the wheel to allow the insertion of adhesive paper shims between the cup washer and the wheel. Install a stack of about five dots for severe cases and fewer for less severe wobble. Adhering the stack of adhesive shims to the tip of a straight blade screwdriver facilitates easier positioning on the inboard side.
3. Install an equal number of shims between the outboard cup washer and the wheel precisely at the center of the pencil line marked earlier. Push the outboard washer and wheel toward the grinder and tighten the nut.
4. Re-test the apex of the wobble using the pencil marking method as before. It may take a few tries, so be sure to use a different colored pencil each time so you can distinguish the current mark from previous ones. Add or remove paper shims as needed until you are satisfied with the results. A mark that runs ≥75% of the way around the wheel is acceptable.
Once both wheels have been corrected for wobble, ensure the nuts are tightened to the recommend torque and replace the safety guards.
True the Wheels
To minimize vibration and prevent tool bounce, the circumference of each wheel needs to be made concentric to the axle. A wheel-truing device will do this more effectively than a handheld wheel dresser. Wheel truing systems feature a single diamond, whose position, relative to the wheel, is controlled and micro-adjustable. By mechanically controlling the diamond, it is possible to remove high spots from the surface of the wheel. Sharpening tools on the resulting smooth surface significantly improves the appearance of bevels and sharpness of edges.

Wheel-truing systems with a singlepoint diamond dresser are available commercially (Photo 10) or can be shopmade. If you are inclined to build your own truing system, there are several sources for inexpensive single-point diamond dressers, including McMaster-Carr; MSC, formerly Enco; ebay.com, and Amazon.com. A 0.50-carat diamond mounted to a 1/2″-diameter, 6″- (15cm-) long shaft will serve you well in most cases—for wheels up to 10″ (25cm) diameter—though a 0.33- carat diamond can be used for smaller wheels (up to 6″ diameter).
Step by step
1. If your wheel-truing device utilizes a tool-rest for support, position the tool-rest within ⅛” of the wheel. The top surface of the tool-rest needs to be pointing at the axle of the grinder or slightly downward. Do not position the tool-rest in an upward position.
2. Use a file to remove any nicks or bumps from the edge of the tool-rest facing you. It is advisable to chamfer this edge as well. Tighten the tool-rest securely. Rotate the wheel by hand to ensure it clears the tool-rest.
3. Position the diamond so it barely touches the face of the wheel. Once the position of the diamond is set, put on a dust mask and faceshield. Move the diamond away from the wheel and start the grinder.
4. Traverse the truing device left and right across the face of the wheel five or six times, then very slightly advance the position of the diamond toward the wheel. Repeat this procedure a few times, stopping the grinder to inspect the wheel. Repeat as necessary until the diamond has contacted the entire circumference and width of the wheel.
5. Repeat the same procedure on the other wheel.
Maintenance and Use
Continue to use the truing device exclusively to maintain concentricity of the wheels and smooth and deglaze the outer surfaces of the wheels. (De-glazing is the removal of clogged metal particles.) Using the wheeltruing device routinely will prevent re-developing vibration and will keep your wheels in top-notch condition.
Once the tune-up procedure is complete, your grinder should perform with optimal results. The vibration of the grinder will be minimized and tools will not bounce on the surface of the wheels.
Don Geiger is a professional woodturner who enjoys leading workshops, teaching, and demonstrating at symposiums and clubs. He has been active in the woodturning community since 1999. Don markets several of his own inventions and is a dealer for Robust Tools, LLC. He lives in Newberry, Florida. For more, visit geigerssolutions.com.


