This article, “Turn an Etui-Inspired Box” is from the pages of American Woodturner and is brought to you by the America Association of Woodturners (AAW) in partnership with Woodworker’s Journal.
The idea of a small lidded container for holding pills, sewing needles, toothpicks, or garden seeds will probably conjure up different images for all of us. When we think of making a lidded box on the lathe, a long, narrow shape may not be the first form that comes to mind. I have turned many pill boxes over the years; however, calling this container a pill box might limit ideas for design variations. Regardless of the box’s intended use, choosing to make a small item just for the pure joy of making it might be reason enough. And whatever you call it — an ornamental case, a box, lidded tube, or even an etui — it ultimately is a lidded container with an atypical shape and design. As I present my procedure for turning this delightful little box, you will discover it is a project ripe for exploring options.
Etui: an Ornamental Case
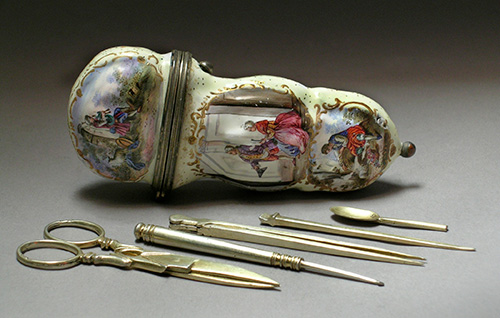
Photo: Los Angeles County Museum of Art (Gift of Varya and Hans Cohn), Public domain, via Wikimedia Commons
French in origin, this small ornamental case, usually featuring a hinged lid, dates to the early 17th century. It was designed primarily for women to hold scissors, needles, cosmetics, perfume, or miniature writing sets.
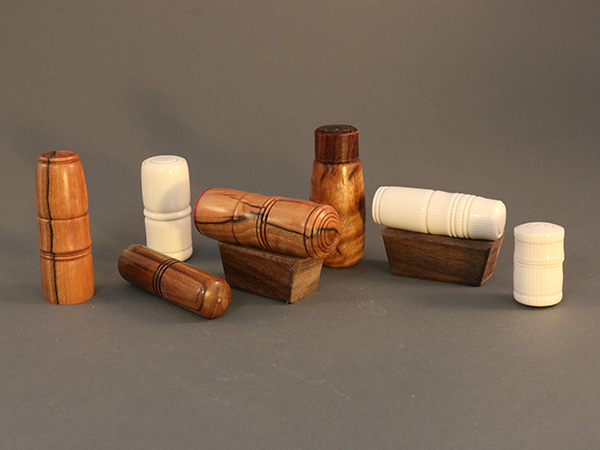
They were mostly made of silver, ivory, bone, leather, gold, or enamel, and, not surprisingly, woodturners have adapted the form for the lathe as a long, narrow lidded box. Past President of the Yellowstone Woodturners Bruce Blackketter, now of Joplin, Missouri, turned his own version, as shown.
Material and Design Choices
Materials suitable for this small container include wood, cast resin, acrylic, and other man-made plastics. Some design choices may affect the material you choose. For example, when considering a threaded connection or a slip fit for the lid, material choices make a difference. For a thread-chasing project, I might select a hard, dense material such as African blackwood or a two-part cast resin. For a nice friction-fit connection, any material, hard or soft, will suffice. For a lidded box that holds my daily pills when traveling, a nice tight suction fit will hold the container together safely. But if you prefer more security, nothing beats a threaded connection.

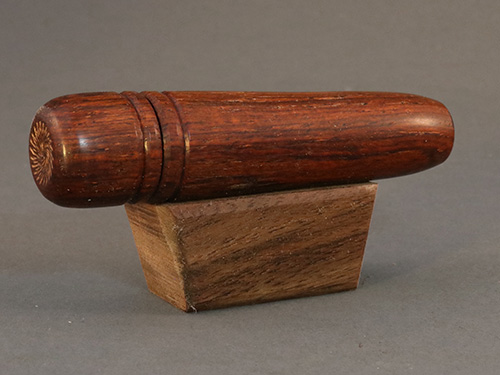
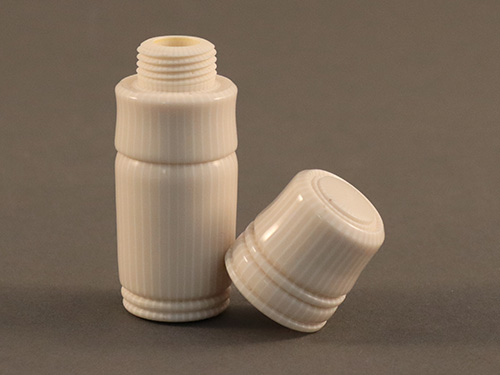
The focus of this article will be turning a box using spalted cherry with a slip-fit, or friction-fit, connection of the lid.

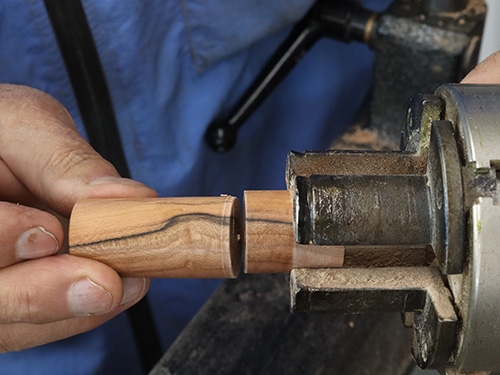
The old maxim, form follows function, may be front and center in this discussion. If the intended use for this small object is to securely hold pills, needles, or toothpicks, long and narrow is a better design. Perhaps arriving at the best design requires first deciding what the container will hold. A prototype made from a suitable scrap of wood costs little in either time or material and may be the best method of determining the proper inside volume. Starting with a very small female opening in the lid will dictate the size of the opening in the base at right. Consequently, the opening is very small. Proper sizing of both the lid and base openings will provide the maximum volume for your project. The photo shows the completed lid above the base, which is chucked in pin jaws. In the finished box, the inside diameter (ID) of the lid is 25/32″ (20mm) and the ID of the base is 19/32″ (15mm).
With a rather long cylindrical form, the usual shape and design possibilities available in “boxes” that woodturners typically make may be difficult to apply. Fibonacci’s Golden Ratio, which is sometimes used to determine the lid-to-box ratio in lidded boxes, may not be optimal for an etui-inspired box. For my own favorite design, I lean toward long flowing lines with delicate details
As for etui dimensions, a good place to start is with a 1″ (25mm) square blank, 3″ (8cm) long. The dimensions of your own project will depend largely on the intended use of your container.
Turning Process
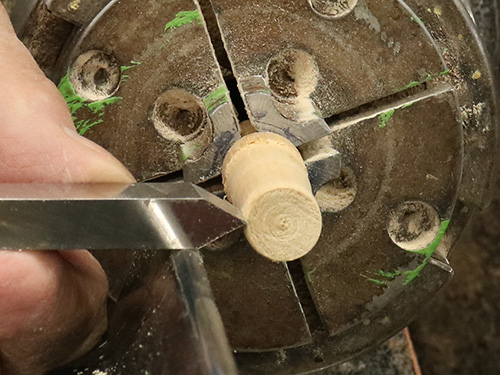
In the following steps, I chuck the blank directly into pin jaws, eliminating the need to form a tenon, or spigot.
This process does require alternative methods for reverse-mounting the lid and base (jam-fitting), which I’ll discuss later.
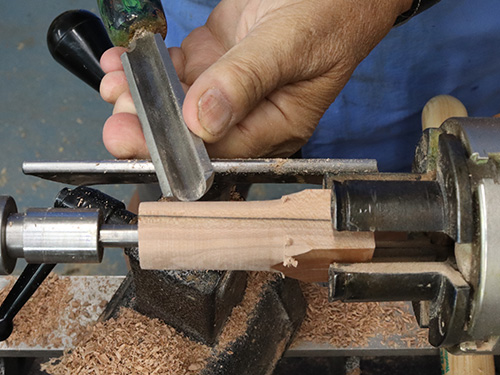
Start by turning the blank to a cylinder using a spindle-roughing gouge . With the tailstock removed, true up the end of the blank with a reverse and true up the other end.
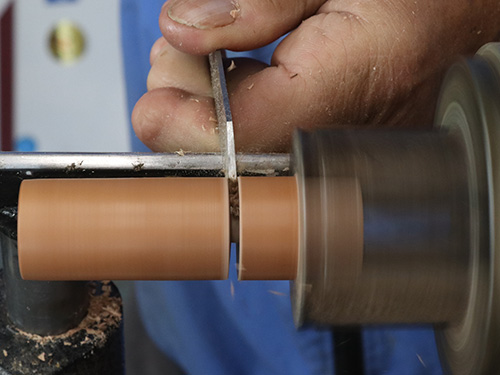
With the rounded workpiece chucked up in the pin jaws, part the base section from the lid using a parting tool.
Turn the Lid
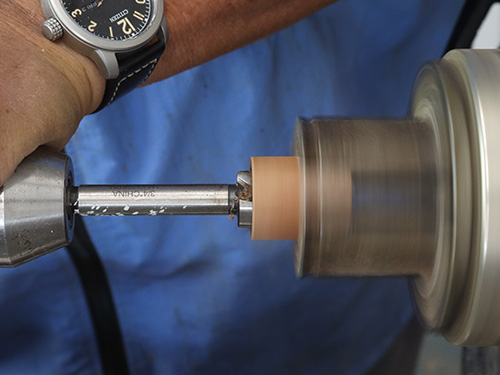
I drill a recess in the lid using a 5/8″ (16mm) Forstner bit. By drilling the recess in the lid, rather than hollowing the lid by hand, the walls are perfectly straight and parallel. Sand and apply a finish to the inside of the lid. If your container is to hold medication, it may be prudent not to apply any finish at all.
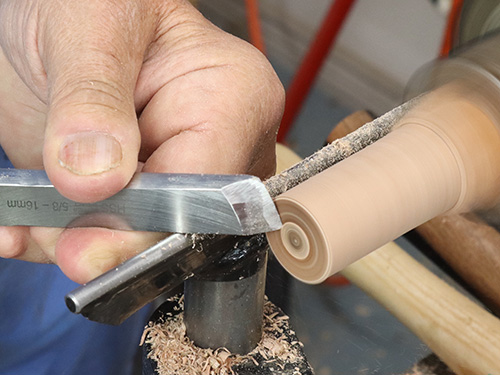
Remove the lid from the chuck, and mount the base section. The lid will mount to the base by way of a friction fit on a tenon at the end of the base, so I form that tenon using a small beading and parting tool.
Sneak up on a good fit by cutting and testing the connection repeatedly, until you have a snug fit. At first, I attach the lid to the tenon with a tighter than necessary connection while I complete the turning of the lid and add decorative elements. This connection can be fine-tuned for a more serviceable fit in a later step.
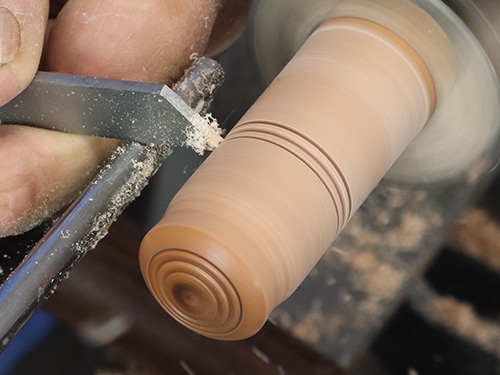
With the lid jam-fitted onto the tenon of the base, I use a beading tool to add some decoration to the top of the box and to the area near the join.
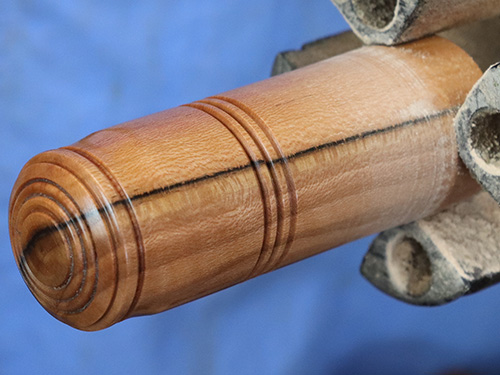
I complete the lid by sanding, applying an abrasive paste, applying a friction polish, and finally buffing to a nice sheen.
Wood Jam Chuck
A jam chuck is a workholding method, or fixing, that makes use of a tight friction fit, usually of the workpiece onto a piece of scrap mounted in a chuck or on a faceplate. This operation is accomplished by carefully turning the jam chuck to the correct size. A caliper can be used at first, followed by test-fitting until the two components mate securely together.
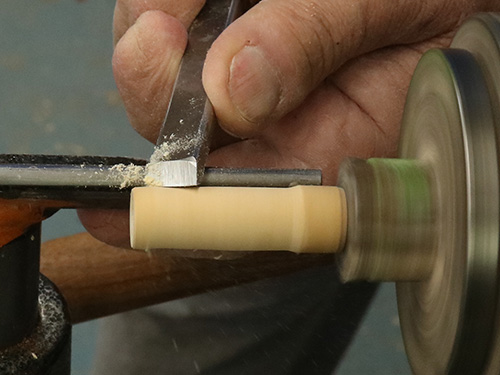
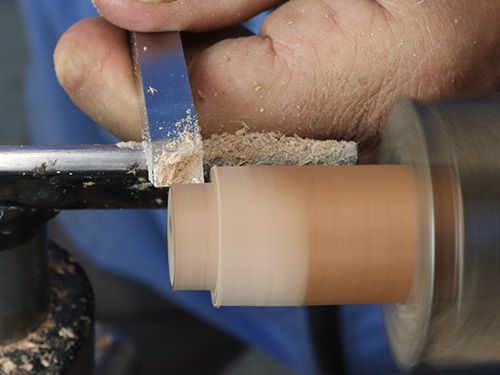
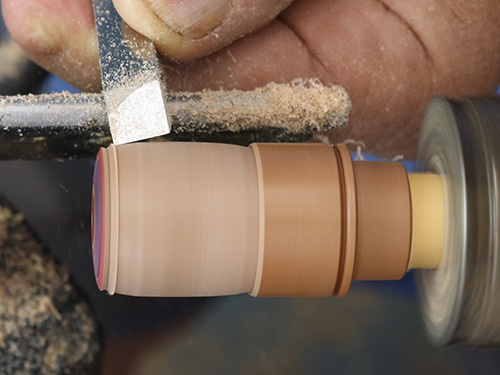
One key benefit is that it does not require tailstock support, allowing total access to a piece while completing the turning and finishing. Note that for larger pieces, tailstock support is recommended when possible. My favorite tools for this operation are a ½” (13mm) skew chisel and 3/8″ (10 mm) beading/parting tool. Both can be used in either cutting or scraping mode and will serve to accomplish the task.
I start with the skew presented in a cutting orientation to remove the bulk of wood . Next, I use the beading/parting tool to scrape the surface and make minor adjustments. Sneak up on a good fit by cutting and testing the connection repeatedly.
Correcting a Loose Fit
When you are learning to make jam chucks, it is common to remove too much wood, creating a fit that is too loose. Several options are available to tighten up the connection and make it more secure. One is to lightly spray the jam chuck with water, which will swell the wood fibers for a better fit. This can also be accomplished by applying a layer of wax. Another idea is to add a layer of tissue paper or paper towel between the jam chuck and the workpiece to help take up the slack. Finally, if the failed jam chuck is a piece of waste wood, save it for a future project and start again with another scrap.
Turn the Base
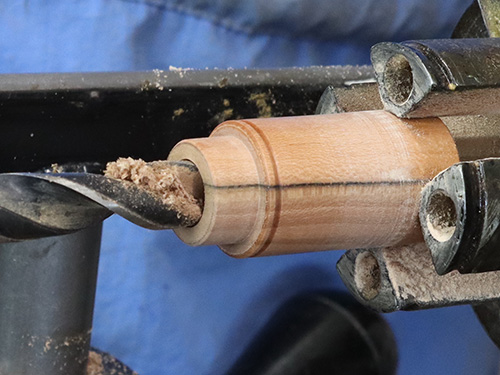
I drill the opening in the base with a 1/2″ (13mm) bradpoint bit. I make this opening as large as possible to allow for more volume inside the box. Note that if you drill too wide a hole in the base, the walls of the tenon will become too thin. Maintain ample thickness here so you won’t weaken the tenon that holds the lid.
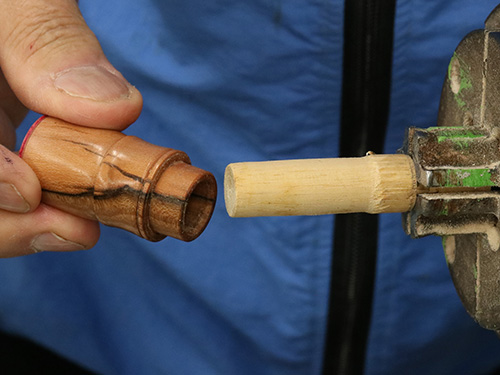
To turn the rest of the box body, I reverse-mount the work onto a jam chuck made from a scrap of dowel mounted in the chuck.
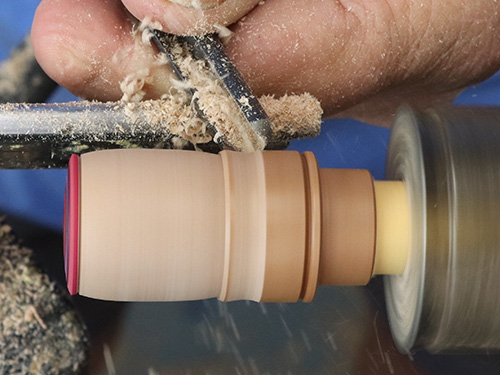
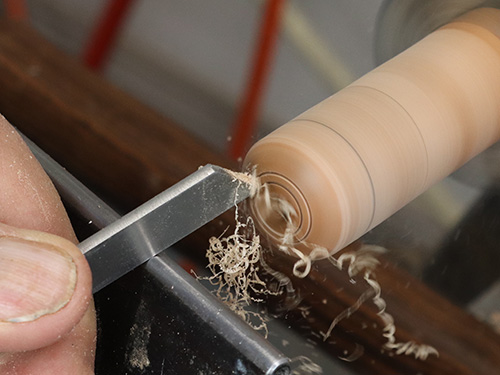
I use a beading/parting tool as well as a small spindle/detail gouge to shape the base and add decorative details. At this point, I finetune the lid-to-base connection to my desired fit—not too tight, but not so loose that the lid will fall off.
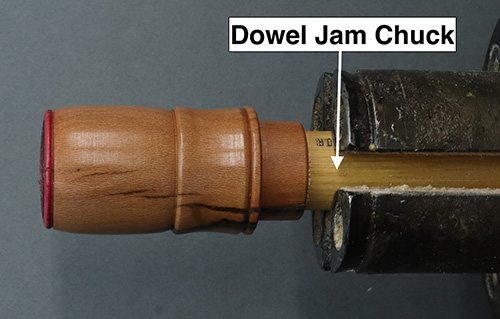
The photo shows a good view of the dowel used to chuck up the base for final turning and finishing. At no point do I chuck up either the completed lid or base directly in the pin jaws. Jam chucking eliminates the possibility of marring the surface of the wood.
Threaded Lid option

The steps in making this project are similar if not identical to the process most turners use for making a lidded box. Adding threads to the female recess and the male tenon may slightly alter your approach to completing this container. A threaded connection will certainly add more security to the lid’s fit. Since most woodturners do not have the skills for chasing threads by hand, using a thread-chasing jig might be an alternative. If you prefer to add a threaded connection to this project, watch my video, “A Small Ornamental Container,” available on my YouTube channel, @wyomingwoodturner.
Conclusion
I find a certain joy in turning miniatures. Usually, a different approach and a higher degree of precision is required. You can transform a small bit of scrap wood or even a pen blank into a work of art. Many small items, from pills to batteries, can be held in this narrow-lidded box. However, no reason is needed for turning one other than the sheer pleasure of turning your own little ornamental case.
Sam Angelo retired in 2011 after forty years in public education. He is currently the president of the Yellowstone Woodturners, an AAW chapter in Billings, Montana. Sam has published hundreds of videos on his YouTube channel, @wyomingwoodturner, including one on making a small box, as shown in this article. He offers turning classes and continues to turn daily in his shop.

