This article, “Form and Figure Turn a Hawaiian Bowl,” by Pat Kramer, is from the pages of American Woodturner and is brought to you by the America Association of Woodturners (AAW) in partnership with Woodworker’s Journal.
Hawaiian bowls, or ‘umeke lā’au, may look simple to create. But with elegant curves and a semi-enclosed shape (the walls slope inward toward the rim), they represent a good “reach” goal for turners looking to expand their tool and design skills. ‘Umeke are the perfect marriage of pure form and wood figure, and this article describes my typical workflow for crafting them.
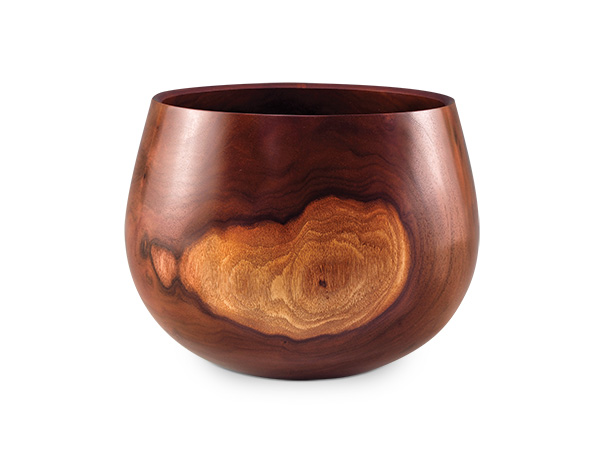
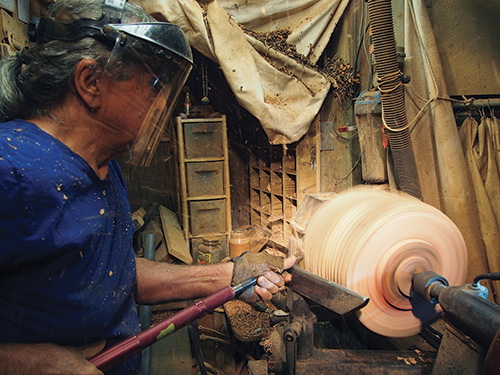
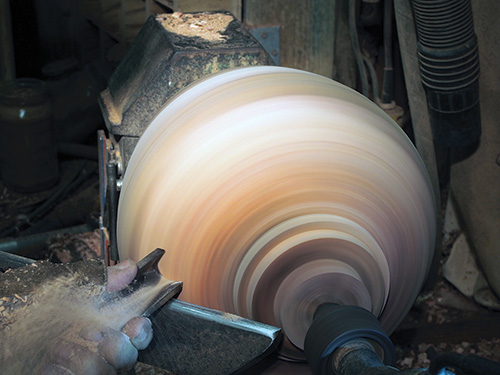
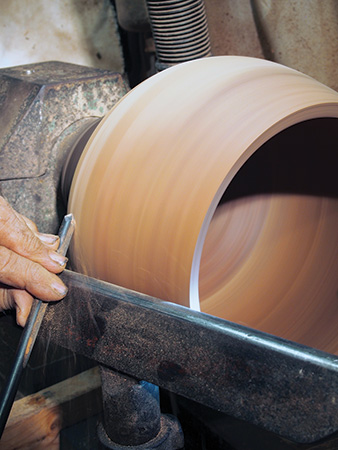
Apart from adjusting for size and depth, the methods for making many ‘umeke are similar. A kū’oho, shown in the opening image, is a good beginning bowl. An iconic form, it is wider than it is it tall. This classic bowl has an accessible shape and presents fewer tool-handling and sanding challenges than deeper ‘umeke.
Choosing and Cutting the Log
The majority of ‘umeke are turned endgrain. Hawaiian woods, with their deeply colored heartwoods and lighter sapwoods, have the perfect contrast for creating sapwood “islands” on the bowl sides. Many non-Hawaiian woods do not have this contrast, though walnut does and would be an excellent choice. It is also not mandatory to have contrasting sapwood and heartwood; other woods, such as ash, with distinct growth markings, are also suitable. The markings can create patterns that simulate the effect of a sapwood island.
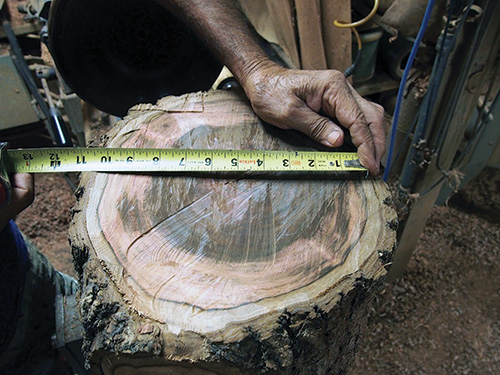
Examine the end of the log. If the heartwood is irregular or oval-shaped, measure the narrowest heartwood cross section. Add about 20 percent to this measurement to determine how long to cut the log. As an example, if the heartwood circumscribes an 8″- (20cm-) diameter circle, add 1-5/8″ (41mm) to that and cut the log to a length of 9-5/8″ (24cm). This will produce a blank long enough to create a shape with good proportions, to allow a little extra length for making adjustments to the rim and bottom, and to form a tenon for mounting the bowl in a scroll chuck.
The example shown in this article is made from milo. As with many bowls turned from wet wood, it is good practice to rough it out and let it season before final turning.
Marking Centers
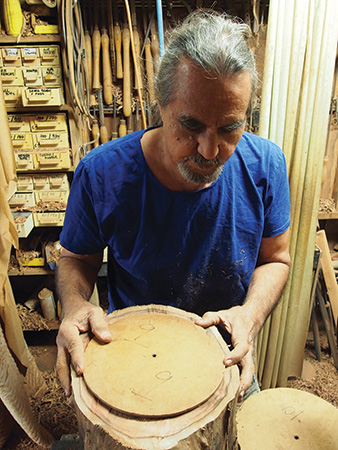
Keep in mind when marking the centers that you ideally want the roughed-out cylinder to have a heartwood center surrounded by equal amounts of sapwood. To mark the centers on the log, I use a circle template that is a little smaller than the heartwood and center it within the heartwood on each end of the log. Note the size and shape of the heartwood. Frequently, it is larger and/or asymmetrical on one end of the log. The end with the larger heartwood diameter should become the top of the bowl, as this orientation will ensure all sapwood is removed from the rim area and, through the turning process, the sapwood islands will be positioned toward the widest part of the bowl. At the rim, it is easy to turn away the sapwood since kū’oho have a fairly shallow slope and the sapwood and heartwood sections are thinly separated.
While marking the top center is critical for properly locating the sapwood islands, the bottom center placement is less critical because the wide bottom curve assures a sharp intersection between sapwood and heartwood.
If the log shape itself is asymmetrical, it is important to account for that when deciding where to mark and mount the centers. In this case, the log has a bulge on one side, so I adjust the top center very slightly toward the bulge. I can make greater adjustments at the bottom of the bowl to avoid removing too much sapwood. If there is a concave section, mark and mount the center away from the concave side of the log.
The sapwood pattern should start below the rim and remain fairly centered on the widest part of the bowl. Sapwood patterns that run off the rim and/or splash too far down the curve will compete with the pure form and have a negative impact. Marking centers with a large crosshairs makes it easier to see the centers while mounting and helps gauge changes if adjustments need to be made to the turning axis.
Roughing and Shaping
Mount the log between centers with the top of the bowl at the headstock side. For this sized bowl, I use a 1-1/4″ (32mm), four prong drive center and a heavy-duty live center with a point and cup. Start by roughing the log to a cylinder, but do not completely true it up yet. As you go, determine whether the heartwood will remain centered. Also, sight down the length of the blank and ensure a good balance between the sapwood and heartwood at the widest part. To achieve this outcome, it may be necessary to adjust the turning centers.
At this point, the piece is not yet a smooth cylinder but should be completely rounded at the rim, where it is easy to see whether the heartwood is centered. With asymmetric heartwood at the rim, you could accidentally turn away all the sapwood while trying to achieve the rounded kū’oho form. If the rim heartwood is centered but the sapwood/heartwood balance is off down the length of the bowl, it may only be necessary to make adjustments at the tailstock end. If the heartwood is not well balanced at the rim, the mounting points at both ends may need to be adjusted. Once the blank is in its final mounting axis, establish the rim diameter and reveal the sapwood pattern splashes, which will influence the final form.
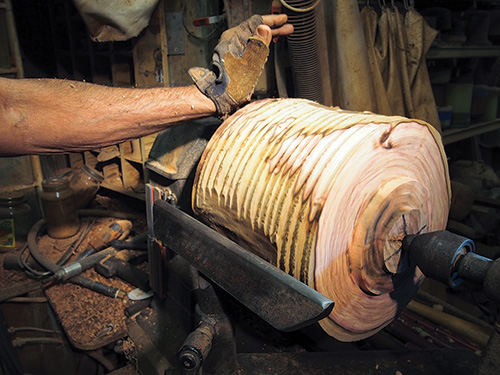
Because the blank is not yet fully trued, I begin roughing the cylinder with a 5/8″ (16mm) bowl gouge. This limits the tool contact and helps to minimize the tool bounce that can happen with a roughing gouge. Turn the speed as high as the unbalanced blank will safely allow. It should not be shimmying around, but a bit of vibration is acceptable. Make peeling cuts to true the tailstock end and rough in a tenon and shoulder on the bottom for remounting. A bowl gouge with a deep V-shaped flute works well at slow speeds to step cut through the off-center mass and form a coarse cylinder. When the blank is better balanced, check the tailstock tightness and increase the speed. I use a large spindle-roughing gouge to true up the cylinder.
Lay the roughing gouge on its side with the handle low to reduce the rim area with peeling cuts. As the shavings peel away, look for signs of penetration into the darker heartwood. Once the heartwood begins to show in the rim area, it is time to switch to the bowl gouge and cut the rim by truing the end of the blank.
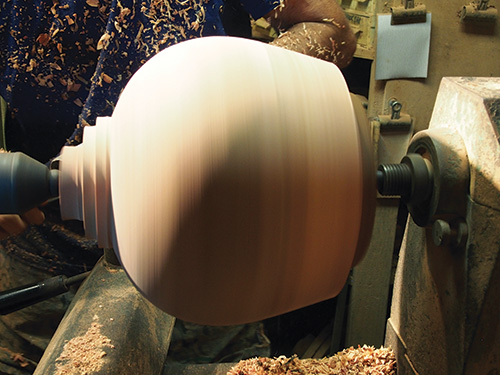
Once the rim is established, it becomes apparent what needs to be turned away at the widest part of the kū’oho, and I can blend the rim into the upper curve of the vessel. I also have a good indication of how the bottom curve must be adjusted to arrive at the finished form.
I do the final blending of curves using the roughing gouge on its side, taking feather-light uphill (climbing) cuts. The uphill direction resists the tendency for cutting grooves into the wood.
Before committing to the final form, pull the toolrest away and consider the entire shape. If you examine the form with the toolrest bisecting the shape, the form tends to appear slightly longer and leaner than it actually is.
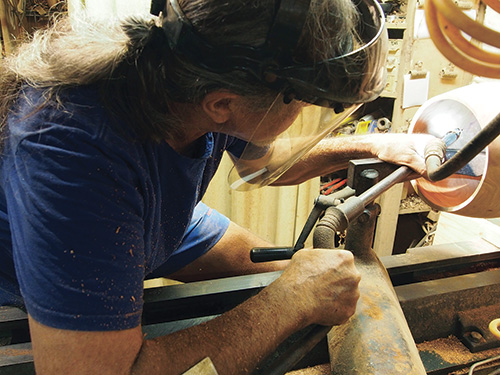
Hollowing
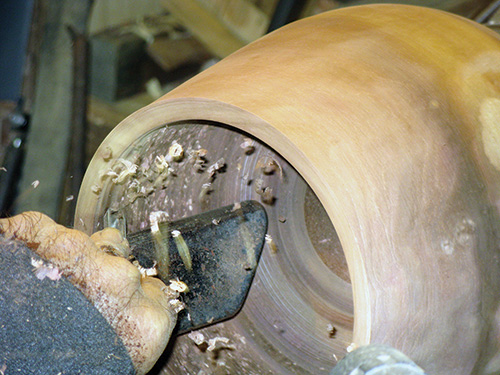
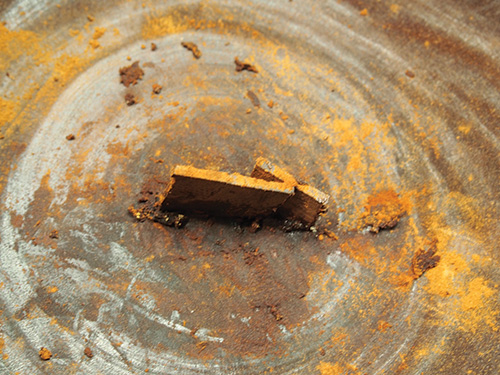
With the bowl mounted in a scroll chuck and supported by the tailstock, I begin hollowing by coring, which is an efficient way to remove wood and create room for tool access. Of course, traditional endgrain hollowing methods of drilling, then using gouges or hollowing tools could be used as well.
After I’ve cored a cone-shaped block, there is still a lot of wood to remove, and I prefer the large, deep-fluted, V-shaped bowl gouge for this task. This versatile gouge doesn’t clog, offers lots of ways it can be presented to the wood, and readily adjusts to varying cutting requirements. I get clean cuts and precise steering through compound curves using bowl gouges for endgrain hollowing.
I rough-shape the inside of the bowl by forming “steps” to approximate the inside curve. I cut from the center out while sighting down the outside shape to give me an idea of how much wood I need to remove. I can easily remove 1/2″ (13mm) of depth in one pass if I begin each step cut with a smooth entry. The heavy cutting load, along with the bevel pressure exerted toward the headstock, tends to keep the gouge engaged in the cut and dampen vibration. With this cut, I remove excess material from the rim down to the widest part of the inside, then switch to a 3/8″ (10mm) bowl gouge to refine the inside shape and define the wall thickness.
The smaller bowl gouge is my favorite tool for cutting in areas sensitive to vibration and chatter. It cuts with very little force against the bowl wall and responds quickly to changes in cutting angle and pressure. I like to sight along the outside shape while cutting to guide me in gauging wall thickness. Then I cut with the flute facing up, from rim inward. I shave the wall down from rim to the widest part of the curve.
I frequently check the wall thickness to verify that I have a good line and do a final cleanup at the curve using light cuts or shear-scraping. The wall thickness is now a little over 3/8″, and I have left a little extra thickness at the widest part to allow for blending into the bottom curve. Milo is a stable wood and, since this piece is turned endgrain, 3/8″ is thick enough for drying and finish-turning later.
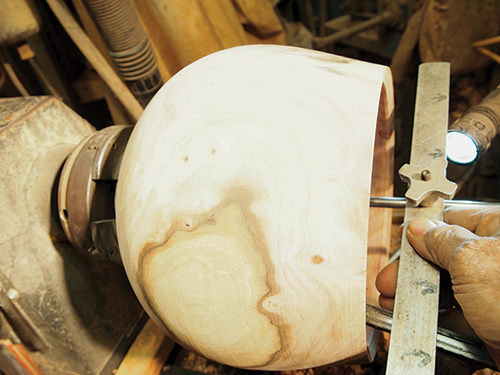
Next, I take a depth gauge and set it to my desired inside bowl depth. I leave the bottom thicker than the wall, somewhere around 5/8″ or slightly more if I have punky areas around the pith to repair. Using the bowl gouge, I excavate the bottom section, alternating between step cuts that peel from center out and back again to the center.
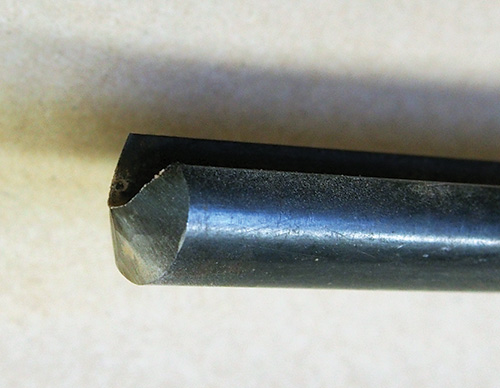
I now have finished the upper curve going from the rim to the widest part and have established the depth of the bowl. At this point, it is easier to see how I must cut the bottom to blend it with the upper curve. The bottom curve tends to be the most problematic area because of the transition from endgrain to facegrain. It should be cut from the center of the bottom through the transitional area to blend in with the upper curve. For this cut, I use a 1/2″ bowl gouge ground almost straight across with a flat and fairly short bevel. This gouge maintains good bevel contact during flat cuts across the bottom. I start with a push cut from center to left, up and through the transitional area, and slowly roll the tool into a pull cut to continue into the upper curve. I do the final cleanup and blending with an armbrace tool fitted with a teardrop-shaped scraping cutter.
The wood is still wet, so I set the bowl aside to season for a few weeks in a warm area away from moving air. In drier areas or with different woods, the walls may have to be thicker for successful drying. If you are turning a sidegrain ‘umeke, there will be a lot of warping, so the rough-turned wall would have to be thicker.
Finish-turn the Outside
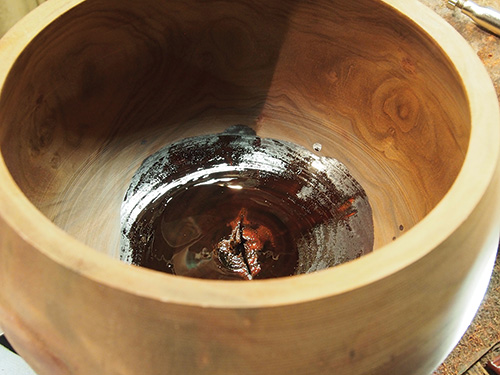
After the bowl has dried, I see there are cracks and a crumbly area at the pith that must be repaired before I can finish-turn. It’s easier to handle this sort of repair when it is still possible to mount the bowl on the lathe. Since I’ll be using a vacuum chuck for finish cutting the outside bottom of the bowl, it’s important to seal any cracks or punky wood. I soak the questionable area with lacquer sanding sealer thinned with an equal part of acetone, which will penetrate the wood and harden the soft fibers. This mixture won’t leave a plastic residue that will interfere with sanding and finishing and will prevent the possible staining from cyanoacrylate (CA) glue.
I prepare wedges to fill the crack and tap them in firmly enough to compress the soft fibers in the crumbly area surrounding the crack. Soft fibers that are still damp from the lacquer sanding mixture will stick together and stiffen the area. I remove the wedges, scrub wood dust into the crack, and apply thin CA glue and more wood dust before tapping the wedges back into place. This usually does a decent job of filling any deep voids and should leave the bottom able to take a finishing cut.
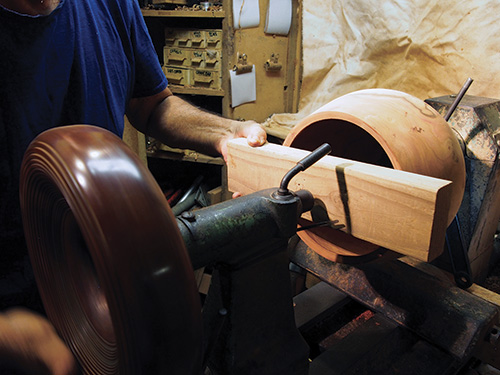
After the glue has dried, I mount the kū’oho in a scroll chuck and lightly tighten the jaws (only tight enough to check whether the vessel is running true). With the piece turning slowly, I see there is a very minor warp at the rim, but it runs true at the foot so there is no need to shim or re-true the tenon. To ensure a solid mount in the chuck, I tighten the jaws while pressing the tenon shoulder against the chuck jaws, using a board between the bowl rim and the tailstock to apply force.
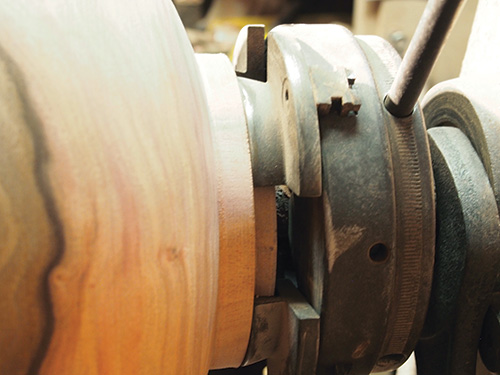
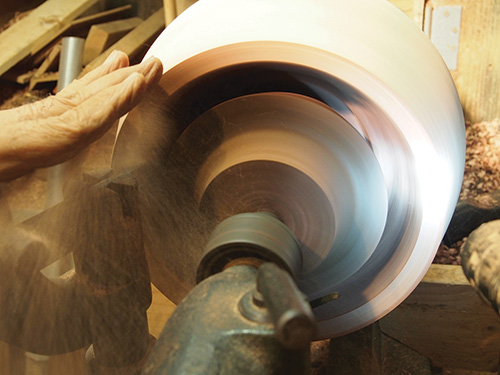
To finish-turn the outside, I start with the 3/8″ bowl gouge. The bowl is slightly out of round, so I run the lathe at a moderately high speed and sweep shear cuts across the rim area to whisk off high spots until it is close to running true. This is the area that is most prone to vibration from heavy bevel pressure, so this cut requires a gentle hand.
I can now continue shear-cutting further down the bowl to the widest part. I use a push cut with the flute up to true up and get a clean cut across the endgrain in the area from the widest part to the foot. Light shear cuts and shear-scraping take care of smoothing and refining the curves. It is helpful to be comfortable enough with tool handling that you can watch the shape rather than the tool; elegant curves will make this bowl come alive, but the form offers no refuge for clumsy execution.
I sand the outside using a 5″ (13cm) disk sander and 180-grit abrasive to finalize the outside shape.
Finish-turn the Inside
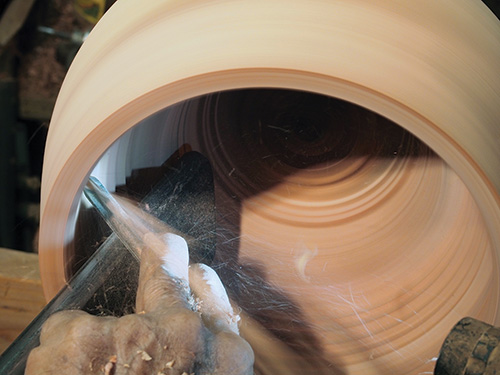
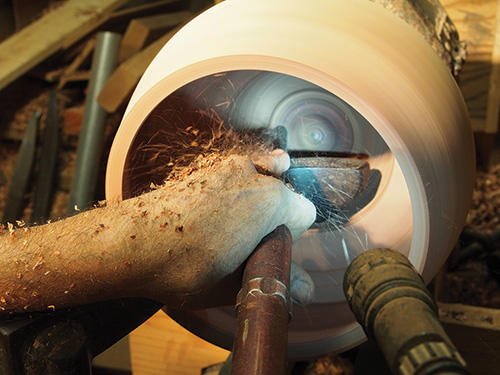
With the lathe running at a medium-high speed, I use the 3/8″ bowl gouge on the inside of the bowl. After carefully truing up the rim area with the gouge handle low to present a high shear cut, I can start taking down the high spots that are out of round. I repeat this cut until I can use a relatively shallow cut to finish truing up the wall and make a continuous cut. I return to cutting with the flute facing up and the bevel rubbing, and make very fine cuts from the rim to the widest part of the curve.
To finish-turn the bottom curve, I once again use the 1/2″ short-bevel bowl gouge. I push-cut from the center outward, through the bottom and endgrain to the sidegrain transition area, completing the curve by rolling the tool into a pull cut to blend into the upper curve. I leave the very center of the bottom a little proud, so I can later sand through the repair area without creating a divot or risking tearout. Final cleanup is done by lightly scraping with a teardrop scraper.
Sanding
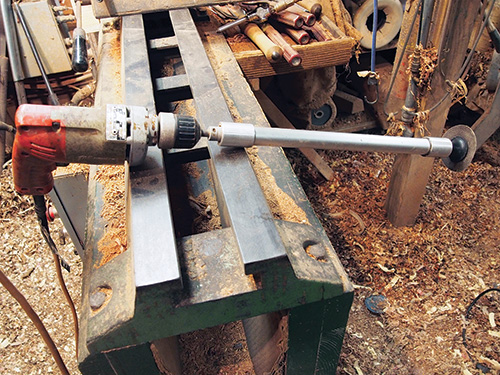
Many ‘umeke that I make are deep vessels with limited access for powersanding on the inside. I have several sanding extensions that allow a deep reach and can take advantage of toolrest support. One of these extensions is fitted with a 125-degree angle head and 2″ (5cm) rigid backing pad. This setup is very effective for smoothing ripples and curves in a deep bowl. I start with 80-grit abrasive,9 which is aggressive but does a good job 9of cleaning up any kind of bruising or compressed fibers and is less likely to generate enough heat to cause checking in the endgrain. I then change to a softer backing pad and sand the inside to 320 grit.
Final Thoughts
I mount the bowl onto a vacuum chuck to finish the bottom and foot, which is a simple concave area on which the bowl will rest. If you don’t have a vacuum chuck, you could also do this using a jam chuck with tailstock support.
After turning the bottom and blending the foot into the lower curve, I can now finish-sand the outside of the bowl to 320 grit.
If additional repairs are needed in the areas affected by the pith’s cracking, I install pewa (butterfly inlays) before applying a hand-rubbed oil finish.
Pat Kramer’s part-Hawaiian heritage informs his work as a woodturner and sculptor, whose work includes both traditional Hawaiian and contemporary bowls. His current focus is on the sculptural possibilities of woodturning with contemporary organic forms. Pat exhibits his work in several galleries.


