While a skew and hand pressure might do, the better approach is to use a steady rest.
At some point, as spindles get longer and thinner, wood’s proclivity to bend over- whelms the turner. The first sign of a problem is what is called harmonic chatter: The tool rubbing against the spindle sets up a harmonic vibration in the piece that imprints a pattern of flat spots in the work, often in a spiral pattern. As you turn thinner, there will be a point where the wood buckles sufficiently that it rides up the bevel and over the tool edge — the result? A big catch.
VIDEO: Supporting Long Spindles with a Steady Rest
We can predict these problems by knowing a little bit about strength of wood as a material. A rule of thumb is that a wood column will start to buckle (bend sideways) when the length exceeds 11 column diameters. Additionally, the stiffness of a round bar drops by a power of four as the diameter decreases. Therefore, a 1/2″ diameter turning is 16 times more prone to harmonic chatter and buckling than a 1″ diameter turning.
These rules do not take into account a number of other factors, but they do give us some understanding of the problem. We can predict that chatter will start to be a problem when a 1″ spindle reaches 12″ in length or when a 2″ spindle reaches 23″, etc.
How much chatter will vary with the species of wood, straightness of the grain, turning speed, sharpness of your tools and your technique. A piece of white oak is much stiffer than a piece of poplar. Grain running the length of the billet is better than the grain running out the sides. Higher turning speeds generally give more chatter than lower ones, and really sharp tools are crucial. And yes, it’s true that good technique can overcome most chatter problems — but at some point, you have to resort to a steady rest.
Spindle Turning Tools
The need for sharp tools may seem self-explanatory. Additionally, having extremely long bevels (inclusive angles of 25° to 30° at the edge) helps to cut the wood cleanly rather than set up chatter. Most spindle turners have edges that are closer to 45°. This creates more resistance to cutting so the wood more readily buckles, riding up onto the edge in a catch. I also believe in honing my 25° edges to a polished edge: honed edges cut with less resistance and leave a much better finish.
Although the skew is the tool most prone to vibration problems, it also leaves the best finish on cylinders and gentle tapers. An oval skew will work with as little as a 22° inclusive angle, while a traditional rectangular skew can be brought to as little as 25°. The skew must have a flat bevel.
Additional skew techniques I have found useful are slower speed, keeping the tool as close to a right angle to the work as possible, and setting the tool-rest a bit high.
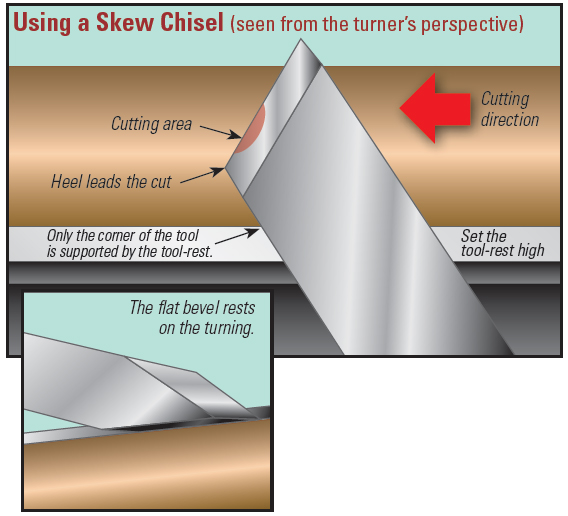
When you use a skew in a normal planing cut with a high tool-rest, as shown in the illustration above, wood removal happens in about half the cutting edge, biased to the heel. To work up to a shoulder, you must slide the tool forward slightly on the rest, all the while keeping the bevel running flat on the work, such that the tool cuts at the very heel. This is the heel cut, and it is also the only way to start on the end of a cylinder. It is the most vibration-free cut of any tool, and what you have to resort to when you encounter bad chatter.
Techniques
Overall, in terms of technique, the sequence in which you turn a spindle is very important. It is almost always best to turn from the center to each end and remove the thinner areas last. When you remember the power of four rule, you realize it only takes a bit more diameter to make a huge difference in a spin- dle’s buckling tendencies. (Luckily, most furniture legs are tapered, so turning all of the elements near the major diameter before thinning the daintier portions keeps chatter at bay.)
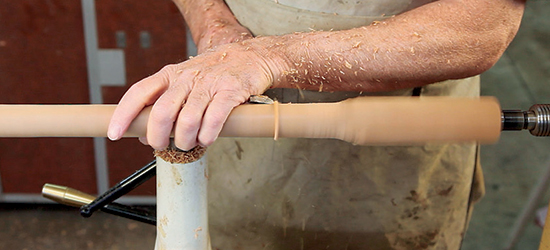
Another technique, mentioned in most turning books, is to wrap your hand around the spindle (once it is round, of course), all the while holding the tool down on the rest with your thumb. Most authors caution that this is done with a light touch and that if you are getting friction burns you are squeezing too tight.
While the hand definitely has some dampening effect, I think the major reason this technique works so well is that it allows the turner to put much greater pressure on the tool bevel. Rather than dampen vibration, the hand around the spindle allows the turner to sense where the spindle is and control the bevel pressure precisely. In effect, the tool’s bevel becomes a steady rest with the rubbing bevel deflecting the piece slightly, dampening vibration.
Steady Rests
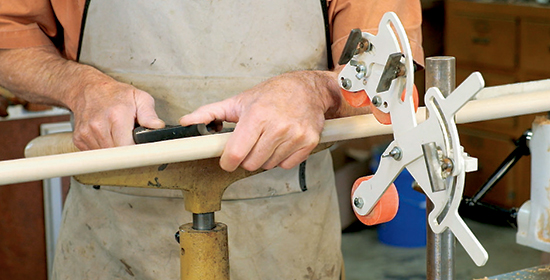
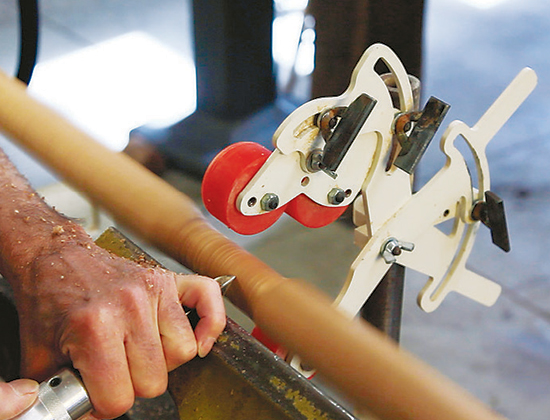
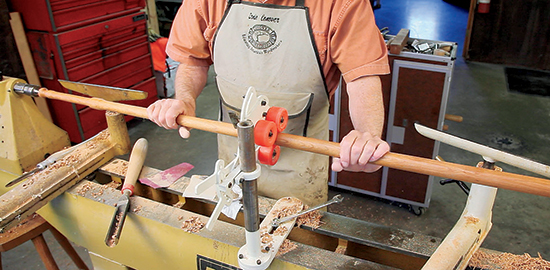
At some point when turning a long slender cylinder, you will go past your ability to control its vibrations while using your skew. That’s when a steady rest comes to the rescue. They are the solution to turning long, thin spindles. A number of good commercial examples are available, and plans abound to build your own.
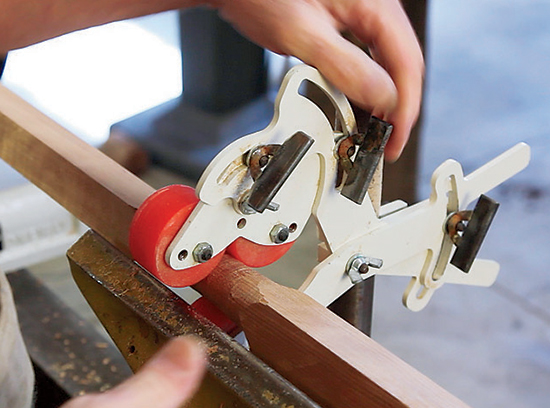
It is much easier to use a steady rest if you have two banjos, allowing the tool-rest to be moved from one side of the steady rest to the other without breaking down the setup. For this article, I used a Oneway Steady Rest which employs roller-skate wheels and is adjustable for a wide range of center heights.
The first order of business in turning anything long and skinny is to mark perfect centers on both ends and chuck it between centers with the steady located at about the halfway mark. There is some wisdom on the street that exactly halfway causes sympathetic vibration patterns, but I have never found this to be true. I place the steady based on a convenient place in the turning. Make sure all the rollers (or the V-notch, in a shop-made steady rest) are not touching the billet before starting the lathe.
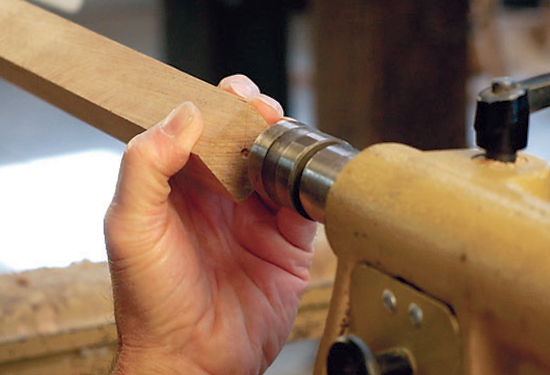
The problem with a long billet is that it is almost never straight. I overcome this problem by starting the lathe at 600 to 800 rpm and use a very sharp spindle gouge to just touch the work at the area where the steady will contact. I then turn the lathe off, examine which corners were cut, and move the tailstock center contact to bring the billet to where all four corners will be cut away equally. The work is now centered at the steady, and I turn it perfectly round at that place with a spindle gouge. If the work buckles too much, I resort to a big round-nose scraper to bring it round without catching — then engage the steady, and move the tailstock live center back onto the original exact center of the billet. The part can now be turned in the normal way.
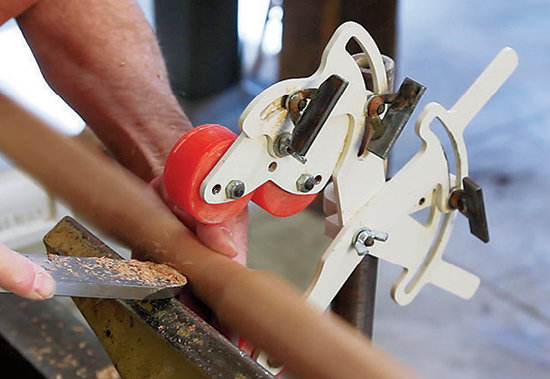
It is often necessary to have the steady contact area a bit oversize. This is especially true if you are using a shop-made steady and burning is problematic. Once the rest of the spindle is turned, simply move the steady a bit (6″ is usually enough) and turn the oversize/burned spot to size.
Conclusion
You can often limp through turning one long spindle using a skew and the “hand wrapped around the work” trick. It usually takes a lot of sanding to correct the result, however. A steady rest makes turning long spindles appreciably faster with far better results. When you turn your next flagpole, instead of running up the white flag, use a steady rest!

Check out our new DVD featuring Ernie Conover and Kimberly McNeelan: Getting Started in Woodturning, our latest offering in the Way to Woodwork series.


