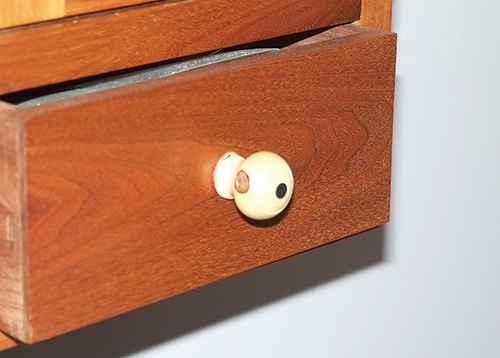
Back in the 18th and 19th centuries when one- to 10-man turners’ shops produced a host of useful household items, our forefathers did not just turn wood. Bone, antler, horn and ivory were materials they purchased in quantity. Many useful items were turned from cow bone and deer antler — the bearings in spinning wheels being an example. Up until about 1820, some shops specialized in working with cow horn, making powder horns and drinking cups, both of which required turning. The horn Once you’ve turned the tagua nut, you can’t tell it apart from ivory — but the vegetarian option is a lot friendlier to elephants. workers were really the first plastic fabricators, using heat to reshape the horns from oval to round before turning. Ivory was turned extensively to make billiard balls, bagpipes, inlays, buttons and sewing paraphernalia.
Even in the 18th century, though, ivory was expensive: it was only within the reach of the most well-heeled customers. Around 1820, an alternative was found in the form of tagua, the nut of the ivory palm tree (macrocarpa being the principal species of the five in the genus Phytelephas). The ivory palm grows across the Andes, starting in southern Panama and continuing through Colombia, Ecuador, Peru, Brazil and Bolivia, but most prodigiously along the Magdalena River in Colombia. It tends to grow in groves, crowding out other trees, lives up to a century, and reaches as tall as 65 feet.
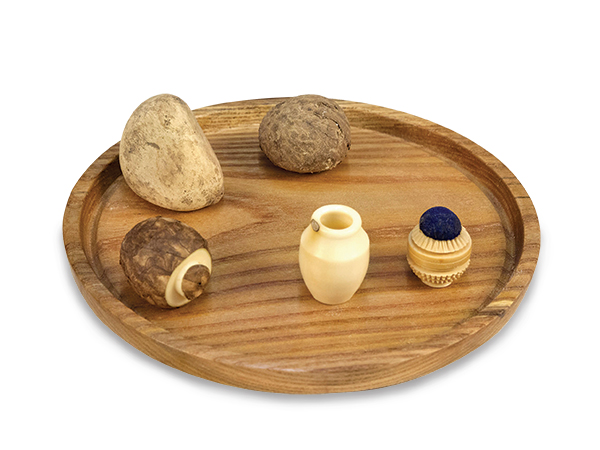
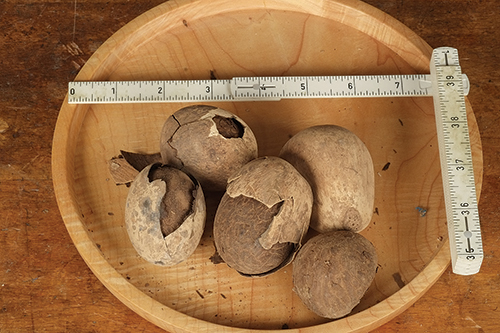
The nuts range in size from walnuts to hens’ eggs, and the dried meat of the ivory nut is indistinguishable from ivory itself, except to the trained eye or chemical test. It also works and carves identically to ivory.
Today’s most common name, “tagua,” comes from the language of the Indians who live along the Magdalena, who still gather the nut. In the early 19th century, it was known in England as the “corrozzo nut,” but spellings in old texts vary. “Corozo” is a common one.
Tagua’s Historical Impact
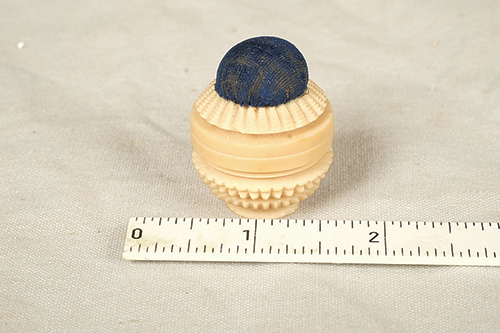
Although the size of the nuts is a limitation, there are workarounds. Today, we have glues that will bond multiple pieces together; the Victorians threaded multiple pieces together to fabricate thimble cases and needle holders, as vegetable ivory threads very well.
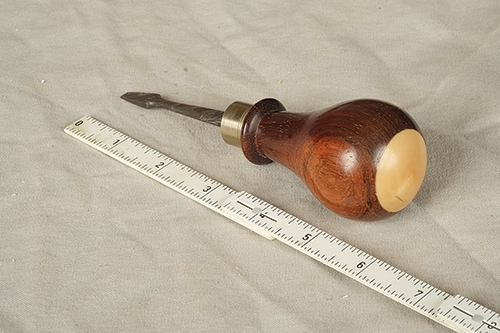
In addition to these items, when the first tagua nuts reached England in the early 19th century, they were enthusiastically crafted into toys, cane heads, knickknacks and ornamental turnings. Starting in Schmollen, Germany, in 1860, factories were established throughout Europe and North America to mass-produce tagua buttons. The worldwide demand became so great that ivory palm plantations were established in South America. Most of their output went to buttons, which are turned, albeit by sophisticated machines. In 1887, it was estimated that three million nuts were required to supply the factories of London and Birmingham, England, alone. One of the biggest button producers, the German American Button Company, was established in Rochester, New York, in 1893. It survived long after most of the other tagua button companies had switched to plastic or gone out of business.
In the 20th century, plastic began to displace tagua, but early plastic was brittle and did not take to hot irons well. Still, improvements in plastic came fast, such that by the 1930s the tagua plantations fell into neglect and the jungle took over.
Tagua Today
Today, turners and the art world are again revering tagua. Available from Craft Supplies USA and Amazon for about a buck apiece, ivory nut is great fun to turn, carve and scrimshaw — just like ivory. It leaves the elephant, however, alive and well.
The only drawback to vegetable ivory is that about 95% of tagua nuts have a fissure at the center, ranging from mild to severe. Learning to work around (literally) this problem is problematic at first, but you soon get handy at maximizing the yield.
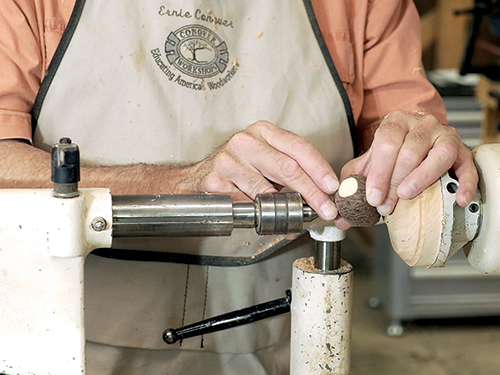
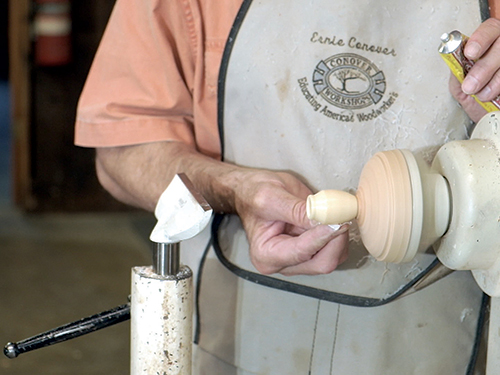
To make the nut into a small vessel, it is useful to think of it as an egg. If you examine the nut, you will perceive that there is a bump where it was attached to the tree, which marks one end of the long axis of our egg. You want to make this the mouth of your miniature bowl. At the other end of this axis you need to sand a small flat spot — about the size of a dime is good. This can be done with a disc sander, a piece of sandpaper on the bench or a coarse file. You now glue the nut to a level glue block on a faceplate with medium cyanoacrylate glue, centering as best you can.
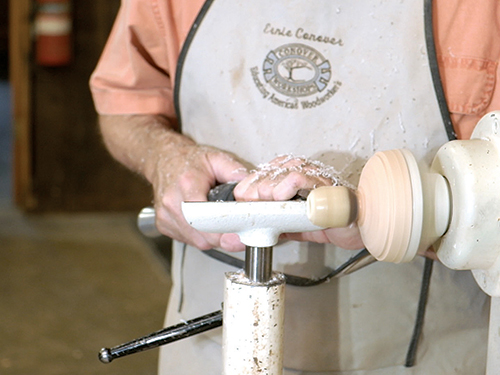
You can now use normal spindle turning techniques to hollow out and shape your miniature vessel. A spindle gouge will work fine, but it needs to be very sharp and will dull more quickly than with wood. Tagua loves scraping, and small, sharp scrapers with a good burr will shape and smooth beautifully. You will hit the fissure; the objective is to turn this away. You now shape the outside to the shape of the inside, leaving a thin wall. Sand to about 400-grit, then polish with a very small bit of cloth and fine automotive polishing compound. The result will be spectacular!
You can also drill a hole through the long axis of the egg, forming a tube. You can now join that to other such tubes by gluing or chasing threads between them. A modification of this idea is to turn a vessel, then make a tight-fitting cap out of another nut to form a small box.
Try Miniature Slabs
Another approach is to cut the nut into slabs using a backsaw, scroll saw or band saw. If using the band saw, it is best to make the aforementioned flat spot, glue the nut to a length of wood, and use this strip as a handle to do the band sawing safely. Once you make the first cut, you can work around the fissure and get nice slabs. The slabs can be glued to a flattened glue block to make buttons, inlays and escutcheons.
You can cut very nice patterns in vegetable ivory with chatter tools. With wood, chatter work can only be done in end grain, but it can be done anywhere on the surface of a tagua turning. Ivory nut can also be scrimshawed, the same as real ivory. Turn what you want to scrimshaw — a button, escutcheon, etc. Bring it to a good polish, then draw your idea lightly in pencil. Next apply any wax onto the surface and buff well. With a sharp, pointed scriber, scratch your pattern into the vegetable ivory. A sharpened awl works fine. Now rub some India ink into your drawing. The wax will prevent the ink from adhering except where you have scratched.
Turning tagua is a nice change from wood and can be done in any lathe, no matter how small. A hard-to-find, but fun, read that can serve as an additional resource is the out-of-print book All In A Nutshell: The Story Of The Vegetable Ivory Nut by Shirl Schabillon.
Above all, I heartily urge you to buy some vegetable ivory and go nuts with your lathe — pun intended!


