
Feeling Charitable
The winners of our eZine contest for the best charitable program involving woodworking found charities that covered the range from toys to turnings – all of them great ways to use woodworking to help others. – Editor
First place goes to an entry with a familiar charity this time of year.
“We are in the 29th year of heading our Toys for Tots Program serving children in three rural counties around Cameron in northwest Missouri. The program provides toys for some 700 children annually and has given toys to over 17,000 children. For many of those years, inmates at the Western Missouri Correctional Center in Cameron have produced a remarkable quantity and quality of wooden toys for area distribution. Toys have included building blocks, puzzles, tractors, trucks, tanks, airplanes…even a three-foot dollhouse complete with miniature furniture. Not only does the program benefit needy children, but it offers inmates an opportunity to learn a skill and give back to their communities. Since inmates have prison jobs during the day, woodworking is done on their off-hours and corrections officer supervisors are volunteers as well. Inmates involved have been recognized by the Missouri Department of Corrections for their efforts.” – Lori Hendee
Second place:
“Habitat for Humanity’s home building program” – Jim Porter
And third:
“Our local Sunshine School is expanding their facility for mentally and physically challenged children. They are having an auction December 3 to raise money for the construction. I donated several woodturnings to be auctioned off at the event.” – Bob Miller
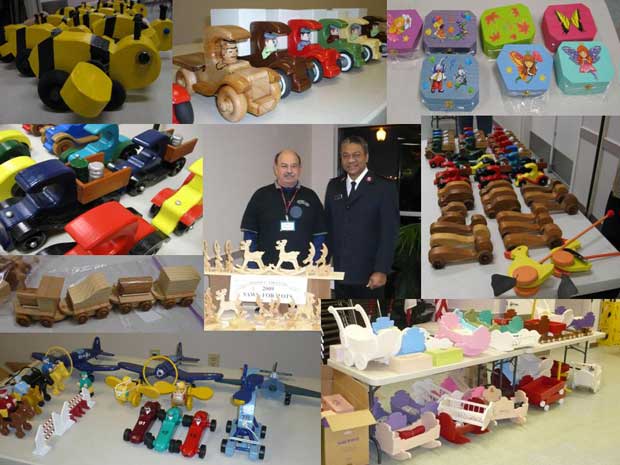
Many other woodworking clubs, of course, also participate in charitable programs – like this one, where the entrant included a photo. – Editor
“The Sacramento Area Woodworkers’s (SAW)Toys for Tots program has been making and donating toys since 1986 to the Salvation Army. In that time, they have donated over 31,000 handmade toys. This year’s presentation of the toys was on December 1st and SAW handed over over 1300 toys. The attached photo shows SAW president Floyd Gibson with Salvation Army Capt. Hendrick Sumter and some of the toys given.” – Andrew Volk
What is Wet Sanding
Although our experts had already offered a couple of different options as the answer to the question “what is wet sanding” in last issue’s eZine, our readers shared even more thoughts on the matter. – Editor
“I think that Mark Thorud may have been referring to something quite different when he referred to ‘wet sanding’ as a finishing technique. I have been using wet sanding as my primary finishing technique for some time, especially on small projects.
The way I proceed is as follows:
1. I sand the workpiece to about 150-grit (or sometimes 220).
2. I dilute oil-based clear gloss polyurethane approximately 3:2 with mineral spirits and apply this liberally with either a rag or wet, folded 220-grit sandpaper (wet or dry).
3. I sand with the grain, adding more poly if it gets too thick. I sand until I can’t feel the sandpaper cutting any longer.
4. With a clean rag, I wipe the slurry against the grain until the surface feels dry.
5. Let dry overnight (or at least six hours).
6. Repeat steps 2 thru 5 but use undiluted clear gloss poly (unless it is too thick) and sand with 320-gritwet or dry sandpaper. Let dry overnight.
7. Repeat step 6 but this time use 400-grit wet or dry sand paper.
The resulting finish will be a joy to touch, combining exquisite smoothness while retaining the feel of wood.
I believe the effectiveness derives from the creation of a slurry consisting of the poly and the fine sawdust, which then acts as a grain filler. I must admit that the process can be time-consuming, and it is messy (I wear nitrile gloves), but the result is very satisfying. I have used this process on walnut, cherry, oak, purpleheart, cocobolo, maple and mahogany. All with good results.” – Stephen N. Price, M.D.
“I am aware of the answers given to the posed question, ‘What is wet sanding?’; however, I think that the proper answer the woodworker was looking for is the following:
“Wet sanding is a method to fill pores in wood like walnut* and oak in the finishing process. I use a slow-drying oil or oil/varnish blend (Danish Oil works fine). One applies a copious amount, rubs it in with a rag well, and then, while wet, sands with a relatively fine grit paper (220 progressing to 400+): the bigger the pores, the coarser the paper. The developed slurry fills the pores. Then you wipe the excess off with the grain, re-wiping any ooze-out later. Let this fully dry 24 to 48 hours as needed. One would want to repeat the process using finer grit or grits until happy — it just gets smoother and prettier. The advantage is that you are filling with the exact color of the wood of the piece and no pores. Of course, all wood species do not require this effort to look good.
“I have an old dedicated random orbital sander to do this with — hasn’t hurt it yet. Not sure I would want to do a big piece by hand. Follow this up by fine-grit sanding, dry, with the grain to achieve best result. After this stage, it’s dealer’s choice for the rest of the final finishing coats, depending on the use of the piece.” – Bob Dennison
Protecting Tools
We also heard an additional suggestion for the reader who worried about protecting his tools stored in an outdoor shed. – Editor
“This is in response to the letter concerning tools corroding while stored in a shed and how to build that shed to help prevent it. In my work, I have done some testing with corrosion on metal in a humidity cabinet. This device runs a cycle where humidity is held at 100 percent and the temperature fluctuates from 60 degrees Fahrenheit to 140 degrees Fahrenheit several times a day. Standard clean steel would have red rust in a 24-hour cycle. We found, however, that the controller that regulated the temperature failed and, while maintaining the 100 percent humidity, the temperature stayed ambient (approx 70 degrees Fahrenheit). Surprisingly, clean steel did not show any rust after three weeks in a 10 percent humidity environment! It was determined that the repeated condensation cycle is what causes more rapid propagation of corrosion.
“To that end, I would suggest that the entire shed be insulated with a vapor barrier. I would have a cement floor with a vapor barrier or sealed. This floor acts as a 50 degree radiator and, if the building is insulated, this can help minimize the temperature swings (condensation cycles). Your suggestion about the light oil or wax would be the icing on the cake to prevent corrosion. Bottom line is to maintain a fairly steady temperature and, without heating, it this is the best I can come up with.” – Larry Giust
Great Finish, Sad Ending
And this reader shared with us his tale of a wonderfully finished coffee table, loved – and lost. – Editor
“Several years ago, I made a coffee table out of a couple of planks of cocobolo. The tabletop was about 4 feet long, 20 inches wide, and 1-1/2 inches thick. I used a mixture of Watco Danish Oil and powdered pumice. I made it to the consistency of catsup. Then I just performed a French-polish on the top, using a diaper folded up to a pack of cigarette size with another wrapped around it.
“It took some time to affect a decent sheen, but the most amazing thing with this oil finish was when someone left a glass on the table, and it left a ring on the table the size of the glass bottom. Simple solution was to wipe a generous amount of Watco Danish oil on the spot, and left it over night. The next morning I came down, and literally wiped the tabletop clean of any residue from the glass impression.
“I came across that wood from a fellow who offered the boards to me for a debt. I lost that table in a divorce, and I heard some time later that my former spouse sold it at a garage sale for $5.
“That’s why, today, after 30 years of blessed singleness, I’m still single, still happy, and still making sawdust in my garage-shop.” – Mel Hibbard


