How do I form a tenon on the end of a five-foot-long table apron? It won’t fit atop my table saw in the tenon jig.
Rob Johnstone: You could use a dado head mounted in your saw and nibble away (yup, that is the real woodworking term) the material at the end of the rail to form a tenon. If your apron is rectangular in shape with squared up edges, then it is really easy to do. Use some scrap lumber to test your cuts and you can remove stock on successive passes, using a miter gauge to control the cuts, until you have a tenon. You may need to pare away on the cheeks with a chisel to fit your tenon to its mortise. If your apron is not going to end up in a rectangular form with squared-up faces, it likely will be in that form at one point in your machining process. Take the time to form your tenons at that time, and then move ahead with the rest of the shaping you have in mind.
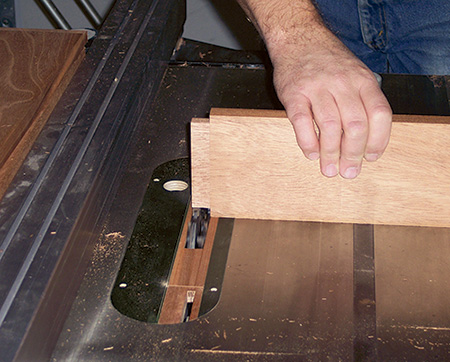
John Brock: I cut these on a crosscut sled on a table saw using a stacked dado set. I first make the shoulder cuts as I would on a shorter piece, then nibble the tenon down. I leave a little extra material on the tenon cheeks and pare them with a hand plane or a chisel for a clean press fit in the mortise.
Tim Inman: Sometimes we let technology get in our way. On a really long or difficult-to-fit-in-the-jig board, why not go back to the old school and just do it by hand? It is really pretty simple, and quite effective, to use an old-fashioned hand saw to define the shoulder position and depth. Then use a very sharp chisel to pare away the excess. They did it this way for centuries. If you must do it with something you can plug in, set up a handheld router.
Carol Reed: Hog it out with a dado blade and a miter gauge, just like Norm does!


