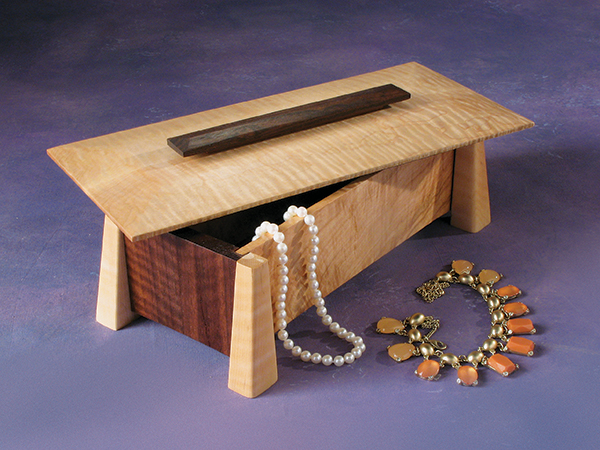
The box shown is the fifth generation of this design. After each production run of about 20 boxes, I make slight design changes to enhance the look and simplify the machining. Any hardwoods would work, but since the box uses so little lumber, I prefer to incorporate highly figured woods. For safety, ease of construction and consistent cuts, I use a jig for bevel-cutting the legs and another jig for beveling the top surface of the lid.
Starting with the Box Body
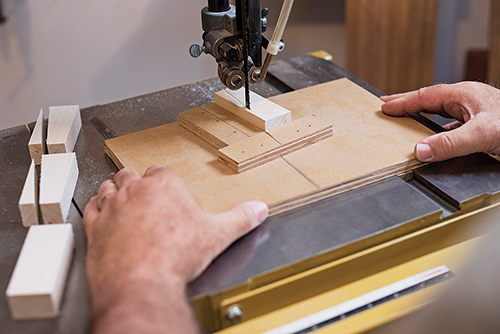
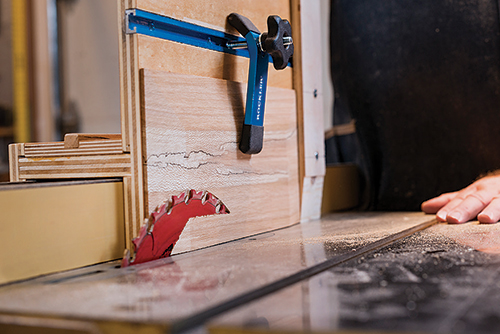
To form the gracefully tapered legs, cut a piece of 1″-thick maple to 1-1/4″ wide by 14-1/2″ long. Then, crosscut four legs to 3-1/2″ long from the long blank. For consistency and safety, I use a simple sled on my band saw table for angle cutting one edge of each leg at 7°. See the Exploded View Drawing for the leg elevations. To make the jig, cut a piece of 1/2″ or 3/4″ plywood to 8″ x 12″ for the base. Cut a runner to slide snugly inside the miter gauge groove on your band saw, and glue it to the bottom of the base so the band saw cut will be roughly centered in the base. Band saw about halfway into the base. Brad-nail a pair of cleats to the top surface of the plywood base to position a leg to trim one edge at 7°. With the wide face of each leg facing down, taper-cut each leg. Sand each miter-cut leg smooth.
Cut the two ends to size from 1/2″-thick stock; I used quilted walnut. Finish-sand the surface that will be the outside face of the end assembly. It’s easier to sand it now, rather than later when it is sandwiched between the two legs. With the inside edges and top ends flush, glue and clamp an end between two legs. Repeat for the other end assembly. Remove the clamp and sand the inside face of each end assembly.
Cut the two sides to size. I resawed a 3/4″-thick piece of quilted maple for these pieces. Cut a 1/4″ rabbet 1/8″ deep along the bottom inside edge of each side piece. Then, sand both sides through 220-grit.
Using a miter gauge with a sacrificial fence and stop, cut a pair of 1/4″ grooves 1/4″ deep on the inside face of the end piece sandwiched between two legs. The groove width needs to be the same width as the thickness of the sides. Be careful not to cut into the legs when cutting the grooves. The stop on the fence allows you to make consistently placed grooves.
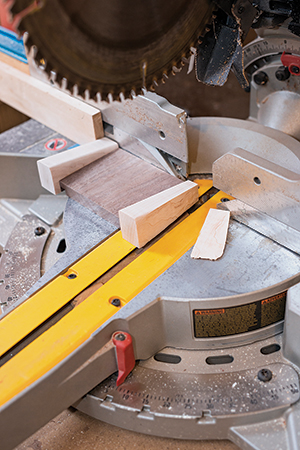
Set a stop on your miter saw fence, and miter-cut a 7° angle on the outside edge of each leg on the end assemblies. Miter-cut one leg of each end assembly, angle the blade to cut the opposite direction, reset the stop, and miter-cut the opposite leg of each end assembly.
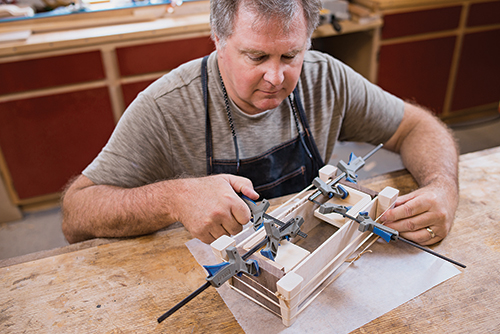
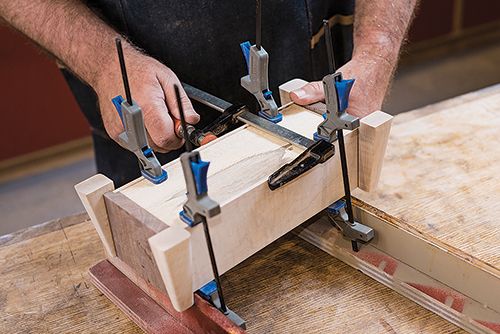
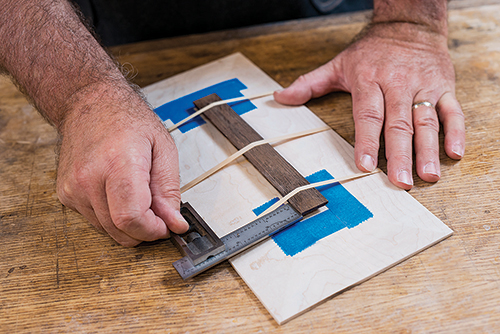
Finish-sand the two end assemblies, sanding a slight roundover along the edges of each leg. Using rubber bands for clamps, glue and clamp a pair of sides between the end assemblies, checking for square. I used shop-made 90° corner braces to keep the assembly square. Double-check that the top edges of the end assemblies are flush with the top edges of the side pieces. Rubber bands make excellent clamps on the tapered legs where regular clamps have a tendency to slide up the beveled surfaces when they’re tightened. Wipe off any excess glue with a damp cloth.
Measure the rabbeted opening in the bottom of the box and cut the box bottom to size. Glue the bottom in place, wiping off any excess glue. After the glue dries, sand the bottom of the box body smooth.
Adding the Lid Next
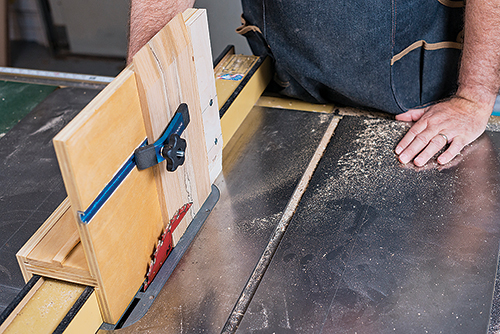
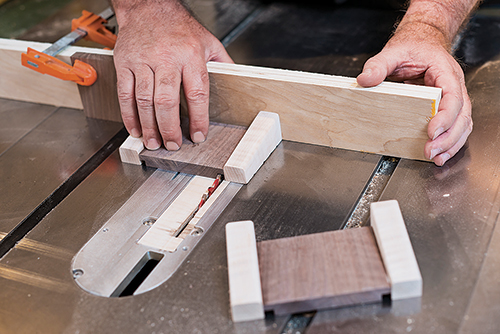
Cut the lid to size from 1/2″-thick stock. If you don’t have figured stock this width, edge-join two pieces of 3″-wide stock for the lid. I often book-match figured stock for the lids to obtain the necessary width. To safely cut the tapers along the top edges of the lids, I use the table saw fence saddle shown here. Tilt the table saw blade to 10° from vertical and bevel-cut the ends of the lid first, leaving a 1/8″ flat along the edges of the ends. Then, bevel-cut the edges. The hold-down on the jig keeps the lid firmly in place when making the bevel cuts.
Sand the top and bottom surfaces of the lid smooth. It is easier to sand the lid now as compared to later when the lift has been attached. Measure the opening of your box, and cut the lid bottom to this dimension less 1/16″ in length and width. Center, glue, and clamp the bottom to the underside of the lid.
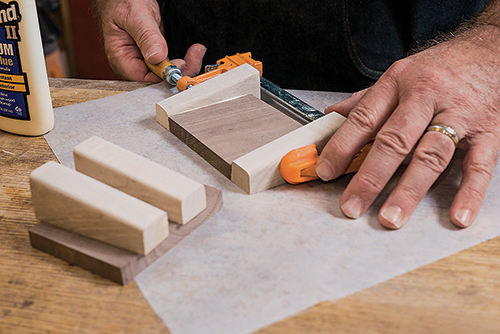
Following the three-step cut sequence in the Drawings, bevel-cut a lift to shape along the edge of a 1″-thick board. Starting with a wider board makes this a safer table saw cut. Sand 10° tapers on the top ends of the lift, and then sand the lift smooth. Cut the lift spacer to size and glue and clamp it centered on the bottom side of the lift. Now, center the lid/lift assembly on the lid top and glue it in place. I use masking tape to mark the lift’s location on the lid.
Finish Sanding and Adding the Finish
Finish-sand the box and lid. To bring out the grain of the figured stock, I use MINWAX® Antique Oil Finish, following the directions on the can. After letting each coat dry, I rub down the finish with Scotch-Brite™ gray Ultra Fine Pads. Three or four coats of the oil creates a lasting finish.
Click Here to Download the Materials List and Drawings.
Marlen Kemmet is a woodworking editor specializing in print and digital communications. He resides in central Iowa and is an avid woodworker with a fondness for Greene and Greene style furniture.


