I’ve recently received a request from my son to build a case for him to hold his collection of old, vinyl records. I think that I’ve got a handle on all of the design issues, but he has asked that the case be finished in a gloss black to match some of the furnishings in his home office. I’m OK with staining and/or clear finishing, but I can’t say that I’ve ever painted a project. Would you please offer some suggestions & pointers to accomplish a black, high-gloss finish on wood? – Mike Bonifay
Tim Inman: This is just about the most difficult finish you’ll ever try doing! A high-built, high gloss black finish is a piano maker’s finish. It will show every flaw, and every irregularity, in spades. A compromise would be a high-built, flat or satin black finish. The less gloss, the less the imperfections will show. You will need to “fill” the wood with a heavy body black primer. They are available from piano finish specialty suppliers. It is like thick gooey paint. Spray it on, let it dry, sand it down. Do this several times. You will be sanding off most of the primer coats. You’ll probably want 220 or 380 paper. When you arrive at a surface that is true and smooth, then coat with a black sealer. Follow the container directions, but you’ll probably want to build two or three coats. Let it dry, then wet-sand it back down. Do this a couple of times at least. Your sandpaper of choice will probably be 400. Finally, apply black lacquer. Again, build a few coats, let it cure, then we sand back down. For this layer, you’ll probably be using 600-grit paper and water. When you have arrived at the “nirvana” point, clean the surface free of all and any dust. Now, clear coat it with something that is only “just’ as shiny as you need. Remember again, less shine is easier to do, more shine is harder. Let this dry completely. Deliver the piece to your son, and get him to sign a “care and feeding” release — and a promise he will not ask you to fix scratches and dents after he has moved the cabinet into his new home. (The piano finish repair people who read this are now cheering. The folks who have never done this kind of finish are probably groaning……) This is a very difficult finish to do well – but you can do it! Please practice on some sample boards before you try it on your new cabinet.
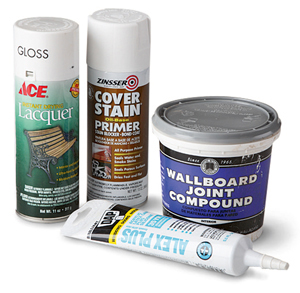
Chris Marshall: In our August print issue last year, Rob Johnstone wanted a glossy smooth finish for a plywood dresser he built for his granddaughter (“Maggie Lu’s Little Dresser,” page 34). He first carefully filled the nail holes and any irregularities on the surfaces of his project with wallboard compound, then caulked the visible joints. He topcoated with primer and several coats gloss white aerosol lacquer. You could do the same thing on your project. Rob was very pleased with the smooth and durable results. But be very careful with the prep work: you want to make sure the surfaces are absolutely free of blemishes, otherwise the gloss lacquer will make them stand out. Flatter sheens of paint will help hide defects, but you won’t end up with the glossy look you want.


