I’m remodeling the steps in my basement. Presently the steps are made of 2 x 12 pine. I had the Amish make up new treads made from maple. My question is, what is the best way to attach the new treads over the old ones? Do I just use construction glue? Do I also nail them? If so, what is the recommended way to hind the nail head? I have finish nailers (15-,16-, 18- and 22-gauge). I will be staining the maple to match the oak trim in the basement. – Peter Sferro
Chris Marshall: Upgrading to maple treads will be a nice improvement to your stairs, but you shouldn’t nail the new treads over the old ones. Doing that will change the rise of the bottom step (it gets taller) and the first step below the landing (it gets shorter), which becomes a tripping hazard. And, doubled-up treads will look odd. The right approach is to remove the old pine treads altogether. This could be a big job, if the balusters are incorporated into the old treads, but maybe your basement stairs have a different, easier design. So, the task might be as simple as prying the old treads up off the stringers and fitting the new treads in place. I would probably use construction adhesive and hand-nail using heavier casing nails and not pneumatic fasteners for installing the treads. The adhesive will help prevent the treads from squeaking down the road.
Tim Inman: Why are you replacing the treads on your steps? New or old? Worn or broken? Inside staircase or outside porch steps? It all makes a difference to the answer. Since you say ‘”in” your house, and you’re making maple replacements in place of the pine, I’m going to guess that you’re replacing the treads on an interior staircase to give it an upgrade. My answer hinges on that assumption.
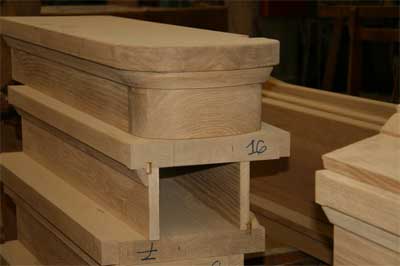
Treads are the flat part we step on. Risers are the vertical pieces that keep us from sticking our toes through the back. Treads are the workhorses. When treads are installed in a staircase, there is customarily a wedge-shaped mortise or “slot” cut into the stringers to hold the treads where they belong. The very important, but hidden and often unknown, element of tread installation is a blind or hidden wedge. Underneath each tread, on both ends where the tread fits into the stringers, a wooden wedge is driven to tighten the tread and hold it in place. This wedge is far superior to simply nailing or screwing the tread down to the stringers. It keeps the tread tight, and prevents most “squeaking” later on in life. Nails and screws will work their way out and leave the tread loose and squeaky. The wedge, properly installed, keeps working itself tight over time. These wedges can only be seen or accessed from beneath the staircase, which is often not accessible upon final installation.
So, if you really want to do the job right, remove the original tread pieces, and install the new maple ones correctly – with wedges. If you just need new wearing surfaces, then about any way you want to install them will work – for a while. Just remember this: if you “top” the old treads, then the first step up at the bottom of the staircase will have a higher rise, and the last step at the top of the staircase will have a shorter rise. This irregularity might not seem like much, but it could cause folks to lose their balance and get tippy. Be careful.


