
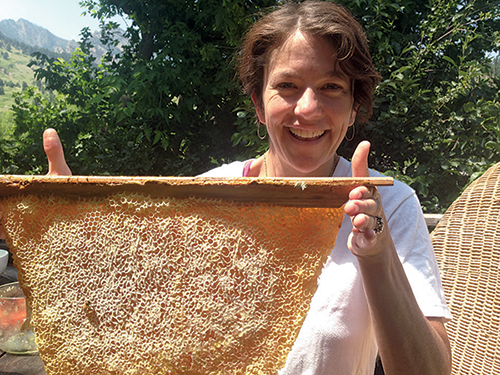
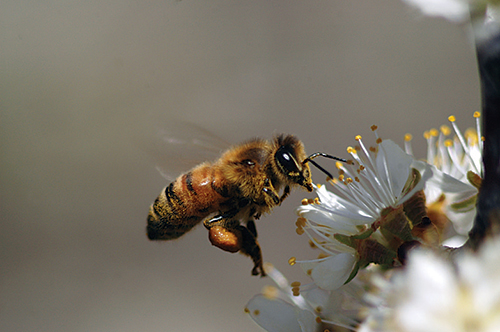
Do your part to help the dwindling honeybee population, harvest honey in your own backyard and get some woodworking in to boot. While making this working beehive, you’ll learn how to make your own tapered lap-siding and polish up your general angle-cutting skills. For detailed instructions on the setup and use of your hive, visit backyardhive.com.
We at the Woodworker’s Journal are pleased and honored to be working with BackYardHive. We support their efforts to help better the bee and pollinator situation. Below, in their own words, is what they are all about (from their website): “Our primary focus is on improving bee ecology and beekeeping methods that respect the honeybee.
Our hope is that by introducing new hobby beekeepers to the rewards of beekeeping there will eventually be backyard beekeepers worldwide who will help bring back the feral bee population and improve the genetic diversity of the honeybees. This diversity is critically important to the survival of this most precious natural resource. Thank you for being a part of the solution and being a part of the growing community of backyard beekeepers we are helping to create at BackYardHive.com.”
Get Your Beekeeping Supplies
Once you’ve built your beehive and found a good location to place it, you are going to need some supplies — for example, some bees.
We recommend our partner in this project, BackYardHive.com, as a great place to get the stuff you need to put this project into production. They have informational online material that can get you started as well as a nicely produced DVD that walks you through the process. They have supplies for sale and even an online place to ask questions. Here is a short list of “must-haves” our partners recommend:
How-to DVD — demonstrates how to care for bees in your backyard
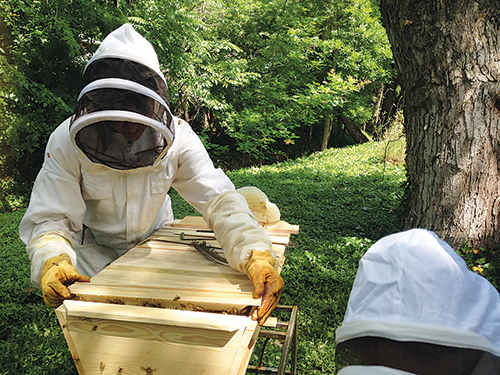
The Original Hive Tool — key to working the hive, loosening the combs for harvesting
Herding Tool — helps to gently move the bees off the comb without using smoke
Natural Beeswax — used to coat the bars; this encourages the bees to align their combs on the bars
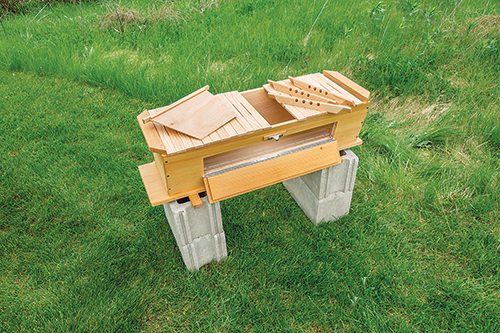
Building the Box
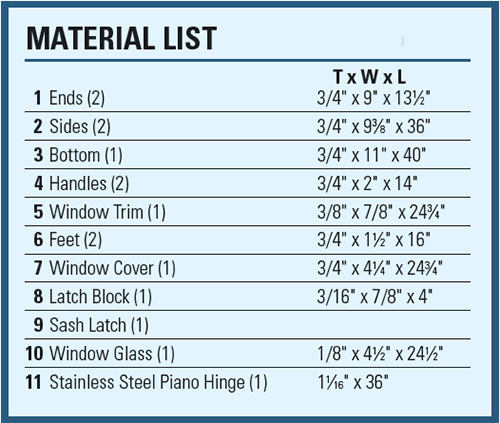
Start the project by laying out and cutting the two hive ends (pieces 1) to shape. Then use one of these workpieces to set your table saw’s blade tilt angle for trimming the top and bottom edges of the hive sides (pieces 2), which also cuts them to width. Then cut the sides to final length. Now chuck a rabbeting bit in your router and rout a 1/2″ x 3/4″ rabbet on each end.
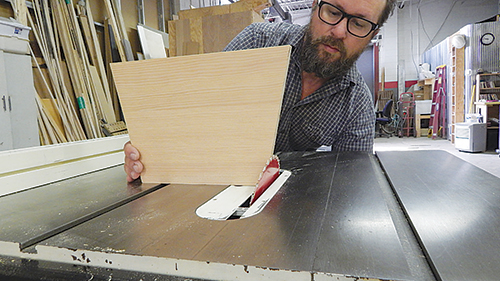
This hive has a viewing window in one of the sides. You can make the window opening’s long cuts on the table saw, carefully raising the blade through the stock at the starting point and then ripping to the stopping point.
Then make the short end cuts with a jigsaw. Or make all four cuts with a jigsaw, if you prefer. Finish it by routing a 1/8″ x 3/8″ rabbet around the inside edge for a glass recess.
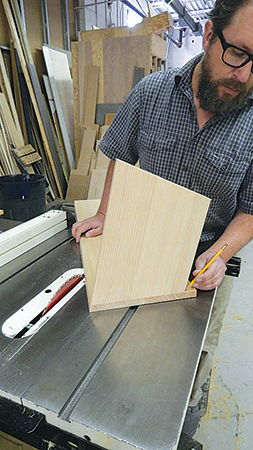
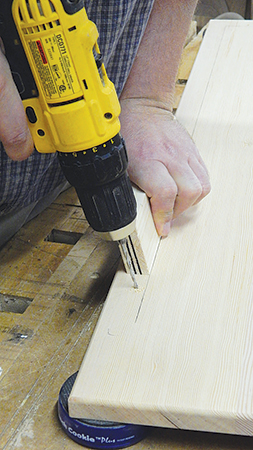
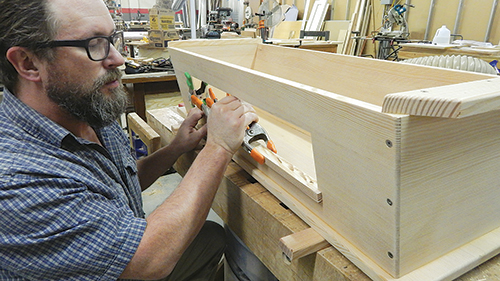
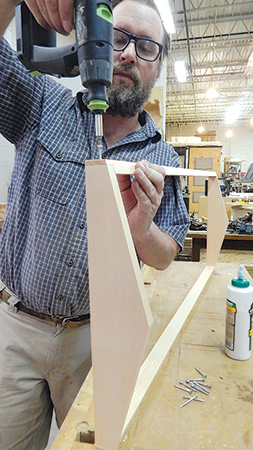
With that done, trim 1/2″ off of the bottom of one of the hive ends: this gap will be the bees’ entrance. Go ahead and assemble the sides and ends with waterproof glue and stainless steel screws.
Next, cut the bottom panel (piece 3) to size and set the hive assembly on it. Trace around the inside. Use this outline as a guide to pre-drill angled pilot holes for attaching the bottom panel to the sides and ends.
If you’d like to round over or chamfer any part of the hive up to this point, now is the time to do it, before attaching the bottom. Then go ahead and install it on the hive with glue and screws.
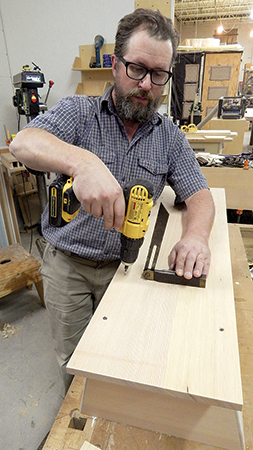
The end handles, window trim and feet (pieces 4 through 6) come next. Cut them to shape, mitering the ends of the handles, and fasten them all to the hive.
You can also rip and crosscut the window cover (piece 7). Round over and rabbet its ends and top edge, leaving the bottom edge flat for attaching the hinge.
After you’ve cut the hinge (piece 11) to length, fasten it in the window opening, and attach the cover. Make and install the latch block (piece 8) above the window opening, and screw the latch (piece 9) to the window cover. Wrap up by setting the glass (piece 10) into its rabbet with a bead of silicone caulk.
Assembling the Hive’s Lid
The lid comes next: it fits over the hive and rests on the handles to protect the inner compartment and combs.
Cut the lid frame sides and ends (pieces 12 and 13) to size, and rabbet the ends of the side pieces.
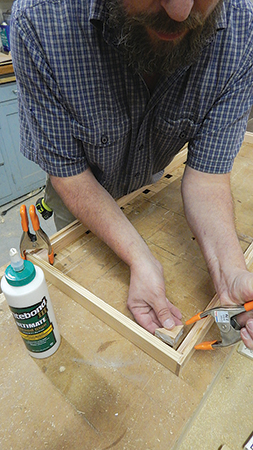
Notice in the Drawings that the lid (piece 14) fits down into a top rabbet in the frame.
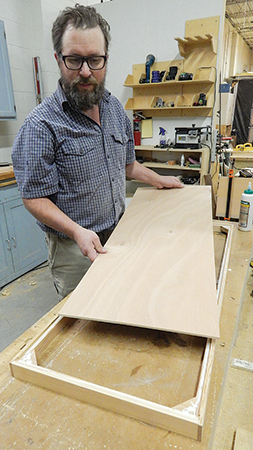
Rout that 1/4″ x 3/8″ rabbet along the top edge of the four frame pieces, before assembling them with glue, screws and corner blocks (pieces 15). Now bed the lid panel into its rabbet with silicone caulk.
Making the Roof
The hive’s roof covers the lid and creates a seasonal thermal barrier, plus weatherproofing.
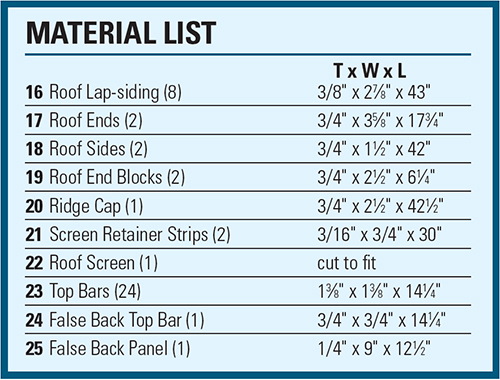
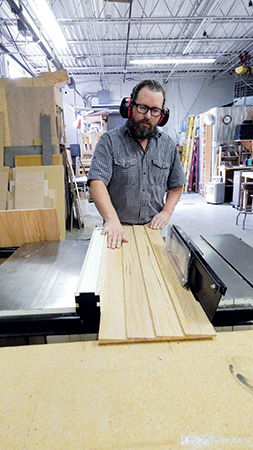
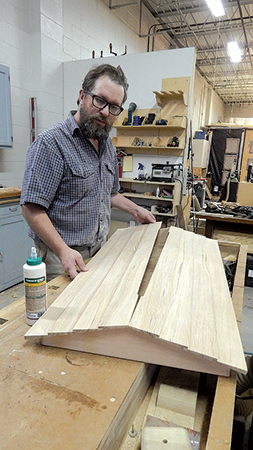
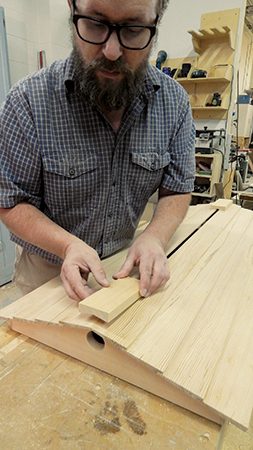
I decided to style my roof with some resawn lap-siding (pieces 16) to add a “homey” touch. To make it, start with 3″-wide by 3/4″-thick stock.

With your band saw’s table tilted 5°, resaw the stock, making two almost equal halves. Doing this can be difficult, so set your fence to saw the offcut about 1/32″ thicker. After cutting the first piece, run the offcut through, so it will end up exactly the same.
When the dust clears, you’ll notice that because of the angle on the siding’s bottom edge, the rough, resawn faces will be the outer faces. To change this angle relationship, rip the bottom edge of each piece with the rough sides face-down and your table saw set at 90°.
Cut off just enough to change the angle. Next, use a dado blade tilted to 85° to cut the rabbet into these bottom siding edges. Leave two pieces un-rabbeted; these will be the bottom edges of the roof. Then cut the siding to finished length.

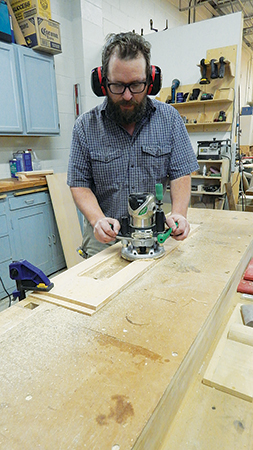
One last step: use a straight bit in your router table to make the 1/4″-wide, 30-1⁄2″-long roof vent cutouts in only the top two pieces.
Most router table fences aren’t long enough for this, as the cutout is longer than the fence. Mine wasn’t long enough, so I clamped a long auxiliary fence with a cutout for the router bit.
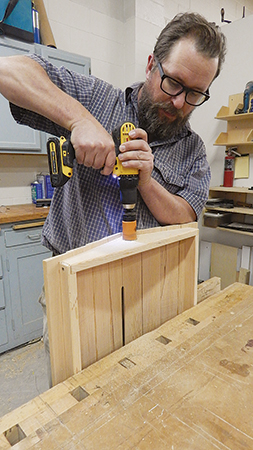
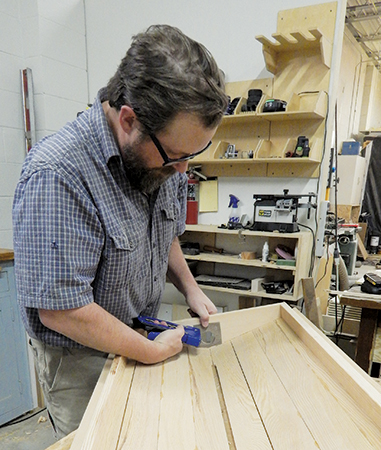
Glue the eight siding pieces into two roof panels, using weights and clamps as necessary to keep the assemblies flat and square. When the glue dries, trim their top edges at 15°, so there’s no gap where they meet at the roof peak.
Next, lay out the roof ends (pieces 17), and cut them to finished length. Cut their slopes on the band saw. Now, rip two roof sides (pieces 18), and bevel-rip their top edges to 15°. Cut them to final length.
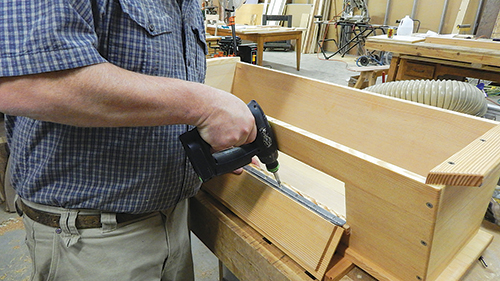
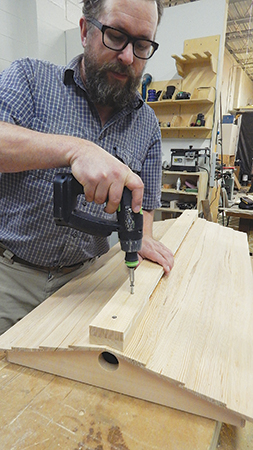
After you mill 1/2″ x 3/4″ rabbets on their ends, glue and screw the roof ends and sides into a frame. You’re now ready to install the roof panels with glue and finish nails. Then bore a 1-1⁄2″-dia. vent hole through each roof end, and staple window screen (pieces 22) over them to cover them from inside.
The roof has two end blocks (pieces 19). Make their V-shaped cutouts on the table saw. If you have a left-tilting table saw, move the fence to the left side of the blade for this operation.
Cut the angles a bit at a time, raising the blade incrementally after each cut. Be sure to cut from both edges before raising the blade. Crosscut the blocks to length, and glue and screw them to the roof.
Install screen (piece 22) over the ridge vent with screen retainer strips (pieces 21) and staples. Wrap up the roof by attaching the ridge cap to the roof ends with countersunk screws.
Machining the Top Bars
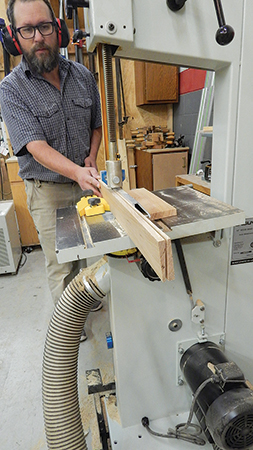
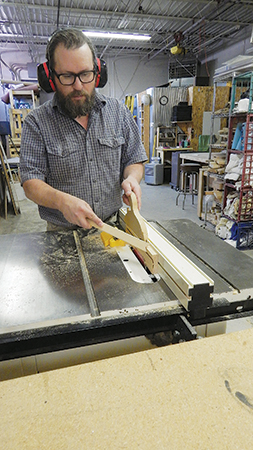
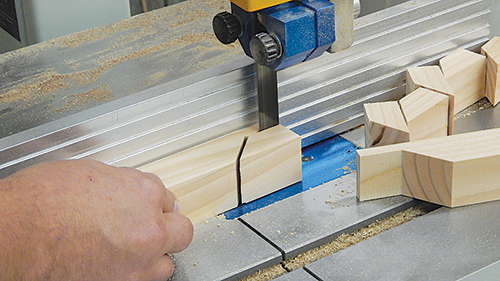
The 24 top bars (pieces 23) lie across the hive and form attachment points for the bees to make individual hanging combs. To build the bars, start with 1-3⁄8″-square billets that are cut to the final length. Cut the non-through end angles at the table saw using a miter gauge equipped with a long fence and a stop block for accuracy. Trim off this waste at the band saw to form a lapped end.
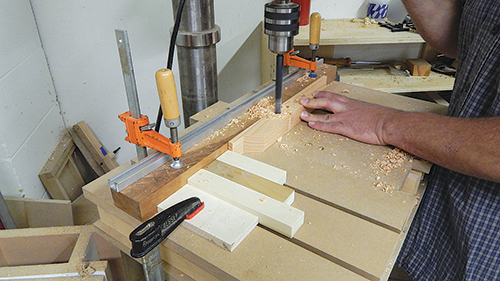
Set up for drilling the bars’ top holes by making three 1-1⁄4″-wide spacers. Clamp a stop on the drill press for the end hole. Drill the first hole and then slip a spacer between the stop and the bar’s end for each successive hole.
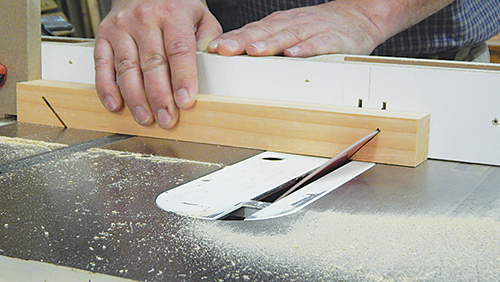
Cutting the bars’ long angled sides is tricky, but with the proper setup, it needn’t be dangerous. You could easily make the first cut with the point facing down, but the second cut would be impossible. Instead, you’ll need to cut the bars with the point facing up. Again, if you have a left-tilting saw, move the fence to the left side of the blade.
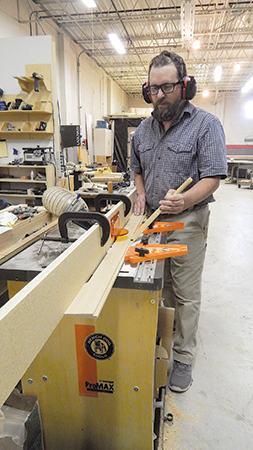
You’ll need three essential items to make these cuts: a zero-clearance insert (with its slot cut through at the same angle that you’re cutting), a featherboard and a push block. The zero-clearance insert and push block are job-specific but worth the added measure of safety. Without the zero-clearance insert, the offcuts will slide down between the blade and the throatplate’s opening, causing a dangerous binding situation. If your blade doesn’t lower far enough to allow an uncut throatplate to seat completely, groove the throatplate’s underside where it contacts the blade, allowing it to fully seat. Then raise the blade through the throatplate while it’s pinned down by the rip fence.
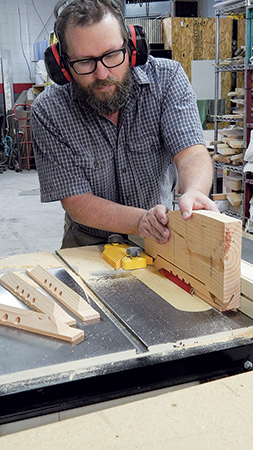
The push block has two “feet” that hold down the thin lapped ends of the bars (see top center photo). Trim the feet to the same width as the bars, so that they don’t interfere with the featherboard. The block’s middle is cut out so that it bridges the taller part of the upturned bar. As you feed the stock, the blade becomes housed within the block.
Now that you’ve got all of your safety equipment ready, bevel-rip one side of each bar, then spin it end-for end in the push block to trim the other side.
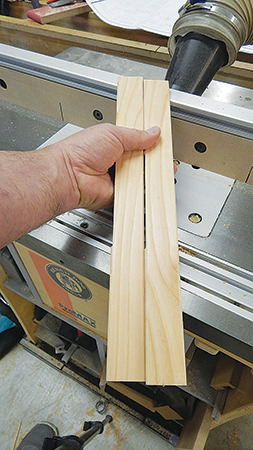
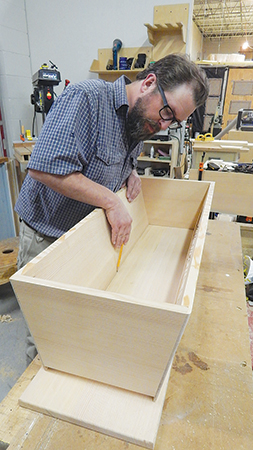
Next, make a slight roundover along both top edges of each bar. The roundover makes it easier to insert a tool that’s used to separate the bars when they’re in the hive and coated with wax. The final step for the bars is to rout a 3/32″-wide, 4-3⁄4″-long vent on one side of each bar. When you set the bars in place in the hive, it creates a gap that’s too small for the bees to crawl through. The false back panel and top bar (pieces 24 and 25) are your last things to build. Rout a 1/4″ groove along the top bar for the panel, and just glue them together.
Apply a finish if you like, to the exterior only. The best choice is a natural finish , so it doesn’t affect the bees or the honey. Now assemble the hive and order some bees!
Click Here to download a PDF of the related drawings.
Hard to Find Supplies
Stainless Steel Piano Hinge #32611
Feed-N-Wax® Wood Polish and Conditioner #24545
Help our Pollinators
Pollinators are in trouble — and that is not good news for those of us who like to eat! (Or for the environment or life on earth in general.) Recent studies and news stories report that honeybee and Monarch butterfly populations are in steep decline. The list of challenges for these essential insects is long: not enough forage (they are starving), pesticides, pollution, mites and other parasites — it is no bed of roses, literally. One bit of good news is that everyday folks are now starting to step up to try to reverse the trends that are hurting our pollinators. Below are just a few good websites (there are many more) for you to check out if you’d like to be a part of the solution.
http://www.fws.gov/pollinators/PollinatorPages/YourHelp.html


