I’m in a bind. I built a custom pie safe/baking station to fit under my existing kitchen countertop. It has punched tin doors and a breadboard top. The cabinet is made from poplar and the breadboard top is maple. I used butcher block oil on the top and Tung oil on the cabinet. The Tung oil finish did not cover the putty I used to fill the nail holes. I now have a finish that has white spots everywhere there are nails. It looks like it has chickenpox. I used Elmer’s® natural wood filler and it said it was stainable. I used a combination of center island plans from your magazine and another one; however, I could not use the rubber wheels as shown. They looked very tacky, so I made my own wooden wheels and assembled them wheelbarrow style.
My problem is this. Can I use an oil-base stain over the Tung oil? I am going to enter this project in the Antelope Valley County Fair in August. I have entered a project in the woodcraft category for the past 10 years and have enjoyed the comments on my projects. – Ron Zega
Rob Johnstone: Ron, there has to be some sort of universal rule of woodworking that says “the finishing challenges must increase in number and visibility as a deadline approaches.”
So to your problem and the solutions: There are a couple of ways to address the putty looking different under the tung oil finish. (And I am assuming here that you are using Minwax’s Tung Oil Finish, which is not a traditional tung oil.)
The best solution is to sand the poplar cabinet until the finish is gone. Then make a sample from a chunk of poplar, put some holes in it, fill them with the putty and test some stains on the sample to see how the putty accepts the stain. My friend, expert finisher Michael Dresdner, is fond of saying, “finish firewood first.” By which he means that you should make samples and test your finishing process before you apply the putty, stain and top coat to your furniture. With that said, even stainable putty often accepts stain differently than the wood around it. (And to put you even in a more challenging situation, my experience with poplar is that it tends to take stain unevenly. See the finishing rule mentioned above.)
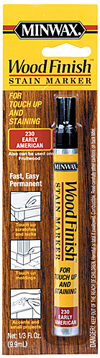
If on your sample board if you find a stain that is working for you, apply it to the poplar cabinet, and let it dry. Hopefully it will blend the putty and the wood better than before. If it does not, you can still take steps to hide the puttied nail holes. Depending on the stain color, you might be able to find a touchup marker (rockler.com sells them) that will allow you to color each putty hole with a color that will hide the putty. I smudge the touchup color with my finger when I use them to feather the ink. If that works, apply your top coat, and you are done.
Another approach is leave the Tung Oil Finish top coat in place and use a touchup marker to get the putty holes colored close to the color that the cabinet is right now, and when you are done with that, apply a polyurethane that has a color mixed in with it. This will keep the stain from blotching in the raw poplar and help to hide the putty as well. The challenge with this approach is that if you apply the finish unevenly, the color will be uneven as well. Valspar® makes an aerosol spray can with poly mixed with stain that I think makes an even application pretty easy.
Tim Inman: Don’t restain the whole works, just fix the little spots and go on. I’m going to skip over the philosophy and principles of working color and wood (you can read about that in my book, The Art of Classical Furniture Finishing) and go right to the practice you need to help you here.
Different things stain differently. Hard woods stain lighter than soft woods. Spring grain stains differently than summer grain. Filler takes color differently than wood, so don’t act surprised if the filler doesn’t look like the wood. It isn’t wood, after all. If you want the filler to look like the wood, you need to put yourself through a one-hundred-mile-an-hour self-taught course in the art of “Faux Bois” (False Wood). You need to learn how to paint out your problems. If you get really good at this, you can even paint in grain lines. It is a trompe l’oeil skill.
Go to an art supply store and buy two tubes of color. Mixes of these two colors will hit 95 percent of the wood colors you’ll need: some burnt umber, and some French yellow ochre. You can get it in oil, acrylic or sometimes water color guache. Pick your favorite medium. The colors will be the same. Also, buy yourself a really nice small pointed brush. Get natural sable or squirrel bristle if you can afford it, or get a really good Taklon synthetic if you can’t. Go home and practice.
To do this “touchup” trick, put a spot of each color on something clear, like a plastic cocktail cup. Put a little solvent (use the right solvent for whatever media you bought: mineral spirits for oil, water for acrylic or guache) into the bottom of the cup. Dip the brush into the solvent, and pick up a bit of color on the tip of the brush. Mix it on the side of your plastic see-through pallet (the side of the cup). Make a “wash” out of the paint and solvent mix. More paint, less solvent equals a more intense color. Less paint and more solvent equals a lighter more translucent wash. Hold the mix over your problem. Is the color right? Then spot the paint mix onto your offending trouble spot. Let it dry a bit, and spray on a quick, light coat of fixative to lock it in. Is the color wrong? Then go to the “other” one. Try again. Still wrong? Now try mixing the two swatches together, while holding the clear cup over your trouble area. You can see right through the cup to the wood, and mix until the color looks good. Don’t go too dark. You can always add a little more color, but — like salt in the soup — it is hard to take it out if you put in too much at first.
“Dry brushing” is often more effective than landing a wet puddle of paint on the spot. Even though you’d like to just drown it out, resist the urge, and you’ll be rewarded. A light swipe on a paper towel to remove the wet excess from your brush tip just prior to hitting your trouble spot will really help. Not quite “perfect?” You can go back and repeat this multiple times. A bridge too far? Swipe it all out with some steel wool and try again. Perfect is the enemy of good.

