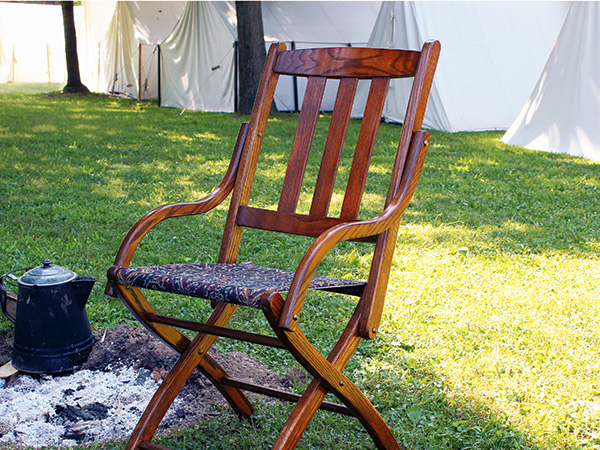
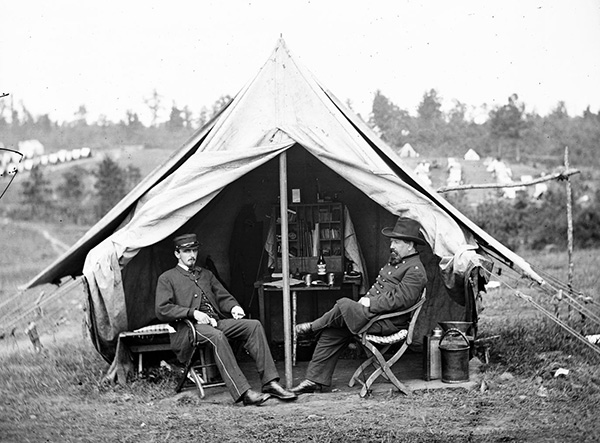
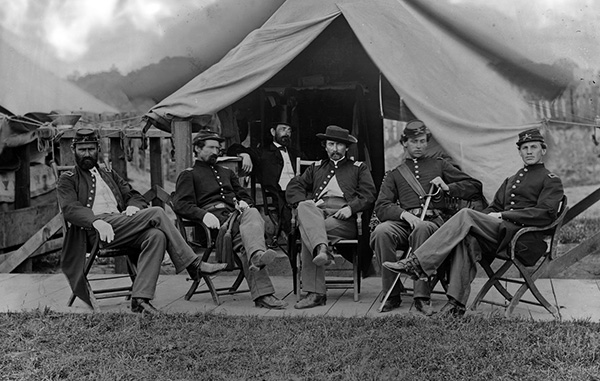
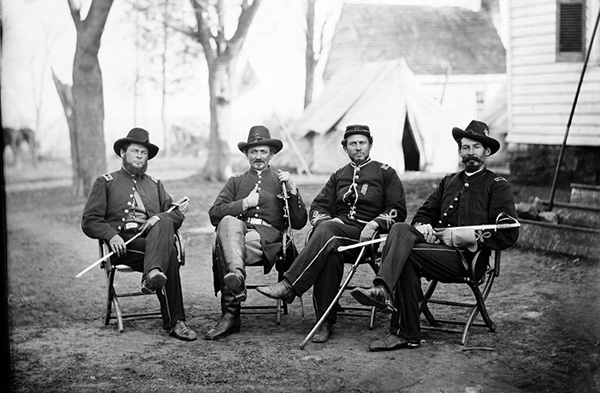
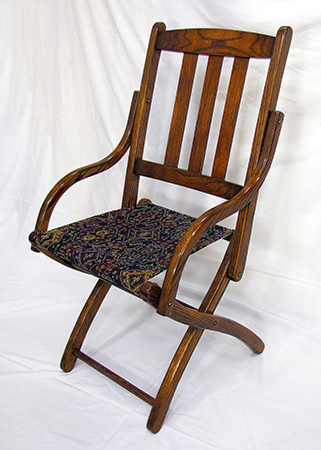
One item of furniture that seemed to be everywhere during the Civil War was a particular style of folding chair that was very popular with officers. These chairs were common before the war — they were the mid-19th century equivalent of the folding chairs nearly everyone today has stashed in a closet — but once the army started moving, officers both North and South took these chairs with them. By war’s end, thousands more were manufactured to meet the demand. It’s no wonder we see them so frequently in the photographic record.
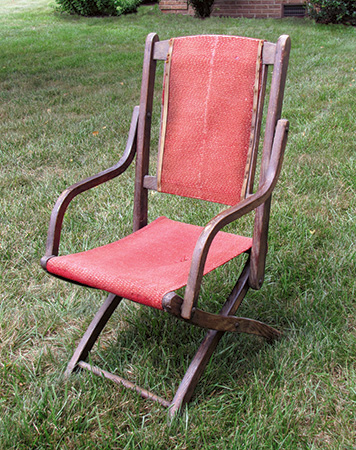
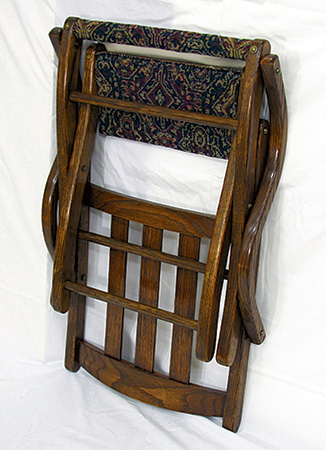
Usually made of oak, these chairs featured a carpet or tapestry seat and, while it might not be apparent, it was that fabric seat that held the chair in its upright position — remove the fabric and the chair collapses. The chairs folded flat for storage or transport; pivoting joints were anchored with mild-steel rivets, the most common method of the day. As a Civil War reenactor, I enjoy making authentic reproductions of the period and got lucky a few years ago when I found a rather battered mid-19th century chair on eBay. It was more than a little wobbly after 150 years, and a layer of red tapestry fabric had been added over the original carpet seat; both layers of fabric were quite weak. But everything else about it was intact, and it would act as the perfect guide to making an accurate reproduction.
Changing History … Just a Little
These chairs look identical in wartime photos, but there were some subtle differences — number and location of rungs, whether the legs curved out or curved in, back slats that ran either vertically or horizontally, etc. — but the most obvious difference is the shape of the armrests. Some were nearly straight with only a suggestion of curves, while others took on a very distinct S-shape possible only with steam-bending. The curves on the armrests of my original chair are about halfway between the two extremes, but still a bit on the sharp side. But, with a bit of tinkering, I eased the sharpness of those curves a bit, so no steambending is needed to create armrests with a graceful curve that you can cut from solid stock.
I also opted to make the stock just a hair thicker. The main components of my original chair are all 7/8″. However, people were generally a bit smaller and lighter 150 years ago, so I increased the stock thickness for the project chair to a full 1″ (which also makes those armrests just a bit stronger).
Finally, I refined the backrest. My original chair has only two very widely separated vertical slats in the back with nothing in the center, and whoever reupholstered the chair with red tapestry also covered that open space on the backrest with poor results: still not much support and not very comfortable. I decided to eliminate the tapestry on the backrest, which wasn’t original anyway, then move those two slats a bit closer together and add a center slat. The result is far more comfortable.
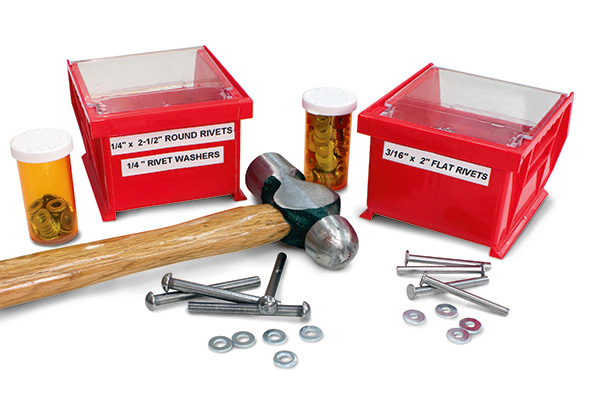
For everything else, however, I stayed with the original historical model: The chair features hand-peened rivets at all pivot points for the folding action, 100% cotton tapestry for the seat, and a shellac finish matching the original.
Lay Out and Prepare the Components
This project begins with a lot of preparatory work to get the components ready; in fact, nearly every part has to be cut and/or shaped before any assembly can begin.
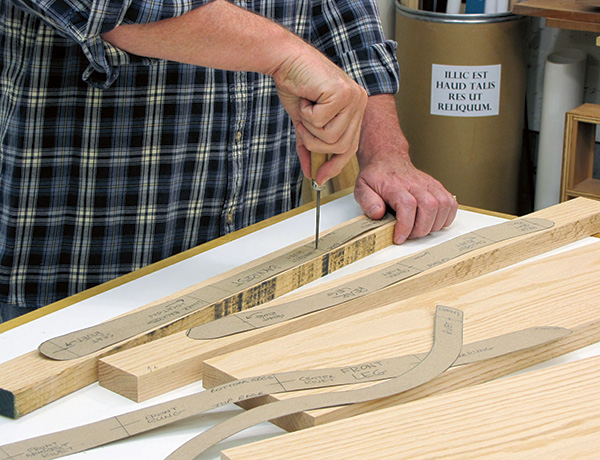
Start by milling your stock for the legs, backrest and armrests. I found a nice piece of red oak perfect for this chair that I first cut into manageable lengths, followed by planing to a uniform 1″ thickness. From that, I cut smaller pieces, selecting for the best grain orientation, and I traced the pattern pieces onto them. The pivot locations are somewhat critical for the chair to fold properly, so you might find it easier to use an awl to mark their locations right through the patterns.
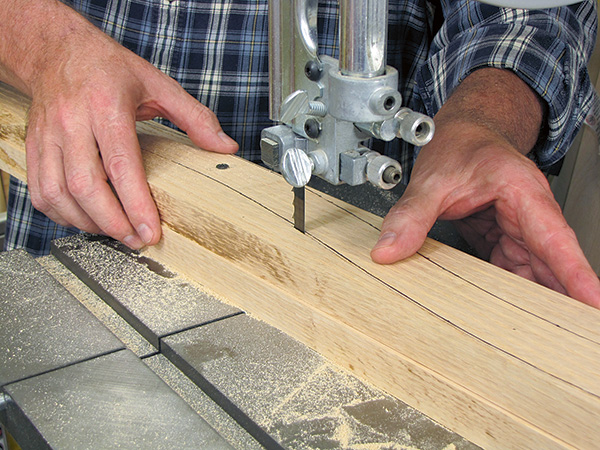
All of these components are in identical mirror-imaged pairs. You can create these most effectively — and easily — by doubling up the workpieces and cutting them simultaneously, using the pivot locations as anchor points. You’ll drill those out later to accommodate 1/4″ rivets, but for now drill smaller pilot holes at those locations and attach the workpieces together in pairs with screws. In this manner, create four sets of components: a pair each of outer legs, inner legs, backrest sides and armrests.

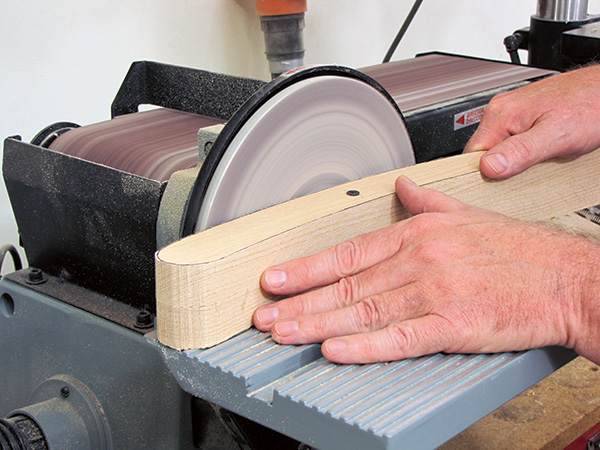
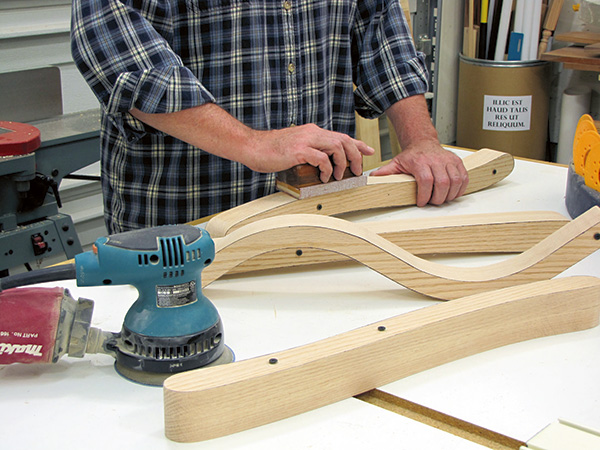
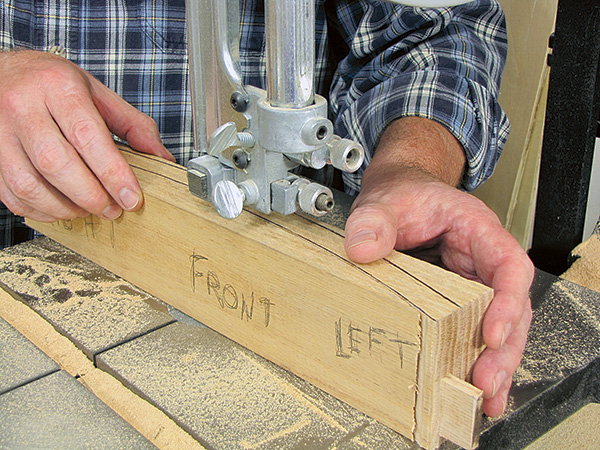
Cut each set out on the band saw, cutting just shy of the line. Follow this up with a good sanding, smoothing all curves right up to the cut line. A disc sander handles all the convex curves, while a spindle sander takes care of the concave curves. Finish-sand everything to remove any machine sanding marks; a combination of a random orbit sander and a sanding block make short work of this task.
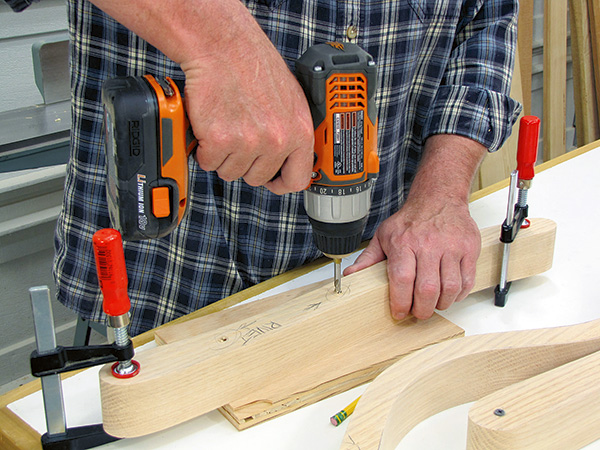
The last thing to do before separating your paired workpieces is to drill the 1/4″ rivet holes. As with cutting, it’s best to drill both workpieces in each set simultaneously, which guarantees that each component matches exactly. Apply some clamps to each of your sets, then remove the screws. Rest the clamped-up workpiece sets on some scrap (which both raises the workpieces off your worktable to make room for the clamps, and prevents tearout on the back side), and use the screw holes as guides to drill your rivet holes.
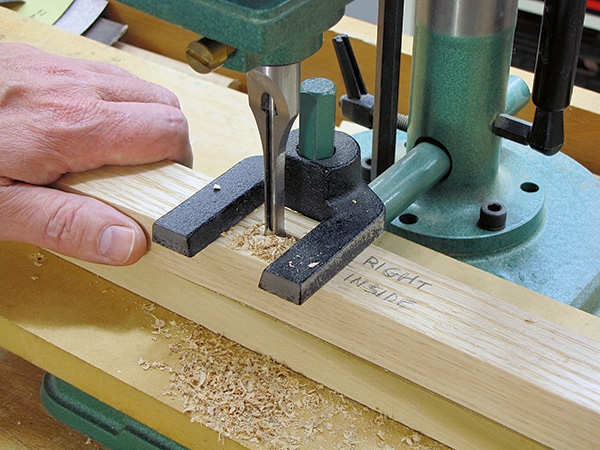
Separate the workpieces and, using the patterns, pencil in the mortise locations on the inside face of each backrest piece. You can cut these 3/4″-deep mortises by hand, drilling out the waste first and then finishing up with a sharp chisel, but it’s hard to beat the accuracy and efficiency of a benchtop mortiser for this task. With the mortises complete, drill the rung and seat stretcher holes 3/4″ deep into the legs, per the patterns.
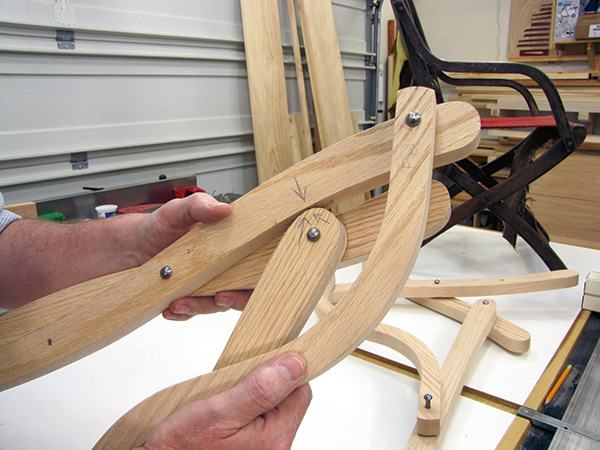
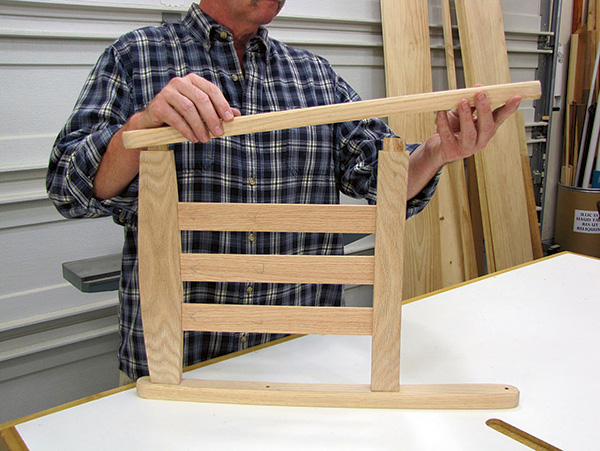
The components you’ve made so far play a direct role in the chair’s folding action, so it’s a good idea to check that action before going any further. Slip rivets into the holes and assemble the four pieces making up each side of the chair. Now verify that the folding action is smooth and that no parts rub against each other. The tolerances on this chair — as on the original — are pretty close, so cutting just slightly off-pattern can create a bind in the action at one key point.
You can see how the bottom of the backrest side piece comes very close to one of the legs about midway through the folding action. If you’ve cut either component slightly too large at this key point, you won’t be able to fold the chair. If that’s the case, remove the rivets and sand these spots out a bit until they clear each other smoothly without rubbing. Remember that you made the components in pairs. If it rubs on one side it’s likely to rub on the other, too, so check both sides.
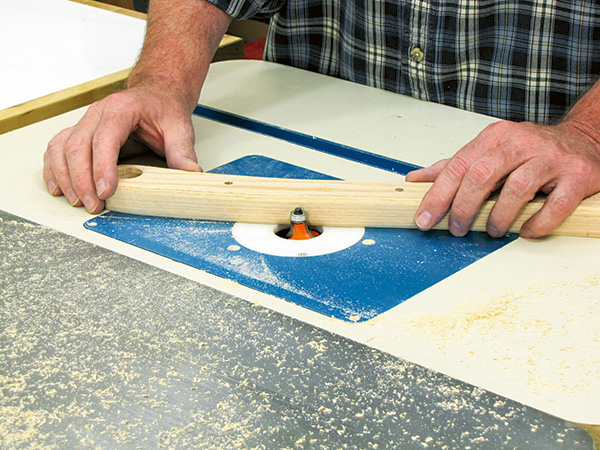
When you’re satisfied that the folding action works perfectly, give the leg, backrest and armrest components a soft roundover on each angled edge.
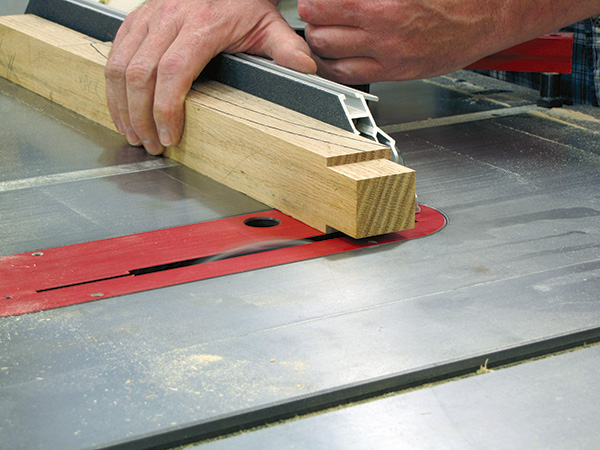
Now, let’s move on to the backrest by tracing the curve patterns onto the upper and lower stretchers. The first thing you’ll want to do is create the tenons; it’s essential that you do this while the stock is still square. Make your measurements carefully, and cut the tenons by your preferred method. Mill the 3/4″-deep mortises for the back slats on the inside edges of the stretchers (top edge of the bottom stretcher; bottom edge of the top stretcher).
Moving back to your band saw, cut out the curves on the two stretchers. For the lower stretcher, simply cut the two face curves, and that workpiece is done. The upper stretcher will have a curve on top, but cut just the two face curves for now.
Finally, cut out the three back slats from 1/4″ stock to the dimensions in the Material List.
Begin Assembly — The Backrest is Key

Back when we checked the working action of the components, you saw how the two leg sets and the backrest worked together to perform the folding action (the armrests pretty much just go along for the ride). To do this, the inner leg set must fit perfectly inside the other, while at the same time fit inside the completed backrest. The two leg sets are easily adjustable — the length of the dowel rungs and seat stretchers determines the width — but the mortise-and-tenon construction of the backrest isn’t quite so forgiving. For that reason, we’ll begin assembly with the backrest, and fit everything else to that.
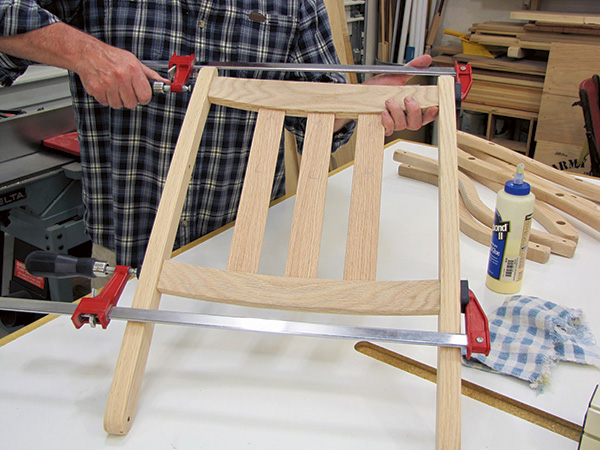
Slip the three back slats into their respective mortises in the lower stretcher. Don’t use glue in the mortises; when the chair is complete, leaning against the backrest will cause those slats to flex slightly, so they need to be free to move a bit.
Slip the top stretcher into place over the three slats. If you’ve cut everything correctly, the fit will be snug enough to hold everything together. Apply glue into the backrest side mortises and slip the stretcher/slat assembly in place. Put glue into the other backrest component and slide it into place. Clamp up the completed backrest assembly.
While the glue is drying, cut the rungs to length for the inner leg set per the dimensions on the Material List. It’s best to err slightly long on the rungs; it’s easy to shorten them to the exact length in the next step, but you can’t make too-short rungs longer. Remove the clamps from the backrest. Dry-assemble the inner leg set, and place it inside the attachment points in the bottom of the backrest. You need to allow for 1/8″ on each side of the leg set for washers, so if you’ve cut your rung and seat stretcher correctly, you should have exactly 1/4″ of play here.
I like to use a piece of 1/4″ scrap as a feeler gauge to determine the fit — a cutoff from one of the back slats works well. If it slips perfectly into the gap you’re done. If it’s too tight, remove the rungs, shorten them slightly and try again; if it’s too loose, cut new rungs a bit longer. When the inner leg set fits perfectly, glue the rung and seat stretcher in place.
Now, the outer leg set is the exact same width as the backrest assembly, so we’ll use the inner leg set to size the outer one in a reverse of the procedure we just did. Dry-assemble the outer leg set and place the inner set inside it. As before, the clearance should be 1/4″ to allow 1/8″ for washers on each side. When you’re satisfied with the fit, glue and clamp the outer leg set till dry.
Final Assembly

Let’s see how everything works by slipping rivets into all the holes and assembling the chair. My original chair had a 1/8″ washer at each pivot point, but I doubt you’ll have any better luck than I did finding washers of that thickness. Instead, just double up a pair of washers — they’re usually 1/16″ thick — to achieve the right gap.
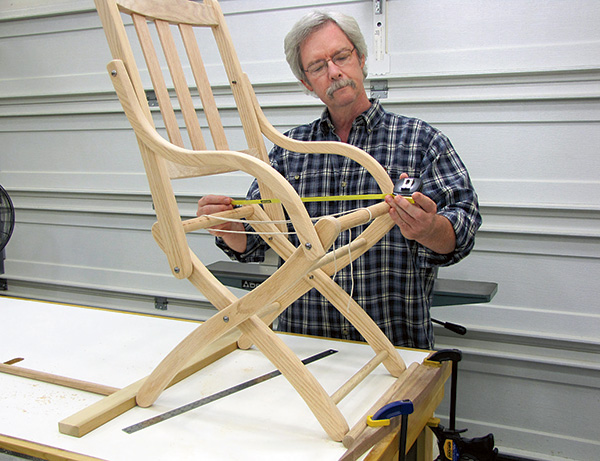
You’ll remember that I noted earlier that it’s the seat fabric that holds the chair in its upright position. Since we haven’t made the seat yet, you’ll need to brace the chair at the feet to keep it upright while you measure for the seat fabric. The fabric on my original chair was so rotten and stretched that it didn’t hold the seat very high — the longer the seat fabric, the lower the chair will sit. You can alter this a bit to suit your own preference, but I found that with the two seat stretchers at 15″, measured from outside edge to outside edge, it makes the chair seat about 16-1/2″ high at the front and 15-1/2″ at the back, which suits me perfectly. If you want your chair higher, make this distance a bit shorter. Make your measurement and add 2″ at the front and back to allow for wrapping the fabric around the stretcher. (The fabric for my chair came to 19″ long.)
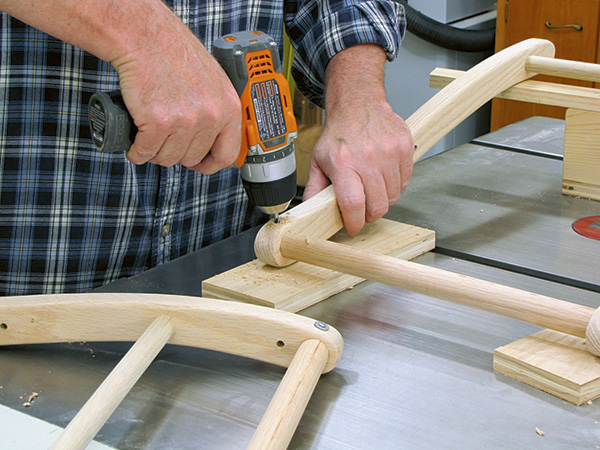
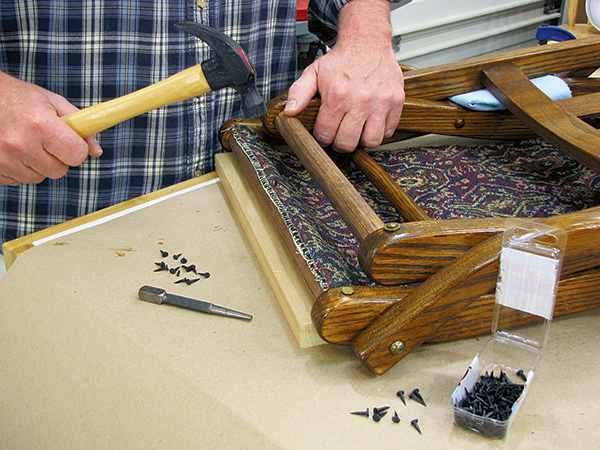
Because the fabric seat supports the chair, you can imagine the stresses on those seat stretcher dowels. Disassemble the chair and reinforce those stress points exactly as they did back then, by drilling through the leg tips and through the dowels and installing a 3/16″ rivet on each of the four seat corners.
Reassemble the chair, beginning with the two leg sets. Slip a rivet through each side of the outer leg set, add a pair of washers, then continue the rivet through the inner leg set. Top this with a single washer and peen over the tip of the rivet till solid. Attach the backrest in the same manner — rivet slips through from the outside, a pair of washers between, slip the rivet the rest of the way, top with a single washer and peen over the tip. Finally, attach the two armrests, again with a pair of washers between moving parts.
Finish your chair any way you like. Originals were either stained or not depending on the whims of the maker — I opted for a dark walnut oil stain. For the highest protection, you can then top with a few coats of polyurethane, but for an authentic appearance, use amber shellac instead. The combination of amber shellac and walnut stain makes for a nice golden brown that’s very striking.
Best Seat in the House
To keep the chair authentic, I used 100% cotton tapestry fabric for the seat. Tapestry fabric isn’t strong enough by itself, plus it’s really stretchy, so I backed up the tapestry with a layer of cotton duck.
For a chair with a 15″ spread across the stretchers, cut a piece of tapestry and a piece of heavy cotton duck to 19″ long. The fabric width should match the width of the exposed portion of the stretchers (14-3/4″ at the front, 12-1/2″ at the back) plus 1/2″ on each side. This results in two 19″ pieces of fabric that are 15-3/4″ wide at one end and 13-1/2″ at the other. Pin the two pieces together with the “good” side of the tapestry facing inward, and put a row of stitching 1/2″ from the edges down both sides. Now, turn the seat right side out so the good side of the tapestry is showing, and run a double row of stitching across each end.
Attach the seat with 1/2″ to 5/8″ steel, brass or copper tacks. Keep in mind that the seat will begin to stretch a bit immediately upon use, so attach it a little “tight.” That is, fasten it in place so the stretcher distance is a bit less than you measured. For the 15″ stretcher distance I wanted here, I actually made it more like 14-1/2″ — the seat quickly stretched with applied weight to the desired size.
Speaking of size, keep one last thing in mind. This project reflects the exact size of an original 150-year-old chair, which offered about 17″ seating room between armrests (a hair less than the typical airline seat). If you’d like a bit more room, you’ll need to extend the length of pieces 5, 6, 8, 9, 10 and 11 by an equal amount. All of the other parts remain the same.


