Spraying a clear finish is a great way to apply a smooth and beautiful top coat — just take your time, practice a bit, and you will be spraying effectively in no time.
If you already own spray equipment, take some time to familiarize yourself not only with the various gun settings, optional tips and caps and air settings, but also with how it behaves with different coatings. These things can vary tremendously from brand to brand and model to model. Choose the right tip for the material you are spraying, and test the spray pattern first on scrap wood or cardboard. Adjust the airflow, fluid trigger and the fan shape and width. Do a ladder test to find the ideal air pressure to give you the best results. Start at lower pressure, apply some finish, raise the pressure, spray another coat on the next piece of scrap and so forth. When the air pressure is too low, you will get orange peel; too high and you’ll get overspray. When it is just right, you should get a smooth, thin, uniform finish.

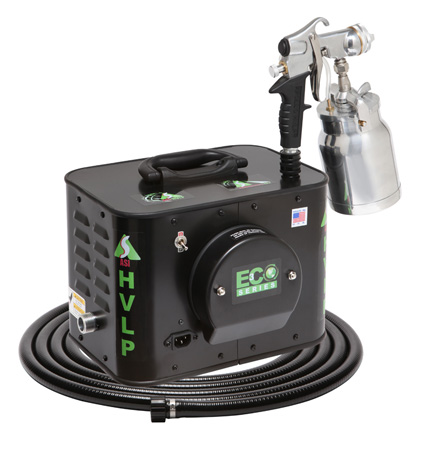
Handling the Gun
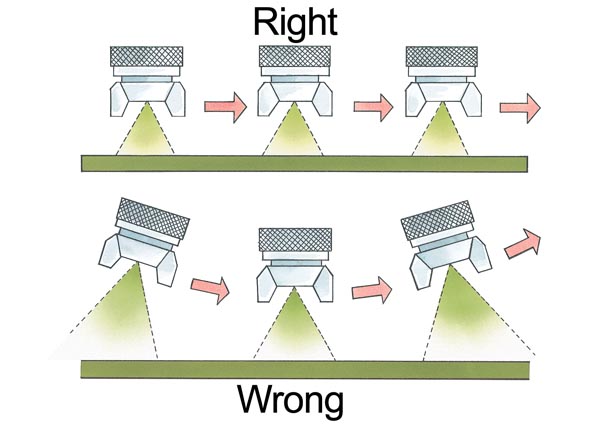
Once the gun is set up, hold it about eight inches from the wood and keep it moving at right angles to the spray fan at all times. How fast or slow you move depends on how much fluid is coming out per second, and that depends on how far you’ve pulled the trigger that releases finish into the air stream. Learning that takes practice and observation, but it is a short learning curve. Play with the gun a bit and you’ll be in charge before you know it.
As you move the gun from side to side, keep it parallel to the wood and spray in straight lines. Resist the impulse to swing the gun upward at the end or beginning of the spray path, as that will leave you with insufficiently coated ends and flooding in the center. Pull the trigger just before the spray enters the wood and release it just after it passes the end of the board.
Spraying Solvent and Water-based Coatings
You will find that water-based coatings generally spray quite nicely right out of the can with no alteration needed. If you must thin them, use Floetrol® rather than water. It will give you far better results. Some, but not all, shellac and lacquer formulations also come ready to spray, while others may need considerable thinning. Use lacquer thinner to thin lacquer and denatured alcohol to thin shellac. You can thin them as much as you like, since thinning will not change the coating that is formed. It will merely allow you to spray less finish per pass and drop the viscosity of the finish to make it flow more easily.
The exception is oil-based finishes. Those are usually formulated not for spraying, but for brushing. To make them behave well through a spray gun takes some alteration, and a slightly different spraying technique.
Spraying Oil-based Varnish and Polyurethane
Spraying oil-based polyurethane or varnish is not a huge problem on horizontal surfaces, which will flow out, but be prepared to spend a bit of time getting used to how varnish hangs on vertical surfaces. Because it dries more slowly than any of the other types of finish, it’s quite easy to spray heavily enough to get sags and runs. Choose a fairly small fluid tip, between 1 mm and 1.5 mm, and get a lot of scrap boards or cardboard on which to practice.
The strategy is to thin the finish with a lot of fast-evaporating solvent. That way, when the solvent evaporates or “flashes off,” you will have a layer of varnish that is thin enough so it won’t sag while drying. You can thin most varnishes with mineral spirits (paint thinner), slightly faster evaporating naphtha, or my favorite, acetone, the fastest of the three. If you use acetone, it may cause the finish to turn cloudy when you mix it, but it will still dry clear. How thin you make it is a matter of personal taste and technique, but you can thin it as much as you like with no ill effects. I’ll often use equal parts solvent and varnish. Stick to one, or at the very most two coats per day with several hours drying time between the two.
Here’s a trick for spraying vertical surfaces. Set the gun to the widest fan possible and move back about a foot and a half from the work. Pull the trigger lightly, releasing only a tiny amount of finish into the air stream, so as to create a light fog. Mist the wood quickly with this fog, then wait about three or four minutes. Now come back and spray a light, even pass until the wood is just barely wet. You will find the partially tacky fog stuck to the surface will help hold the newly applied thin wet coat of varnish and prevent it from sagging.

