This article, “A Classy Espresso Tamper,” by Joe Larese, is from the pages of American Woodturner and is brought to you by the America Association of Woodturners (AAW) in partnership with Woodworker’s Journal.
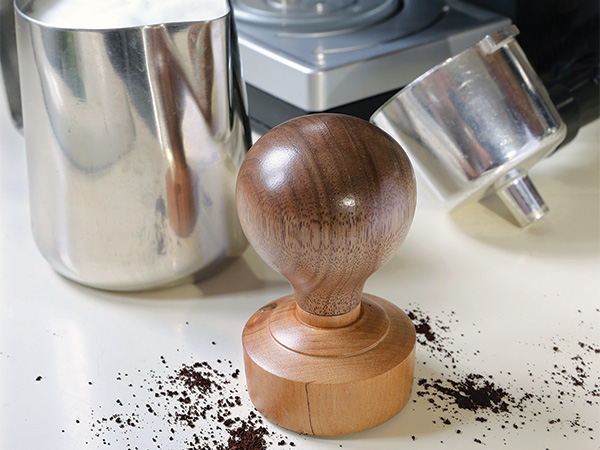
I recently bought an espresso maker, and after using a spoon to pack down the coffee grinds, I realized I needed a tamper. Most commercially sold espresso tampers are made of metal, and some cost more than $100. I was surprised to find that the woodturning supply companies don’t offer a kit, so I decided to turn my own tamper, using a dense, close-grained wood for the tamping part and a contrasting wood species for the knob.
Turn the Tamper Section
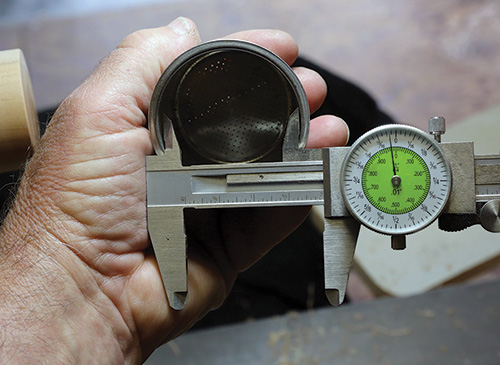
1. Espresso makers have a metal filter basket that fits into a handled device called a portafilter, and the diameter of the filter basket can vary. Measure the inside diameter of your filter basket. Mine measured 2″ (5cm).
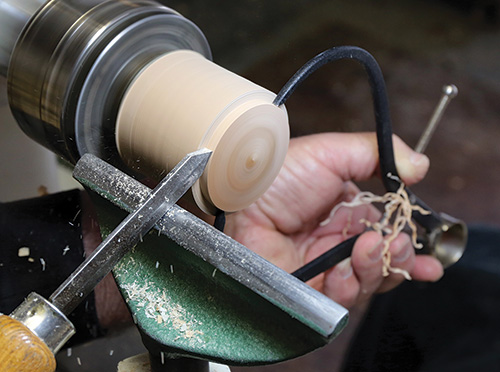
2. Chuck and turn a blank 3-1/2″ (9cm) long to a diameter that will fit the filter basket closely. Be sure to keep the sides parallel or slightly tapered. Hard maple, apple, or birch would be a good choice for the wood.
3. Turn the end flat or slightly convex and sand to a fine grit. As this is the part that will be in direct contact with the coffee grounds, I finished the wood with just a little mineral oil, but you could also leave it unfinished.
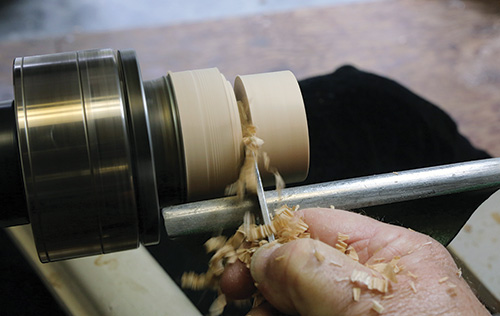
4. Turn a tenon and a slightly larger shoulder on what will become the top of the tamper part. The tenon, which I turned to 1/2″ (13mm) diameter and about 3/4″ (19mm) long, will be glued into a hole in the knob section later. Sand and finish. I used wax for this part.
Turn the Knob
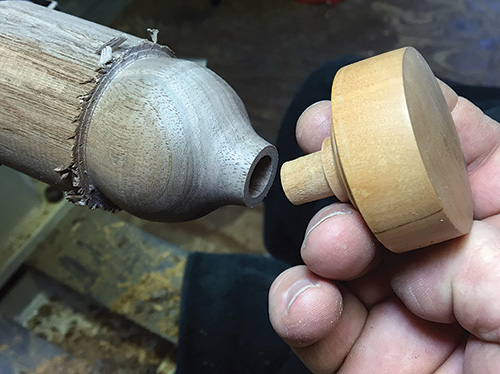
5. Chuck and turn a blank of contrasting wood for the knob. Drill a hole sized to accept the tenon on the tamper portion. Glue the tamper to the knob, then blend the two sections for a smooth transition.
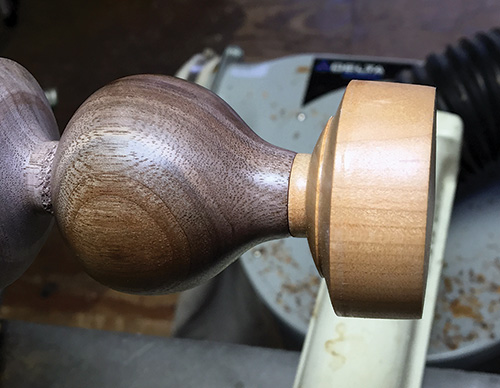
6. Continue shaping the knob, then sand, part, and finish as desired. I decided to finish the knob section with a spray lacquer for increased durability, masking the tamper portion to avoid getting overspray on it.
I can’t guarantee your cappuccinos or lattes will taste better, but I’m pretty sure any home barista would be thrilled to receive a handcrafted tamper as a gift.
Joe Larese is a member of the Kaatskill Woodturners and the Nutmeg Woodturners League and is a turning instructor at the Brookfield Craft Center and SUNY/Purchase. He is a photojournalist by profession. His website is joelarese.com.


