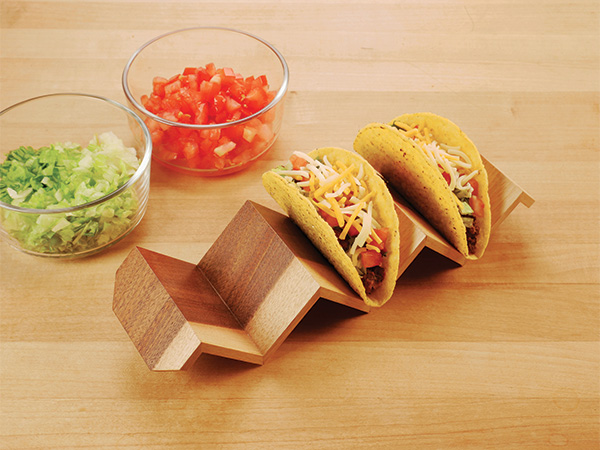
Senior art director Jeff Jacobson designed the jig that makes this Continuous Grain Taco Holder both safe and easy to rout, and he has been hoping to fit this project into the magazine for at least a year. His wish is now coming true — and for good reason: it’s a quick and fun novelty you can make for those upcoming holiday parties or south-of-the-border meals.
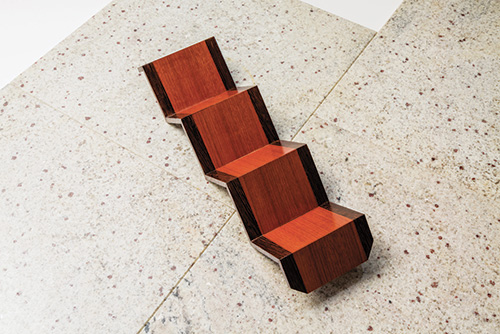
To build it, you’ll need a piece of 1/4″-thick stock that’s at least 20″ long. Choose something from your scrap bin with an attractive and bold grain pattern for best effect — the holder’s accordion- folded miter joints will accentuate the continuous grain. Rip the stock to 3-1/2″-wide, and nip 5/8″ off the corners of one end at 45° to form a starting point for routing. Sand the workpiece smooth.
Making the Routing Jig

Notice in the Drawings and photos that the routing jig mounts to your router table’s miter gauge, for feeding the taco holder workpiece through each routing pass. Cut the jig’s base, fence and miter gauge attachment to size from scrap material; 1/2″ MDF makes an excellent choice for the base. Mark one long edge of the base 2-1/2″ from its end: this reference mark serves as an alignment aid to center the tip of a 90°V-groove bit (item 90880 at rockler.com) you’ll need for routing the joints.
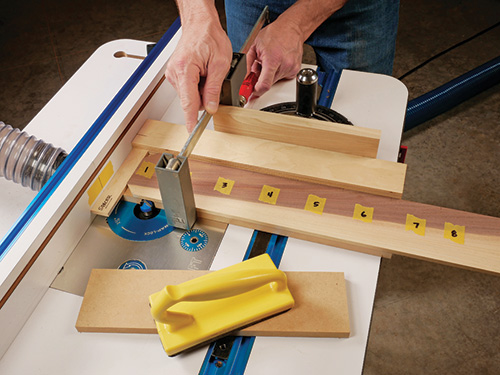
To assemble the jig, install the V-groove bit in your router table and raise it until the tip is flush to the table’s surface. Butt the unmarked long edge of the base against your miter gauge and adjust the base so the reference mark aligns with the bit’s tip. Now carefully set and lock your router table fence squarely against the end of the jig base. Fasten the jig’s miter gauge attachment to your miter gauge’s fence with screws, and glue its bottom edge to the top face of the jig base. Then glue the jig’s fence to the base, flush against the miter gauge attachment.
When the glue dries, make a reference mark on the end of the jig fence (adjacent to the router table fence), 3/4″ back from its front edge. Draw a vertical mark on the router table fence as well to indicate where the bit’s tip is during the routing process.
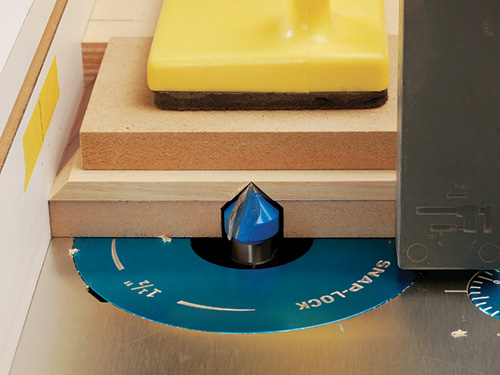
The last step to prep the jig for use is to rout a slot across the jig’s base and into its fence (see Drawings). Stop cutting when the two fence marks line up. Make this slot in several passes, raising the bit a little on each pass until the bit’s tip is precisely 1/4″ above the base.
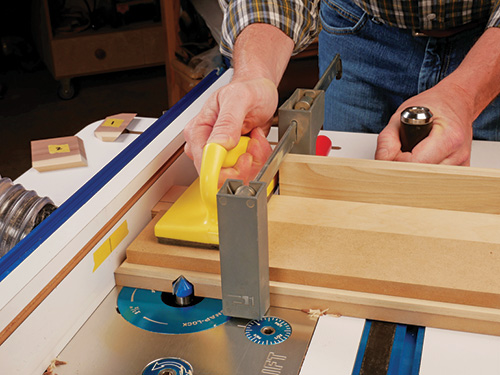
Routing the Miters
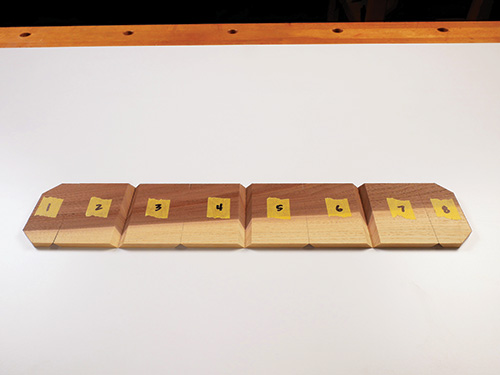
It takes seven routing passes to form the six “V” segments and two ends of this holder. The cuts must also alternate from top face to bottom face in order to create the accordion folds.
You’ll need to insert a 1″-wide spacer to offset the endmost cuts for the 1-1/2″-wide dogeared pieces, but the intermediate five miter cuts don’t require the spacer — they form the 2-1/2″-wide “V” segments. Test your setup on scrap first, to be sure the jig and bit are dialed in accurately.

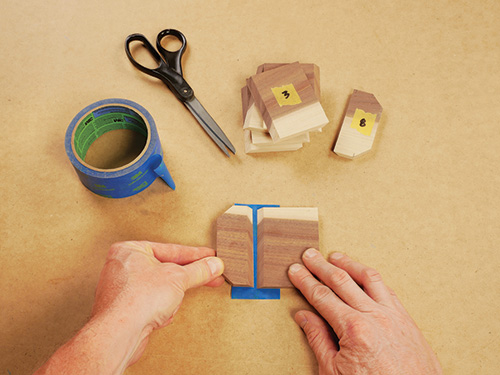
Once you’ve routed the holder segments, trim the corners off the second end, and glue the pieces together. Then topcoat the project with satin poly for a durable, food-safe finish. It’s taco time!


