This article, “An Elegant Paper Towel Holder,” by Bob Rosand, is from the pages of American Woodturner and is brought to you by the America Association of Woodturners (AAW) in partnership with Woodworker’s Journal.
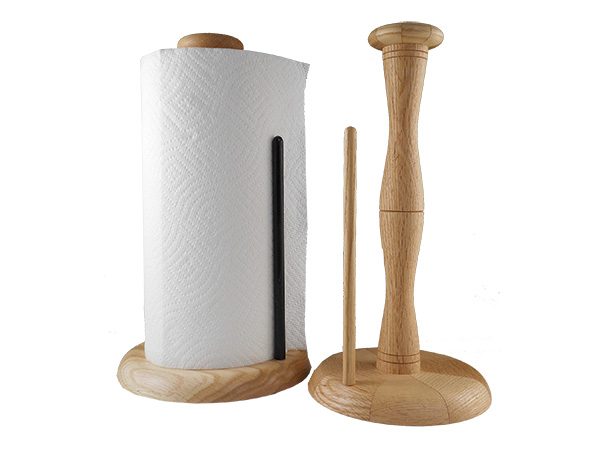
A quick Internet search reveals lots of wooden paper towel holders available for sale. They can be wall-mounted or freestanding. The freestanding types usually comprise a base and a center column. Some have a top finial, or cap, and a side post that provides a point at which to tear off sheets and keeps the paper towels from unraveling. This is a simple project intended as a skill-builder for beginning turners, but of course you might see ways to improve the design and make it more attractive.
I used 3/4″- (19mm-) thick oak for the base, top cap, and side post. For the center post, I used 1-1/2″- (38mm-) thick oak. We’ll turn the base, center post, cap, and side post, in that order.
Alternative Blanks
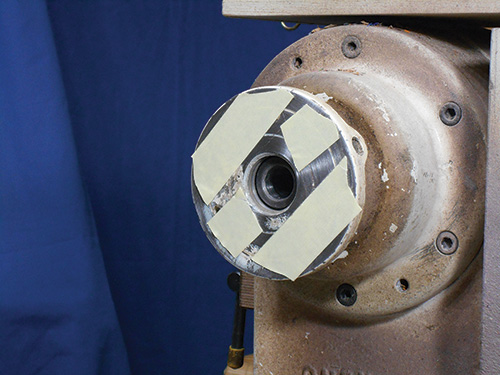
An easy way to add interest to the paper towel holder base and cap is to glue up segmented blanks for those parts. Cut eight 22.5-degree pie-shaped segments with the grain running along the outside edge. Glue them together to form a
blank.
This method completely eliminates the endgrain encountered in “faceplate,” or bowl, orientation and has a nice visual effect. With the grain running continuously around the circumference, it is safe to use a spindle-roughing gouge.
Turn the Base
A simple, easy base is made from a single piece of 3/4″ material pre-cut to an 8″ (20cm) circle. Mount the blank on a faceplate. Two-sided tape is a good way to do this and is available from most woodturning suppliers. After adhering the base blank to the faceplate, bring up the tailstock for added support. Two-sided tape is great stuff, but it’s not failproof.
If you don’t want to use two-sided tape, you could also mount the base blank using a vacuum chuck, hot-melt glue, or a glueblock with a newspaper glue joint (which allows the joint to be split apart after turning). With all of these choices, tailstock support only adds to the security of the mounting.
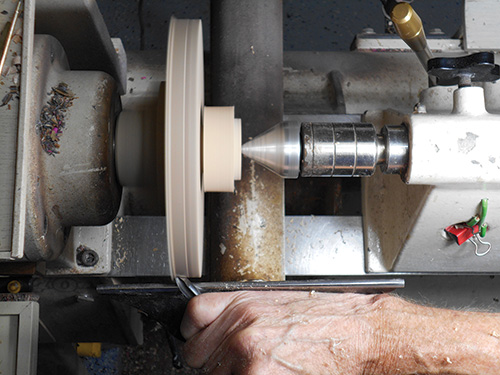
Using a small, sharp spindle or bowl gouge, true up the outer edge of the base. I grind my gouge with a 45-degree bevel angle and make sure the nose of the tool is nicely rounded. During this cut, the bevel of the tool is parallel to the bed of the lathe and the flute is rolled over to the left. This ensures a bevel rubbing cut, not a scraping cut, and reduces the chances of a catch. Take light cuts; I think four or five light passes are a lot more fun and less aggressive than one or two heavy cuts. Also, with the wood mounted in this orientation (with the grain running perpendicular to the lathe bed), you will encounter endgrain, which tends to tear out if the tool is dull or you get too aggressive.
Safety Note: A spindle-roughing gouge is not an appropriate tool for cutting wood in this orientation. Its typically shorter tang, inserted into the handle, is not designed to withstand the forces of endgrain cutting. An endgrain catch could break a spindle-roughing gouge, which is designed for cutting along the grain in spindle, or between-centers, orientation.
For an elegant yet simple look, I have just rounded over the top edge of the base. With the turning of the base completed, slow the lathe speed down and sand, starting with 120- or 150-grit abrasive. I usually work my way up to 600 grit. Holding the sandpaper by hand works well, but you might also consider power sanding, which eliminates the concentric lines that make your turning look like an LP record.
Next, using a 5/8″ (16mm) Forstner bit, drill a hole to accept the center column. The hole should be about 1/2″ (13mm) deep, not all the way through the base. At this point, except for finishing, the base is completed.
Turn the Center Column
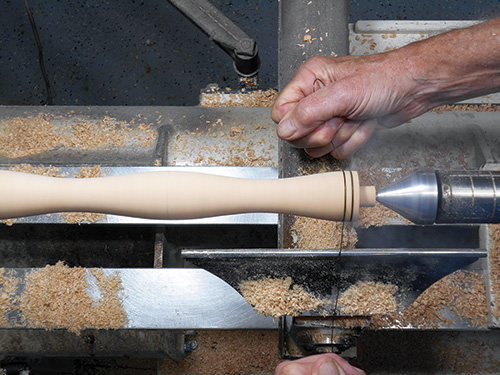
The center column is simply a turned spindle and needs to be about 12-1/4″ (31cm) long by about 1-1/2″ wide at its widest diameter. These measurements will accommodate a standard paper towel roll, which is 11″ (28cm) long with a hollow tube of about 1-3/4″ (4cm) diameter.
A simple dowel would suffice, but for this project I’ve turned a nicer spindle with a 5/8″ tenon on each end. One tenon is glued into the hole drilled in the base of the paper towel holder, and the other tenon, at the top of the column, will accept a cap, which dresses up the top. The cap is not glued on; it has to be removable so you can slide a paper towel roll onto the holder.
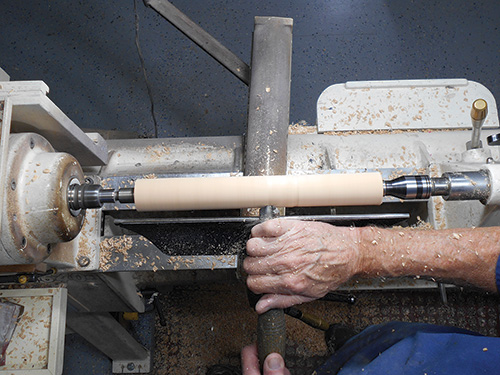
Start with a rough blank 12-1/4″ long by 2-3/4″ (7cm) square. Use a center finder to mark the centers on each end and mount the blank between centers on your lathe. Next use your roughing gouge to turn the blank to a cylinder. When you get close to the finished diameter, be less aggressive in your cutting. You can get a pretty good finish using a sharp roughing gouge. The bevel on my roughing gouge is ground at about 45 degrees and I grind the end of the tool straight across, without the swept-back wings common on smaller spindle gouges. When I cut with a roughing gouge, the handle of the tool is positioned close to 90 degrees to the bed of the lathe.
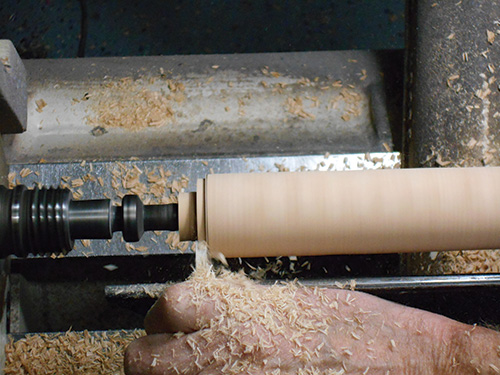
Using a pencil, mark a 1/2″-long tenon at both ends of the workpiece. Use a parting tool to carefully cut a 5/8″-diameter tenon on each end. The tenon at the bottom end should be sized for a snug fit in the hole in the base, as it will be glued in later. The tenon on the top doesn’t have to be as tight a fit because the cap will be removable to allow for the replacement of the paper towel roll. The distance between the tenons should be 11-1/4″ (29cm) to accommodate an 11″-tall paper towel roll.
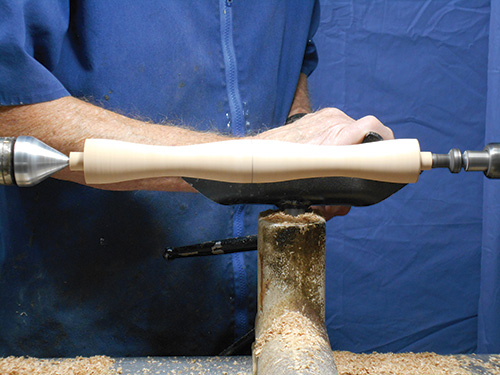
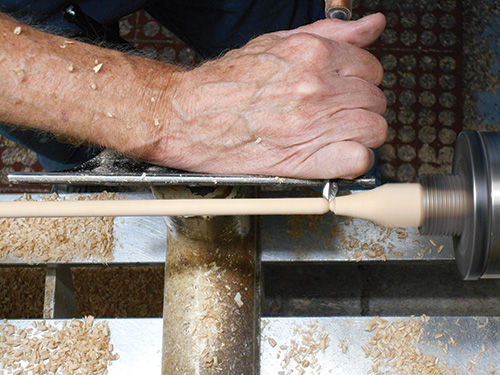
For a graceful design, I marked the center of the spindle and used the roughing gouge to cut two long, shallow coves. The coves add a bit of interest to what might otherwise look like a large dowel rod. I also added a couple of V-grooves at the top and bottom of the center post, as shown in the opening image. These features are hidden when the paper towel rack is in use but add a bit of interest when changing out the towel roll.
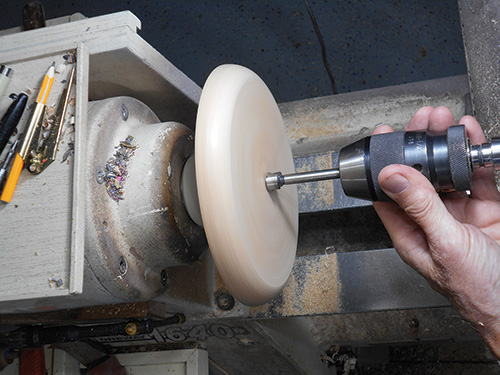
As your skills increase, you may consider embellishing the center column with beads, coves, or perhaps burn lines. Burn lines are applied by creating friction with a burning wire, placed over the top of the workpiece (never wrapped around it) in a V-groove. Apply downward pressure until you begin to see smoke.
Groovy Options
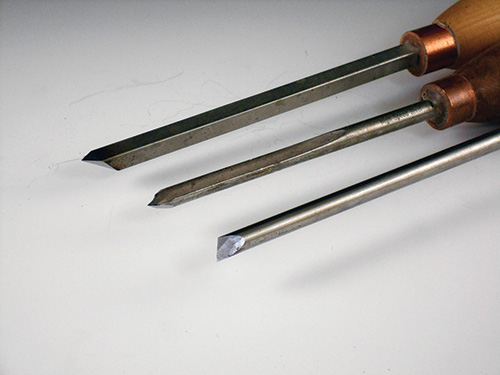
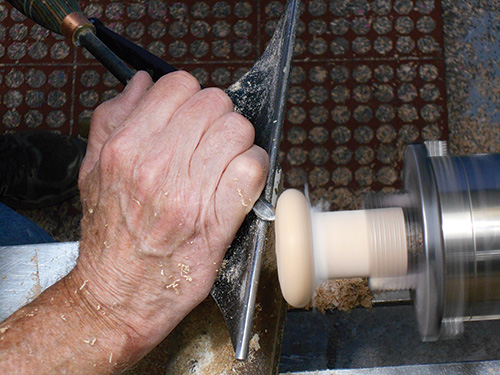
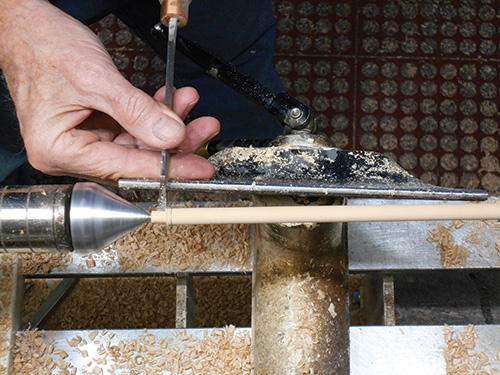
There are several ways to produce a V-groove on a spindle. A spear-point scraper works but also tends to tear the grain a bit. Another tool I’ve used over the years is a repurposed, small spindle gouge ground to a point, rather than a rounded end. I present this tool much like I would present a parting tool, 90 degrees to the lathe bed with the handle starting in a low position. In use, lift the handle while advancing the tool inward in a smooth, arcing motion. But my favorite tool for V-grooves is a small skew, presented with the long point down. The first, shallow, cut is oriented straight on to the work, followed by a second light cut with the handle angled a couple of degrees to the left, then a third cut with the handle angled a couple of degrees to the right. For those last two cuts, make certain the bevel is rubbing and the cuts are light. That will create a clean, smooth-edged V-groove.
Turn a Cap
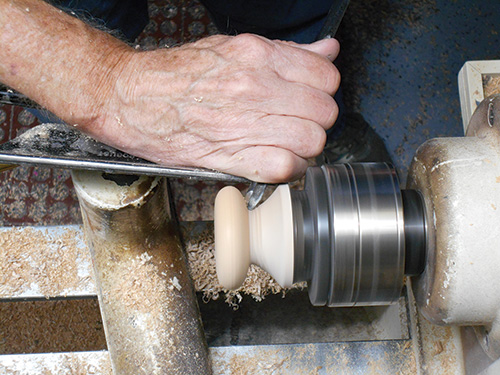
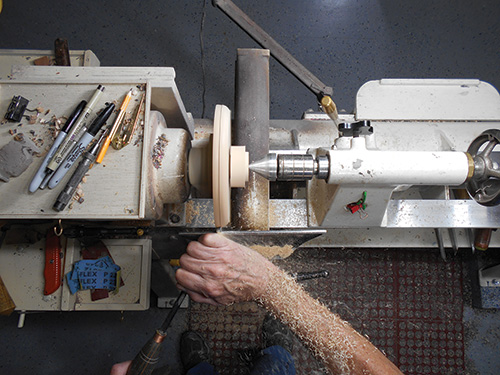
The cap is really just a smaller version of the base, except that rounding of the corners occurs on the top and bottom of the cap. Other than that, it is turned in the same way. Start with a 3″- (8cm-) diameter disk 3/4″ thick, secured with two-sided tape to a 2″ (5cm) wooden wasteblock, rather than to a faceplate. Using a wooden wasteblock allows you to turn into the holding to fully shape the cap, which you couldn’t do with a metal faceplate. Bring the tailstock up for added security.
Turn the cap to your desired shape. A small spindle gouge works well here. Sand to 600-grit abrasive, then drill a 5/8″ hole about 1/2″ deep into the cap. Remove the cap from the wasteblock.

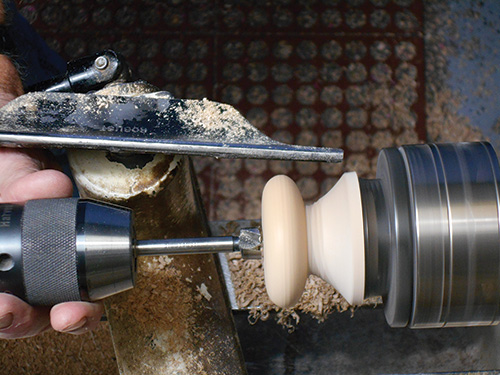
To finish turning and clean up what will be the top of the cap, make a small jam chuck, or mandrel, with a 5/8″ tenon to accept the hole you drilled in the cap. Mount a piece of waste material about 3″ long by 1-1/2″ square in pin jaws and turn the required tenon. You may have to make minor adjustments to “sneak up” on the right friction fit. Turn off the lathe to test the cap’s fit on the mandrel. A parting tool is a good choice for forming this tenon, but a skew laid on its side on the toolrest can also be used. With the cap firmly fitted on the mandrel, finish shaping and sand the top of the cap. Turn a side post
Before turning the side post, drill a 5/16″ (8mm) hole 1/2″ deep in the base about 2″ out from the center post. The side post will be glued into this hole. The 2″ measurement may vary, depending on the size of your paper towel rolls.
I make the side post about 8″ tall. Secure a blank 10″ long by 3/4″ square in pin jaws and bring up the tailstock. (You could simply mount the blank between centers, but using pin jaws helps to lessen vibration a bit.) Using a sharp roughing gouge, turn the side post to about 3/8″ (10mm) diameter. I like to turn the lathe speed up a bit here and take light cuts.
Use a spindle gouge to round over what will be the top of the side post, then measure down 8″ and form a 5/16″-diameter tenon. Sand the side post and remove it from the lathe. Use a small saw to cut off any waste material and hand-sand the rounded top.
All that is left to do is glue the center column and side post into the base and apply the finish of your choice.
Bob Rosand lives in Bloomsburg, Pennsylvania.


