This article, “Make a Hollow Sphere Ornament,” is from the pages of American Woodturner and is brought to you by the America Association of Woodturners (AAW) in partnership with Woodworker’s Journal.
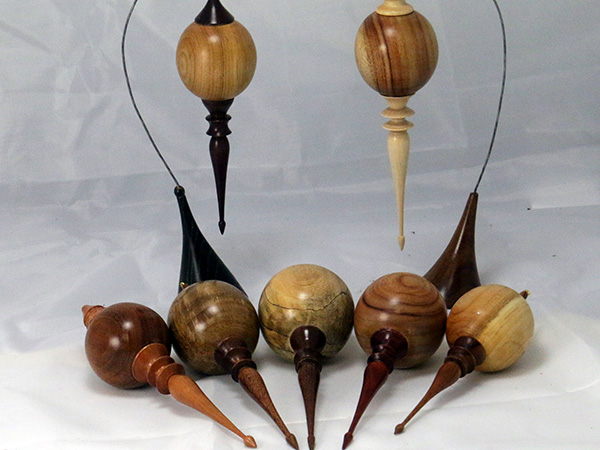
Every year, I make a batch of Christmas ornaments for Tallahassee’s Market Days Art Sale. One of the best sellers—and most fun to make—is a hollow sphere ornament. There are three basic parts to this ornament: the sphere and a bottom and top finial.
Turn and Hollow the Sphere
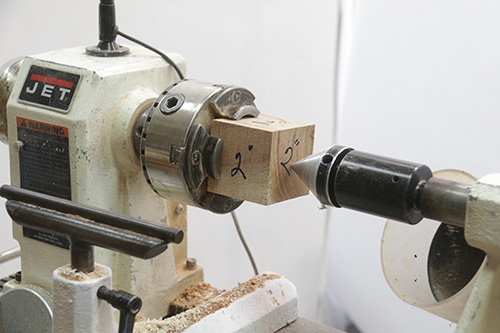
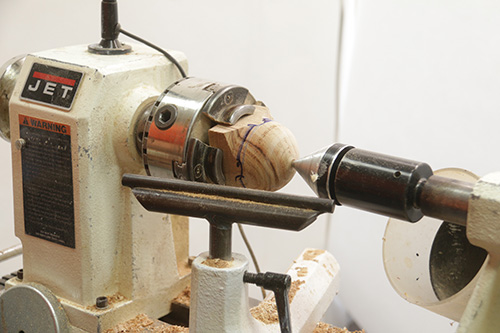
To turn the sphere, start with a small cube of wood about 2″ (5cm) on all sides. It can be a larger cube, as long as it can fit within the jaws of your chuck. Trap the block in a four-jaw scroll chuck, with the endgrain facing the tailstock, and bring up the tailstock with a live center for safety.
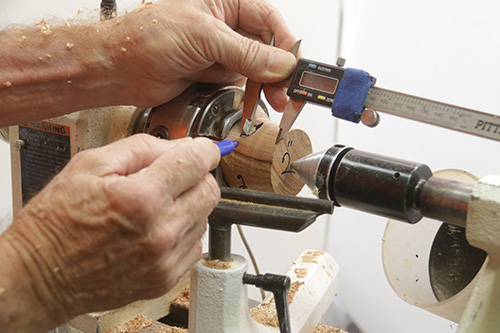
Using a small spindle gouge, rough the block to round about half-way to the chuck. When turning a sphere, it is helpful to know where the center of the block is, so use a caliper to measure the length of the block and draw a pencil line in the middle of the blank.
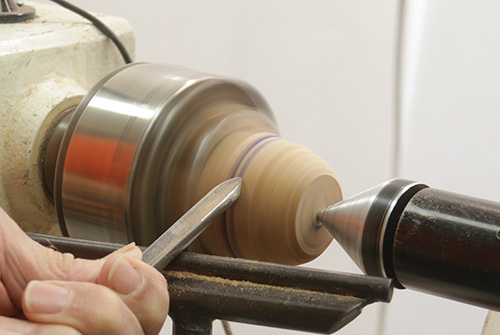
Start by rounding half the sphere, from the centerline toward the tailstock. At the start of the cut, the bevel of the gouge is facing straight up (open position), and the handle is down.
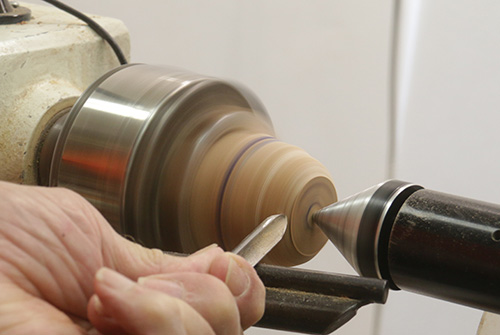
Then roll the gouge to the right and raise the handle while twisting the gouge clockwise, so that the flute ends up facing the live center (closed position). You are essentially turning the right side of a large bead.
It might take three to five passes to round off half the sphere. Don’t worry, the shape doesn’t have to be perfect. You’ll have the chance to clean up the sphere in later steps.
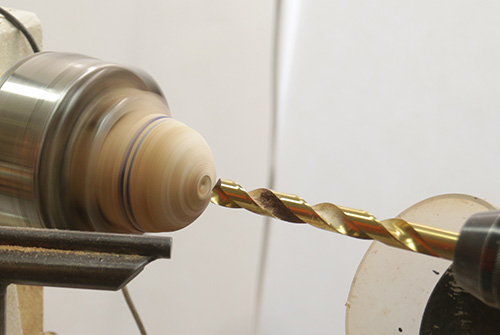
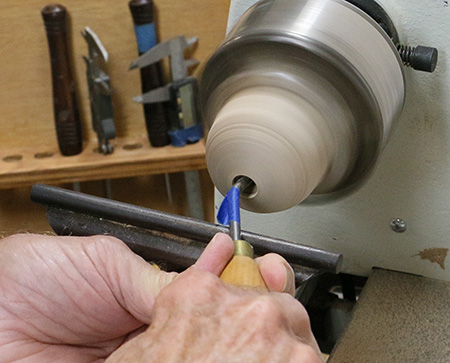
Next, drill a 1/2″- (13mm-) diameter hole all the way through the piece. It helps to make a small divot in the center of the end of the blank to guide the drill bit straight into the sphere.
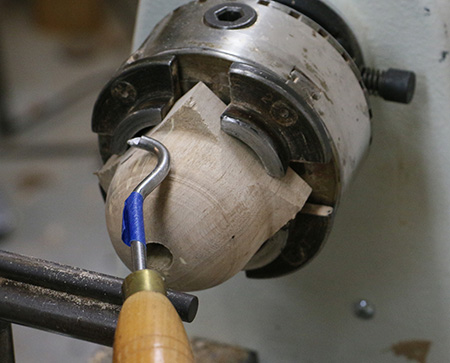
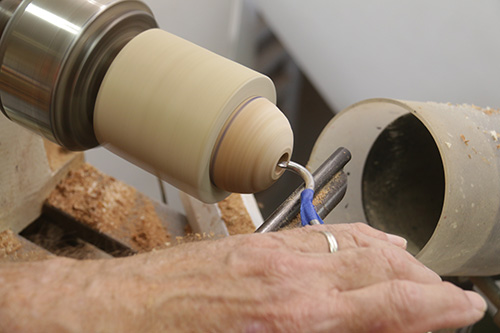
The next step is to hollow the half sphere you just shaped. I use a small bent hollowing tool and put a piece of tape on the shaft as a depth gauge. This will tell me when I have reached the middle of the block.
When hollowing with a tool like this, position the toolrest far enough away from the workpiece so that the straight part of the shaft, not the bent part, is on the toolrest. If the bent part is on the toolrest, the tool may be more “grabby” and you could get a catch. The height of the toolrest should put the cutting edge at spindle height. Work the tool into the half sphere until it is hollowed to the middle. The cutting direction is from the drilled center hole toward the left side of the sphere.
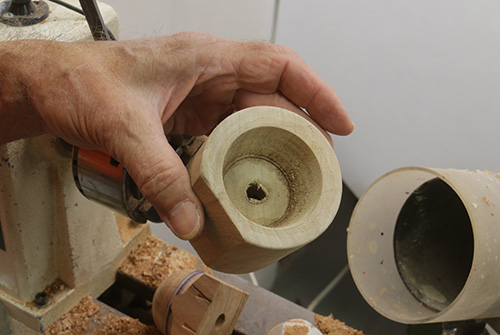
After hollowing to the center, remove the blank from the chuck. The challenge now is how to hold the half-completed sphere to round off and hollow the other side. I do this using a shop-made cup chuck. The cup chuck is made from a blank of wood about 1″ (25mm) larger in diameter and an inch longer than the sphere you are making.
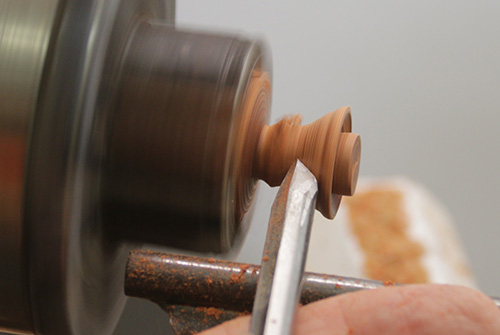
Orient the cup chuck blank so that its grain runs parallel to the lathe bed. To hollow the cup chuck, start by drilling a 1″-diameter hole with a Forstner bit, 1/2″ deeper than the diameter of the sphere. Then widen the hole with a spindle gouge so that the top edge is about 1/8″ (3mm) smaller than the diameter of the sphere and the sides are tapered toward the bottom.

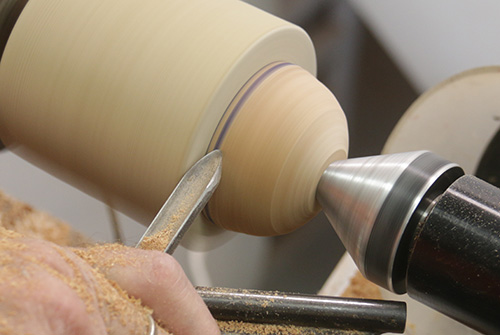
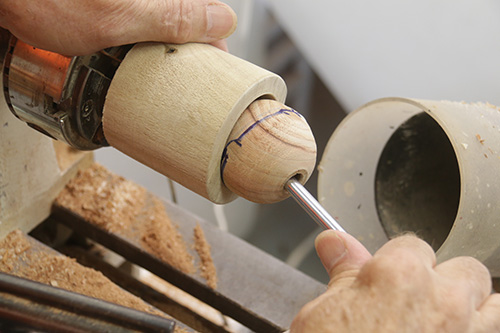
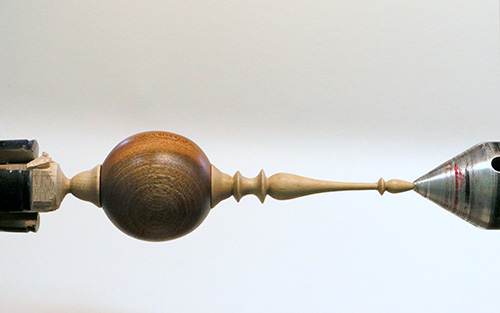
To use the cup chuck, insert the side of the sphere you just completed and trap it in place with a cone center placed in the hole you had drilled. The centerline of the sphere should be just shy of the front edge of the cup chuck. Using a small spindle gouge, round off the second side of the sphere, just as you did the first.
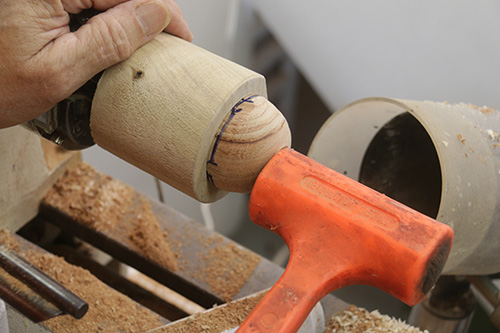
Now you are ready to hollow the second half of the sphere. Obviously, you must remove the tailstock to do this. To ensure the workpiece stays securely held in the cup chuck, give it a tap with a deadblow hammer.
If the workpiece comes out of the chuck while you are hollowing, it will stay on the hollowing tool. Simply stop the lathe and re-set the sphere back into the cup chuck. One technique to get a more secure hold is to moisten the inside of the cup chuck with water before re-setting the sphere.
Hollow the second half the same way you hollowed the first. I use a wire gauge, easily made from a wire coat hanger, to judge the wall thickness of the sphere. Shape the wire gauge so it has a 1/2″ gap.
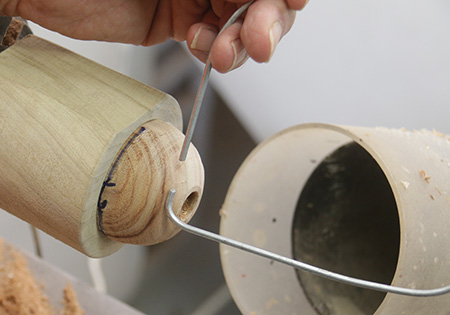
When the point inside is against the wall of the sphere, you can judge the thickness of the wall by looking at the gap between the edge of the sphere and the end of the wire gauge.
To remove the hollowed sphere from the cup chuck, use your lathe’s knock-out bar by inserting it through both sides of the sphere and pulling down.
Refine Sphere Shape
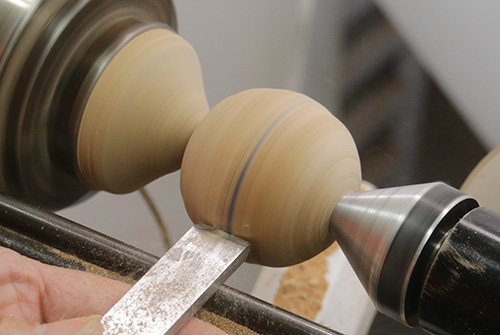
Now it’s time to refine the outer shape of the sphere. Make a tapered jam chuck and trap the sphere between the jam chuck and the live center. A square-end negative-rake scraper can remove any tool marks and round off any mis-matched areas.
Sand the sphere. I begin using 150-grit sandpaper and progress through the grits to 600. If you wish to apply a finish at the lathe, now is the time to do it. I typically apply a thin coat of cyanoacrylate (CA) glue as the finish.
Turn the Finials
I use a scroll chuck with spigot jaws to hold the blank for the finials. A pen blank 3/4″ (19mm) square and 6″ (15cm) long is sufficient for both the bottom and top finials.
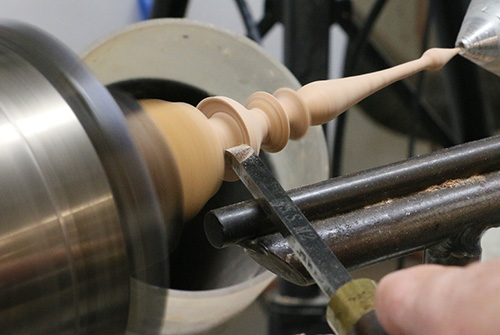
Trap about 1″ of the pen blank in the spigot jaws, making sure they are securely tightened and all four jaws are touching the wood. Then use a spindle-roughing gouge to taper the blank from the headstock side toward the tailstock.
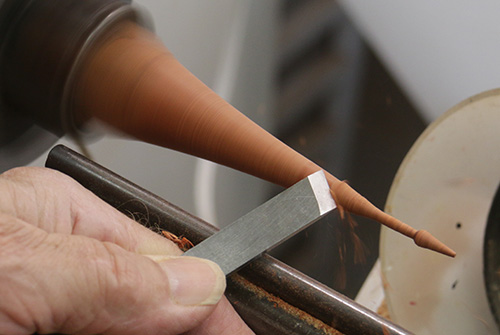
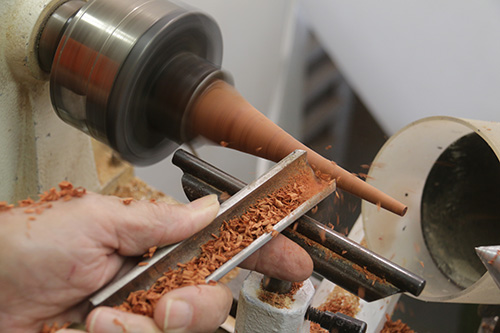
After tapering the spindle, I like to form a small teardrop shape near the end. I do this by cutting “downhill” back towards the chuck using a small skew chisel. Then use the skew, cutting toward the tailstock, to further reduce the finial above the teardrop.
I make the bottom finial about twice as long as the diameter of the sphere. In this case, the sphere is about 2″ in diameter, so the finial is 4″ (10cm) long. Mark the length on the tapered shaft with a pencil, then shape the upper end of the finial.
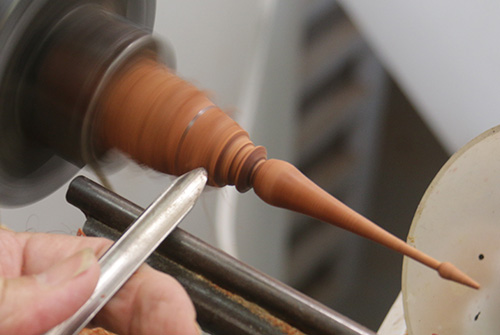
At the shoulder, where the finial will make contact with the sphere, you’ll want to undercut, rather than cut straight in. Undercutting will cause the outer edges of the shoulder to make good contact with the sphere, with no gaps. I undercut the shoulder using a small skew presented on its side.
Sand and apply a finish to the finial. Then use a parting tool to turn a 1/2″-diameter tenon that will fit into the hole in the sphere.
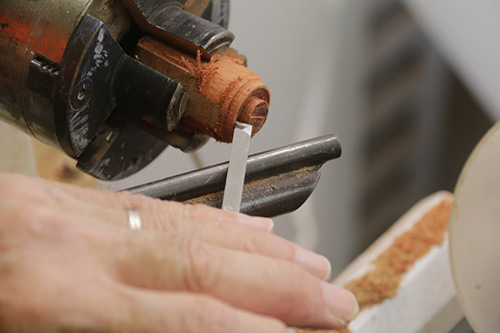
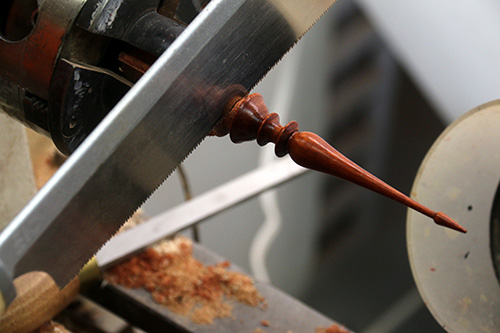
When parting off the finial, leave about 1/8″ of the tenon on the waste block, as this stub will become the tenon for the top finial. I cut the bottom finial off using a thin-kerf saw.
Undercut the shoulder of the top finial, just as you had done for the bottom finial, so it, too, will meet the surface of the sphere with no gaps. Then finish shaping the top finial.
Closing Thoughts
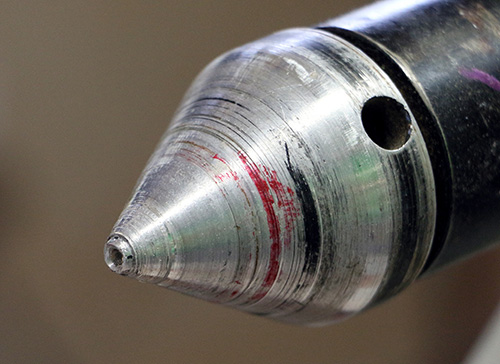
To assemble the ornament, I use the lathe as a clamping device. I drilled a small hole in my cone center, so it can fit over the end of the bottom finial without damaging it . With the top finial still mounted in the chuck, position the sphere on its short tenon, then add the bottom finial by inserting its tenon into the hole in the bottom of the sphere. With the pieces glued, use the lathe to apply gentle gluing pressure. After the glue dries, I buff the ornament and add a screw eye so it can be hung with pride.
With some practice, this project can be completed in less than an hour. If you are making multiple ornaments at the same time, an efficient approach is to perform each individual operation (like hollowing one half of the sphere) on multiple blocks before moving on to the next operation. This saves the time of having to change chucks back and forth for each step. I also find it easier to make a bunch of finials at one time and assemble them into the spheres later, again saving time with changing chucks.
Enjoy the season with your new hollow sphere ornaments.
Walt Wager, Professor Emeritus at Florida State University, has been turning for nineteen years and teaching for eight years at Camelot’s Woodworking Studio in Tallahassee, Florida. Walt can be contacted through his website, waltwager.com.


