James Krenov was renowned for his elegant cabinet work, and he used mostly knife hinges (custom-made by a small shop) for hanging cabinet doors. In The Fine Art of Cabinetmaking, he notes that such hinges “are easy to fit neatly, and give me a wide choice in the way I fit and hang my doors — which in turn allows me more freedom in composing cabinets and the like.” When I build heirloom quality cabinets, I follow his knife-hinged approach, but I only use double-offset knife hinges because I prefer inset doors, a hallmark of fine cabinetry. The trick to mastering the knife hinge installation is to use a pair of marking gauges, as you will see.
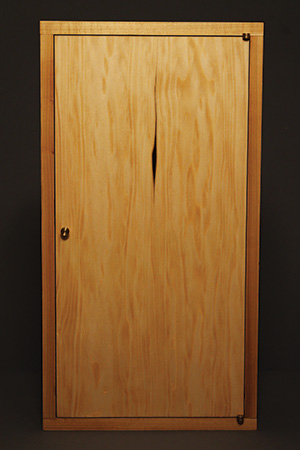
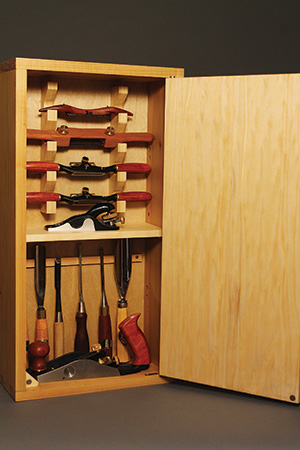
Here is a Krenov-style cabinet I recently made using mostly hand tools — just like Krenov when he built his — to give a proper home for my spokeshaves and carving chisels. In my spare time, I teach a seminar on knife-hinged cabinets. Here you can learn the basics of my cabinet boot camp without leaving the comfort of home! The only power tool you would need, if you prefer a hybrid tooling approach, is a drill press or a palm router.
Design Considerations
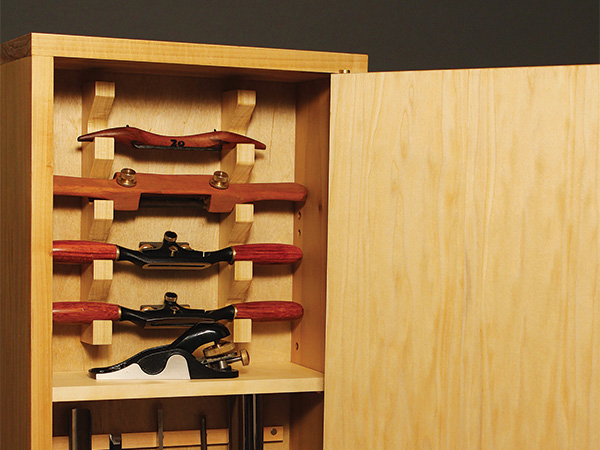
The cabinet is sized at 5″ x 12″ x 27″ — big enough for a dozen tools, but small enough to fit in the wall space I had available. Holders for the shaves and chisels are screwed to the back panel, which can be replaced if the cabinet is reorganized for other uses in the future. I included a middle shelf to provide even more storage space.
When joinery was not a design feature, Krenov often chose dowels to assemble his cabinets. I, too, went with dowel pins for this shop cabinet, and I used a French cleat system so the joint tension won’t be in line with the dowel pins when the cabinet is mounted.
Preparing the Stock
Cut all the pieces to their final sizes, except the door and the rear panel. The door is a glue-up of two panels, and it is slightly oversized for final fitting after the carcass is completed.
The back panel is cut oversized for the same reason. The next step is to mark out all the workpieces in their proper orientation. Skipping this step is a recipe for all kinds of blunders, similar to gluing up an assembly without any dry fitting.
Making the Carcass
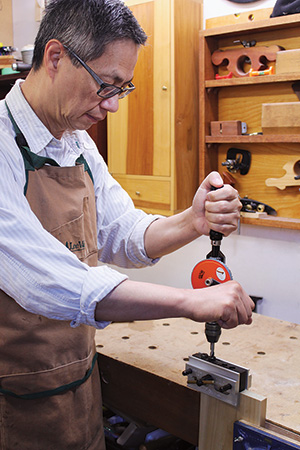
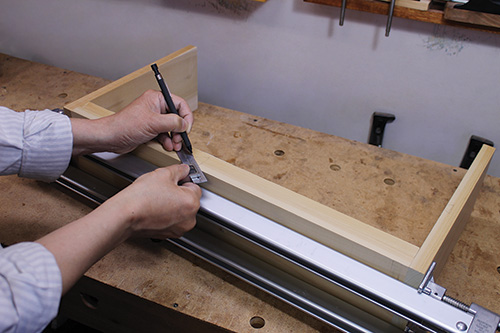
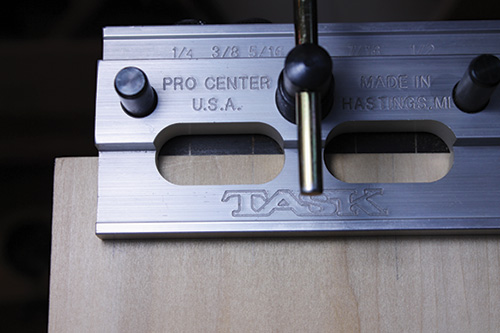
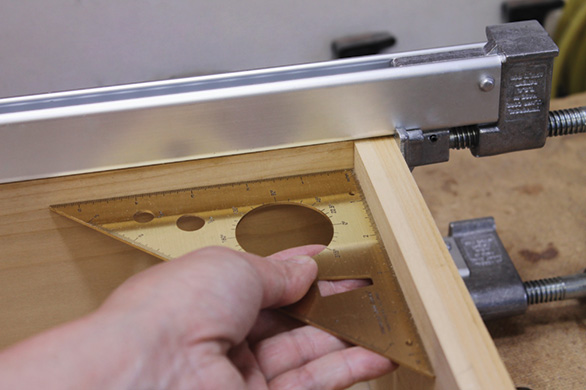
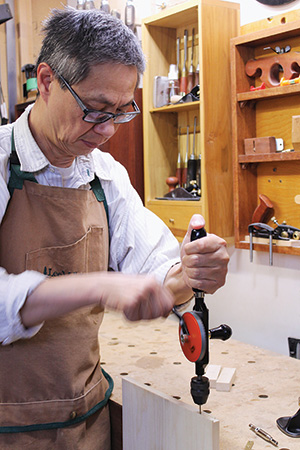
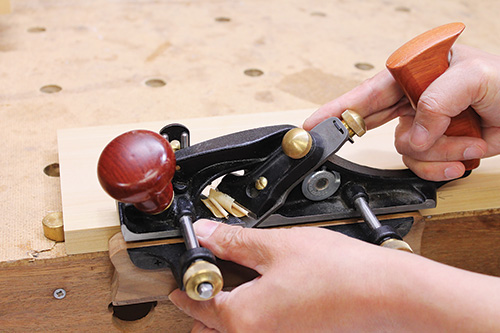
The carcass consists of the top, bottom and two sides. Here, the top and bottom are joined to the sides with dowels. I used a doweling jig to bore the end grain holes. Make sure the holes are located away from where the rabbet will be cut.
I insert dowel centers into the end grain holes of the side panels to accurately align the workpieces for proper dowel placement. The trick, however, is to ensure the mating boards are flush on the front and on the side as well as being perpendicular to each other.

My foolproof solution: use a right-angled brace so the mating boards are held flush and at a right angle when the indentation marks are made.
Unless you have more than a pair of dowel centers, mark the three dowel holes in each joint in two steps.
First, mark and drill for two of the dowels in the joint parts, then dry assemble the joint with dowels so you can mark for the last dowel placement with one of your dowel points.
Cutting the Rabbets
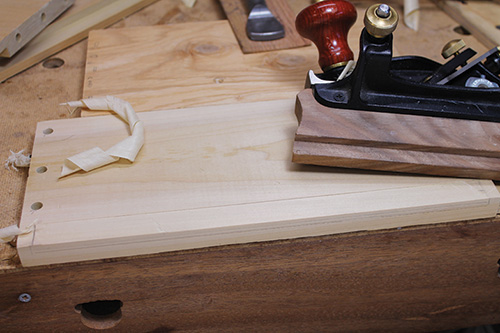
To recess the back panel, cut through rabbets (3/8″ wide x 5/8″ deep) on the cabinet sides and stopped rabbets on the top and bottom pieces.
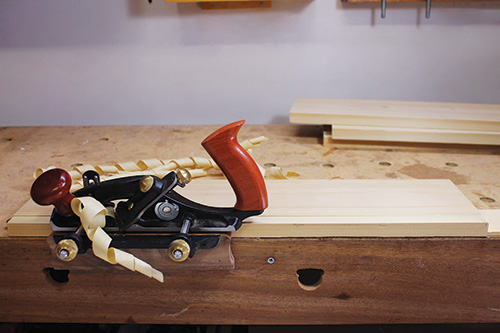
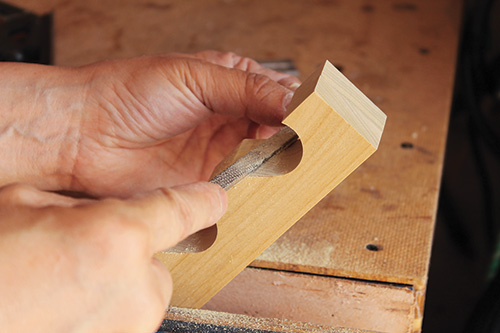
I rabbeted the sides with a skew rabbet plane and the top and bottom with a router plane and chisel.
You can, of course, cut all the rabbets with a router or remove the bulk of the waste on a drill press, then chisel them the rest of the way.
Once all the rabbets are cut, drill holes for shelf pins before a dry assembly. Then cut the rear panel to the exact size of the back opening. Set the carcass aside for now.
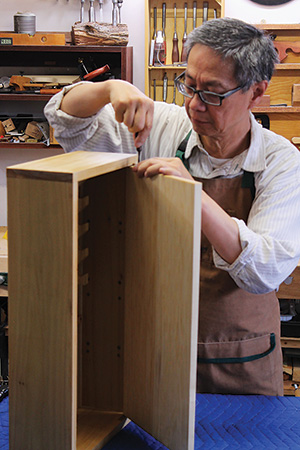
Installing the Door Hinges
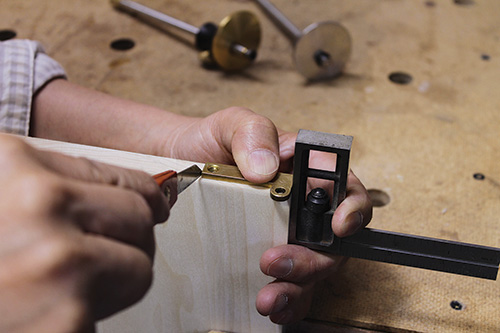
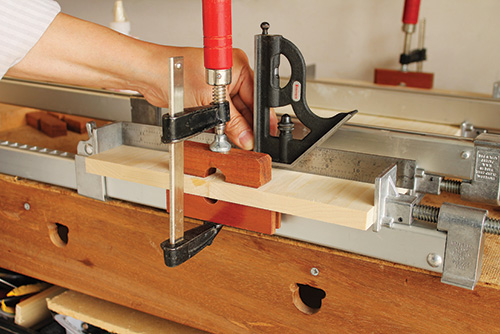
To install the door hinge leaves (the ones with pivot holes), first clamp the door vertically with the front face toward you in a vise.
Center the hinge leaf, making it flush with the door’s end.
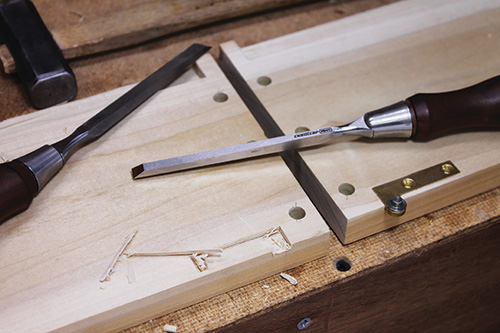
Scribe out the perimeter of the hinge with a marking knife.
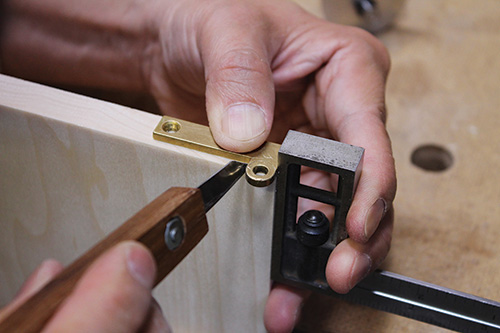
Use a pair of marking gauges to complete the front and back edges of the hinge mortise.
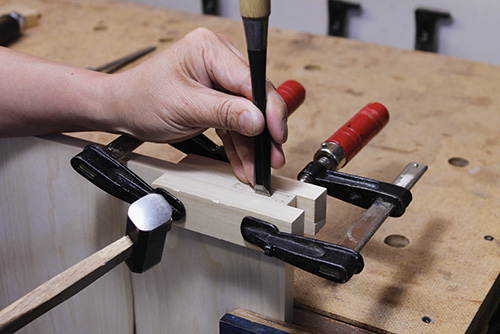
Keep the gauge settings, as you’ll use them again to mark out the carcass hinges later.

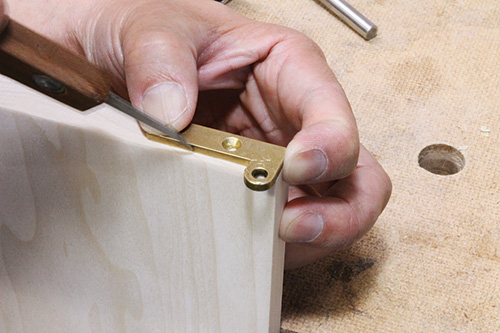
Chisel or rout out the hinge mortise to depth.
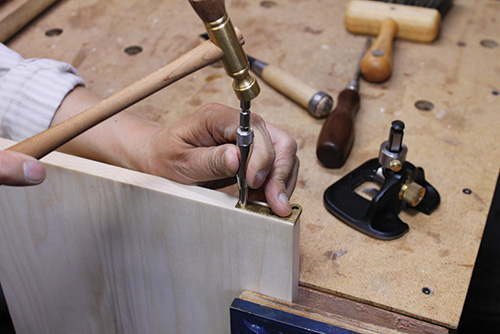
Finally, drill pilot holes for the hinge screws before installing the hinge leaf.
Repeat the same process for installing the other door hinge leaf.
Using a Rabbet Plane
– Start the cuts from the far end of the stock in short strokes. Lengthen them progressively until you can make full-length passes.
– Place your non-dominant hand on the fence rather than on the front knob, which is used only when making scoring cuts across grain.
– Set the blade for lighter cuts, especially if cutting against the grain.
– Remove the shavings often and wax the sole to reduce friction.
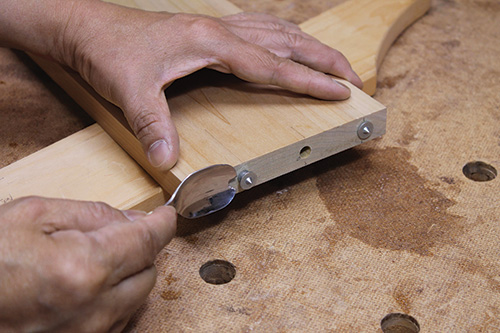
Installing Carcass Hinge Leaves
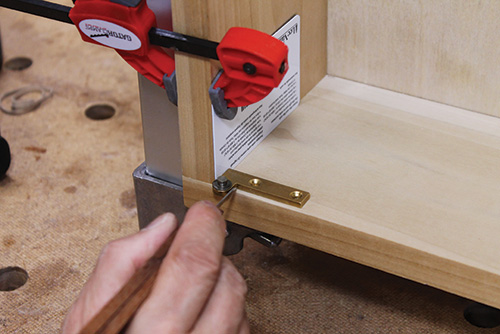
The carcass-side hinge leaves are the ones that have the pins and washers on them. The pin hinge leaves are to be mounted slightly away from the hinge side to leave a gap between the side and the door. For most cabinets, I set a gap of about 1/32″, which is about the thickness of a plastic gift card.
With the carcass still clamped in place, insert a gift card between a pin hinge leaf on the bottom piece and the side where the door is to be hung.
Hold down the pin hinge leaf and scribe across the end of the hinge, and also across the elbow, to mark the hinge location from the side.
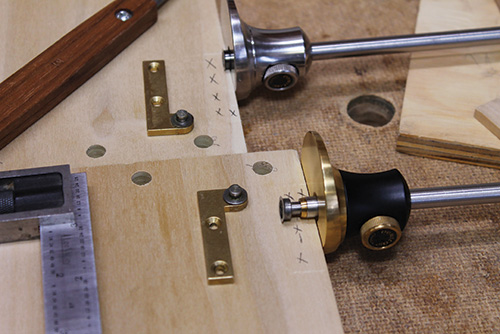
The next step is to mark the pin leaf location from the front face with the two marking gauges used in the door hinge steps. After mortising the hinge recess on the bottom, drill for screws and install the pin hinge leaf. Repeat the same steps to install the other hinge leaf.
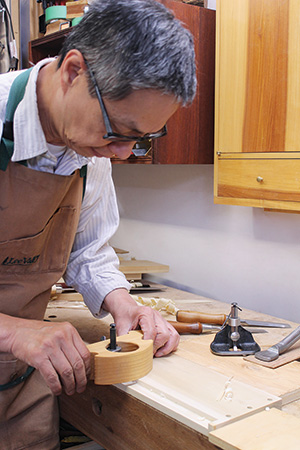
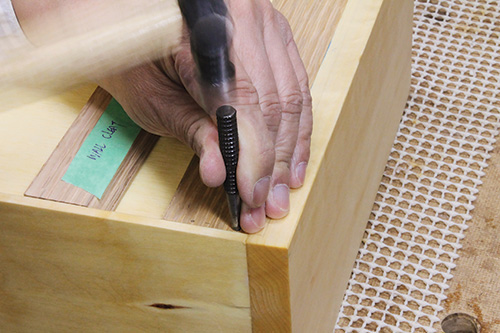
Gluing Up and Installing Holders
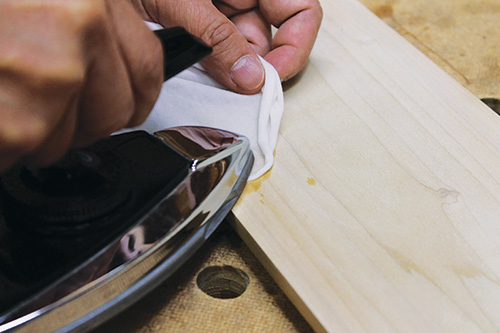
Inspect the cabinet parts for any dents that might have occurred during the construction process, and fix them before final assembly. They’re usually easy to steam out with a household iron and damp rag. Glue up the carcass (but not the rear panel), and install the door temporarily.
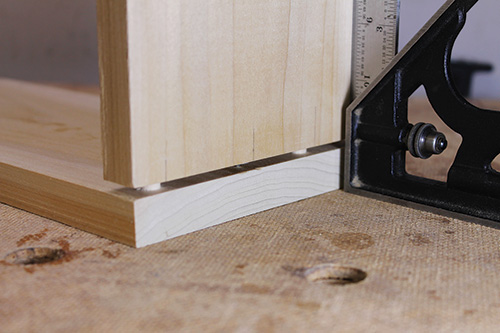
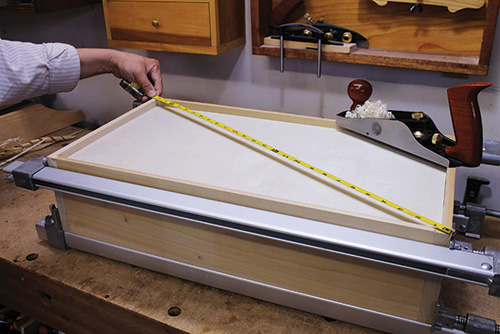
Here is my secret to getting a perfect side reveal on cabinet doors: Close the door and trace along the inside edge of the side to find out how much to trim the oversized door for the reveal.
Depending on the seasonal wood movement in your setting, a reveal of 1/32″ to 1/16″ is about right. You can, of course, unhinge the door and shave more off later, if it expands across the grain.
I use a wooden strip with rare-earth magnets glued to it to serve as a chisel holder. Screw it to the lower part of the rear panel. An elegant way to display the spokeshaves is to hang them between two slotted posts, which are likewise screwed to the rear panel. These are just ideas, of course, because how you parcel out the internal areas of the cabinet will depend on the hand tools you plan to display.
Finishing Up
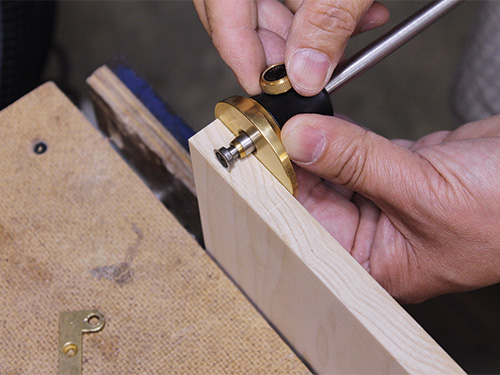
Ease all the sharp edges if you prefer, and apply finish before assembling everything. When the finish cures, install a door catch and knob. Voila! You have just completed your first-ever handmade knife-hinged cabinet. Now choose just the right wall space for it — a task that can take as much deliberation as the building process! Install the cleats, and hang up a cabinet that Krenov himself would be proud to see!
Click Here to Download the Drawings and Materials List.
Hard-to-Find Hardware:
Solid Brass Precision Knife Hinges (1) #26278
Solid Brass Knob (1) #27755
Brass 1/4″ Pin Supports, 16 pack (1) #30437


