This article, “Off-Center Salt and Pepper Shakers,” by John Lucas, is from the pages of American Woodturner and is brought to you by the America Association of Woodturners (AAW) in partnership with Woodworker’s Journal.
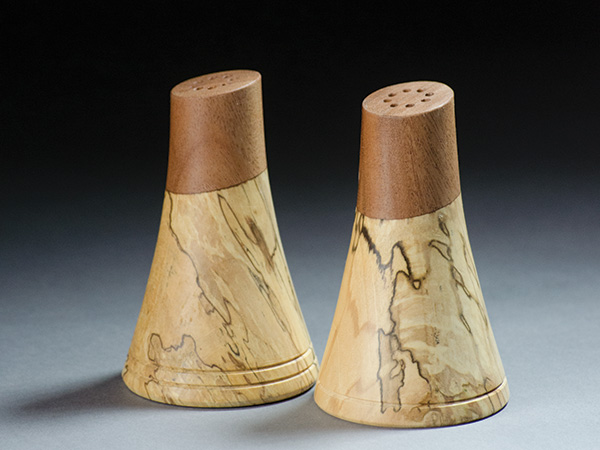
Just before Thanksgiving, I watched as my wife set the table for our guests. She made the comment, “We don’t have any good salt and pepper shakers.” Well, you know she might as well have said, “When will you make me a set?” The order from the commander-in-chief was now on the books. I thought I would try to design a set that was simple enough that anyone could make them, but with a bit of flare to the design. I decided on an off-center version that would be easy to turn.
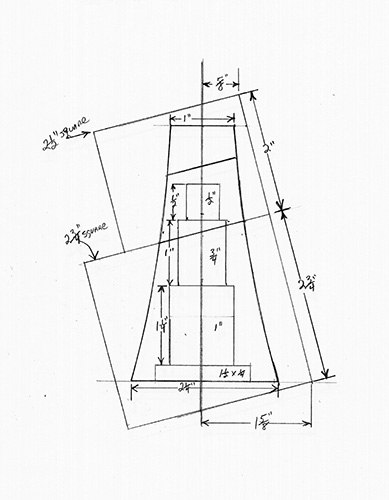
I designed the set on paper so I could easily determine how big the blanks would have to be and how far off-center to mount the blanks for turning. Not being a computer person, I did my designing the old-fashioned way, with a drawing board I got from my parents as a graduation gift forty-six years ago. It still works and I have never had to reboot it or download any new software.
Prepare the Blanks
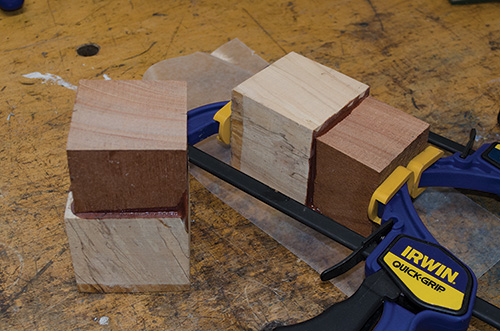
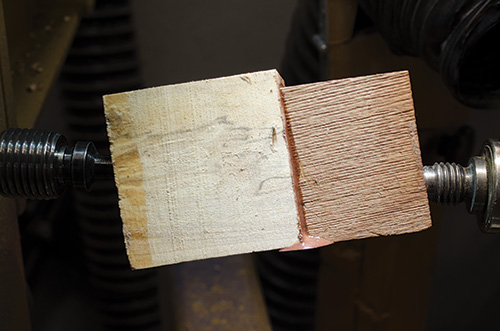
I start with two blocks of contrasting wood that I glue together into a single turning blank. The bottom block is a cube that is 2-3/4″ (7cm) in each dimension. The top block is 2-1/2″ (6cm) square and 2″ (5cm) long. I cut the blocks on the bandsaw and then use a disk sander to make one end of each perfectly flat to ensure a good glue joint. I glued the blocks together so that one side aligns flush with the adjacent block’s face and is equally spaced on the other three sides. Epoxy provides the strength needed for this endgrain-to-endgrain joint. Using exotic oily woods requires the extra step of wiping the glue face with naphtha and letting it dry just before gluing.
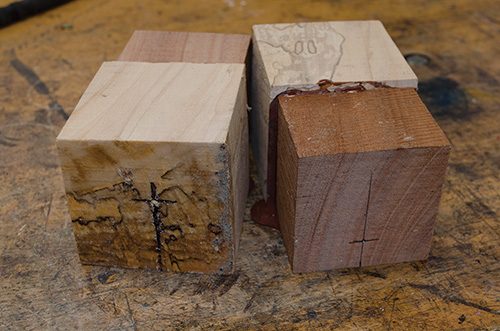
Once the adhesive cures, the small block is marked 5/8″ (16mm) in from the flush side and centered on the block. The larger bottom piece is marked 1-5/8″ (41mm) from the flush side and centered on the block.
Rough-turn the Exterior
I mount the blank between centers and turn away some of the off-center corners but resist the temptation to make the blank too small at this stage. A parting tool makes quick work of the waste material on the large (bottom) end. I turn a tenon on the small end for the 2″ jaws on my Vicmarc chuck. Because the blank is off-center, the tenon may not be a uniformly round spigot, but as long as each jaw makes good contact, the blank will stay on the lathe. As a safety measure, make sure the tenon has a square shoulder that will register against the top of the chuck jaws.
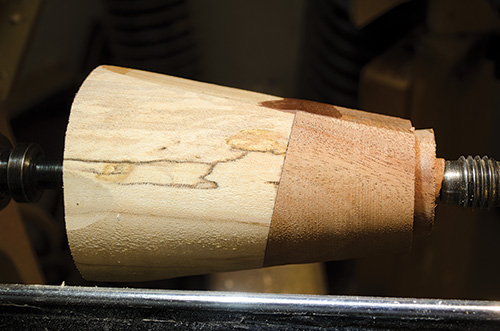
With the top of the blank mounted in the four-jaw chuck, I bring up the tailstock for support and remove waste material from the bottom of the blank until only a small tenon remains. Then I remove the tailstock and turn away the last of the tenon. I like to mark dead center using the toe of the skew to create a tiny recess, which helps the Forstner bit start on center.
Hollow the Interior
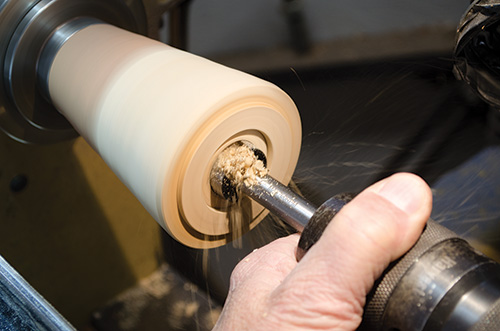
Making interior space to fill the shakers involves a sequence of increasingly smaller-diameter drill bits that will create a series of stepped holes. I mount a drill chuck in the tailstock and, using a 1-1/2″ (38mm) bit, drill 1/4″- (6mm-) deep hole. Next, I move to a 1″ (25mm) bit, drilling 1-1/4″ (32mm) deeper than the first hole. Then I chuck a 3/4″ (19mm) bit and drill 1″ deeper. And finally, I use a 1/2″ (13mm) bit and drill 1/2″ deeper. At this stage, I use a bowl gouge or spindle gouge to slightly round over the edges of the 1-1/2″- and 1″-diameter holes.
The markings on my tailstock quill are useful for measuring bit depth, but taping a ruler to the tailstock will give you a work-around if your quill is not marked. Care must be taken when drilling these holes, particularly in the final steps, as the bit is pushing against endgrain and can break the top.
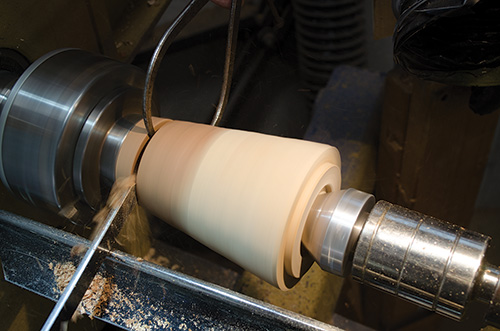
A live center with a large cone centers and stabilizes the blank for the next step. If you do not have a cone center, make one out of wood to fit in or over your current live center. I turn the base diameter to 2-1/4″ (6cm) and make a 1″-deep parting cut 3-1/2″ (9cm) from the bottom.
Finish Turning the Exterior
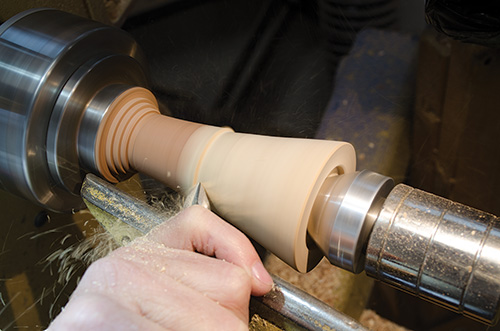
I turn a stairstep from the chuck down to the 1″ parting cut to make room for the following shaping cuts. I shape the blanks to create a flowing curve, tapering from the 2-1/4″ base to the 1″ top. I use a spindle-roughing gouge until I get close to the final shape. Then I use a freshly sharpened 1/2″ spindle gouge to make the final cuts. To distinguish the salt shaker from the pepper shaker, I form a small V-groove near the bottom of one shaker and two V-grooves on the other shaker. Some have suggested placing the dark wood on top for one and on the bottom for the other. Whatever system you devise, you still have to remember which is which and explain your logic to your dinner guests. At my age, I always grab the wrong one anyway. Pending befuddlement aside, the next step is to sand everything, including the bottom.
Cut on a Bias
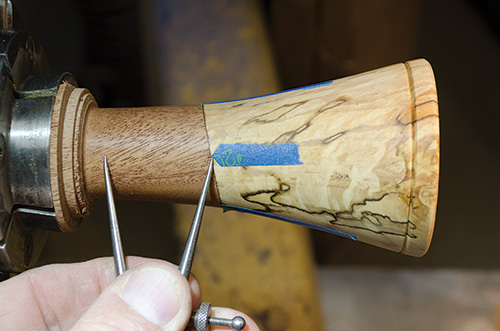
The top of each shaker is cut at an angle and I decide the angle should be parallel to the glue joint between the two species of wood. To determine where to place this cut, I locate the high spot where the two species join and mark the spot with a piece of tape. Then I mark the low spot with another piece of tape, followed by another piece marking the mid-point. I want the glue joint between the two species to be roughly two-thirds of the total height of the shaker. I measure the distance from the bottom of the salt shaker to the middle mark. I divide this dimension in half and set my calipers to this measurement. With my calipers, I transfer this measurement to the shaker, referencing from the high and low tape marks. I put new tape at both of these points and remove the first tape strips. The two new points indicate my cut line.
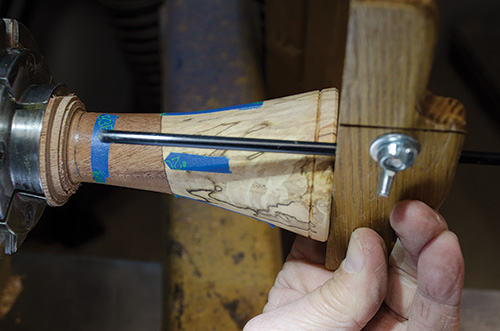
Before making the cut, I drill as close to the bottom tape mark as I can. I pull the tailstock away and measure carefully just shy of the bottom line that indicates the angled saw mark. I transfer the hole depth to a 1/2″ bit and drill up to this mark. If you use a Forstner bit for this task, be sure to account for the length of the center spur.
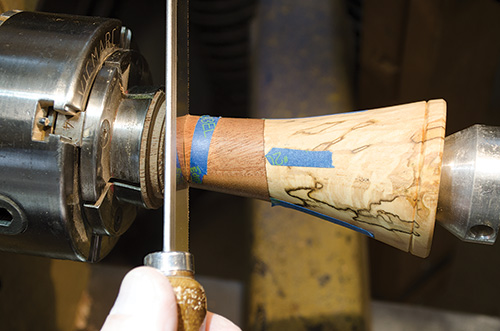
I rotate the turning so the two pieces of tape are visible, then align my cut with the angle of the glue line. I use a small, finetooth saw to make the parting cut with the lathe off. The cut proceeds slowly near the end to avoid breaking the shaker or tearing a corner off the turning. I leave the tailstock with the drill bit loosely in place to support the turning.
Drill the Shaker Tops

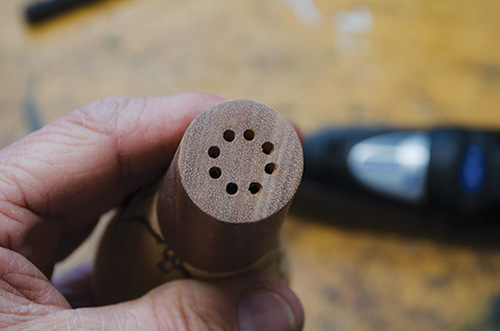
To create a neat arrangement of holes for the salt and pepper shakers, I set a compass a little wider than 1/2″. I lay one leg of the compass alongside the shaker top and drag the point around the outside of the piece so the pencil in the opposing leg will draw a circle on the top that is a little smaller than 1/2″ diameter. I add four marks on the circle at 12, 6, 9, and 3 o’clock, then divide these marks equally to give a total of eight uniformly spaced marks. A center punch makes small indents at the marks to orient a drill bit.
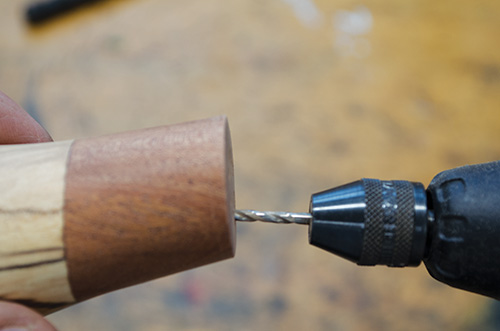
I use a 3⁄32″ (2.4mm) bit mounted in a rotary tool to drill the holes. The holes are easiest to start with the bit held perpendicular to the slanted surface of the shaker. Once the hole is (gently) started, I adjust the bit parallel to the axis of the saltshaker or even tilted very slightly toward the center. With all eight holes drilled, the construction is complete.
I like to use a durable finish for the outside such as lacquer or wipe-on polyurethane. I do not finish the inside. I use salt and pepper shaker bungs, commonly available from woodturning supply stores, to plug the hole in the base.
That’s all there is to it. Hope you have fun with this project.
John Lucas, a retired photographer, has been working in wood for more than thirty-five years and also dabbles in metalworking. He enjoys modifying machines, making tools, and sharing his knowledge through written articles and videos. He has taught classes at John C. Campbell Folk School, Arrowmont, and The Appalachian Center for Craft.


