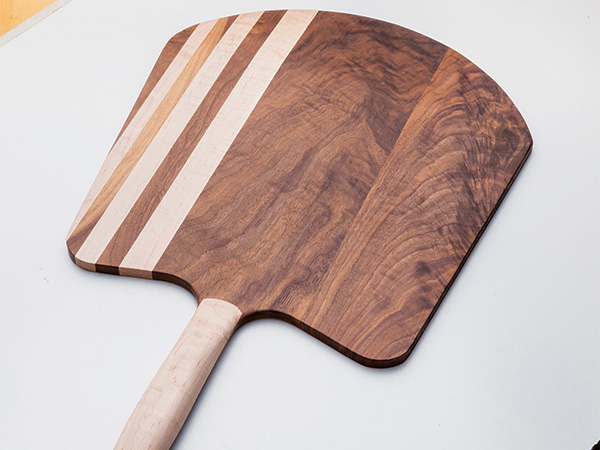
You may have seen your favorite pizza restaurant using a pizza peel (essentially a giant spatula) to lift your pizza pie in and out of the oven. With this project, you’ll be able to replicate that restaurant experience in your own kitchen.
The first step is to glue up a panel to create your peel. We used 1/2″-thick walnut and curly maple stock, but you can utilize scraps of your own choosing — maybe some small, interesting pieces or leftovers from other projects that are lying around your shop. Just remember not to make your blank too thick to begin with: the peel needs to be skinny enough to fit under your pizza.
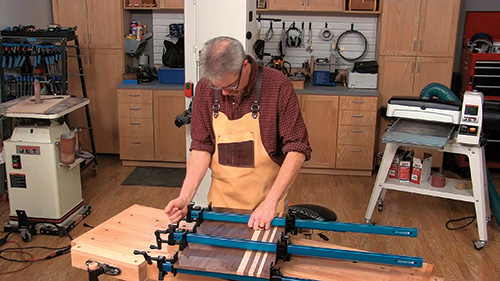
Rip strips from your stock and arrange them in an attractive pattern, then glue them up and wait for the glue to cure. Our blank measured 1/2″ x 14″ x 24″. When you’re ready to proceed, scrape off the dried glue and run the panel through a sander or a planer to flatten it. If you use a drum sander like we did, lower the drum no more than 1/64″ with each pass.
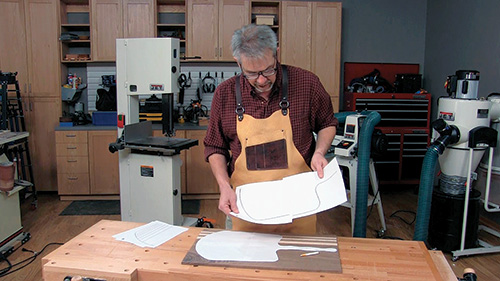
Now you’re ready to cut the shape for your peel. Our full-size pattern offers a fairly traditional shape — but you could create your own pattern and let your imagination run wild. Once you’ve got your pattern ready, trace around it to transfer the lines of the pattern onto your panel blank. On the walnut blank we used, chalk or a “chalk marker” shows up better than a normal pencil line.

On your band saw, cut just outside those lines to form the shape of the pattern. Then sand right up to the line to achieve the final shape of your pizza peel. A spindle sander really helps here!
You’ll notice that the skinny handle that emerges as a result of these cuts isn’t too comfortable to hold. The remedy for that is to laminate another 1/2″ piece of wood on top of the handle portion of your peel — we used some curly maple. Clamp your lamination in place and, once the glue cures, drill a hanging hole and refine the shape with a drawknife, spokeshave or sandpaper.
Taper Edge with Sanding Sled
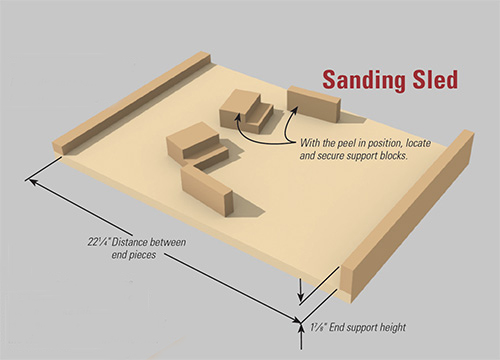
Your peel’s looking pretty good at this point — you can even use the flat portion as a cutting board when you’re ready to slice your pizza. However, you don’t want the front edge to be flat: it needs to be tapered in order to slide under your pizza. You can create this taper with a hand plane, belt sander or random orbit sander. In our case, we went back to the drum sander, creating a sled to hold the peel at the proper angle for creating a nice, even taper.
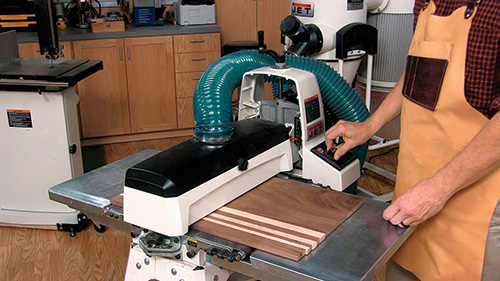
To make the sled, you’ll need to first determine the height you want to elevate the front edge (in our case, it was almost the maximum height that would fit through the sander). Attach a riser block to lift and support the entire front edge, a couple of backer blocks to hold the back edges secure, and a screw and washer through the handle to prevent it from tilting or lifting when the sander presses down on the front edge.
After securely mounting the peel on the sanding sled, run it through the drum sander, making several passes and lowering the sander a little bit with each pass. Stop when the front edge is still roughly 1/8″-thick.


