A good fence can make your band saw one of the most useful machines in your shop. This fence can be made in a weekend for around $20, and it will do a great job on your band saw. It easily adjusts for drift (the front stop pivots) and it has a handy extension for ripping longer stock. It is easily removed, and it can be used on either side of the blade (necessary when making beveled cuts).
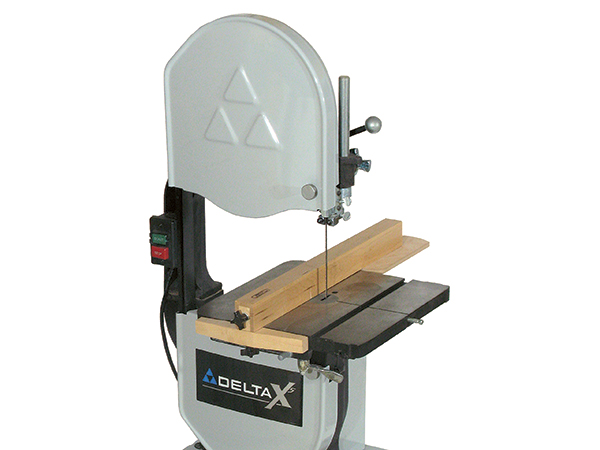
You can adapt this fence to any band saw, but the dimensions given here are for my 14″ Delta. You may have to vary them to fit your machine.
I used hard maple for my fence, but any straight, stable hardwood will do. But before you start, the first thing you will need to do is create a flat surface on the front and rear of your saw’s table. If your band saw table has flat surfaces, you can skip this step. If not, make two 3/4″ battens and bolt them to the front and rear of your saw. Again, this may change the length of pieces 1, 2 and 11 in the Material List, because it might require your fence to be a little longer than the dimensions shown. Recess the bolt heads so the fence will ride over them. Once these are attached, you can get the measurements needed to make your fence.
As you can see from the Drawings, construction is simple and straightforward. The important thing is to keep everything straight and square. For that reason, when building the “channel” for the fence, I found it made the glue-up easier if I ran a shallow rabbet down both sides of the top cap to receive the sides (pieces 1 and 2). This greatly facilitated keeping things in alignment. The end blocks (pieces 3 and 4) will need a hole through them to accommodate the threaded rod (piece 11) . It is essential that these holes be exactly in the same place, front and rear. I cut these pieces to a snug fit and glued them in place after the “channel” was finished.
The front end block will need a hole for the pivot stud (piece 12, made from 1/4 x 20 threaded rod). The stud will need to be securely glued in place. I used epoxy and it worked well. I attached narrow inner guides (pieces 5) to the inside of the side pieces for the clamping foot (piece 6) to ride within. This probably wasn’t really necessary, but I thought it would keep the clamping foot contained in the channel when the foot was tightened. If you do install them, remember to leave room at the front of the fence for inserting the clamping foot (see the Drawings).
The clamping foot should be a close fit, but not so tight that it is hard to move easily in the channel. So that the foot would move smoothly back and forth on the threaded rod, I epoxied a threaded coupler (piece 14) to receive the threaded rod into the foot (see the Clamping Foot Detail). The pivoting front stop should have a piece of sandpaper glued to it (pieces 9 and 10) to ensure a secure lockdown after the fence is adjusted for drift.
I found the outfeed support (piece 7) to be a nice touch. It adds just a little extra support for longer stock that I may be resawing or ripping. When you size your fence, make sure you leave enough overhang to accommodate this attachment. It is secured to the fence with the support cleat (piece 8).
Once that piece is attached, go ahead and put a spray finish of some sort on the fence. A spray can of clear finish is only a few dollars at the hardware store and it makes short work of this task.
With the finish cured, you can assemble the components of the fence and secure the long threaded rod with the aviation nut and washer (pieces 15 and 16). Attach the star knobs (pieces 13), and you are ready to put it to use. You will need to square the fence up to your table and then tighten the pivoting stop. If your blade drifts as you are ripping, the pivoting fence stop can be adjusted to accommodate the drift.
I have found this fence to be very handy. I hope it works just as well for you.
Click Here to Download a PDF of the Related Drawings and Materials.
– Tom Flader is a Journal reader from Fond du Lac, Wisconsin


