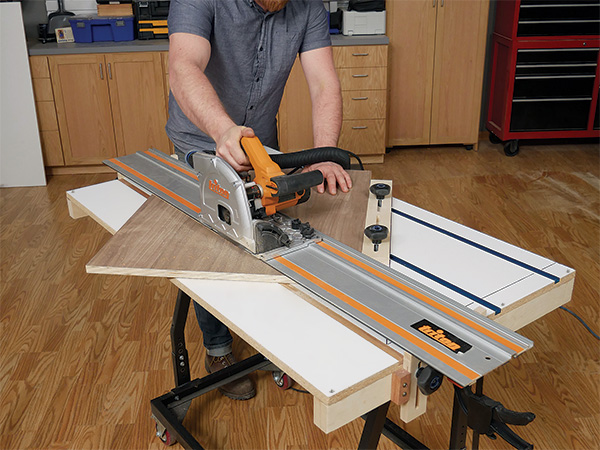
If you do your woodworking in a small home shop without space for a full-size table saw, a track saw can be the best answer for making precise rips and crosscuts on plywood panels or even on hardwood. (I can’t count the number of times my Triton Plunge Cut Track Saw has saved me from hiring help or calling a friend over to assist in exchange for pizza and cold ones, once the work is done.) The only downfall is that, due to the positioning of the track/fence on top of the workpiece, you need to reset angles and measure each and every cut. That can make precision a challenge.
With this jig, I wanted to create a solution that allowed for swapping out material without moving the track, and hence the angle, every time I made a cut. I wanted to be able to set an angle (90˚, for example), place a stop and clamp my workpiece while freeing my hands to use the saw more safely. (I had already increased safety and improved my results by adding the Triton TTSWC Track Saw Work Clamps, which clamped the track to my workpiece so I didn’t have to worry about it moving during setup or, even worse, mid-cut.)
Design Process
When I come up with a new jig idea, I usually grab a pad of paper and doodle some ideas for scale and concept, then head over to the computer to mock up a plan in 3D/CAD until I am sure it will work. That bit of work on the front end of a new project can save tons of time and material cost.
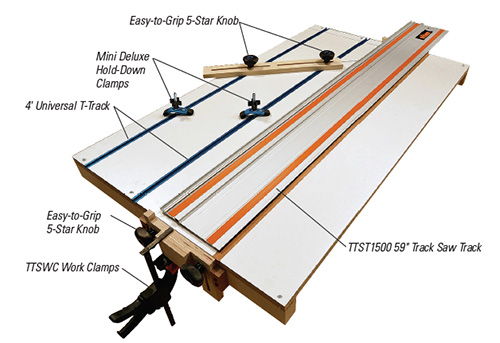
With a workable plan in hand, I spent some time on rockler.com searching for the jig-making parts I would need to make it happen. You can find my list in the Hard-to-Find Hardware box at right. The photo above that box should give you a good idea of where I placed the jig hardware. I already had a Rockler Material Mate Panel Cart for a work surface, a Triton TTS1400 Track Saw and a 59″ track, so I designed my jig around these elements. If you have a longer or shorter track, you may want to adjust the jig slightly.
Make Some Cuts to Make Your Jig
To make the jig, you’ll first want to cut your melamine top down to size. I found a 28″x48″ top to be the right size for my shop, but you could go wider if you want a larger work surface. Then you can move on to cutting your fence track supports, alignment blocks, clamping blocks, bottom rails and spoil board to the dimensions listed in the Material List I made most of these parts — except for the alignment blocks, which are cut from hardwood — out of Baltic birch plywood.
Now it’s dado time. Use your router to cut the three dadoes shown in the Drawing. Two of these three dadoes are for your jig’s T-Track. The third dado is for the replaceable spoil board. This is an optional feature, but handy: it will enable you to cut through materials without the blade damaging the melamine on the top of your jig. The hardwood spoil board will keep your jig working like new much longer. See the Drawings for locations. You’ll want to make sure you set the depth of the first two dadoes slightly deeper than the T-Track (so, just a hair over 3/8″). This keeps the track below the jig surface when you glue it in place. That way, it doesn’t interfere as you move your workpiece.
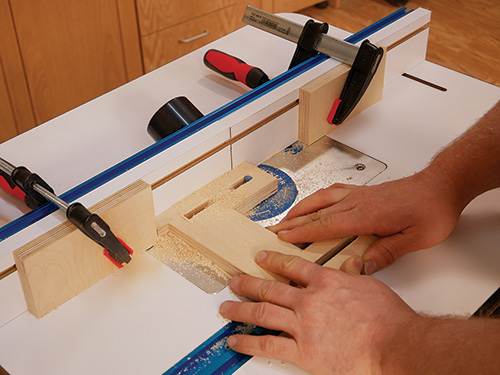
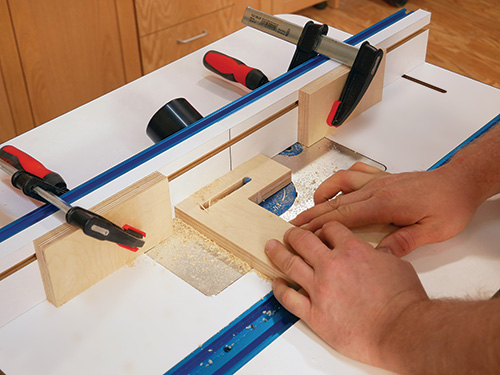
Next, mill the two stopped slots in the fence (see Drawings for dimensions). To make these cuts, I used a router table with a 3/8″ straight bit and marked the tabletop with blue tape to make sure I could start and stop the cuts accurately.
With your fence completed, you can move on to the track supports. This cool assembly is the system that allows you to move the track up and down for material placement without losing the angle alignment you are working so hard to keep. You will need to cut four more 3/8″-wide stopped slots in the track supports. Check the Drawings for locations and dimensions.
Assembling the Jig
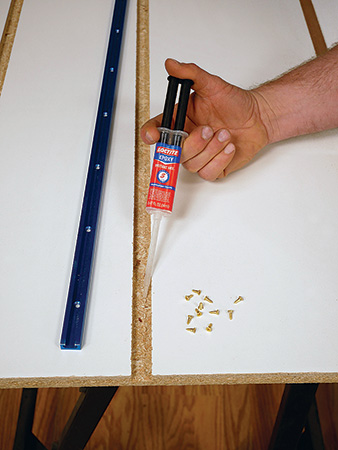
It’s time to put things together. Double-check that your dado depth fits your track, then grab some epoxy and your 3/8″ screws and start installing the T-Track. During use, there will be quite a lot of force trying to pull the tracks out of the jig, so use plenty of epoxy. I used Loctite’s® Quick Set Epoxy dispenser that automatically mixes the two components together as you apply it.
While you have your epoxy out, glue, clamp and screw those bottom rails onto the base of the jig as well. Since they keep everything straight and level, make sure you have them lined up perfectly.
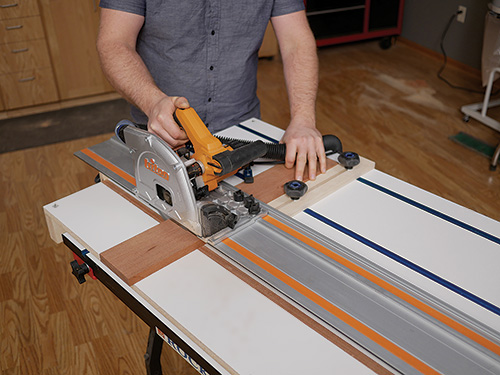
You can now fit your fence, installing it with the star knobs and 1-1/2″-long T-track bolts from Rockler. Next, mount the track supports by drilling holes through the bottom rails for the 3-1/2″ T-track bolts, and spin on the star knobs, as shown in the Drawings.

Just a few more steps and you’ll be ready for your first cuts! At this point, you will use a square to line up your track supports perpendicular to the melamine top and tighten them in place with your newly installed handles. Screw the alignment blocks in place on either side to keep the supports properly aligned in the future.
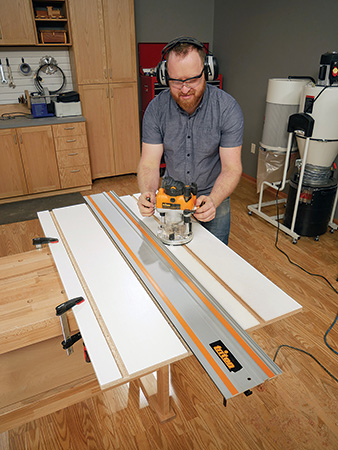
Now it’s time to make that project you’ve been dreaming of!
Click Here to Download the Materials List and Drawings.
Hard to Find Hardware
Rockler 4′ Universal T-Tracks (2) #20054
Rockler Mini Deluxe Hold-Down Clamps (2) #45692
Rockler Easy-to-Grip 5-Star Knobs, 5/16″-18 (6) #51036
5/16″ SAE Flat Washers (1 pk.) #48661
1.5″-5/16″ T-bolts (1 pk.) #36677
3.5″-5/16″ T-bolts (1 pk.) #35877
Brass Screws #4 x 3/8″ (1 pk.) #30489
Loctite Quick Set Epoxy (1) #36631
Triton TTS1400 Plunge Cut Track Saw (1) #57330
Triton TTST1500 59″ Track Saw Track (1) #57652
Triton TTSWC Work Clamps (1 pr.) #51203
Rockler Material Mate Panel Cart and Shop Stand (1) #56889
– Jacob Garrison is a woodworker in the Woodworker’s Journal shops.


